The Remote & Office Management Solution, which we will refer to as ROMS, is an update to our Return to Office app. This solution enables effective management of remote and office staff.
The ROMS app can be configured to allow you to create a bespoke app that reflects your specific business needs. The purpose of this article is to provide you with a view of the screens that form the application and provide you with an understanding of the configuration opportunities that exist within the app.
Roles and Features
Screens for all users
Screens for staff
- Update my Status
- Check-in/out using QR Codes
- Health Survey
- Manage Booking
- Booking Confirmation Screen
- My Bookings
- Guidance
- News
- User Settings
- Staff Directory
- Offices
- FAQ
- Report an Issue
- Notifications
- Interactive Floorplan
- Browse Menu
Screens for office managers
- OM – News
- OM – Edit Offices
- OM – Generate QR Code
- OM – Manage Bookings
- OM – Office Risk Assessment
- OM – Dashboard
- OM – Health Survey Submissions
Screens for admins
- Admin – Manage Staff Directory
- Admin – Configure Security
- Admin – Edit Communication
- Admin – Manage Communication
- Admin – Delete Data
- Admin – Download Data
Screens for Catering Staff
Screens for all users
- Onboarding

This screen introduces the user to the app and the various functions that it provides.
This screen can be configured to display on the first use of the app only.
You can configure the number of slides to display and the text and imagery can be changed to create your desired look.
This screen uses the onboarding component, for more information see here.
- Terms
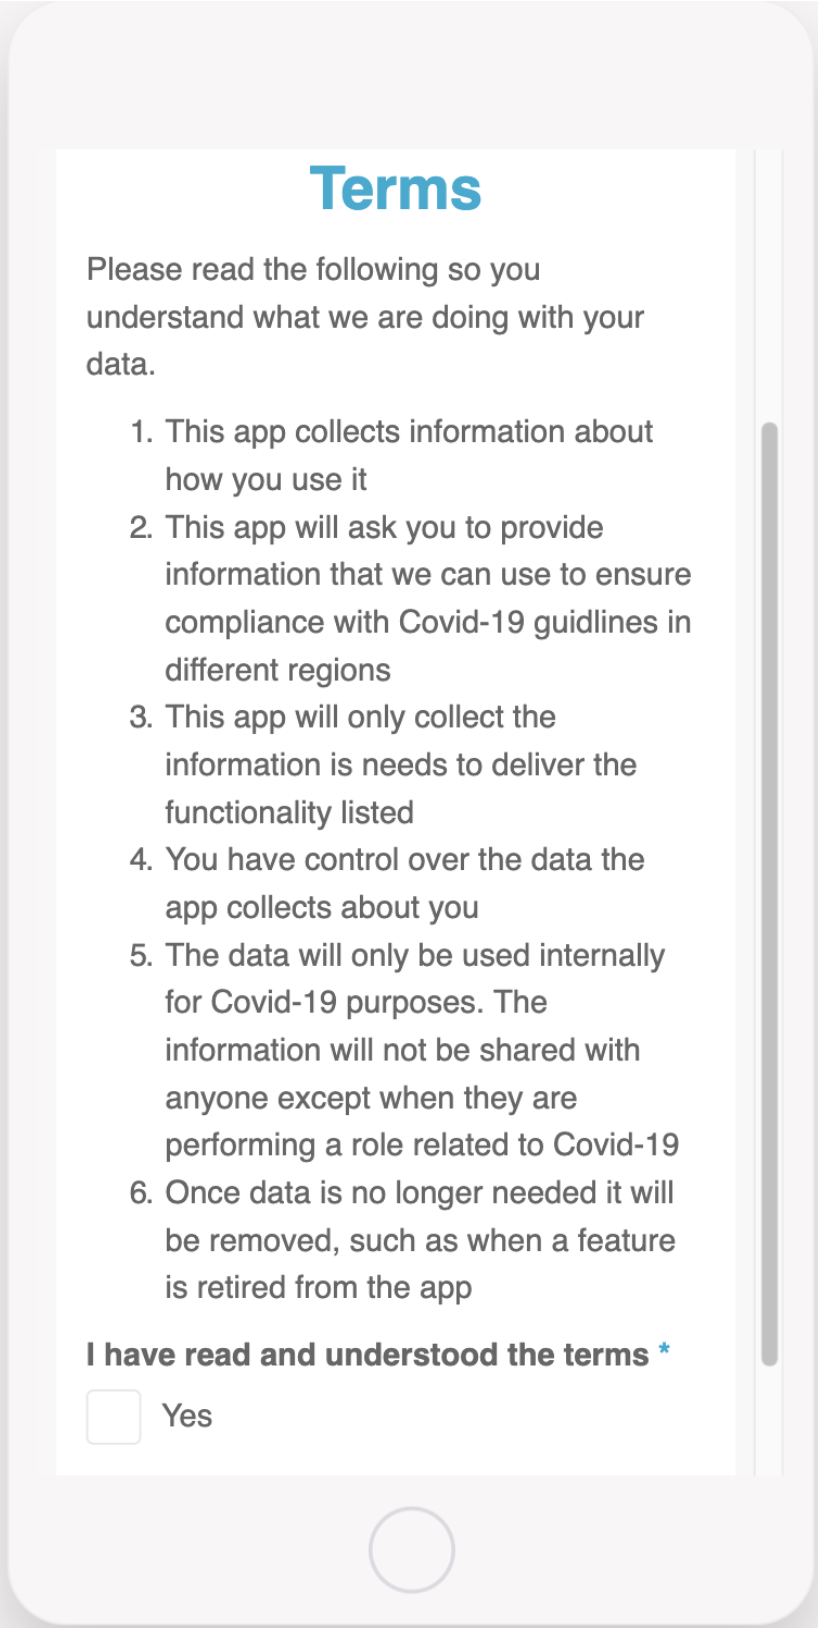
This screen will display the terms of use text and will be displayed on the first use of the app only.
The text displayed can be amended to reflect what is required.
This screen uses the text component, click for more information.
- Login or SSO Login
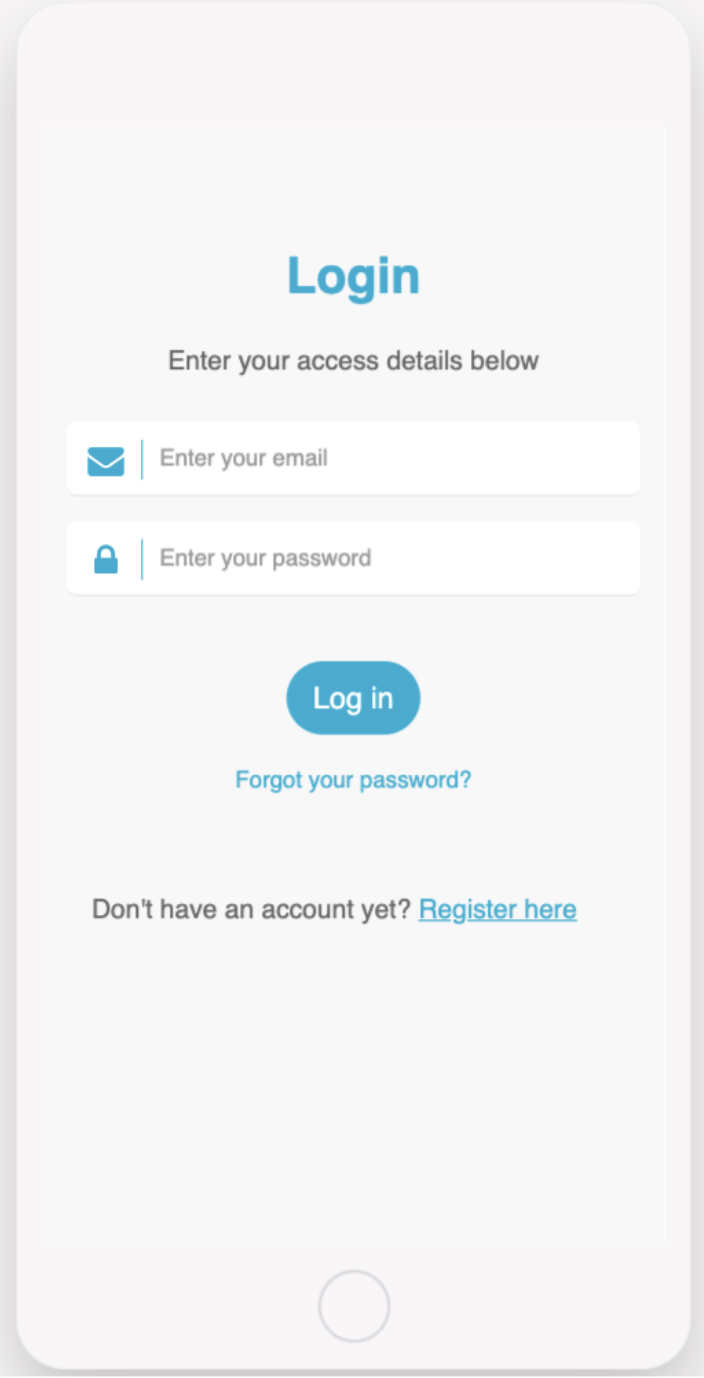
This screen provides security for the app allowing access to only registered users.
This screen can be configured to reflect your security preferences. Login can be via SSO, email and password, or email only.
By logging in this will also define the user role and ensure the correct permissions are shown per user.
Click to learn more about the login and SSO components.
- Registration
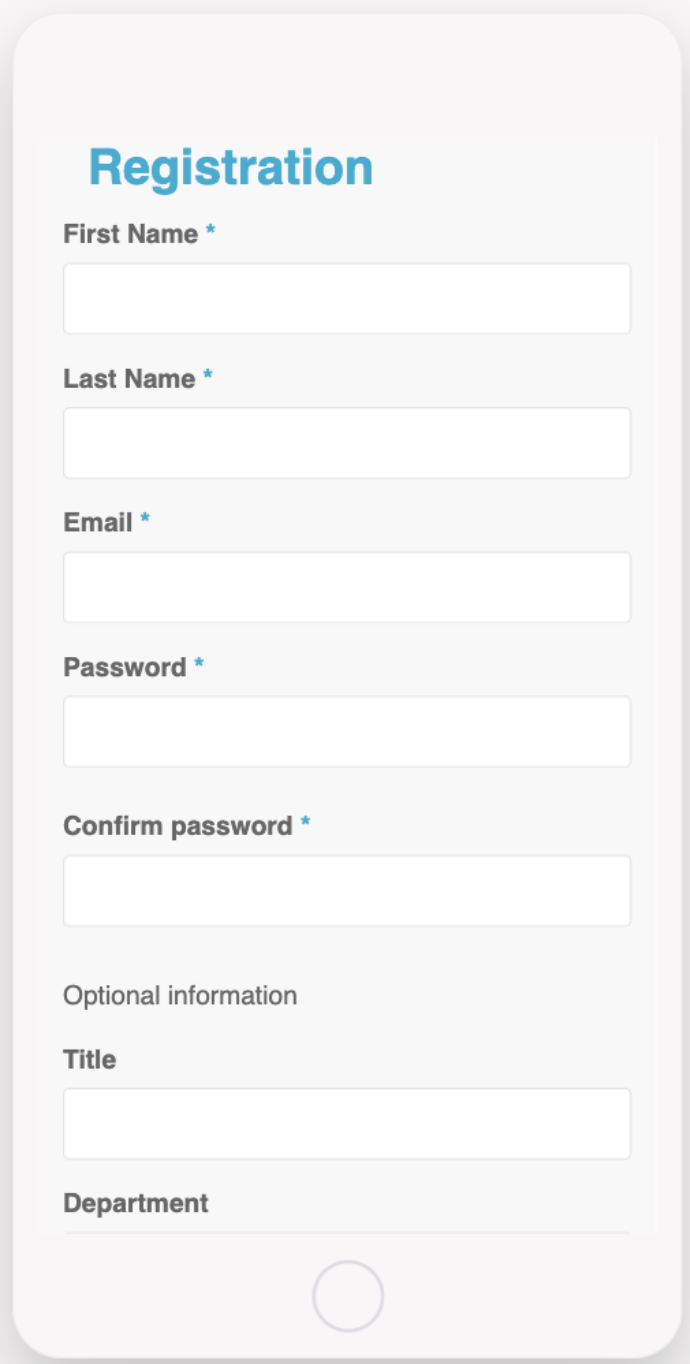
This screen provides the ability for users to register for access to the app and can allow guests and third parties to join and use the app.
This screen can be configured to include any requirements needed.
This screen uses the form component, see more here.
- Home screen
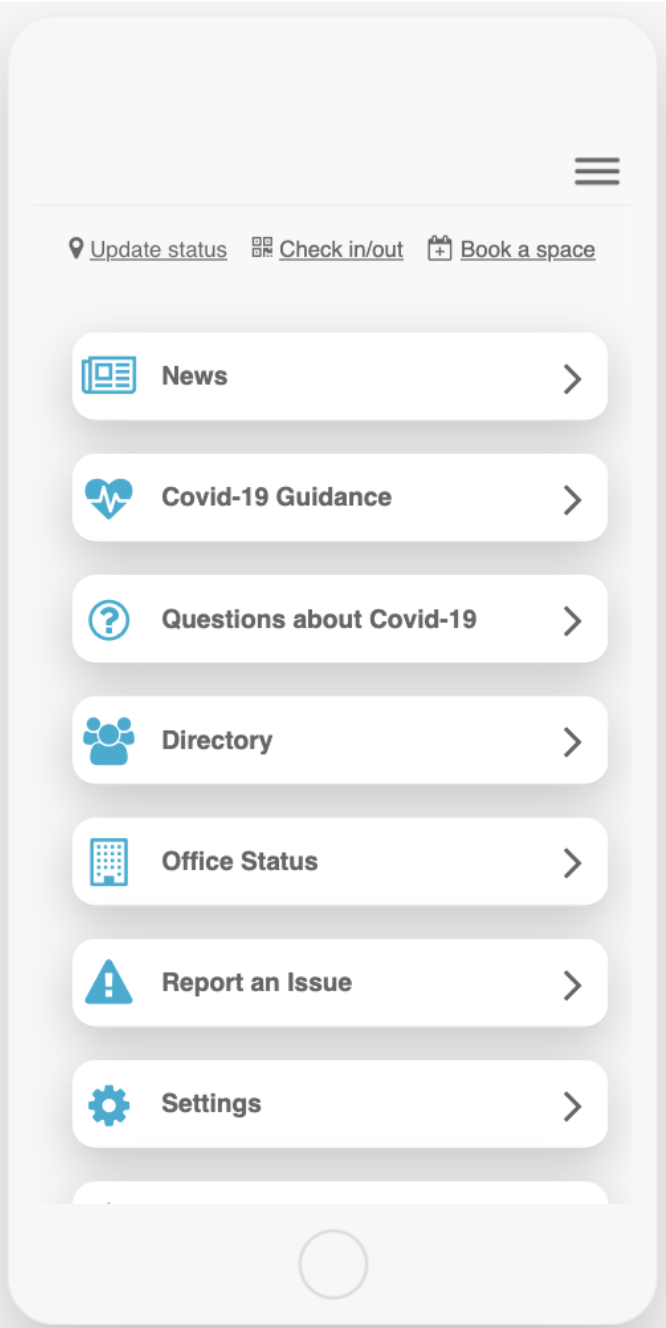
Alternate views are displayed depending on user type.
Users will see a list of all the key features once they are logged into the app. Depending on the user role one of 3 menus will be displayed.
This menu can be configured to display links to the features you chose to make available for the user.
This feature uses the list component, see here for more information
Screens for Staff
- Update my Status
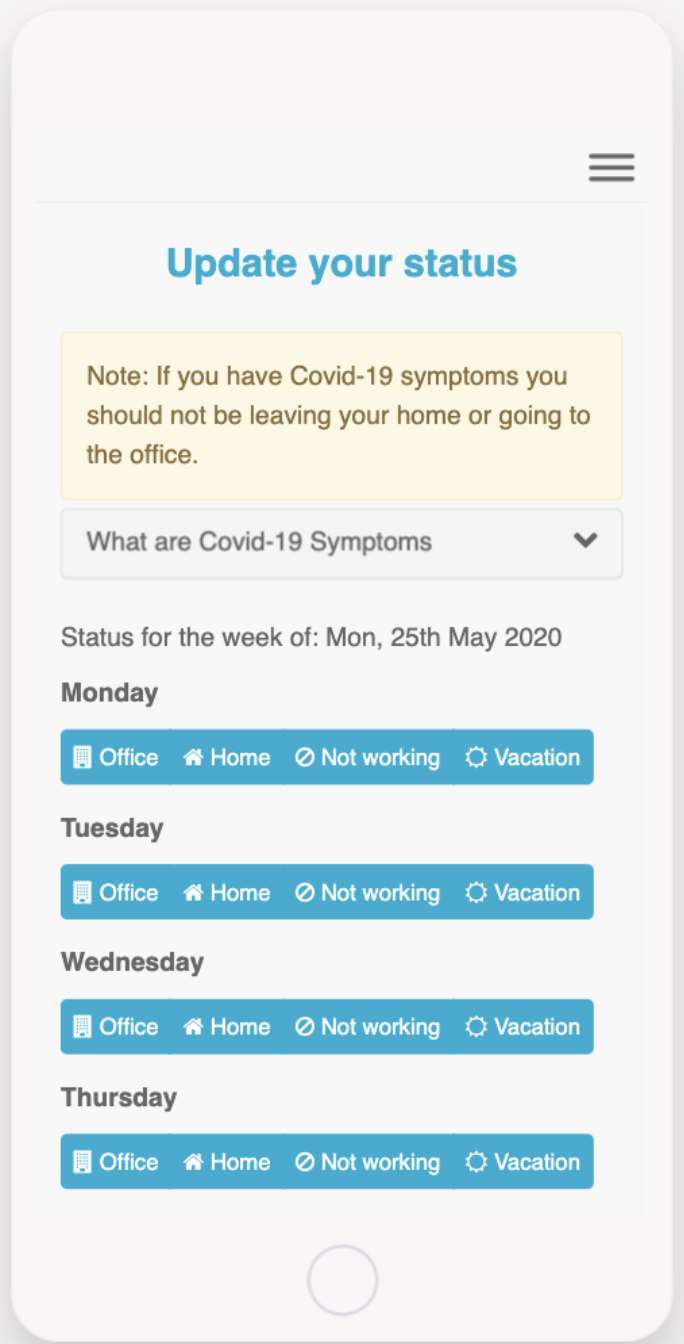
Users can update their status to ensure colleagues are aware of whether they are working and where. The status will appear in the Staff Directory.
Status options include: Working from home, In the office, Not working, or On holiday
The status options can be configured to display the status’ you require.
This screen uses the form component, for more information see here.
- Check-in/out using QR Codes
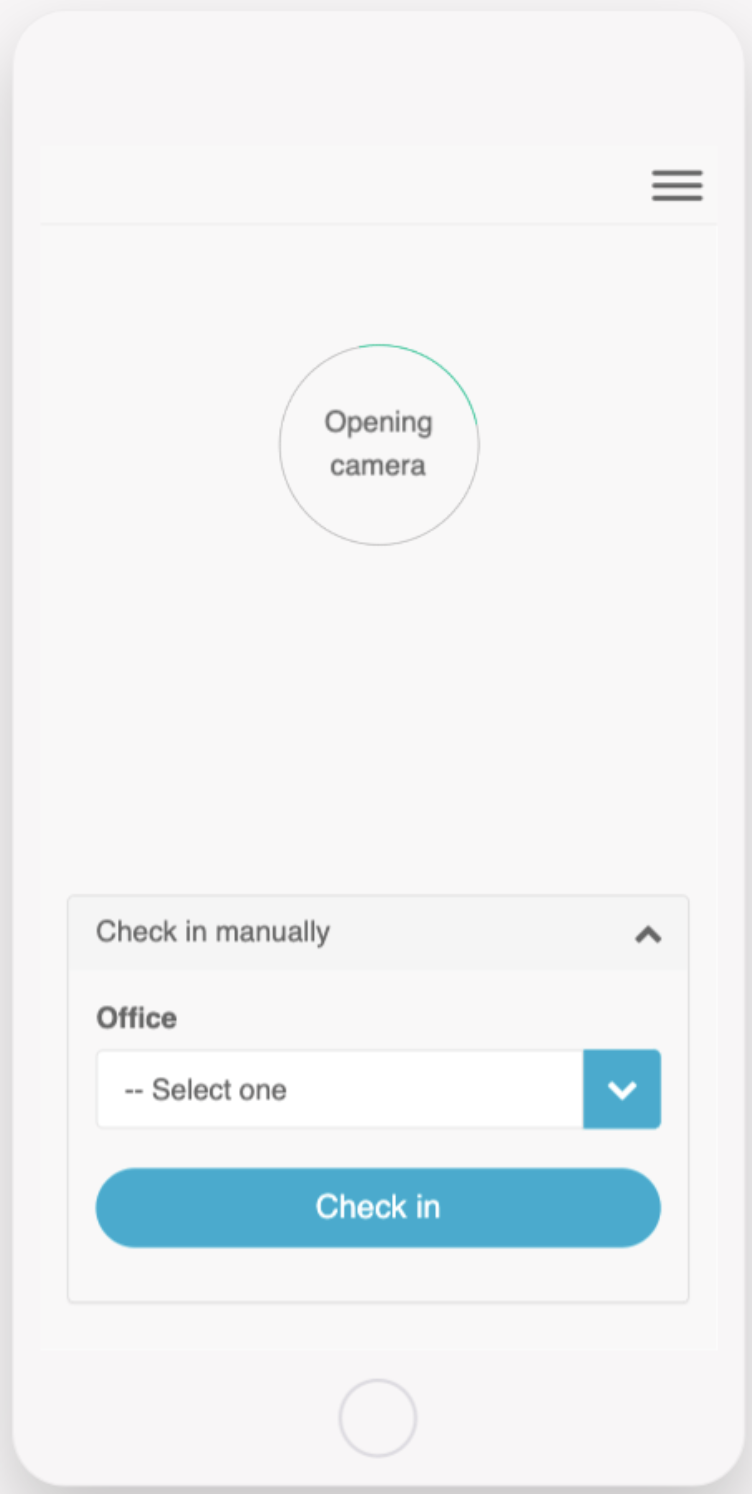
This screen provides users with the ability to check-in and check out of a space using QR codes on mobile devices.
On web, the manual check-in and check-out option are used. Users will automatically be checked out of a previous space when checking into a new one.
If a user checks in and the space is full they are shown a message to alert them and the user should confirm whether they want to continue. The office manager will be alerted via email if the user does continue.
QR codes are printable within the app by the office manager.
Check-in workflow
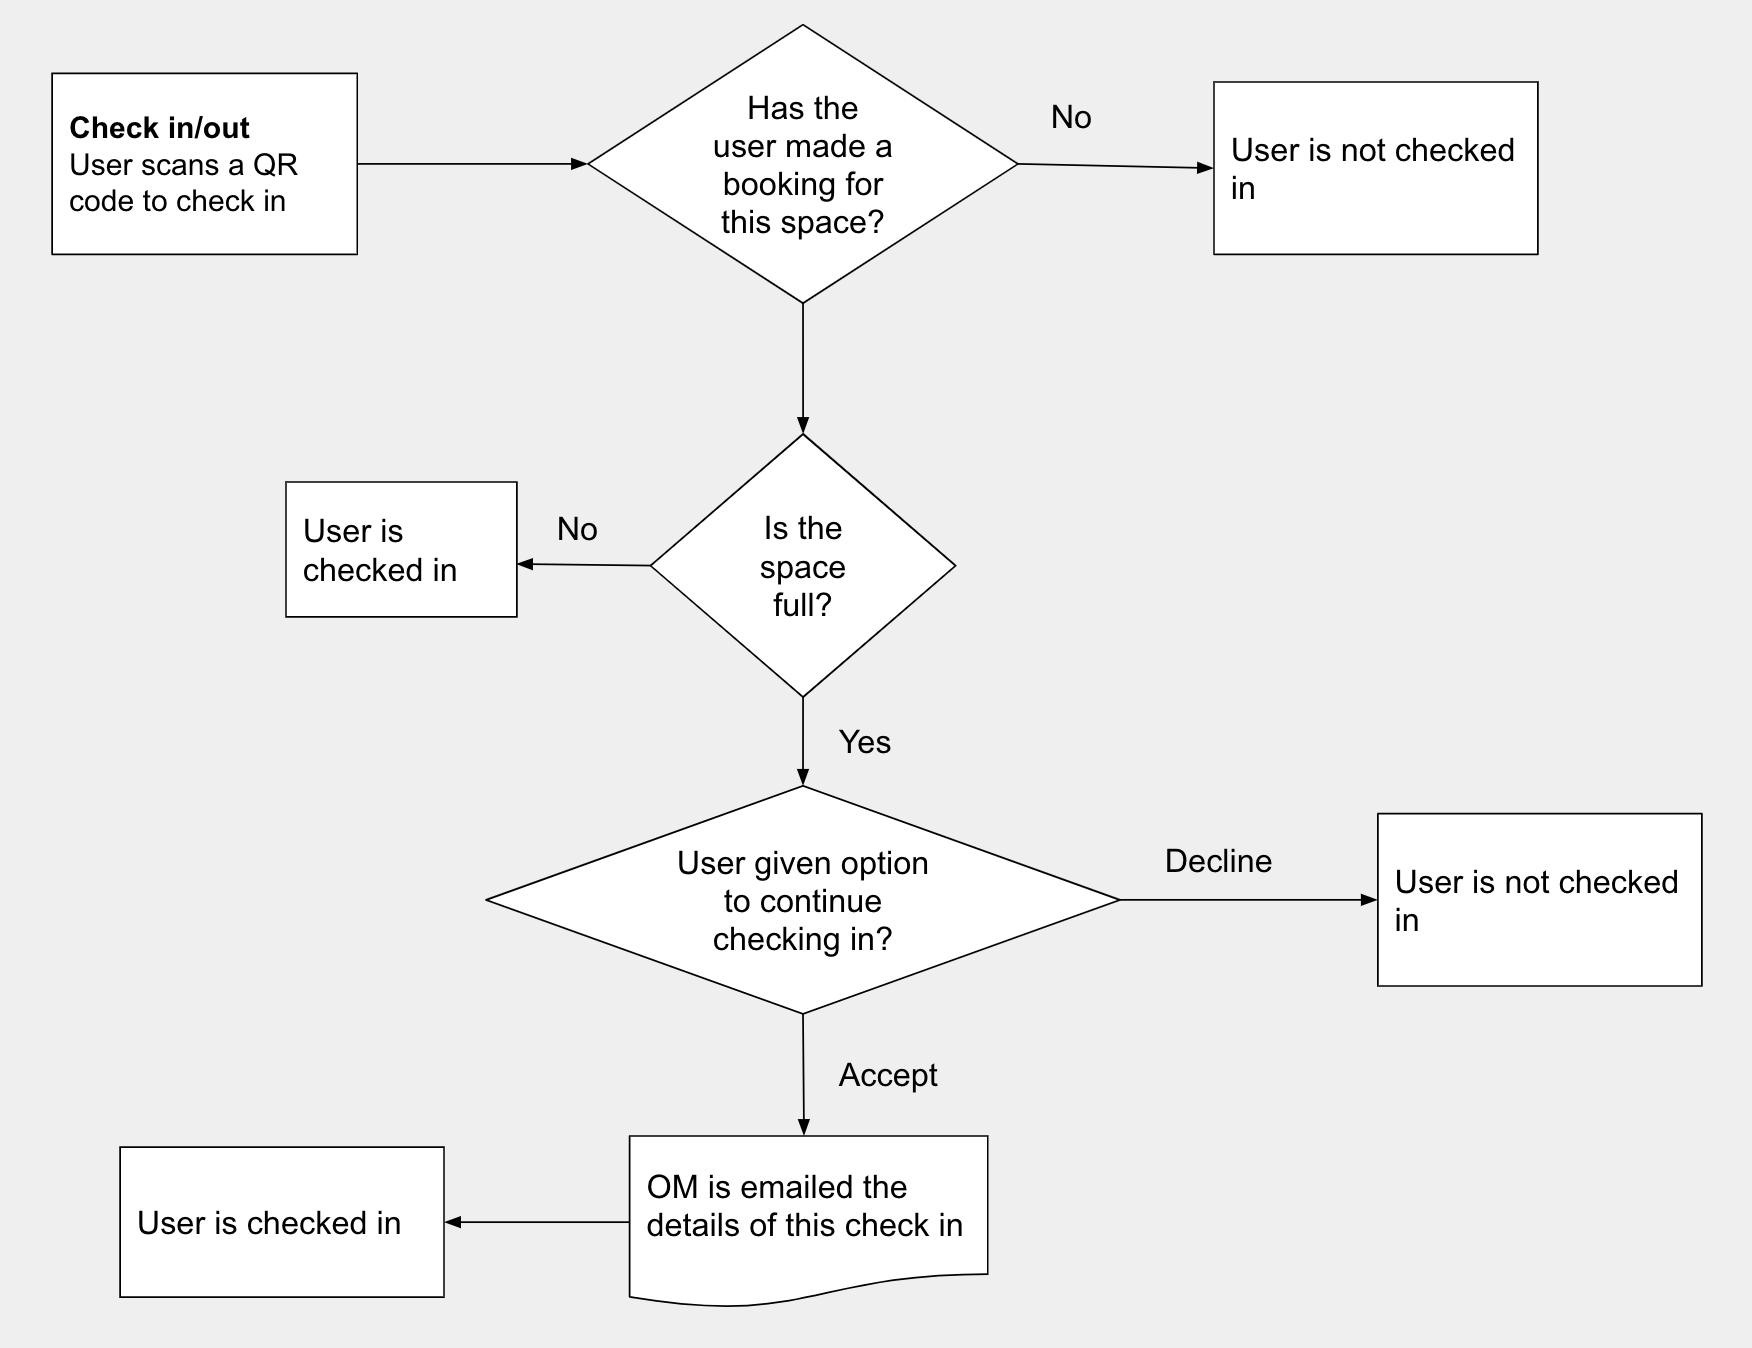
Click to enlarge
- Health Survey
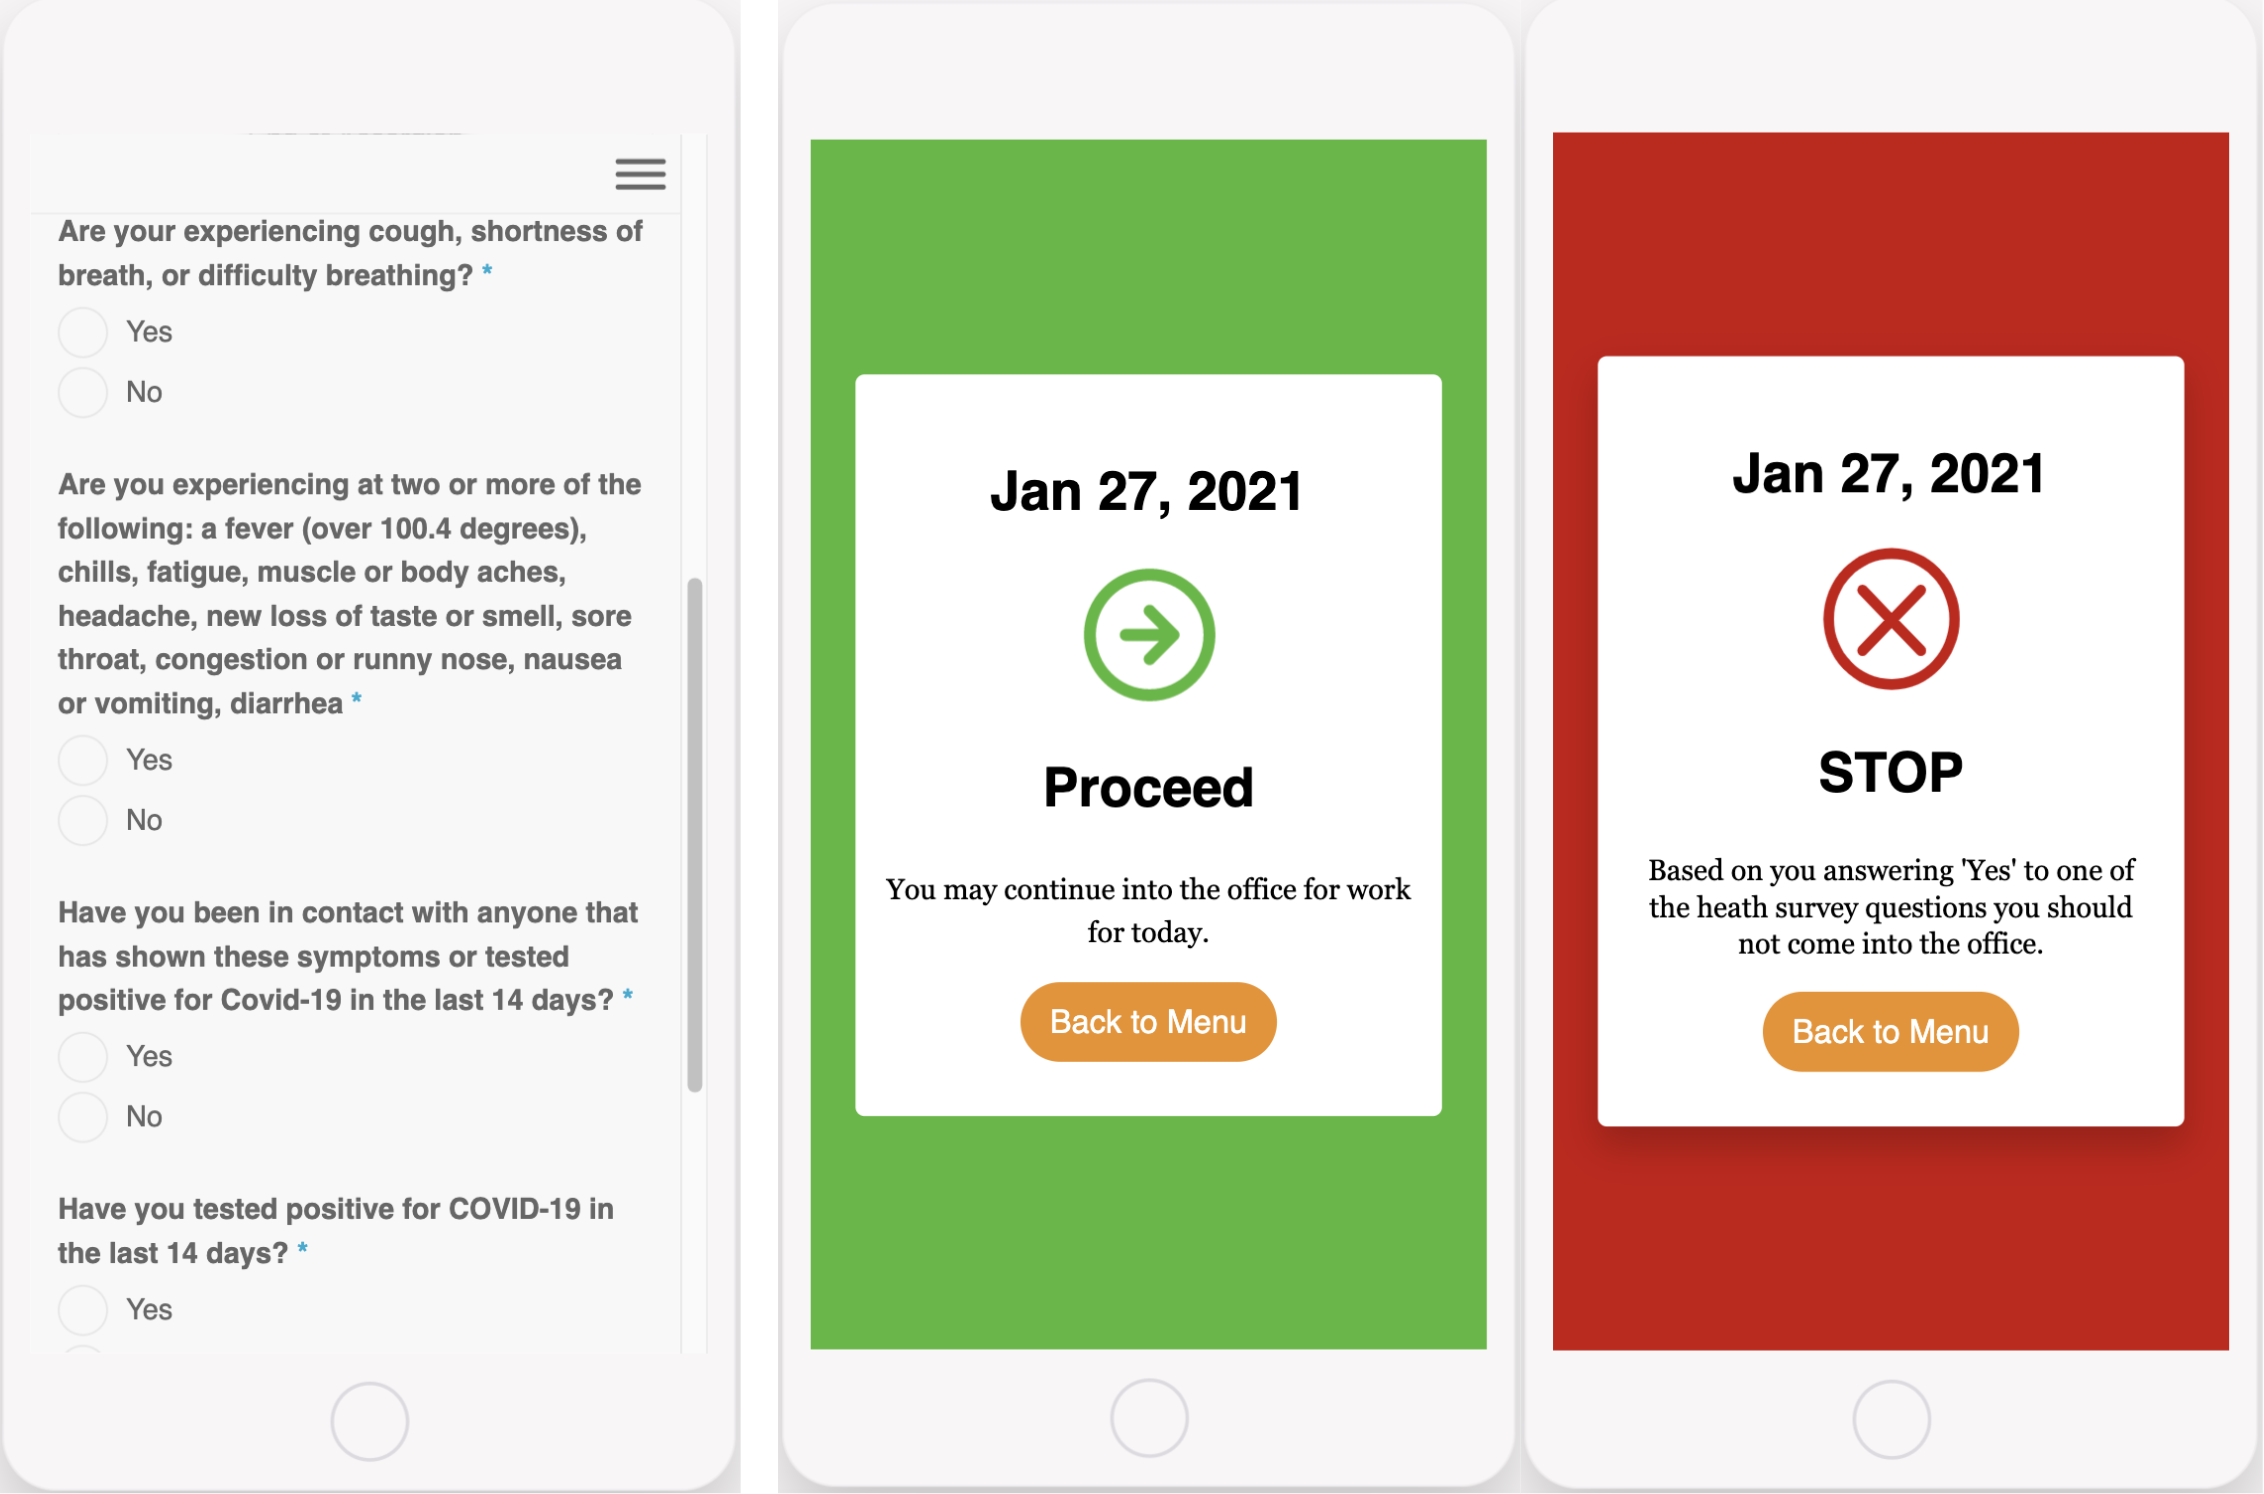
Provides a survey for colleagues to complete to determine their health before allowing entry to the office.
Staff members should complete this before attending the office. Following the completion of the survey, the user will be shown an approve or deny access screen, depending on their answers.
If the user answers “yes” to any questions the relevant office manager will be alerted via email.
This survey can be configured to include any questions required but would require updates to the code.
This screen uses the form component, for more information see here.
Health survey workflow
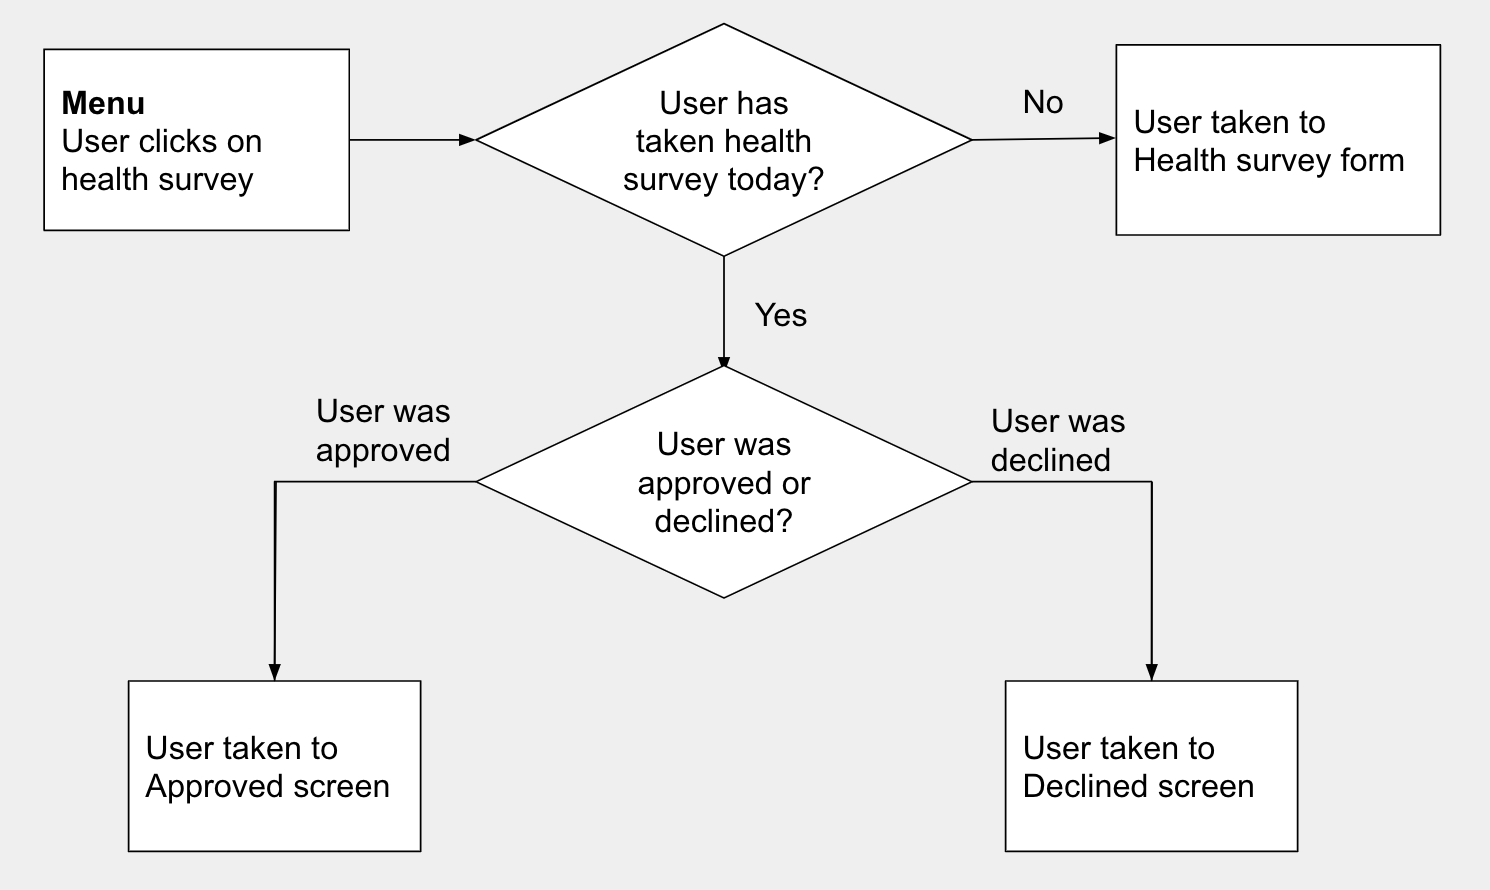
Click to enlarge
- Manage Booking
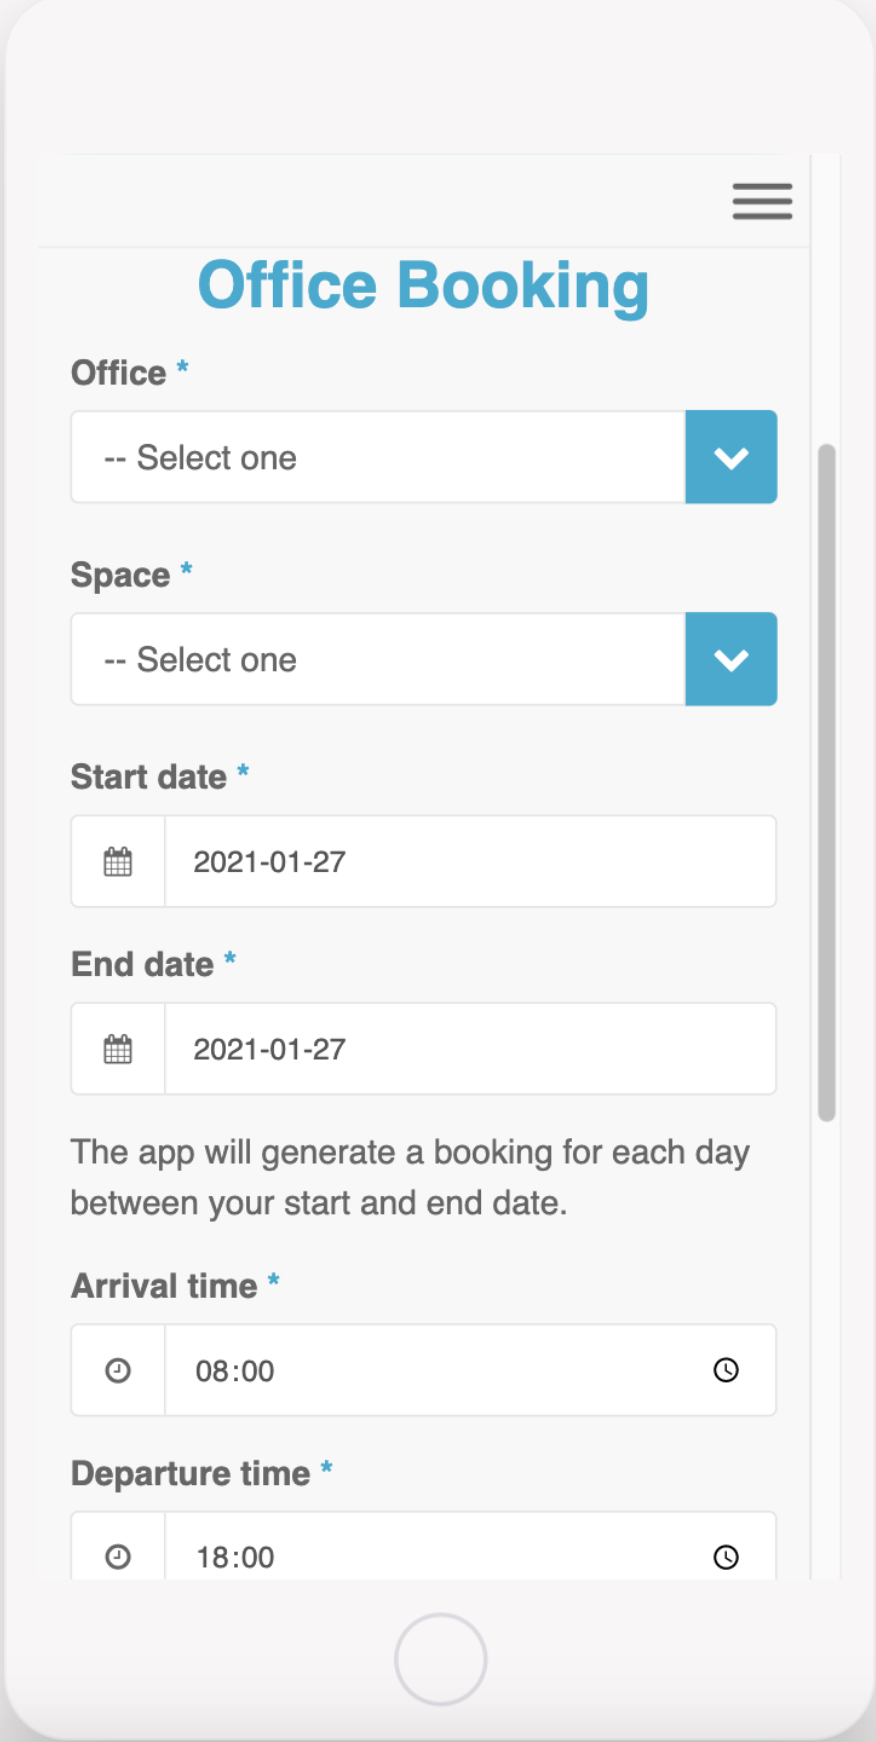
This screen will allow the user to book a space within an office for a given day or a block booking over a given number of days.
By default, bookings are automatically approved until capacity is reached, in which case the booking will be waitlisted to be approved by the office manager.
A user can only make one booking per space per day.
The user will receive 3 notifications for every booking that has an “Approved” status
1. A booking reminder sent 24hrs before arrival time
2. A reminder to complete health survey 2hrs before arrival time
3. A reminder to check-in 15mins before the arrival time
This can be configured to have all bookings needing office manager approval before confirming the booking.
This screen uses the form component, for more information see here.
Manage booking workflow
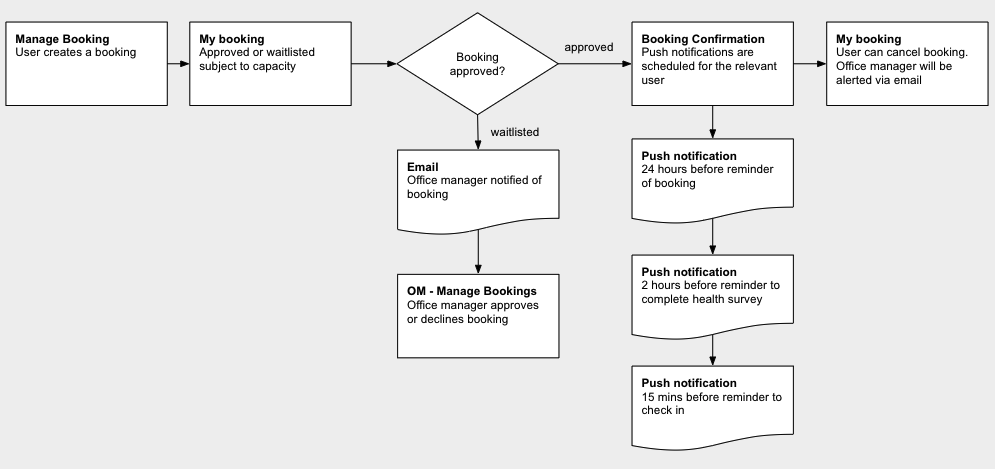
Click to enlarge
- Booking Confirmation Screen
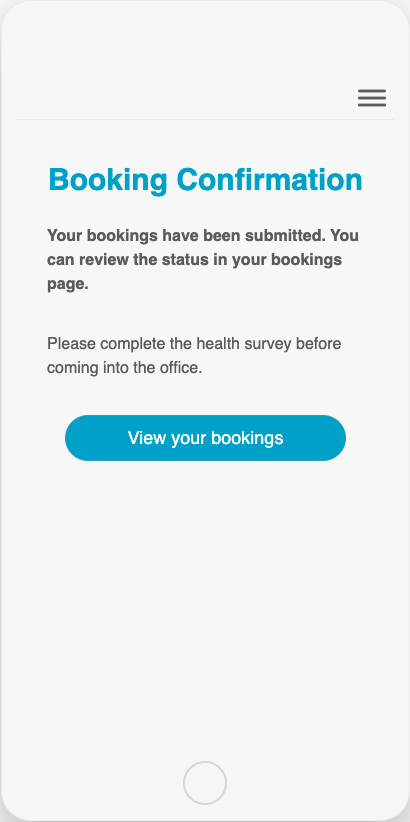
This screen is where the user is taken after submitting a booking from the manage booking screen.
You can configure this screen to include any text or components necessary.
- My Bookings
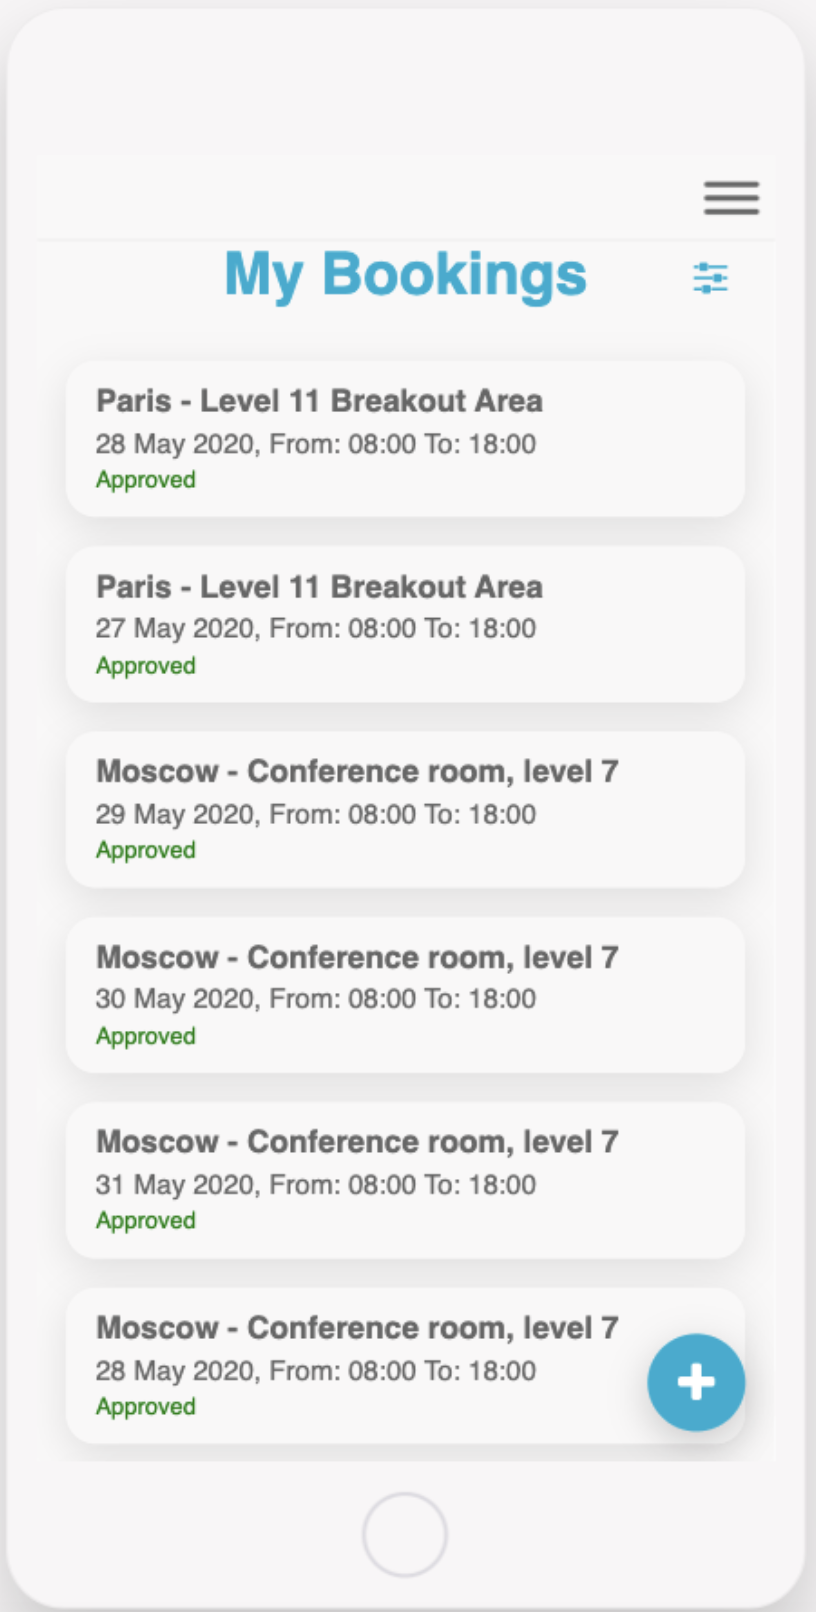
Users can view their own current and future office bookings using this screen. The booking will indicate whether it has been approved or waitlisted.
Users can also cancel existing bookings from this screen. When a user cancels a booking, an email is sent to the corresponding Office Manager. All 3 booking notifications scheduled for this booking are cancelled and the cancelled booking will no longer show in the list.
You can configure this screen to display the required booking information.
This screen uses the list from data source component, for more information see here.
- Guidance
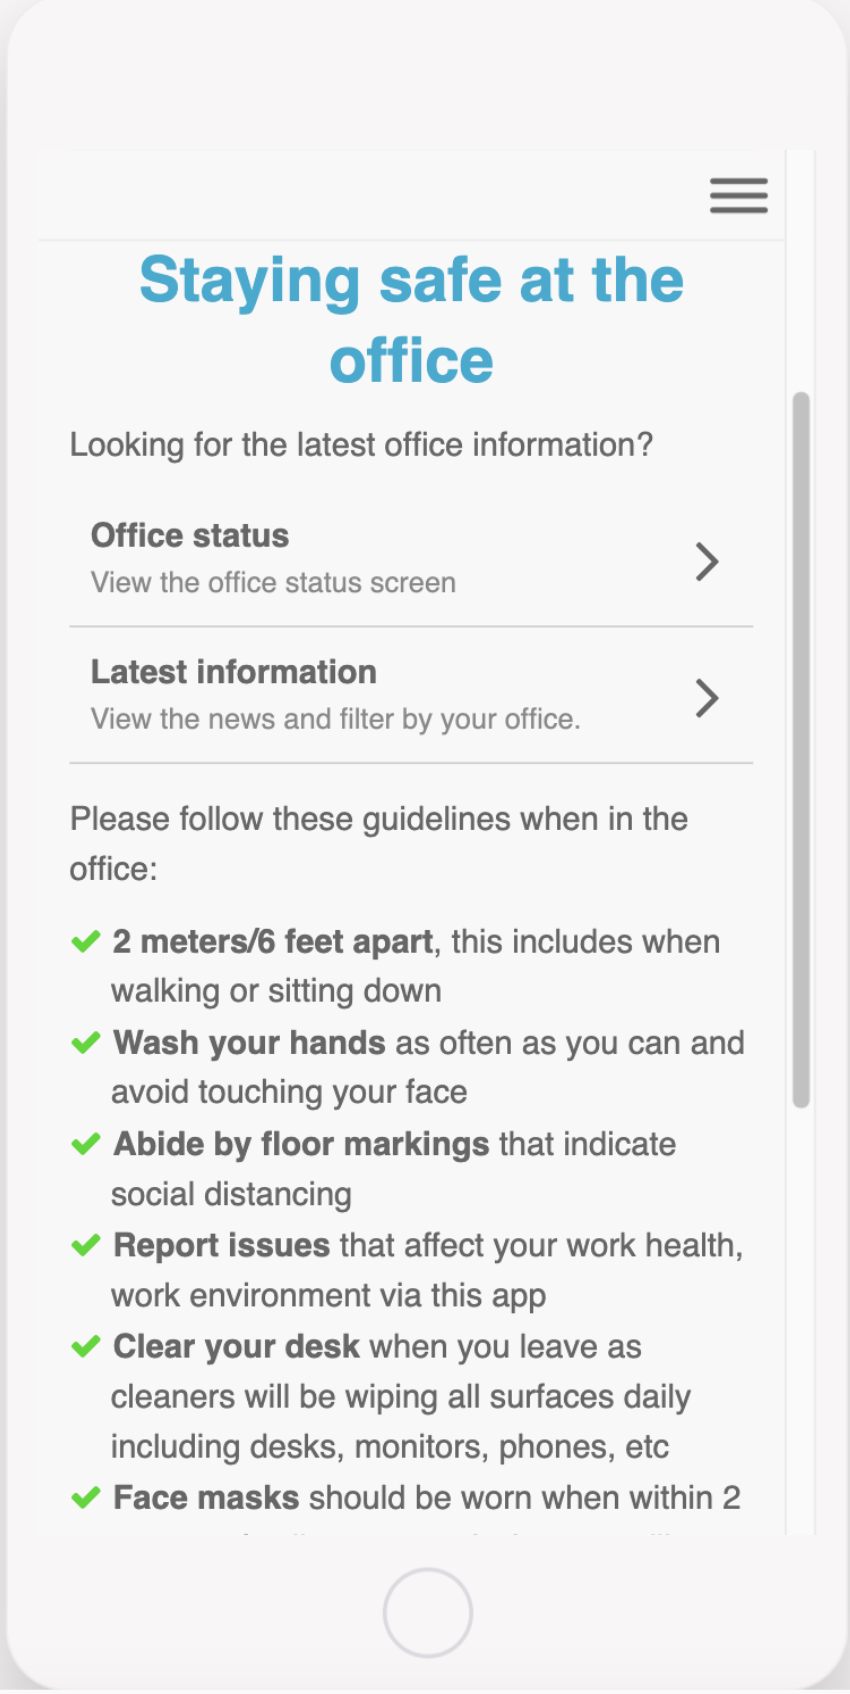
This screen can be used to check the Covid guidance when working in the office.
The screen can be configured to display your specific guidance for either the firm or the office.
This screen uses the list and text component, click for more information.
- News
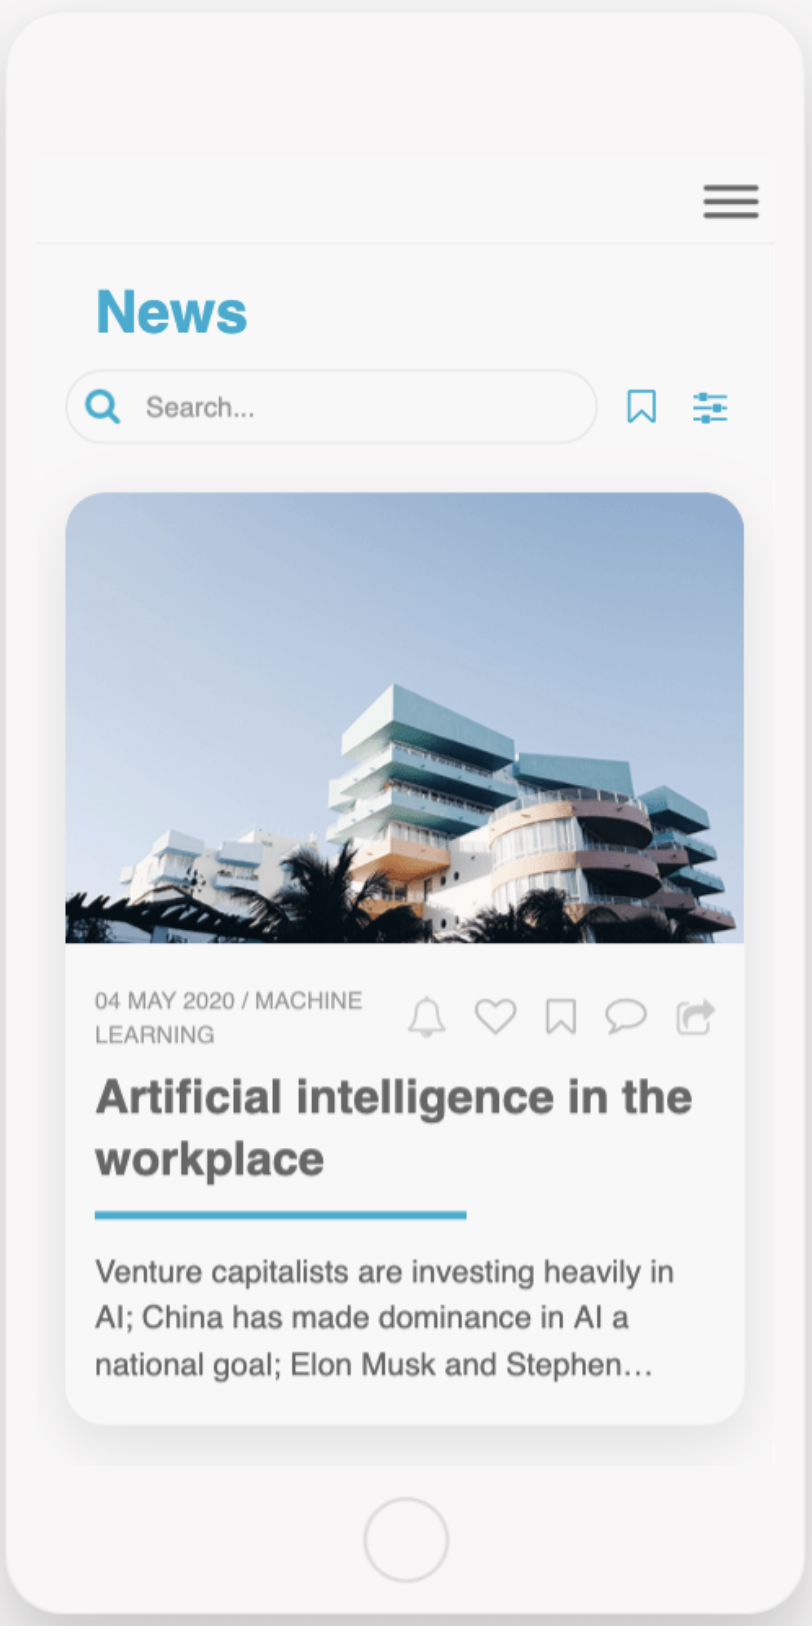
This screen can be configured to show news. You can use this to show firm news, covid news, sync to a database or use an RSS feed.
The default option uses the list from data source component. See more here.
For RSS feed see here.
- User Settings
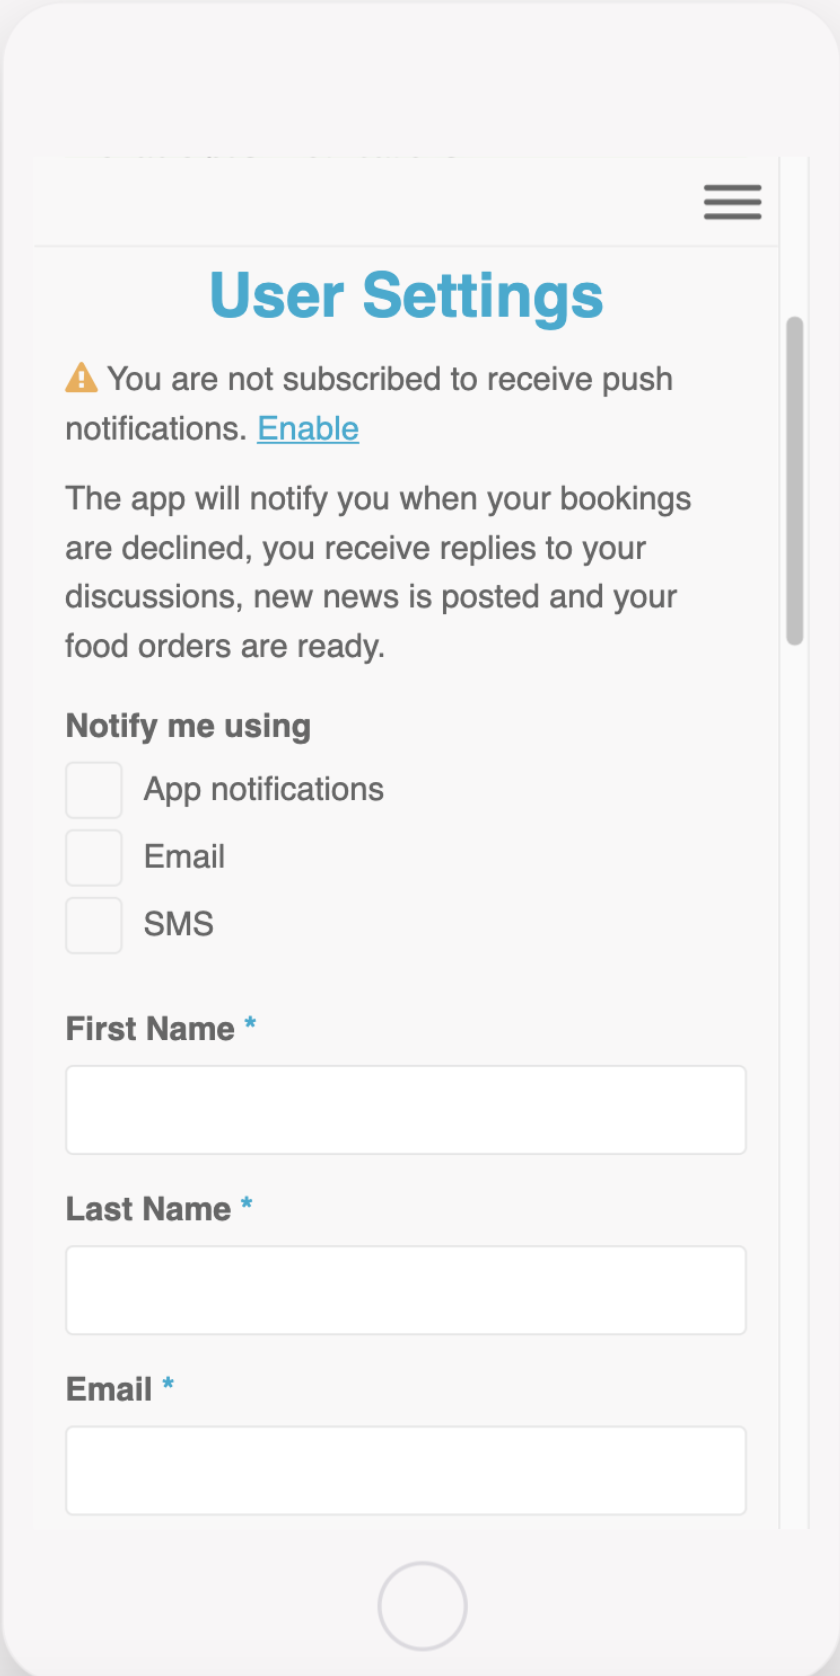
A user can use this screen to update their profile information and configure their app notification settings.
Fields can be added or removed to meet requirements.
This screen uses the form component, for more information see here
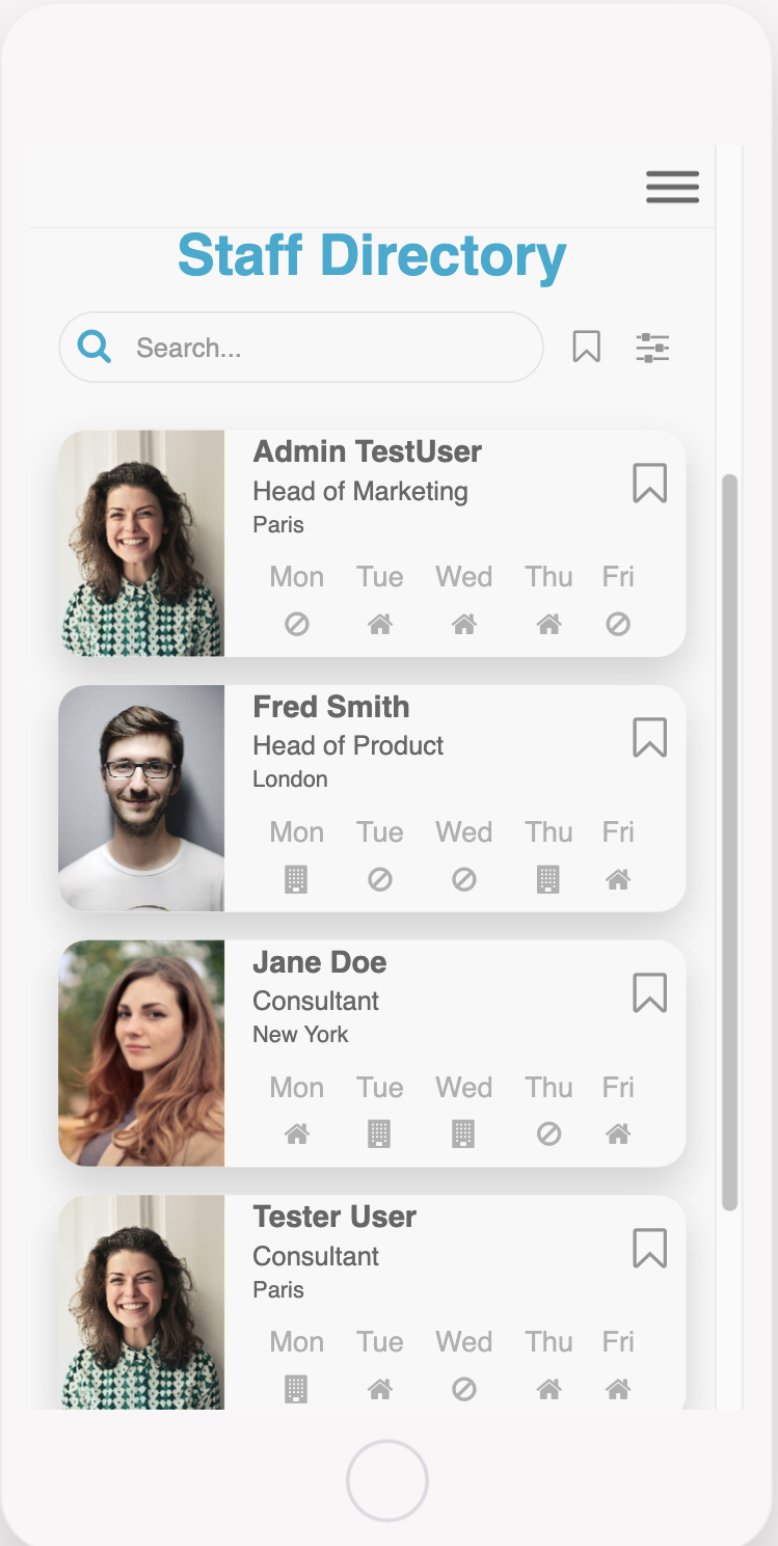
- Staff Directory
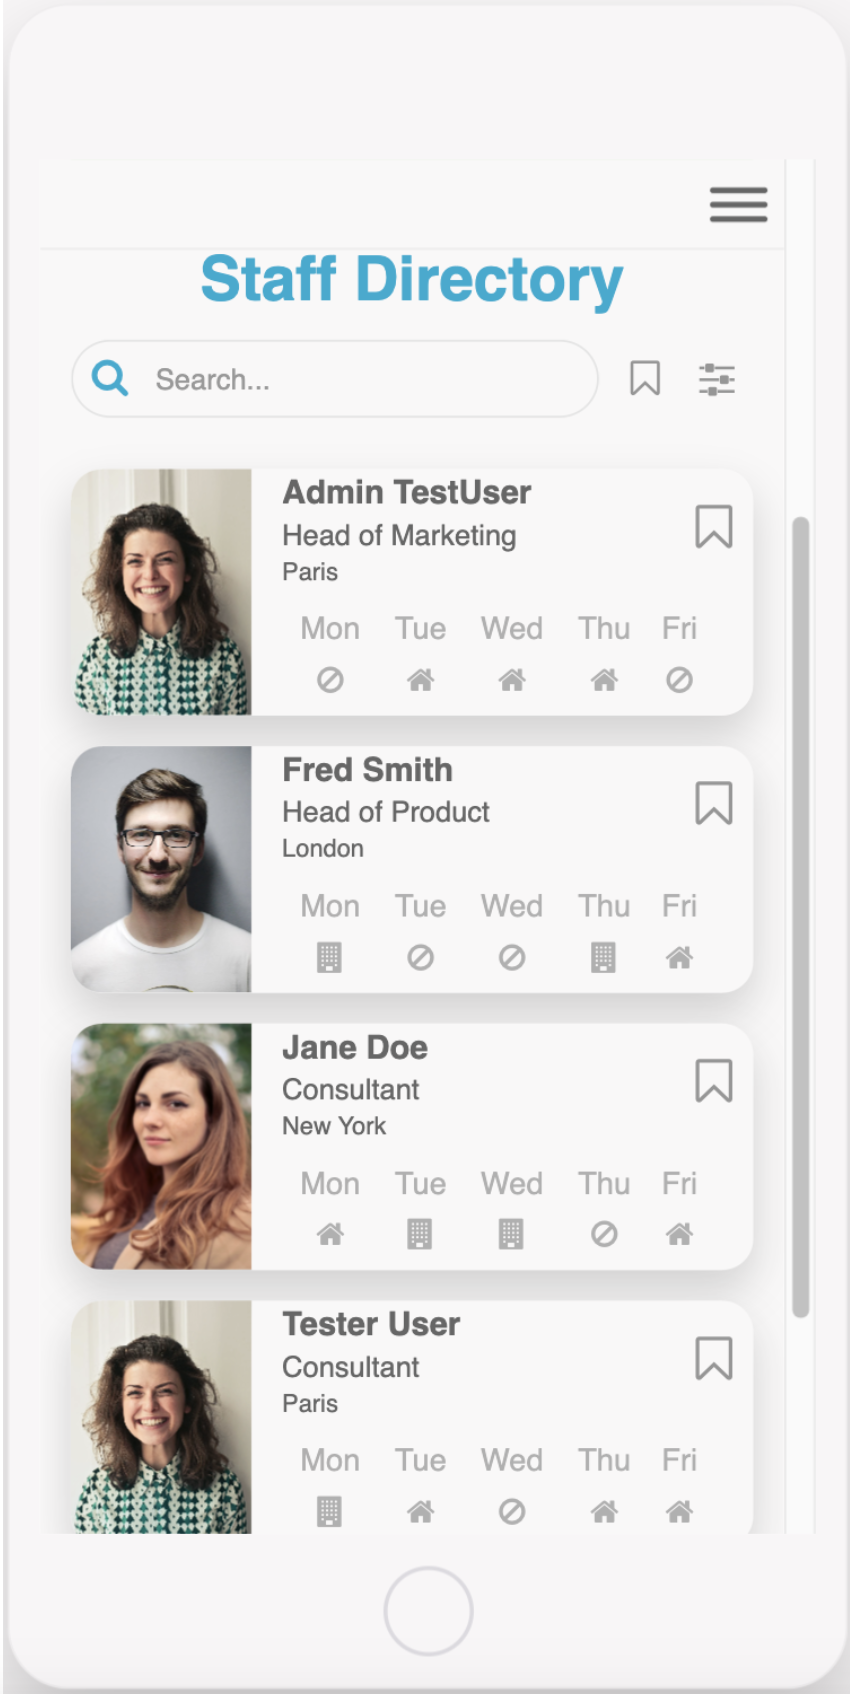
This screen will display your staff directory and images as well as displaying the status information of each staff member.
This screen can be configured to include any information required and uses the list from data source component. See more here.
- Offices
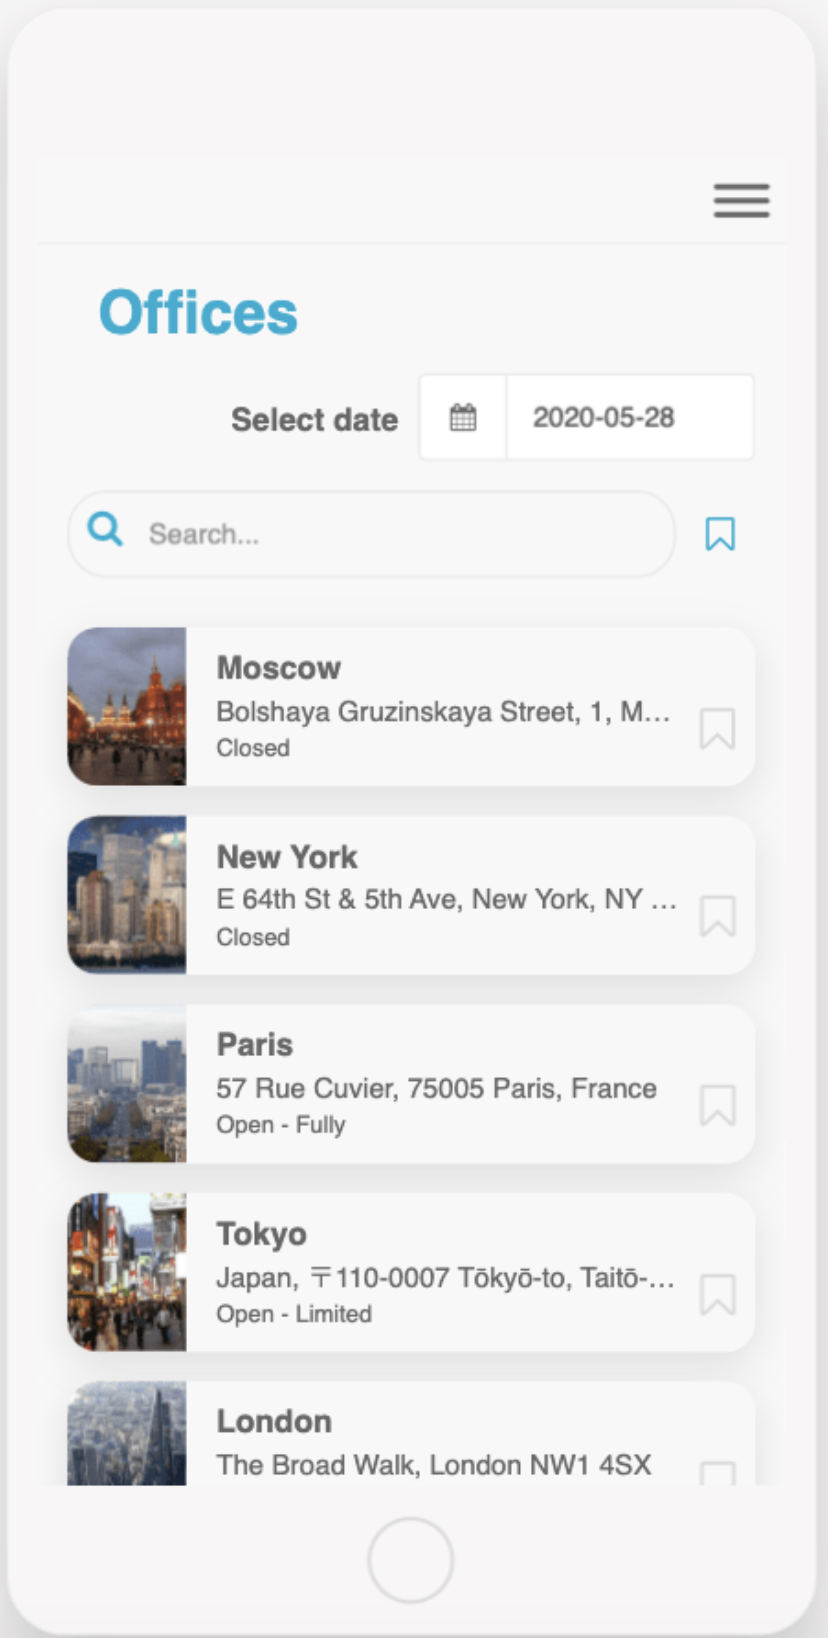
This screen provides information on your offices and the space availability on a specific date.
This screen can be configured to include all relevant office information and office managers will have the ability to amend and update this information.
This screen uses the list from data source component. See more here
- FAQ
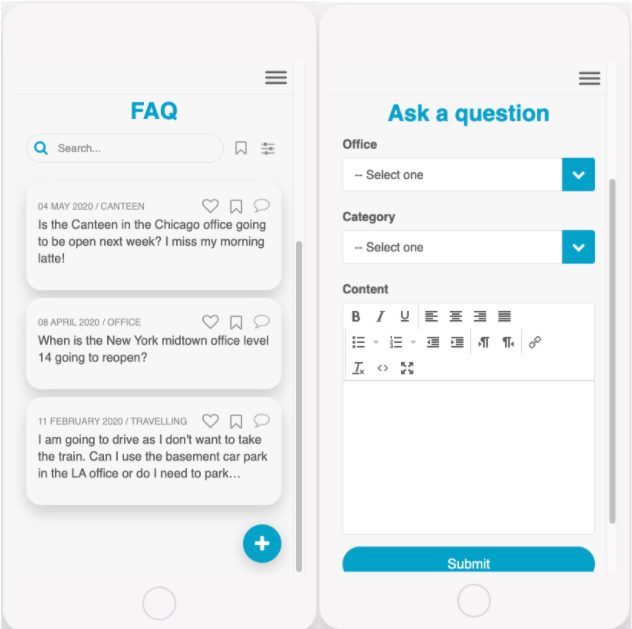
This screen provides a public question and answer forum for colleagues.
This screen can be configured to allow commenting and liking, questions can also be pre-populated, or from a set list.
This screen uses both the list from data source and form components.
- Report an Issue

This screen allows users to report an issue when using the office space. The relevant office manager will then be alerted.
This form can be configured to include whichever fields are necessary.
This screen uses the form component, for more information see here.
- Notifications
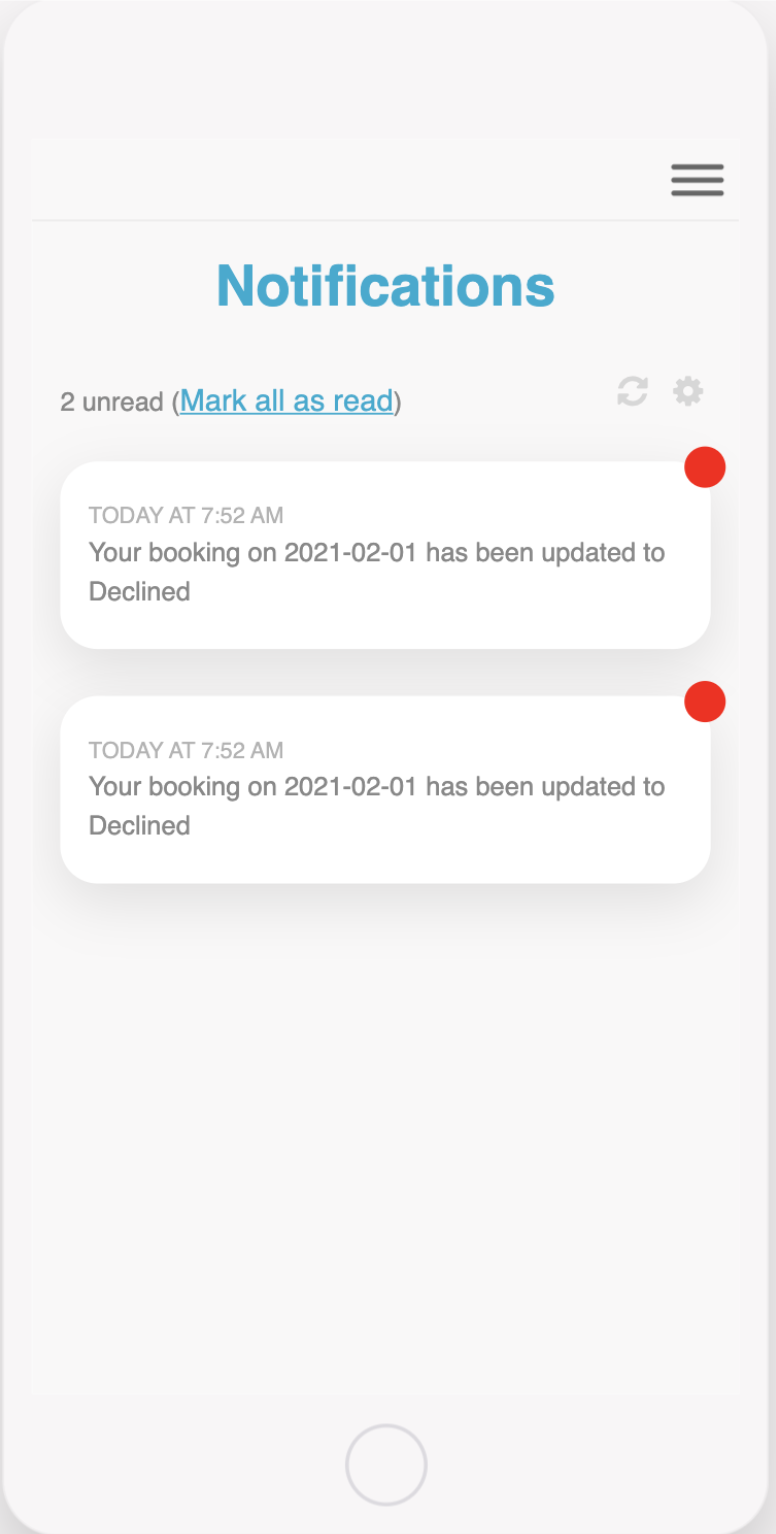
This screen displays all the notifications that have been sent to the user.
Notifications are sent automatically when there is new news, bookings are modified, the user is mentioned in comments, or an admin sends an in-app notification via Fliplet Studio.
This screen uses the notifications component, see here for more information
- Interactive Floorplan
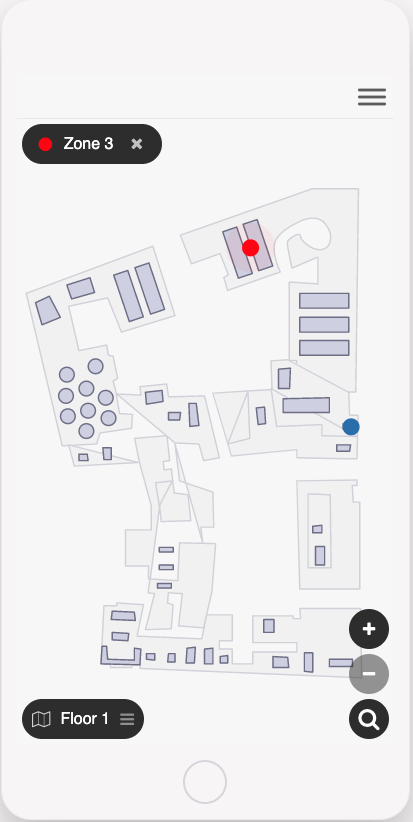
This screen can be used to display a floorplan of the office space with interactive markers to highlight a space. The user can use this screen to click a marker and be taken to the “make a booking” screen for that particular office space.
This screen can be configured to include your own floor plan with the markers you require.
This screen uses the interactive graphics component, see more here.
- Browse Menu
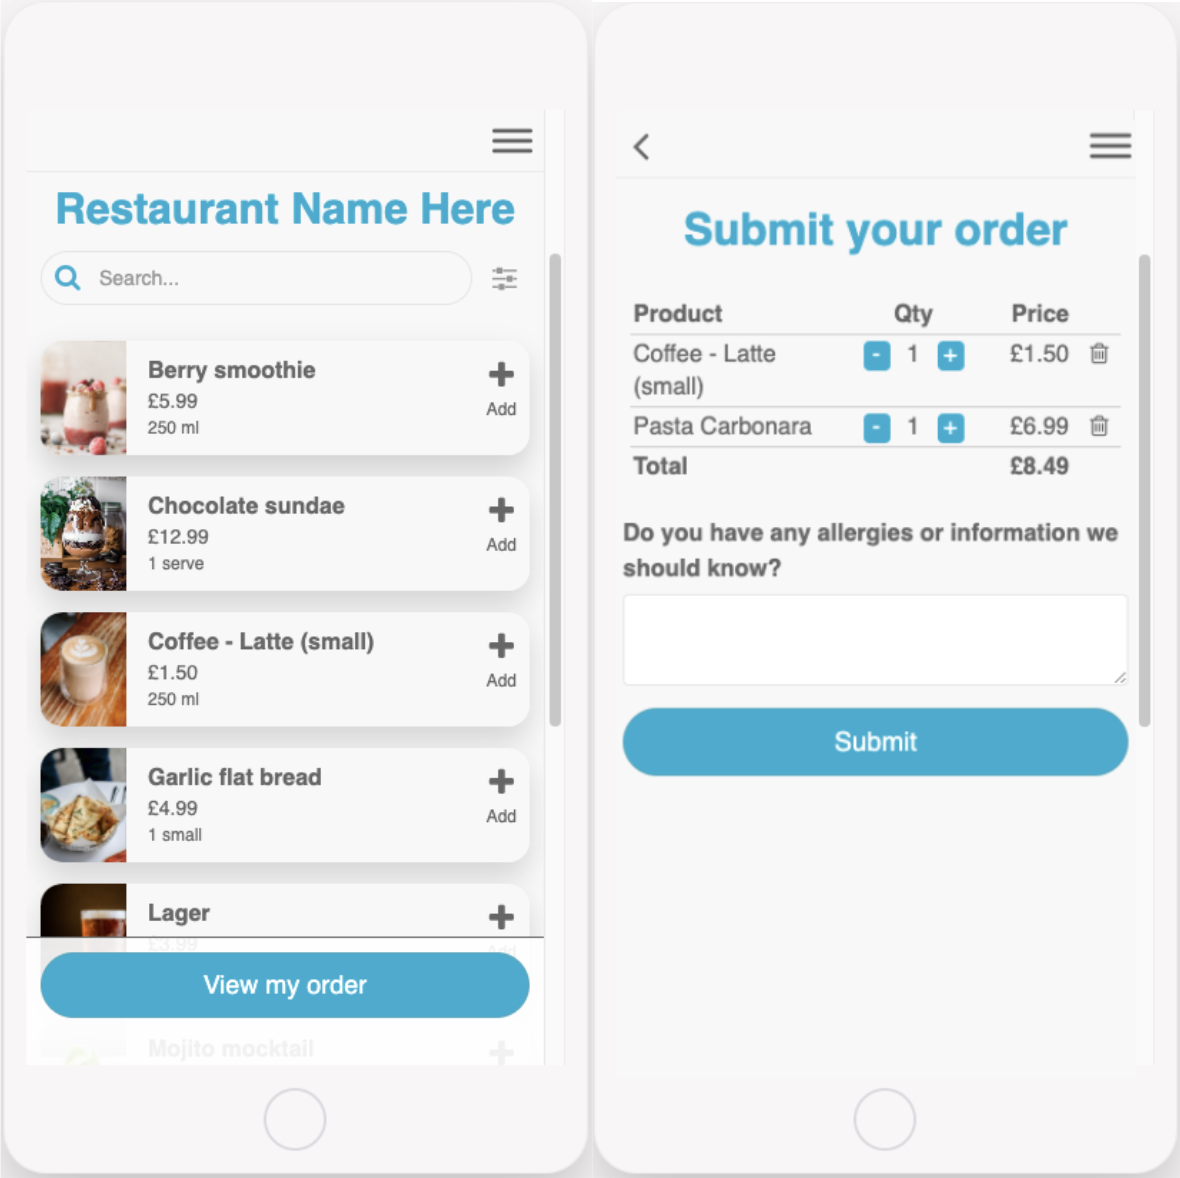
This screen can be used by staff to browse, search and filter the office restaurant/catering menu. You can add items to your order and view your order summary before submitting the order.
This screen can be configured to display any menu items required.
This screen uses the list from data source component. See more here
Office Manager Screens
- OM – News
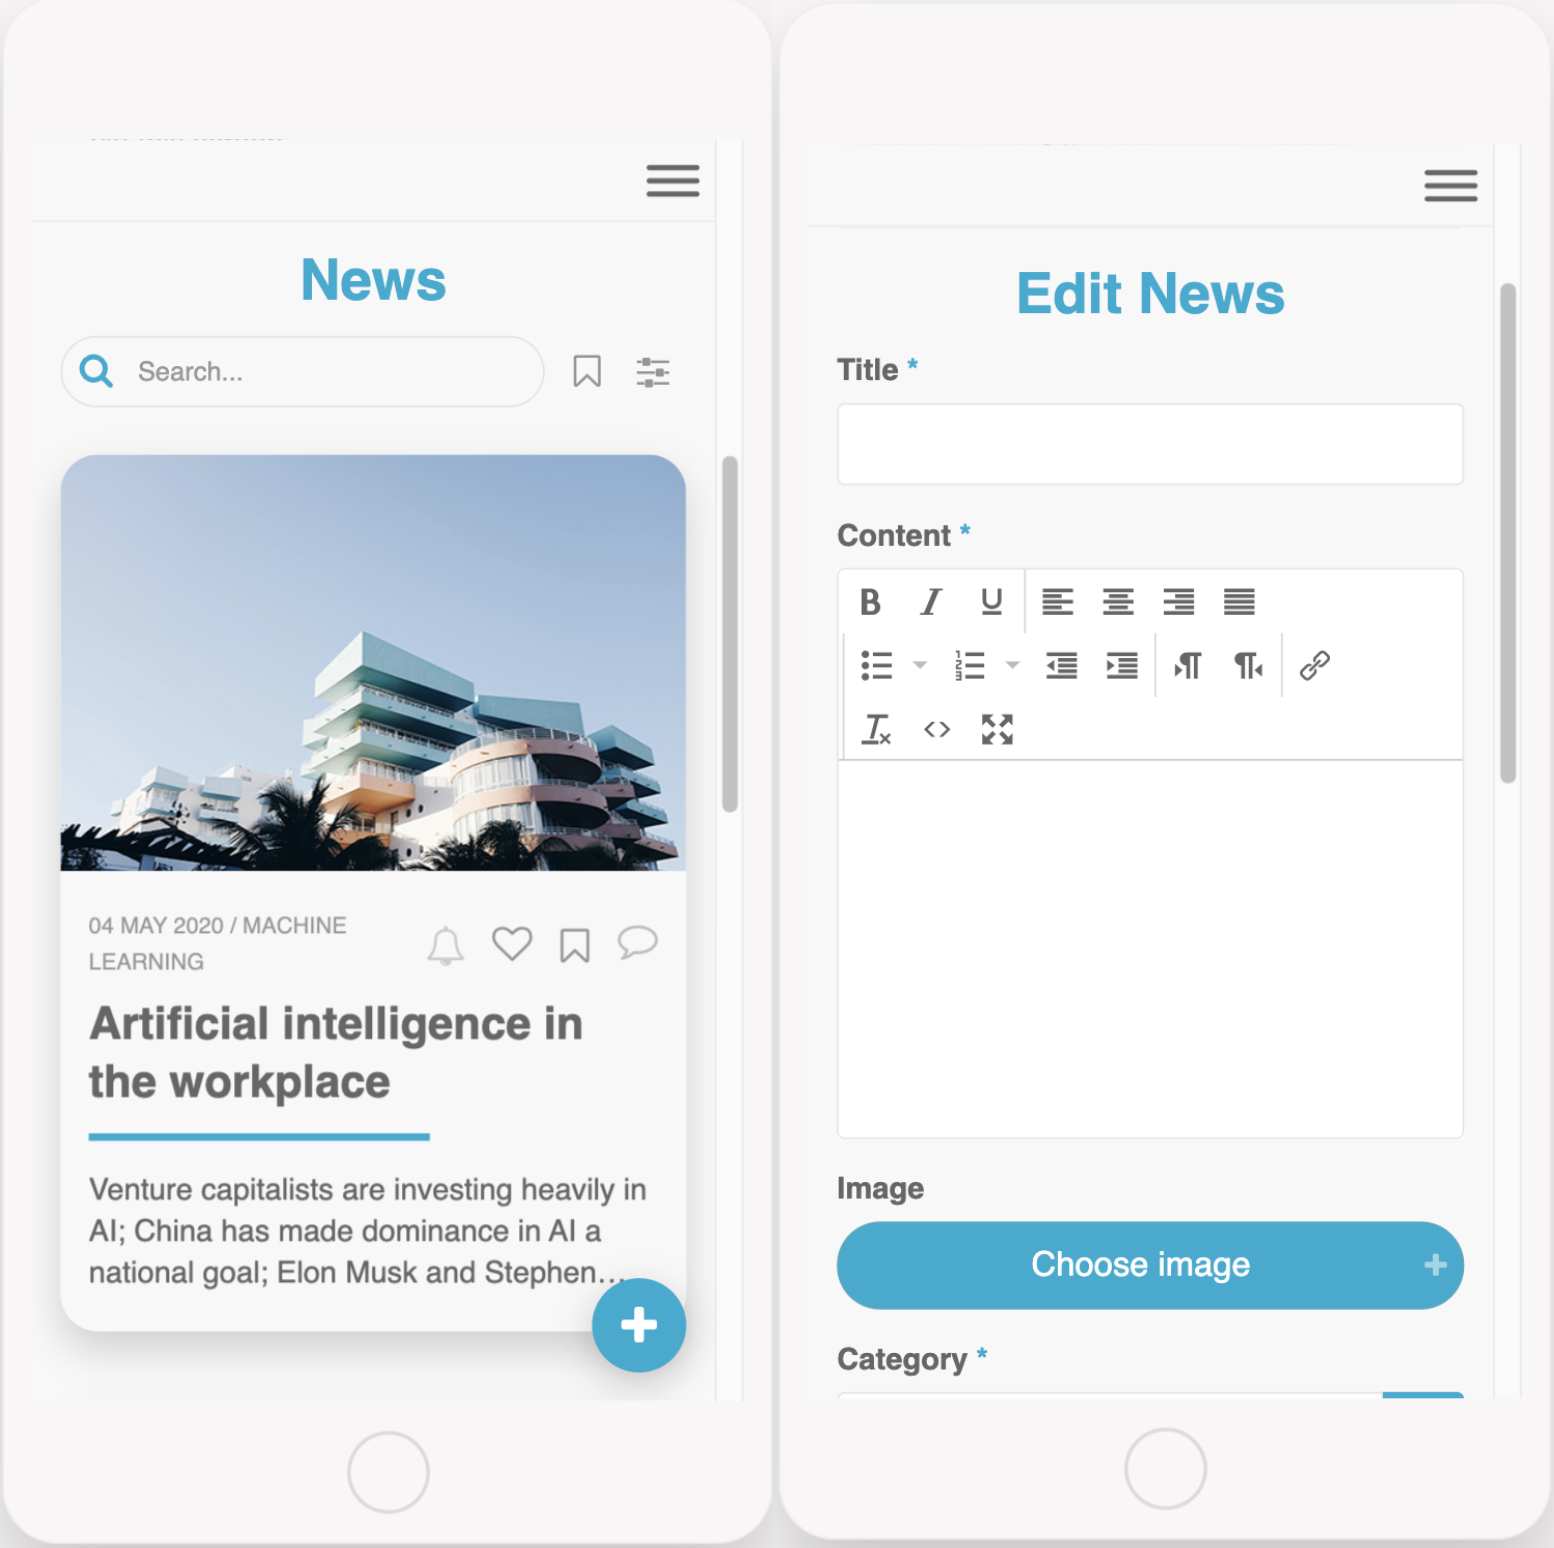
Office managers can use this screen to add a new news article, make edits to an existing article or delete an article.
This screen uses both the list from data source and form components.
- OM – Edit Offices
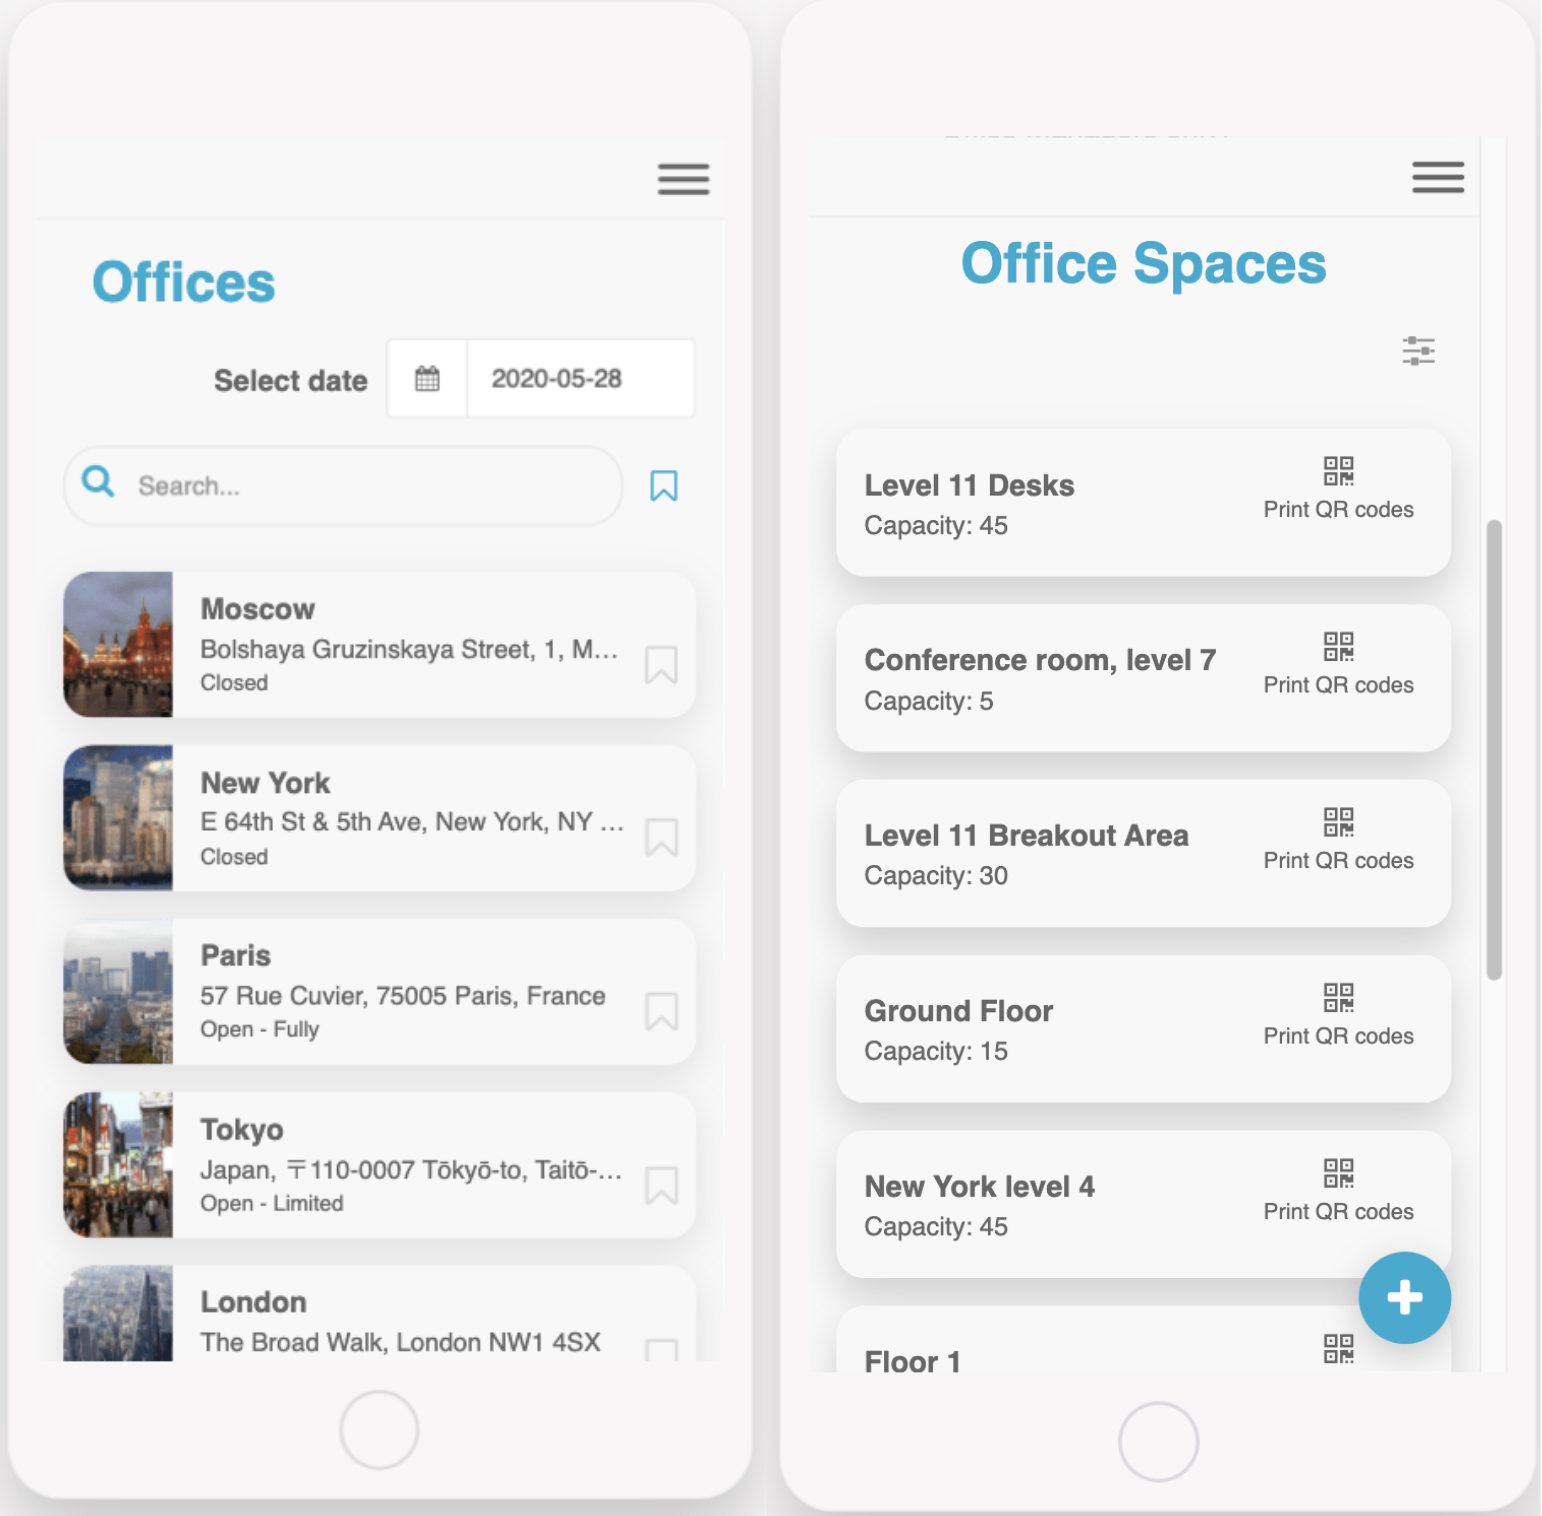
This screen will allow the office manager to access the button to edit office spaces.
This screen also enables office managers to create new office spaces and set the capacity per space.
QR codes can also be accessed and printed from here.
- OM – Generate QR Code
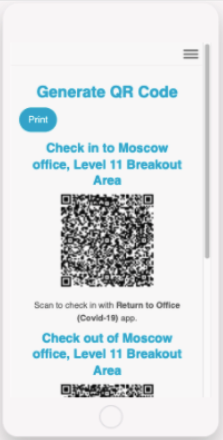
This screen will allow the office managers to generate and QR codes that can be used for colleagues to check into spaces.
- OM – Manage Bookings
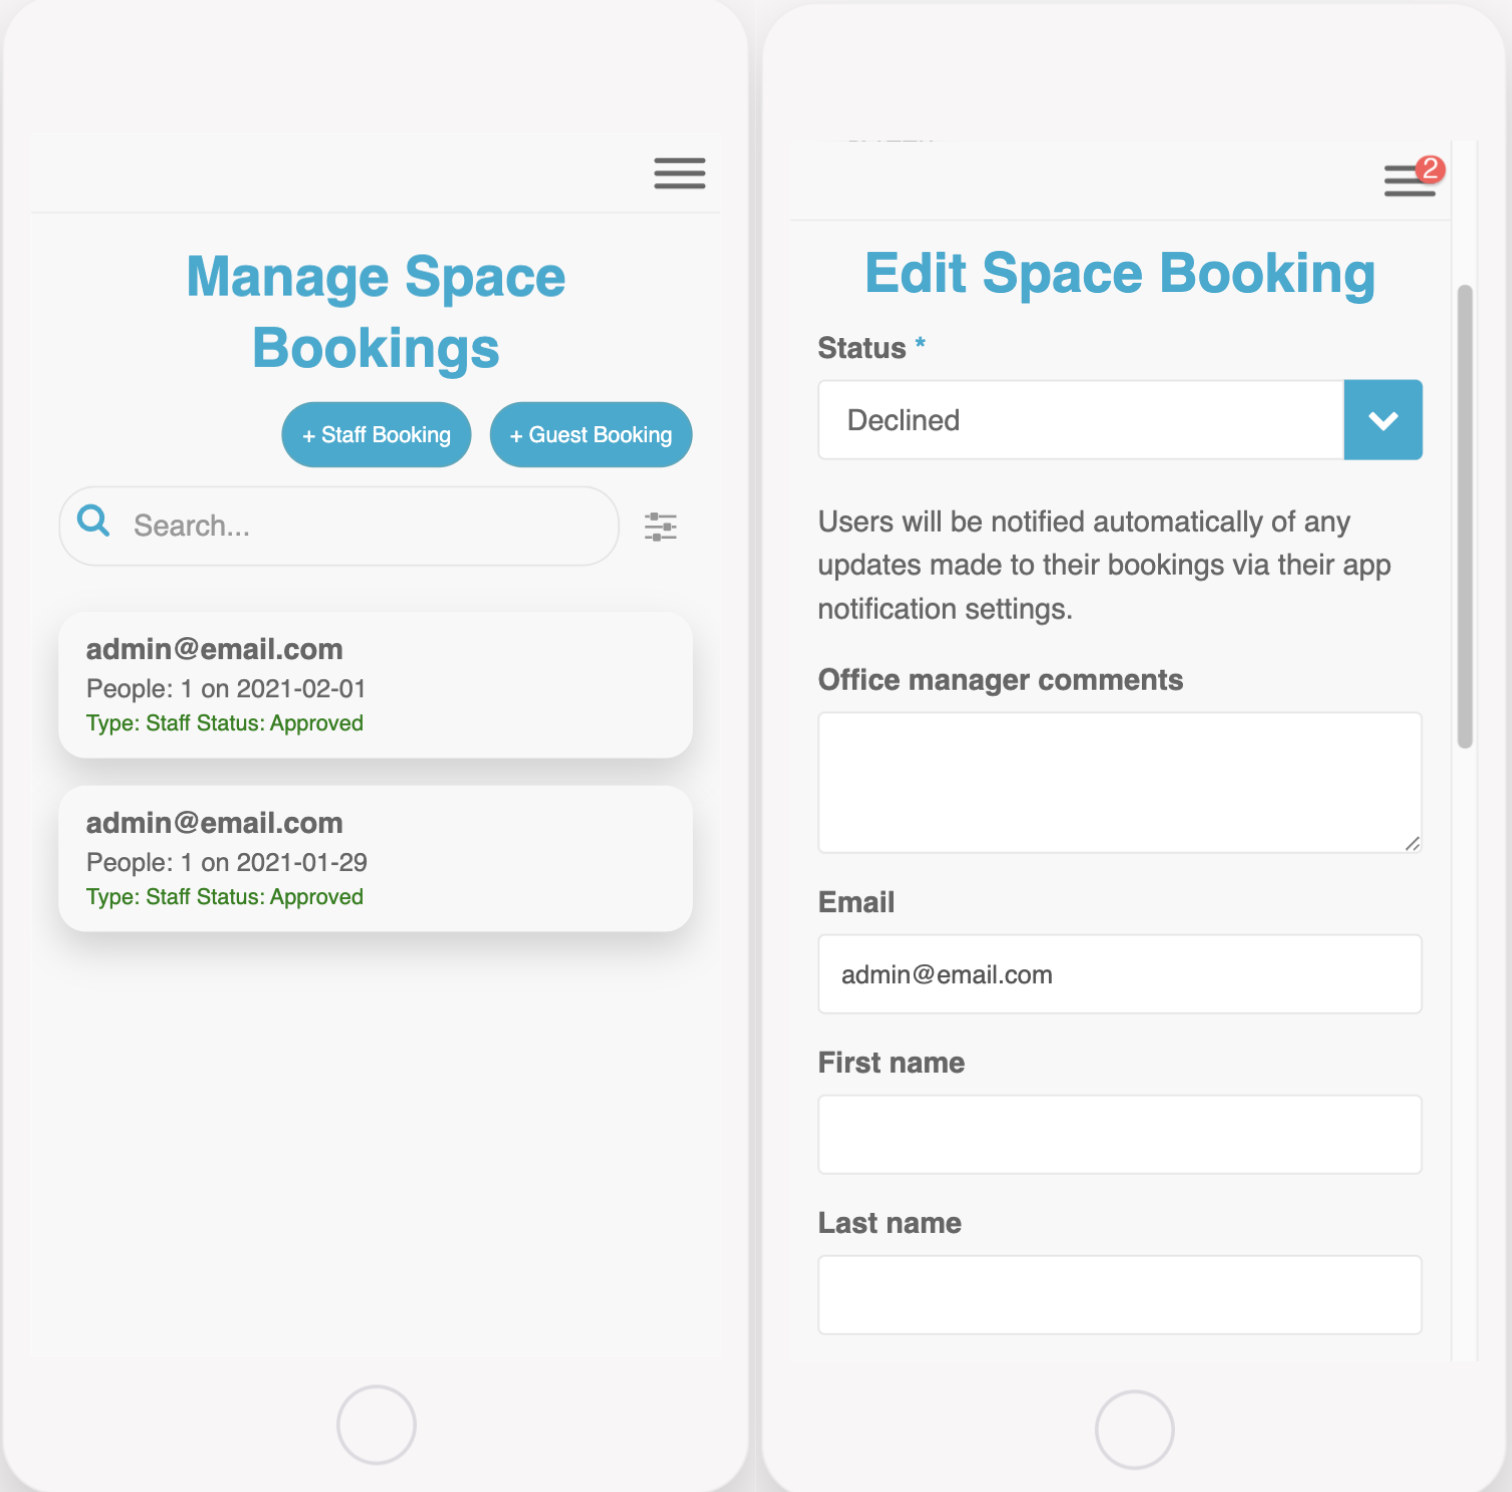
This screen will display the current bookings and allow office managers to review and edit any bookings. If any changes are made to a user’s booking, the user is alerted via email.
They can also use this screen to create a new staff or guest booking.
This screen uses both the list from data source and form components.
- OM – Office Risk Assessment
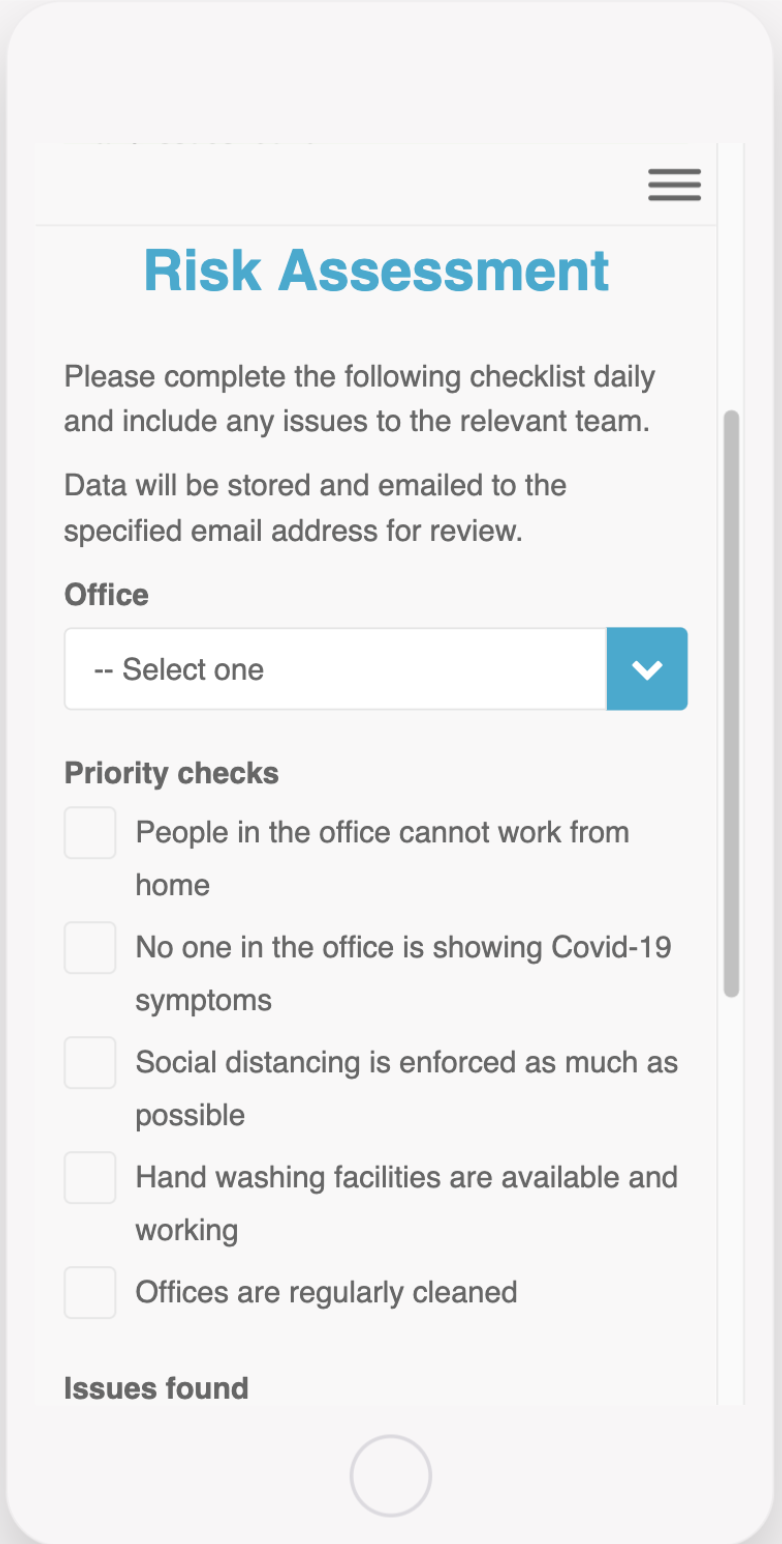
This screen can be used by the office manager to perform a risk assessment of the office.
This checklist can be configured to reflect your preferred assessment tasks.
You can also configure who is alerted via email with the report for review.
This screen uses the form component, see more here.
- OM – Dashboard
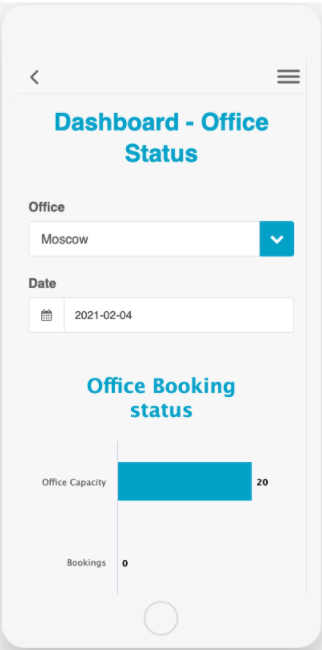
This screen is for use of office managers and admins.
This screen allows you to select an office and a date range to see data.
The office capacity and availability will be displayed here as well as display the status of everyone who is booked in and checked in.
Can be configured to display specific client information
- OM – Health Survey Submissions
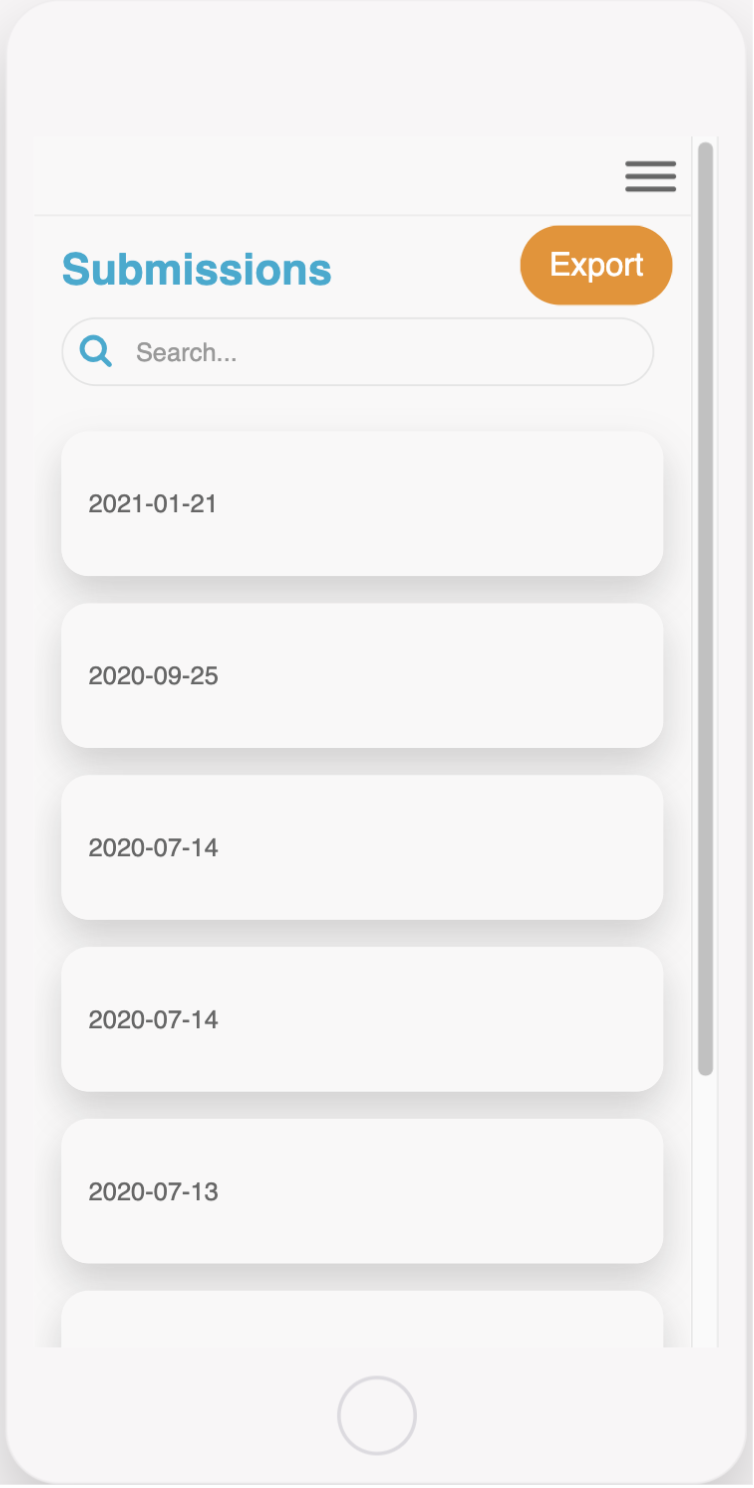
This screen will display a list of the completed health survey submissions and can be accessed by office managers and admins to see who has completed the survey and what their status is. Office managers and admins can export the data as a CSV file on the web app only.
This screen uses the list from data source component and can be configured to display the information submitted from the survey.
Admin Screens
- Admin – Manage Staff Directory
This screen can be accessed by admins to make any amendments to staff profiles.
This screen uses the list from data source component. See more here.
- Admin – Configure Security
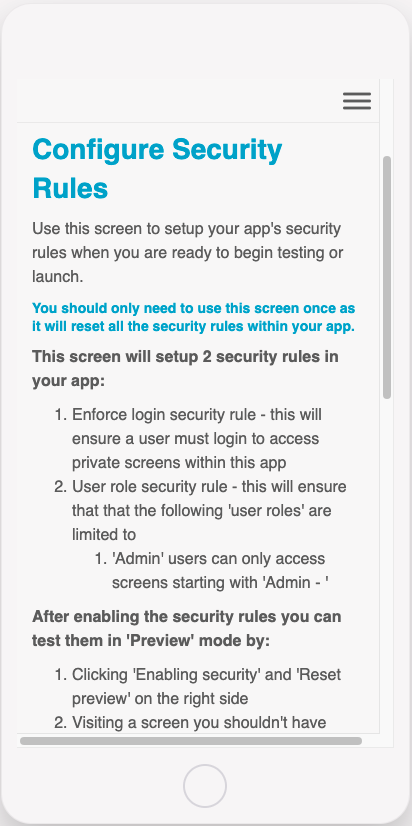
This screen can be used by admins to configure the security rules in your app. This screen must be accessed via Fliplet studio.
You should only need to use this screen once as it will reset all the security rules within your app and the app will require an in-app update to be published before they are live.
This screen uses the form component and amends your app’s security rules. Learn more about screen security here.
- Admin – Edit Communication
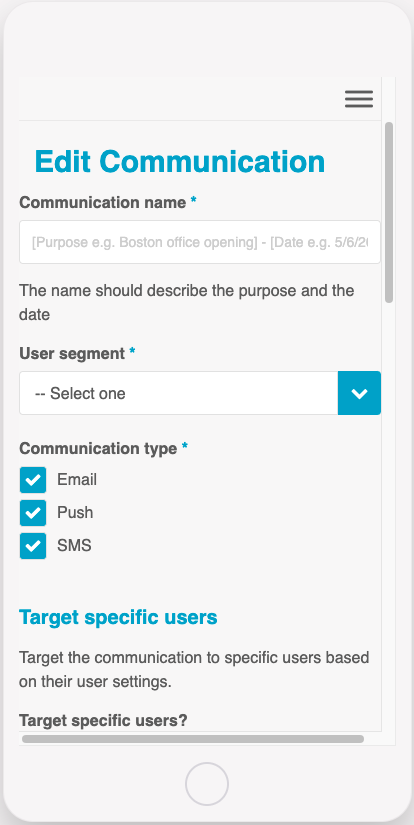
Admin users can use this screen to promote their app and new features to users by sending suitable email, push and SMS notifications.
This form has the option to submit, save, send a test or send to users. If you select save this draft can be viewed and edited from the manage communication screen. If you select to send a test, this will be sent to you to view.
This screen uses the form component, see more here.
- Admin – Manage Communication

Admin users can use this screen to view previously sent communications or saved communications.
Select the communication to view, and click duplicate to load the edit communication form with the communication detail prefilled.
This screen uses the list from data source component. See more here.
- Admin – Delete Data
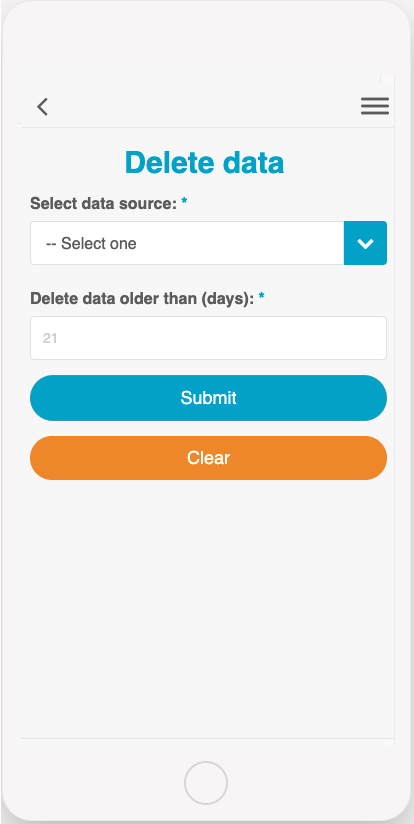
Admins can use this screen to delete data from data sources that you no longer want to store.
For the UK it is a requirement to store only the last 21 days of health records.
The admin user can select the required data source and choose the number of days that determine which data is deleted.
This screen uses the form component, see more here.
- Admin – Download Data
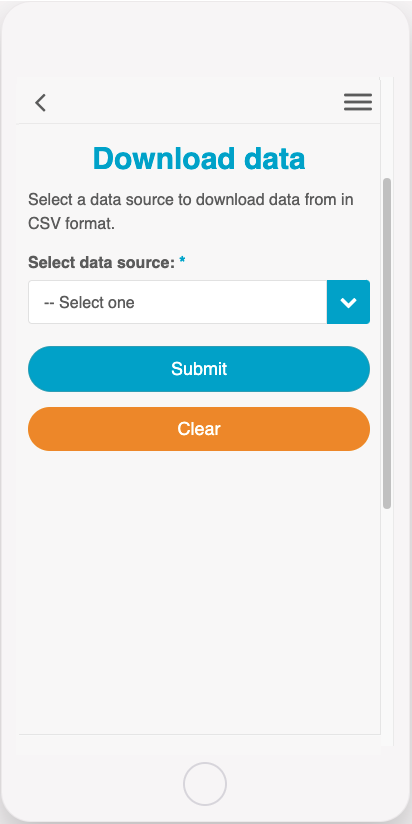
Admins can use this screen to export a data source in CSV format.
The drop-down list will include all data sources currently used by the app.
This screen can be used on the web app only.
This screen uses the form component, see more here.
Catering Staff Screens
- Catering – Orders List
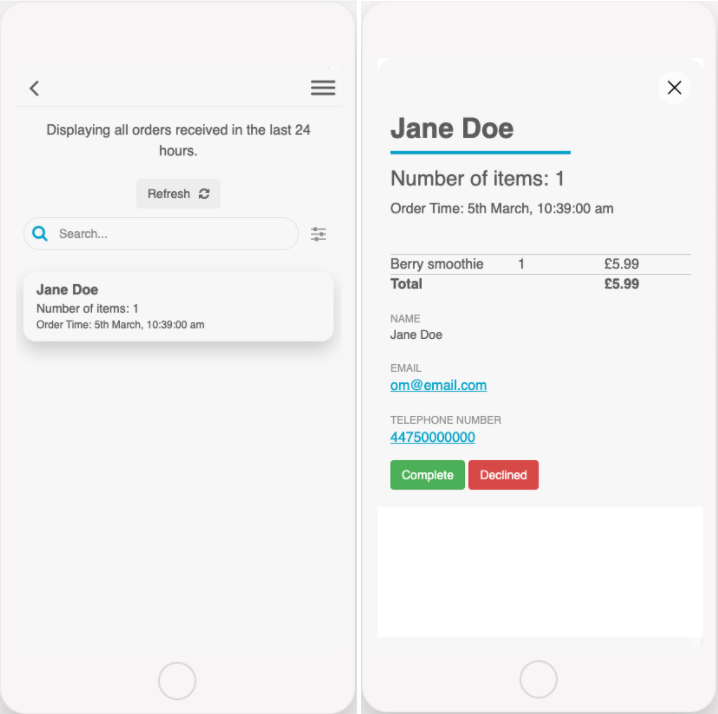
This screen will display all orders made from the menu. It is designed to be displayed on an iPad or computer so that catering staff can see when a new order is received.
The app will check for new orders every minute, if there are new orders the screen will play a sound and flash. A “new orders found” message will also be displayed. To view the latest orders tap refresh and the screen will update.
Select ‘Complete’ or ‘Declined’ within each order to change its status and track an order’s status.
This screen can be configured to display all of the order details you require.
This screen uses the list from data source component. See more here.
- Catering – Manage Product
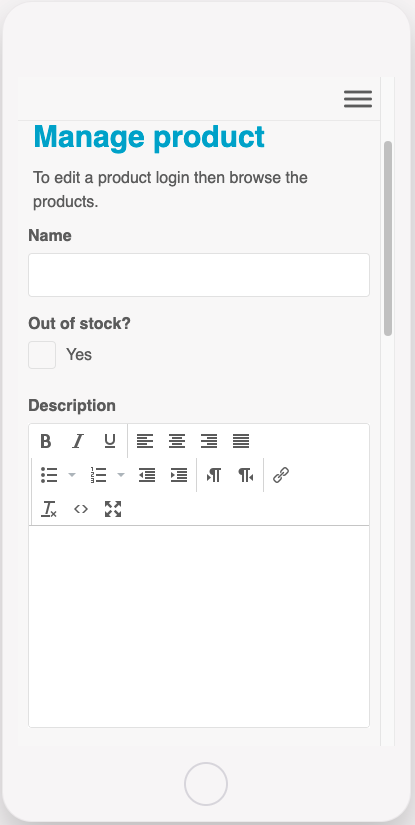
This screen can be used by catering staff to add new products to the menu.
To update existing products, including setting an item to out of stock, use the browse menu screen to select the item and click edit to be redirected to this form to update the item.
This screen can be configured to include any fields required for the menu.
This screen uses the form component, see more here.
Related Articles