People are at the heart of every successful organization. In order to foster a culture of collaboration and transparency, people need to be able to see, connect and communicate.
The Directory solution enables you to create an app that gives your users the ability to quickly find key people in their organization and learn about colleagues.
This article covers the following:
Benefits
- Easy access to employee information – access information about colleagues, such as contact details, job titles, department, and other relevant information
- Efficient Communication – quickly find the contact information of colleagues, including phone numbers, email addresses, and other communication channels. This streamlines the process of reaching out to coworkers, promoting efficient and timely communication within the organization
- Employee Engagement and Networking – learn about colleagues’ skills, expertise, and interests, which can encourage collaboration and knowledge sharing
- Onboarding and Orientation – help newcomers become familiar with the organizational structure and build connections with their colleagues more efficiently
- Enhanced Productivity – save time by quickly finding the right person to contact or locating the necessary information to complete their tasks. It minimizes the need for manual searches or relying on outdated contact lists
- Mobile Accessibility – offers the flexibility to access employee information on the go. Employees can use their smartphones or tablets to search for colleagues, get contact details, or refer to organizational charts, even when they are not at their desks. This can be particularly useful for remote or mobile employees.
Use cases
The directory app has been created with internal directories in mind.
Employee Directories: Internal directory apps are often used within organizations to create employee directories. Enable employees to access contact information, job titles, departments, and other relevant details about their colleagues. It facilitates communication, collaboration, and networking within the organization.
Business Directories: Directory apps can serve as comprehensive business directories, providing information about local businesses, including contact details, addresses, operating hours, customer reviews, and ratings. Users can search for specific types of businesses or explore different categories, such as restaurants, hotels, salons, healthcare providers, and more.
Features
Directory
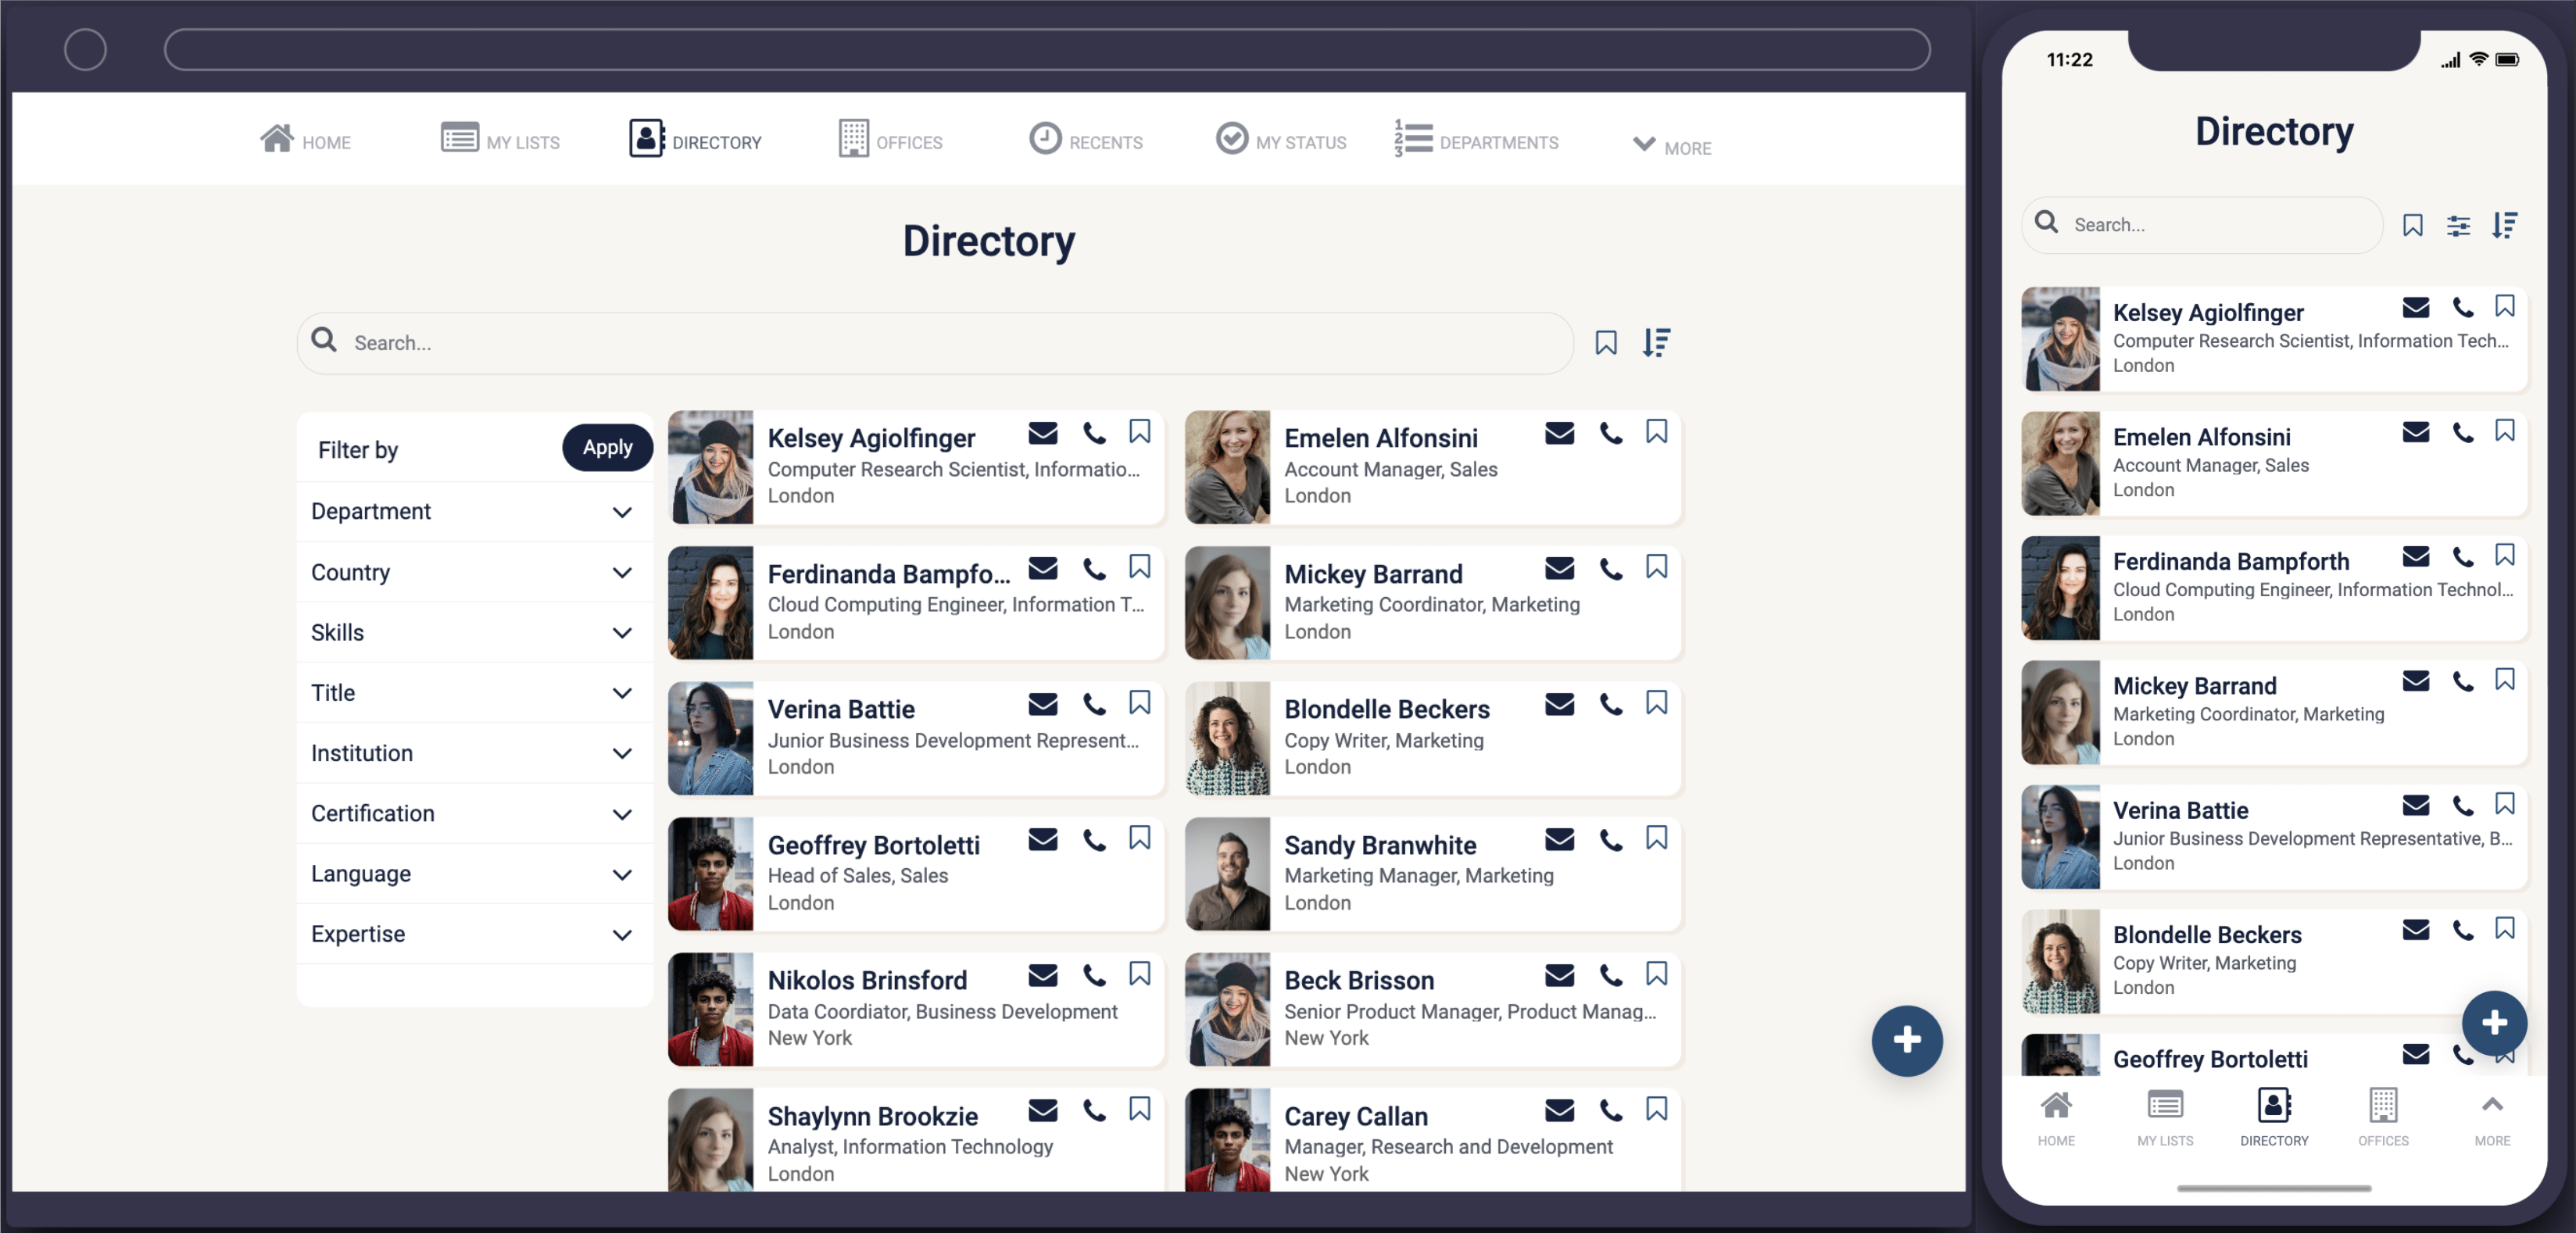
The directory screen includes a list of all staff registered to the app and their latest working status.
Key features of the directory list include:
- List and detailed views that are customizable to display any of your own data
- A search and filter option to quickly find the people you’re looking for
- A sort and bookmark function
- A dynamic design with tailored views for mobile, tablet, and desktops.
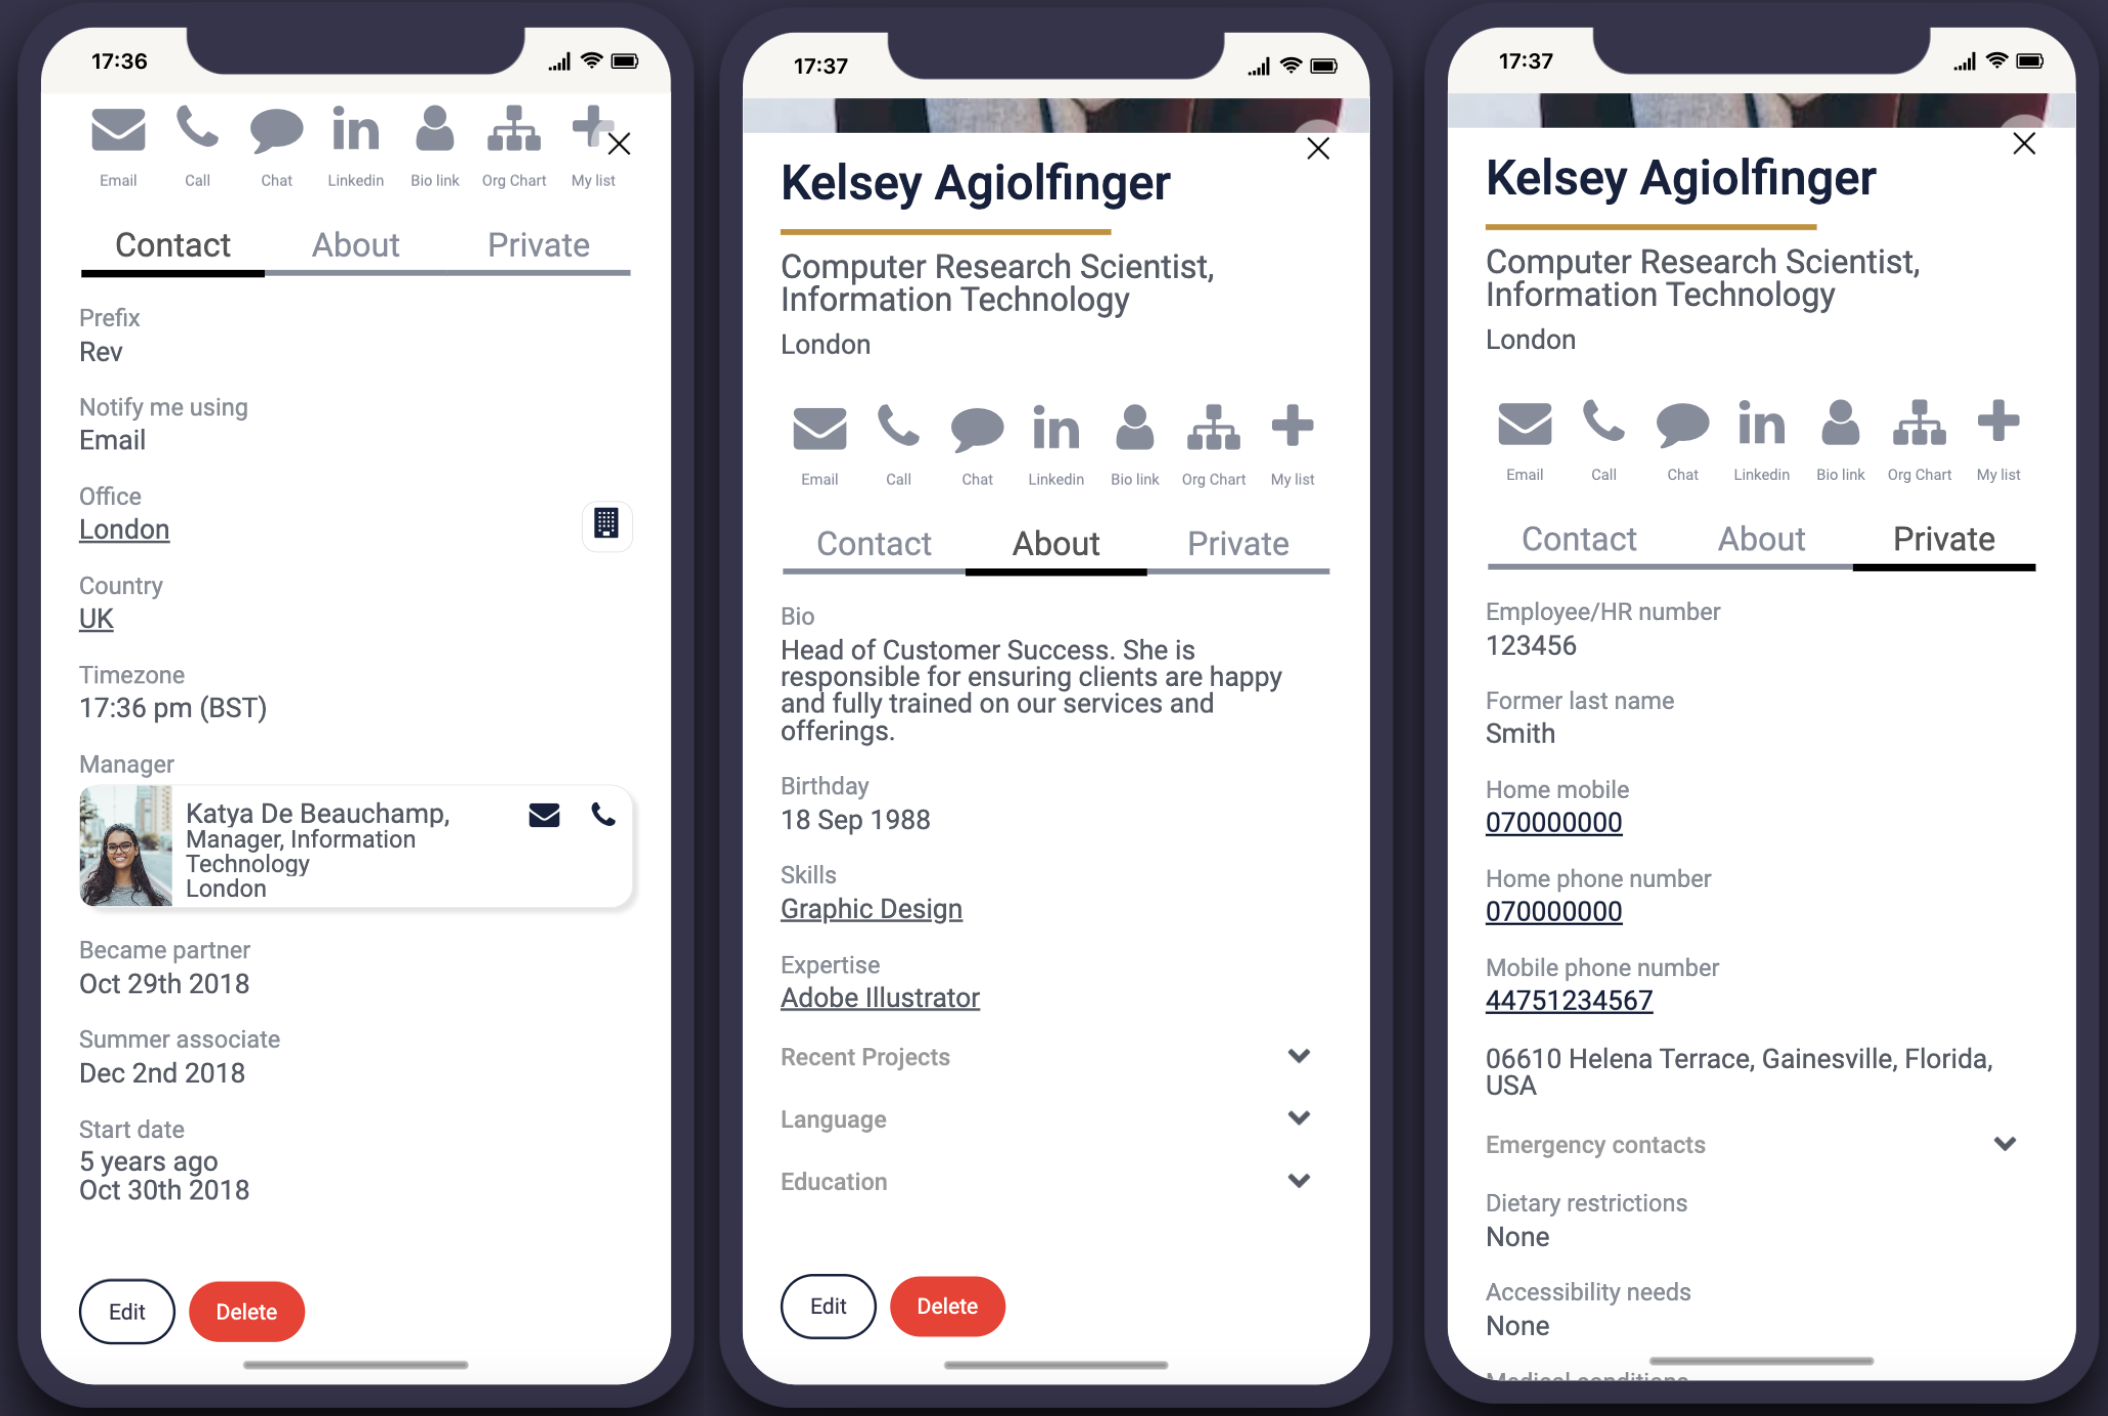
Clicking on a user profile will open up more detail.
This includes; contact information, some more basic information, and a private tab that is only visible and accessible to specific people such as admins and HR for example, which includes some personal or sensitive information.
Org chart
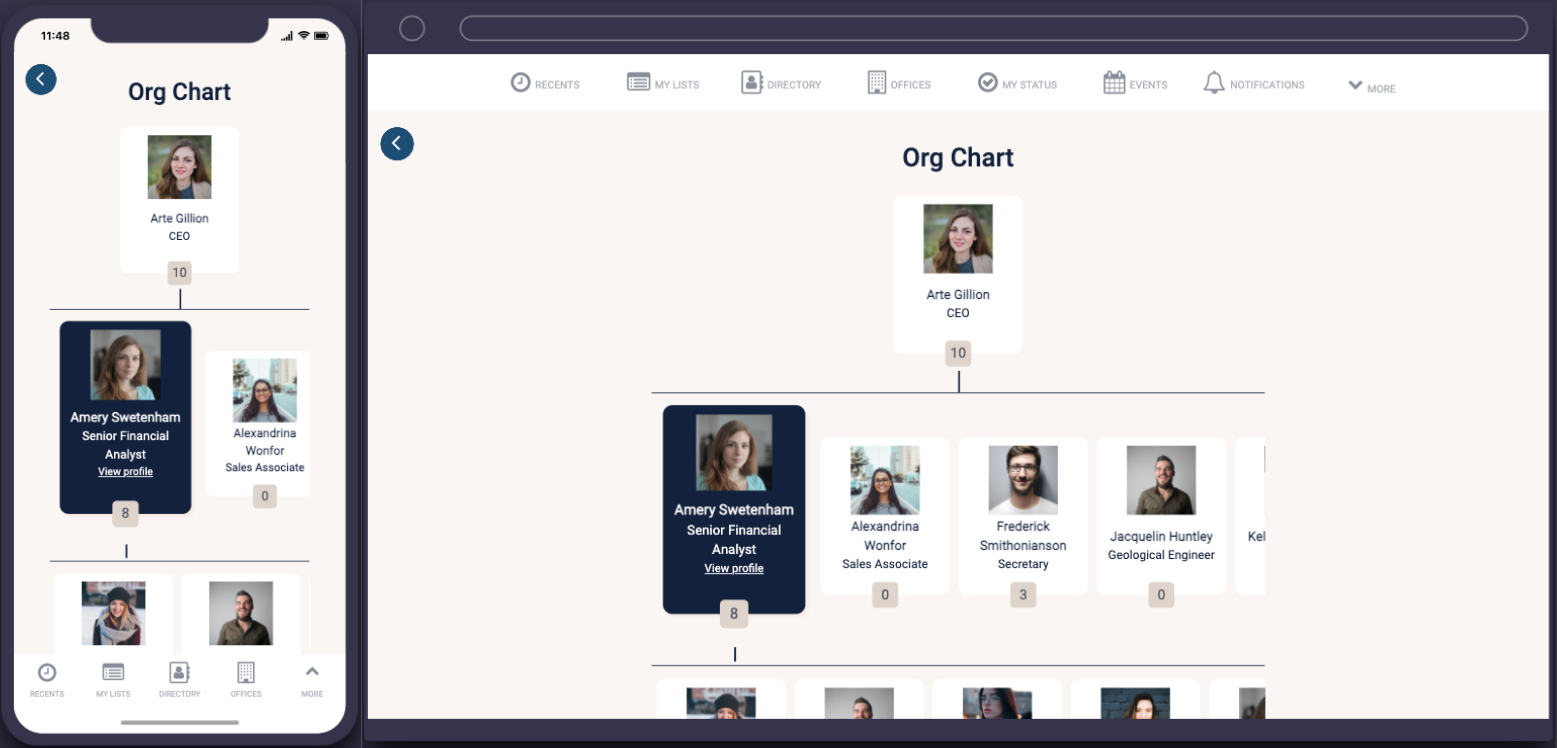
The org chart screen enables users to see and navigate through the organizational chart of the company.
Users can see who they are, what their role is, and who they report to.
Users can click on the highlighted profile to access the full user profile and their information.
The org chart is populated by the people data.
Digital business card
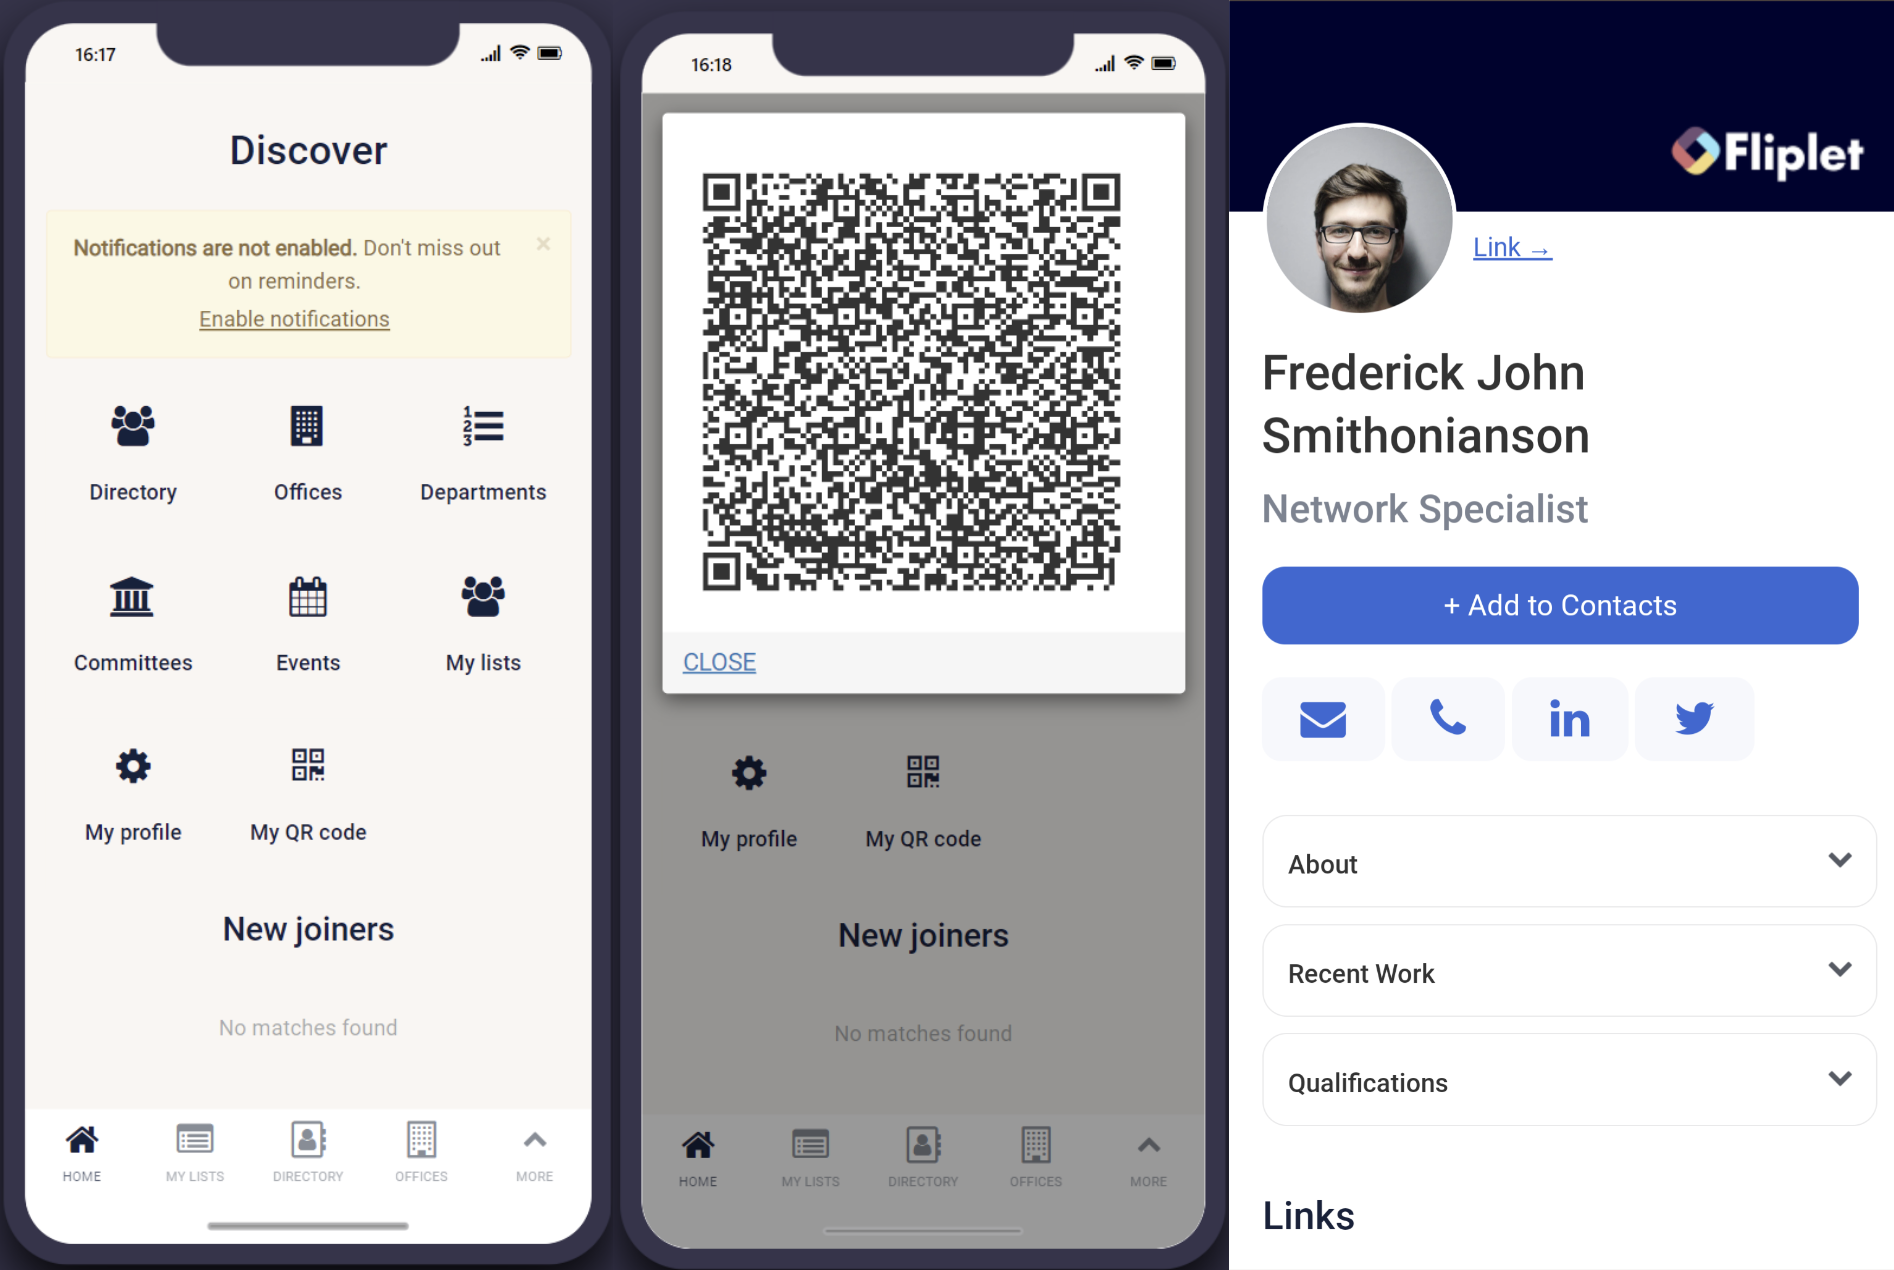
The digital business card is a public profile that can be accessed by anyone via scanning a QR code.
Users can access their QR code from the home screen, by clicking “My QR code”.
The digital business card can include links to social media, phone calls, emails, portfolios, etc.
You can also use the “add to contacts” option to add the user to your device contacts.
Using Studio, the layout can be edited and the data will be populated using the user’s directory profile information.
Note: the app needs to be published for this feature to work correctly, and scanning the QR code whilst in Studio will not work. It should be tested and viewed via the live app only.
Groups
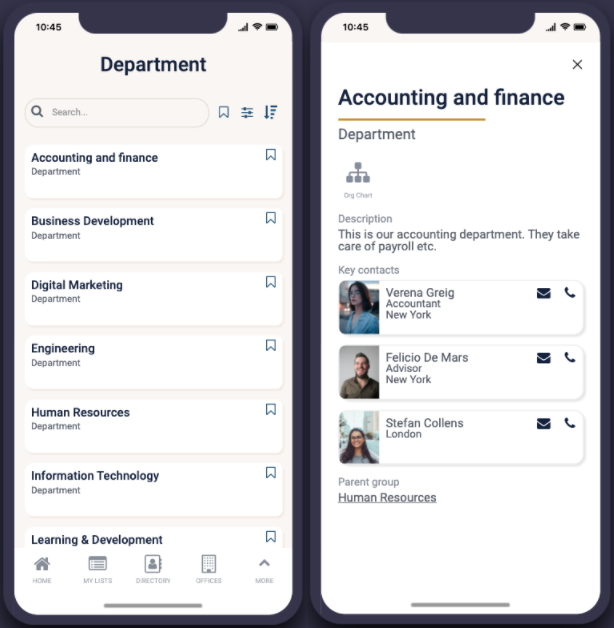
The groups screen will display a list of groups such as departments or committees, enabling users to view group information and its members.
The groups screen supports users finding the right person to contact. By default, department or committee options can be selected from the app menu, however, these can be configured to any group type.
This screen uses the list from data source component, learn more here.
Office information
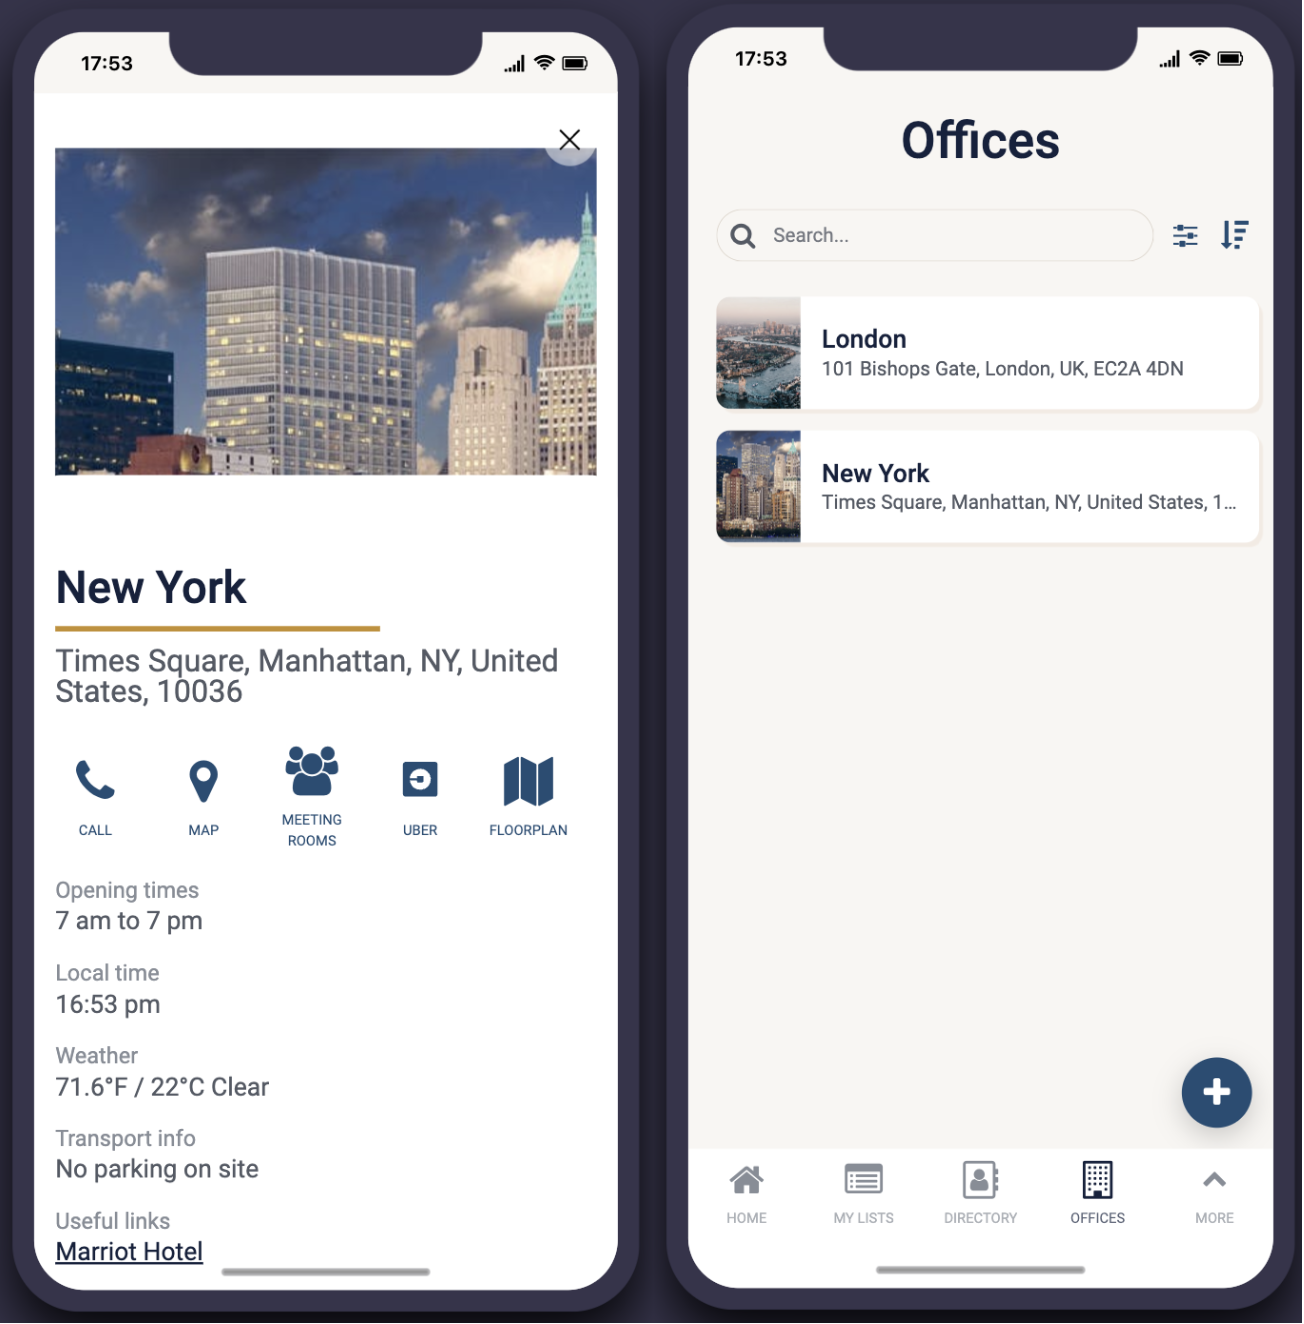
Office information will be accessible with the app and this can include:
- Location, useful information, and transport options
- Map
- Weather & time zone
- Floorplans
- Amenities including accommodation, food, and other records
- Meeting room and the facilities they offer
- Uber & Lyft integration
Events
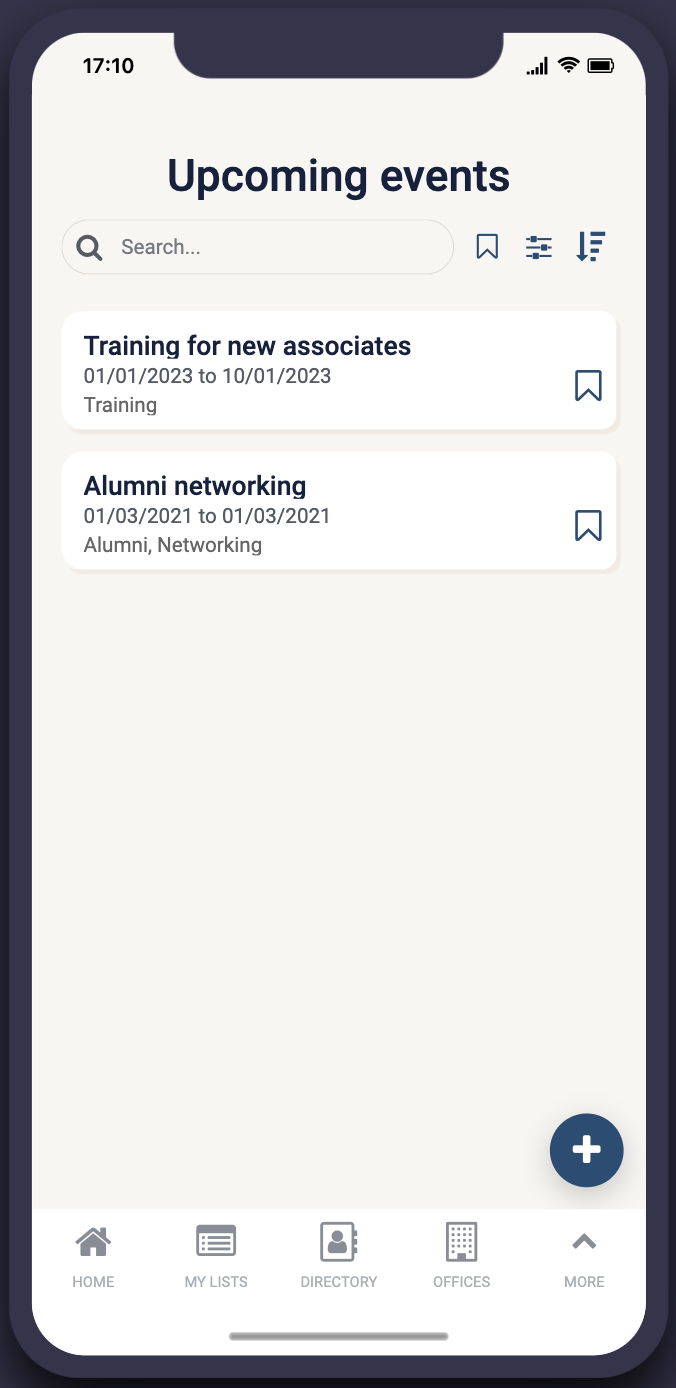
Use the events section of the app to feature upcoming internal events.
Users can search, filter, and bookmark events.
New events can be created by all app users and users can edit their own events, by clicking the event and selecting edit.
Use the LFD filter settings to automatically remove past events.
Status management
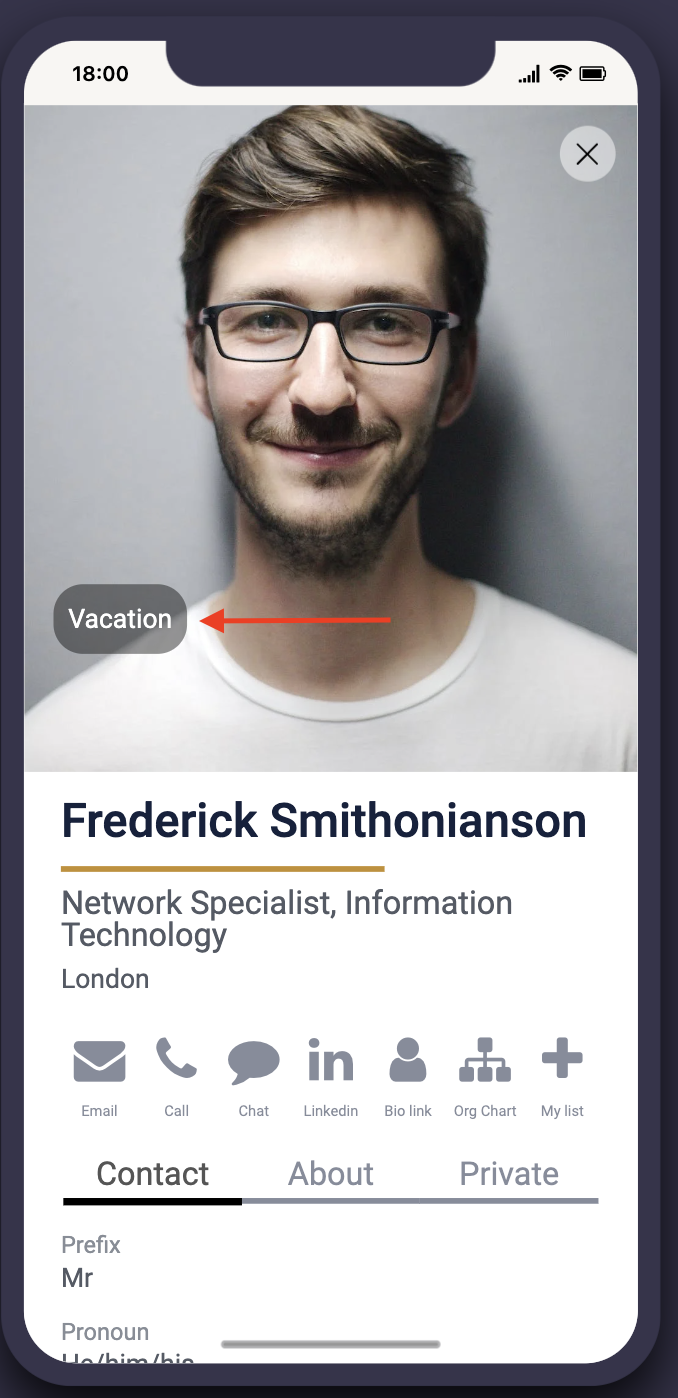
Users can update their working status, which is then reflected in the directory to inform staff or users of the app of their status.
A user can see a list of current and previous statuses here.
Users should click on the plus button to add or update their status.
This screen uses the list from data source component, learn more here.
User roles
The app will enable access to two types of users. The employee or staff and Admins.
Each user role will have access to the following features:
User role overview
|
User role |
Definition |
User-specific features |
|
Admin |
Manages the app and users |
|
|
Staff |
Access to the directory features |
|
Solution set up
Features requiring content
- Staff
The solution includes sample data that should be replaced with your own. To replace the data:
- Upload data into the Staff data source (see the ‘Instructions – Excel import’ screen)
- Ask users to complete their info when they sign up for the app via the registration screen
- Office
The solution includes sample data that should be replaced with your own. To replace the data:
- Upload data into the “offices” data source (see the ‘Instructions – Excel import’ screen)
- Use the “Admin – edit office” screen to input
- Meeting rooms
The solution includes sample data that should be replaced with your own. To replace the data:
- Upload data into the meeting rooms data source (see the ‘Instructions – Excel import’ screen)
- Use the “Admin – edit meeting room” screen to input
- Groups
The solution includes sample data that should be replaced with your own. To replace the data:
- Upload data into the meeting rooms data source (see the ‘Instructions – Excel import’ screen)
- Use the “groups” screen to add and edit existing groups
Features that can be populated once the app is live
- Events
- Facilities (office amenities)
- User status
- User lists
Related Articles