This is a guide for how you publish apps to an app portal. This assumes the app portal has already been pre-configured. If you need help setting up the portal from the start, please read this article.
Apps can be published as a standalone app as well as within a portal.
Step 1 – make sure the new app is published
-
In your app, go to the Publish button and publish your app to web
- Publishing your app to the web will make it available in your organization’s portal settings
Step 2 – In the portal settings, select the new app
-
Click on the portal component to open the settings
-
Scroll down in the settings to where you can see your available apps
-
Select the new app from the list
-
Note: only published apps will be listed here, so if you can’t see the app as an option, go back to step 1 and make sure the app is published
-
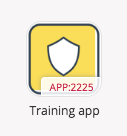
Make a note here what the app ID is, as you’ll need it for the next step
-
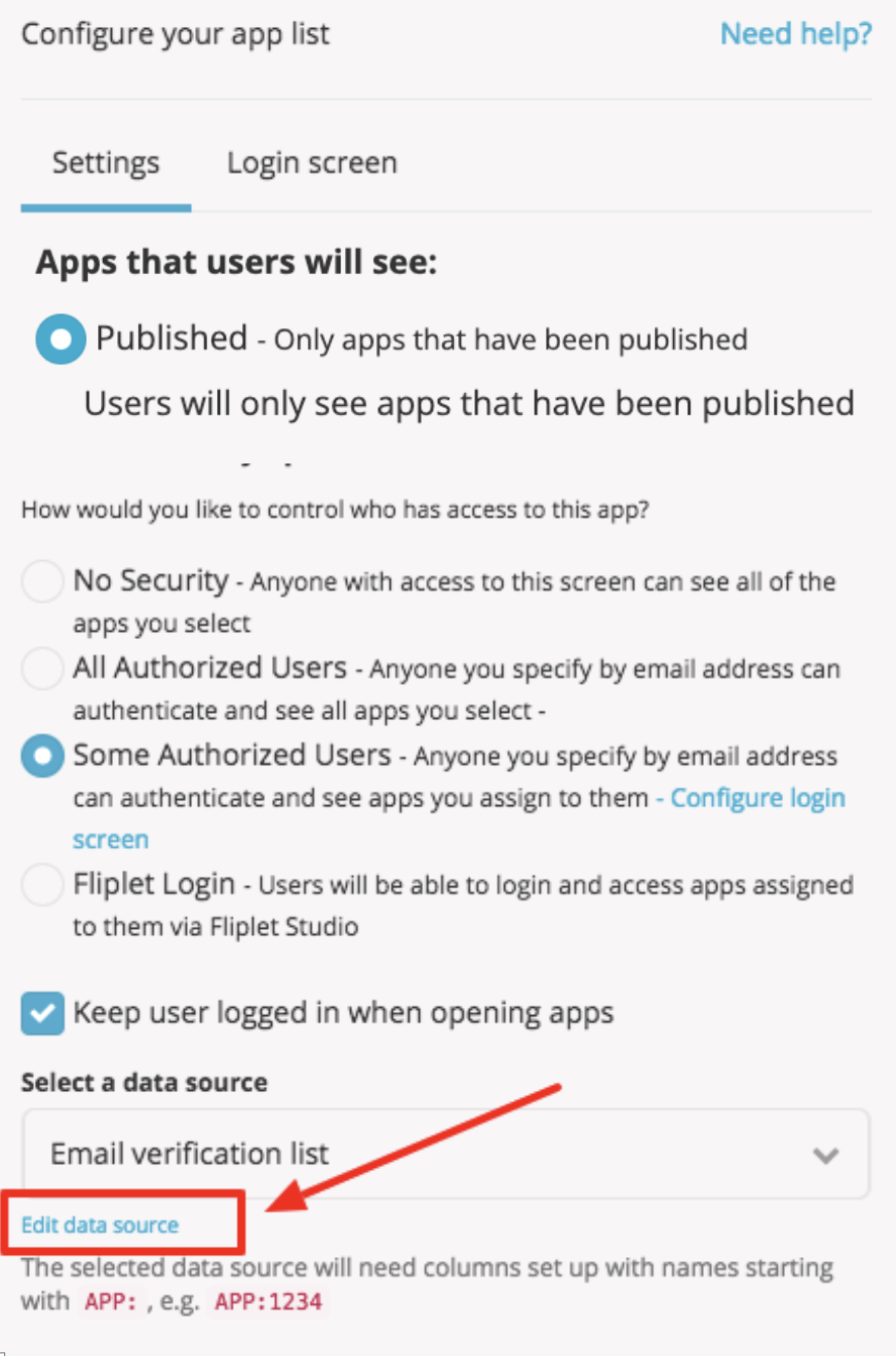
Step 3 – In the user data source, add the new app ID in a new column and give users access to the new app
-
In your portal settings click the button to edit data source
-
In your data source, create a new column and add the app ID like this APP:1234
-
Note that 1234 needs to be the unique App ID you can see from your list of available apps
-
-
Next to each user email mark an x in the new column if a user should have access to the new app
-
Save data source and portal component settings
Step 4 – Test it on Fliplet Viewer to make sure you can access & download the new app
-
Make sure to give yourself access to the new app so you can make sure you can access it on Fliplet viewer
-
You won’t be able to test downloading the app in Fliplet Studio preview since the portal only works on mobile devices
Step 5 – Publish the portal to make changes go live
-
To make your new app available on your live app, publish an update from within Fliplet Studio
-
When your app has updated, try to download the app and to make sure it’s working
Related Articles