Note:
As of 8th March 2021, Our Return to Office template has been updated to The Remote & Office Management Solution template. If you are new to the template please see here instead. If you are looking for support for your app built before 8th March 2021 continue reading the below.
Use the Return to the Office template to manage the new rules related to Covid-19 and streamline all your management processes by utilising technology to enforce, communicate and notify staff. Employees can use the app to book a desk space and ensure they’re complying with social distancing measures.
The Return to Office app can be configured to allow you to create a bespoke app that reflects your specific business needs. The purpose of this article is to provide you with a view of the screens that form the application and provide you with an understanding of the configuration opportunities that exist within the app.
Roles and Features
Screens for all users
Screens for staff
- Update my Status
- Check-in/out using QR Codes
- Health Survey
- Manage Booking
- My Bookings
- Guidance
- News
- User Settings
- Staff Directory
- Offices
- FAQ
- Report an Issue
- Notifications
Screens for office managers
Screens for admins
Screens for all users
- Onboarding

This screen introduces the user to the app and the various functions that it provides.
This screen can be configured to display on the first use of the app only.
You can configure the number of slides to display and the text and imagery can be changed to create your desired look.
This screen uses the onboarding component, for more information see here.
- Terms
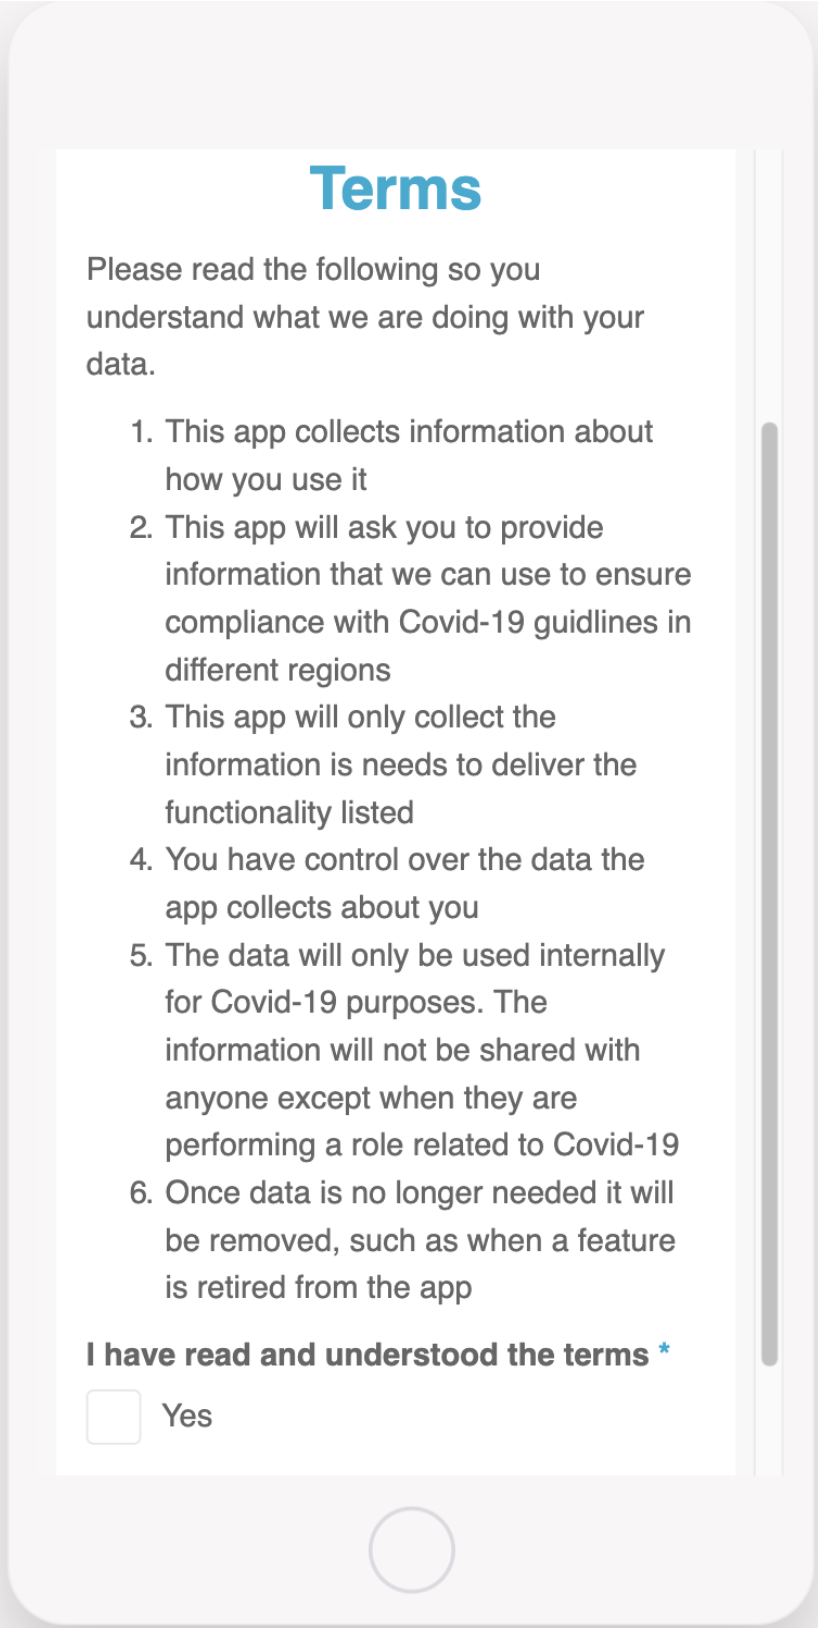
This screen will display the terms of use text and will be displayed on the first use of the app only.
The text displayed can be amended to reflect what is required.
This screen uses the text component, click for more information.
- Login or SSO Login
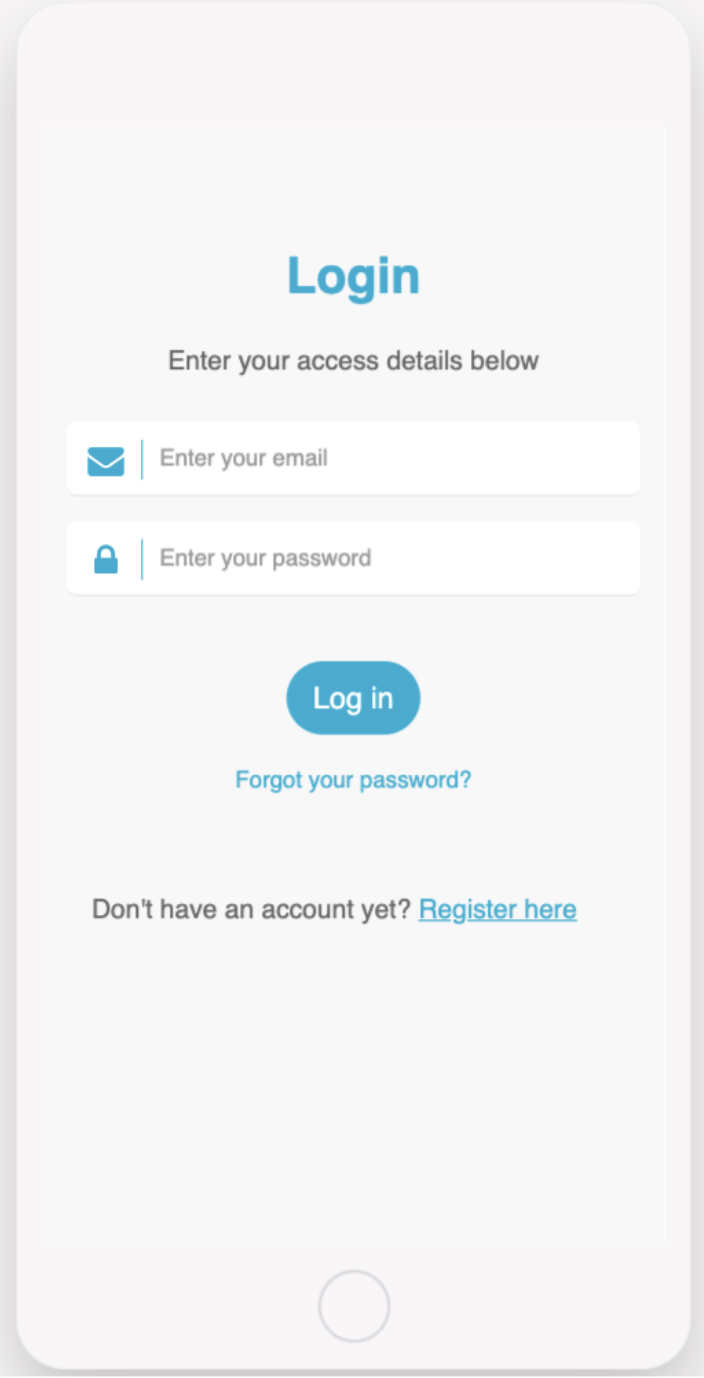
This screen provides security for the app allowing access to only registered users.
This screen can be configured to reflect your security preferences. Login can be via SSO, email and password, or email only.
By logging in this will also define the user role and ensure the correct permissions are shown per user.
Click to learn more about the login and SSO components.
- Registration
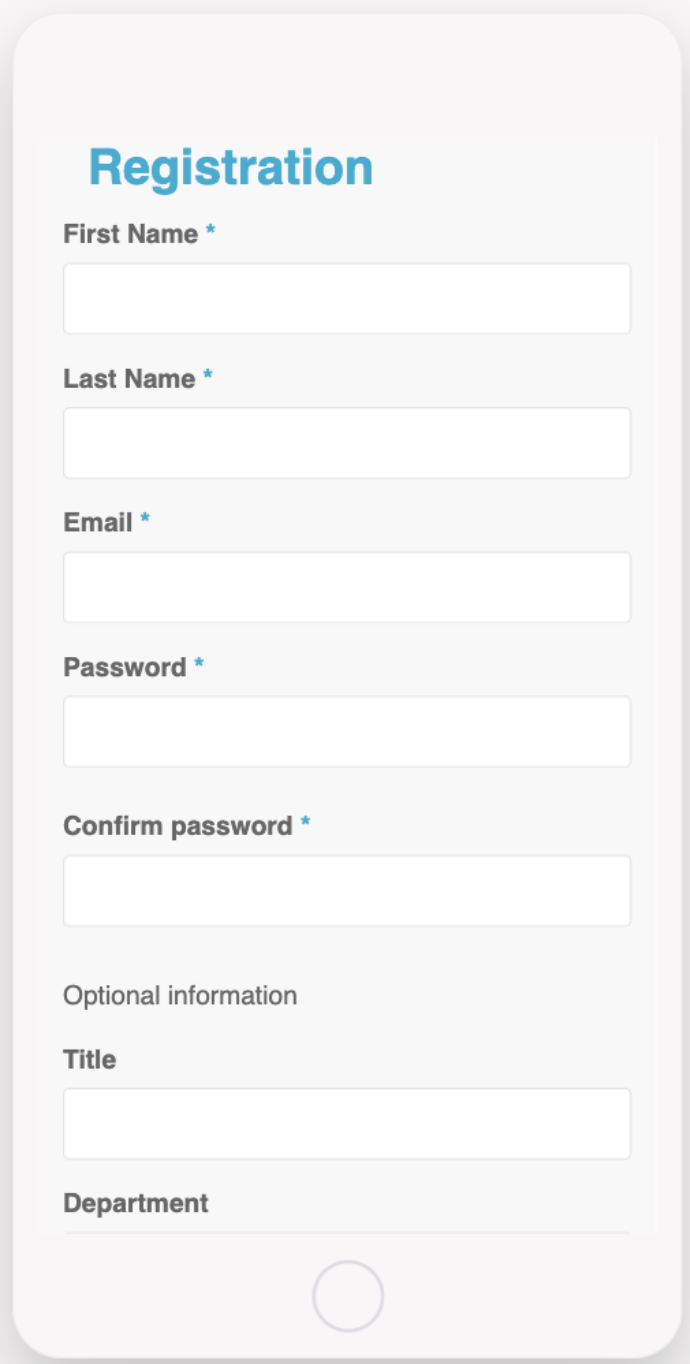
This screen provides the ability for users to register for access to the app and can allow guests and third parties to join and use the app.
This screen can be configured to include any requirements needed.
This screen uses the form component, see more here.
- Home screen
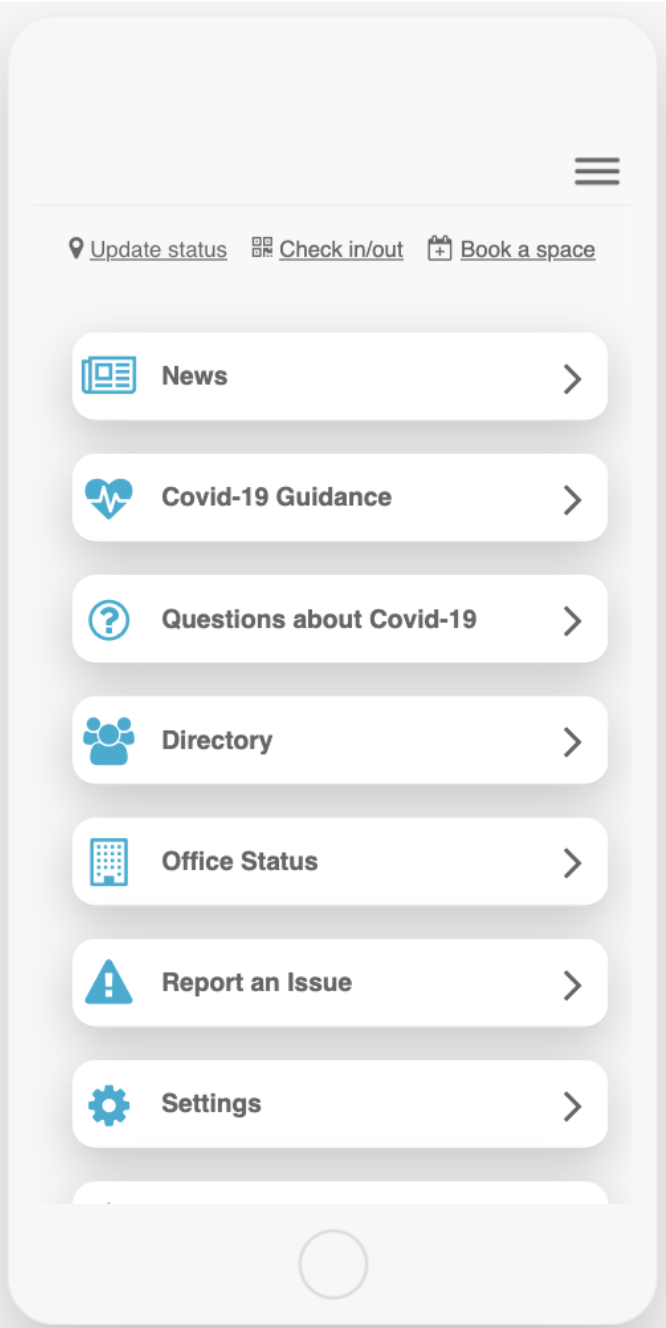
Alternate views are displayed depending on user type.
Users will see a list of all the key features once they are logged into the app. Depending on the user role one of 3 menus will be displayed.
This menu can be configured to display links to the features you chose to make available for the user.
This feature uses the list component, see here for more information
Screens for Staff –
- Update my status
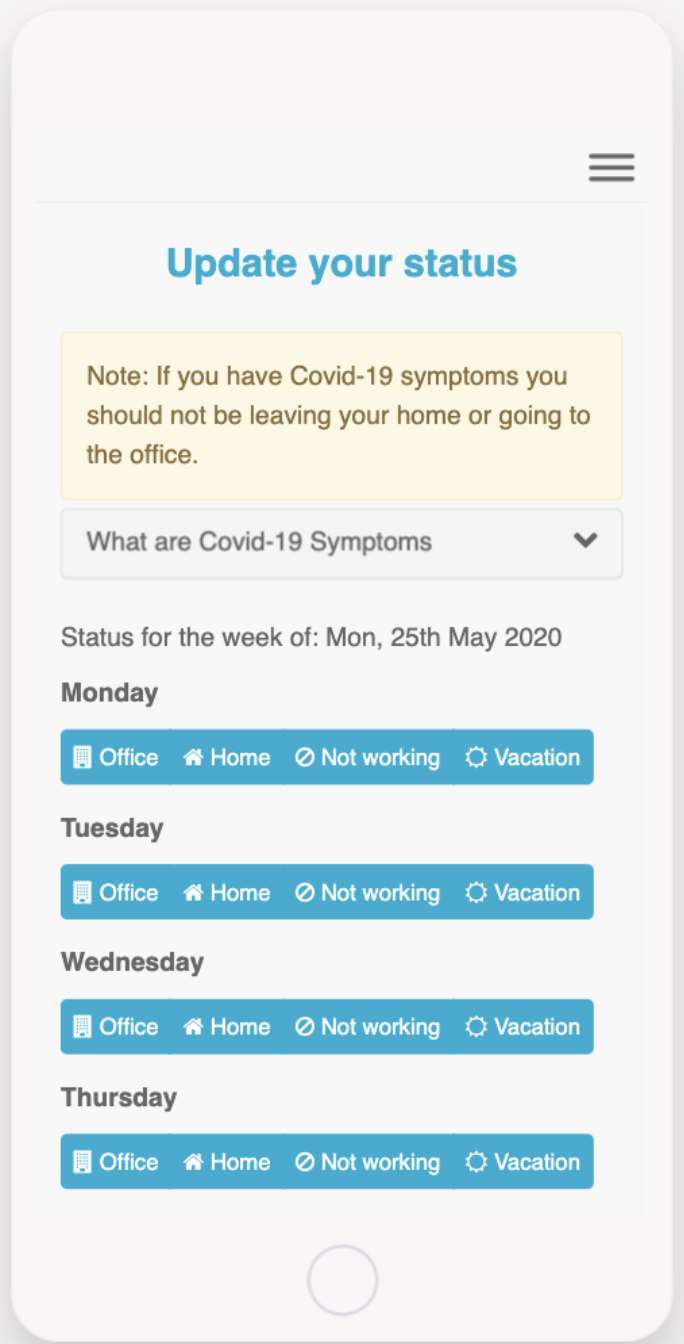
Users can update their status to ensure colleagues are aware of whether they are working and where. The status will appear in the Staff Directory.
Status options include: Working from home, In the office, Not working, or On holiday
The status options can be configured to display the status’ you require.
This screen uses the form component, for more information see here.
- Check-in/out using QR codes
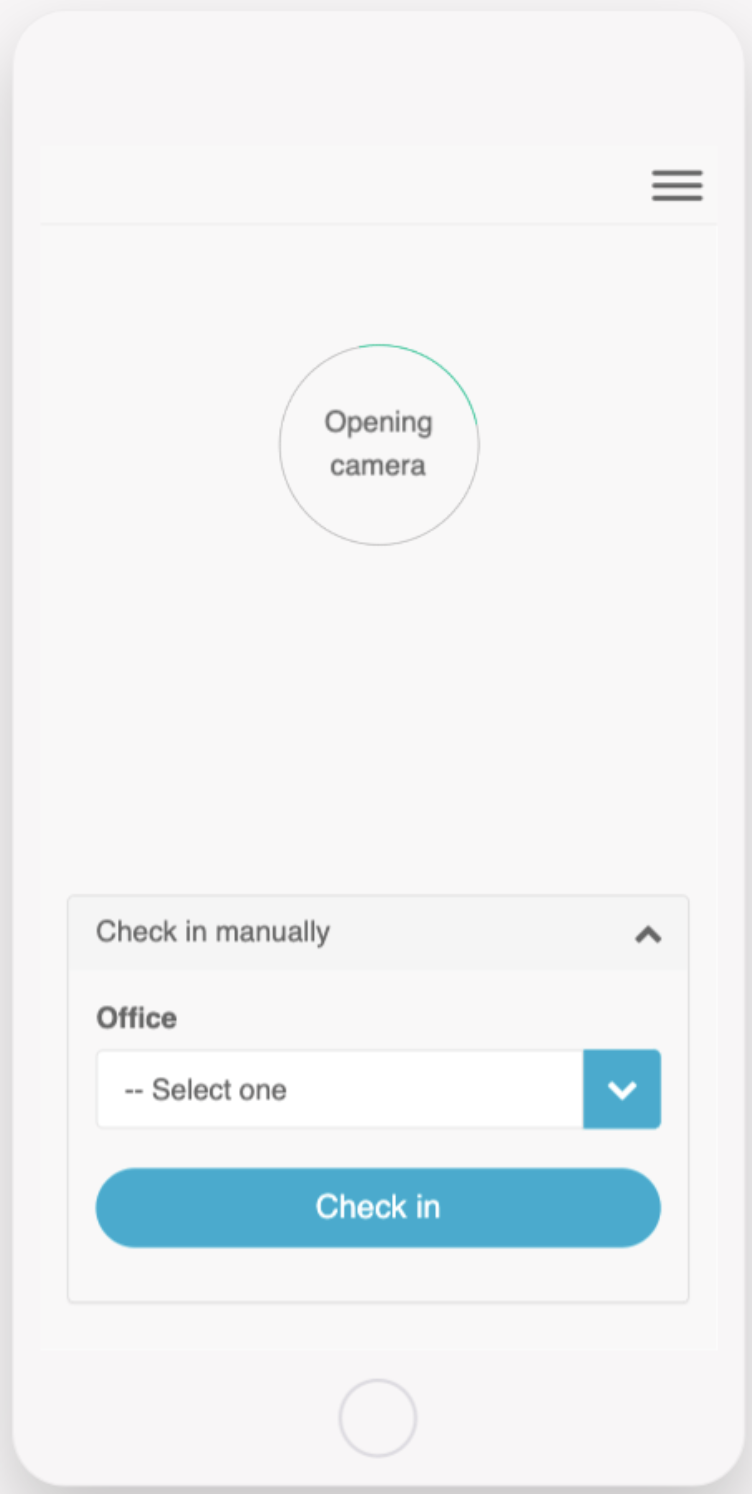
This screen provides users with the ability to check-in and check out of a space using QR codes on mobile devices.
On web, the manual check-in and check-out options are used.
QR codes are printable within the app by the office manager.
- Health survey
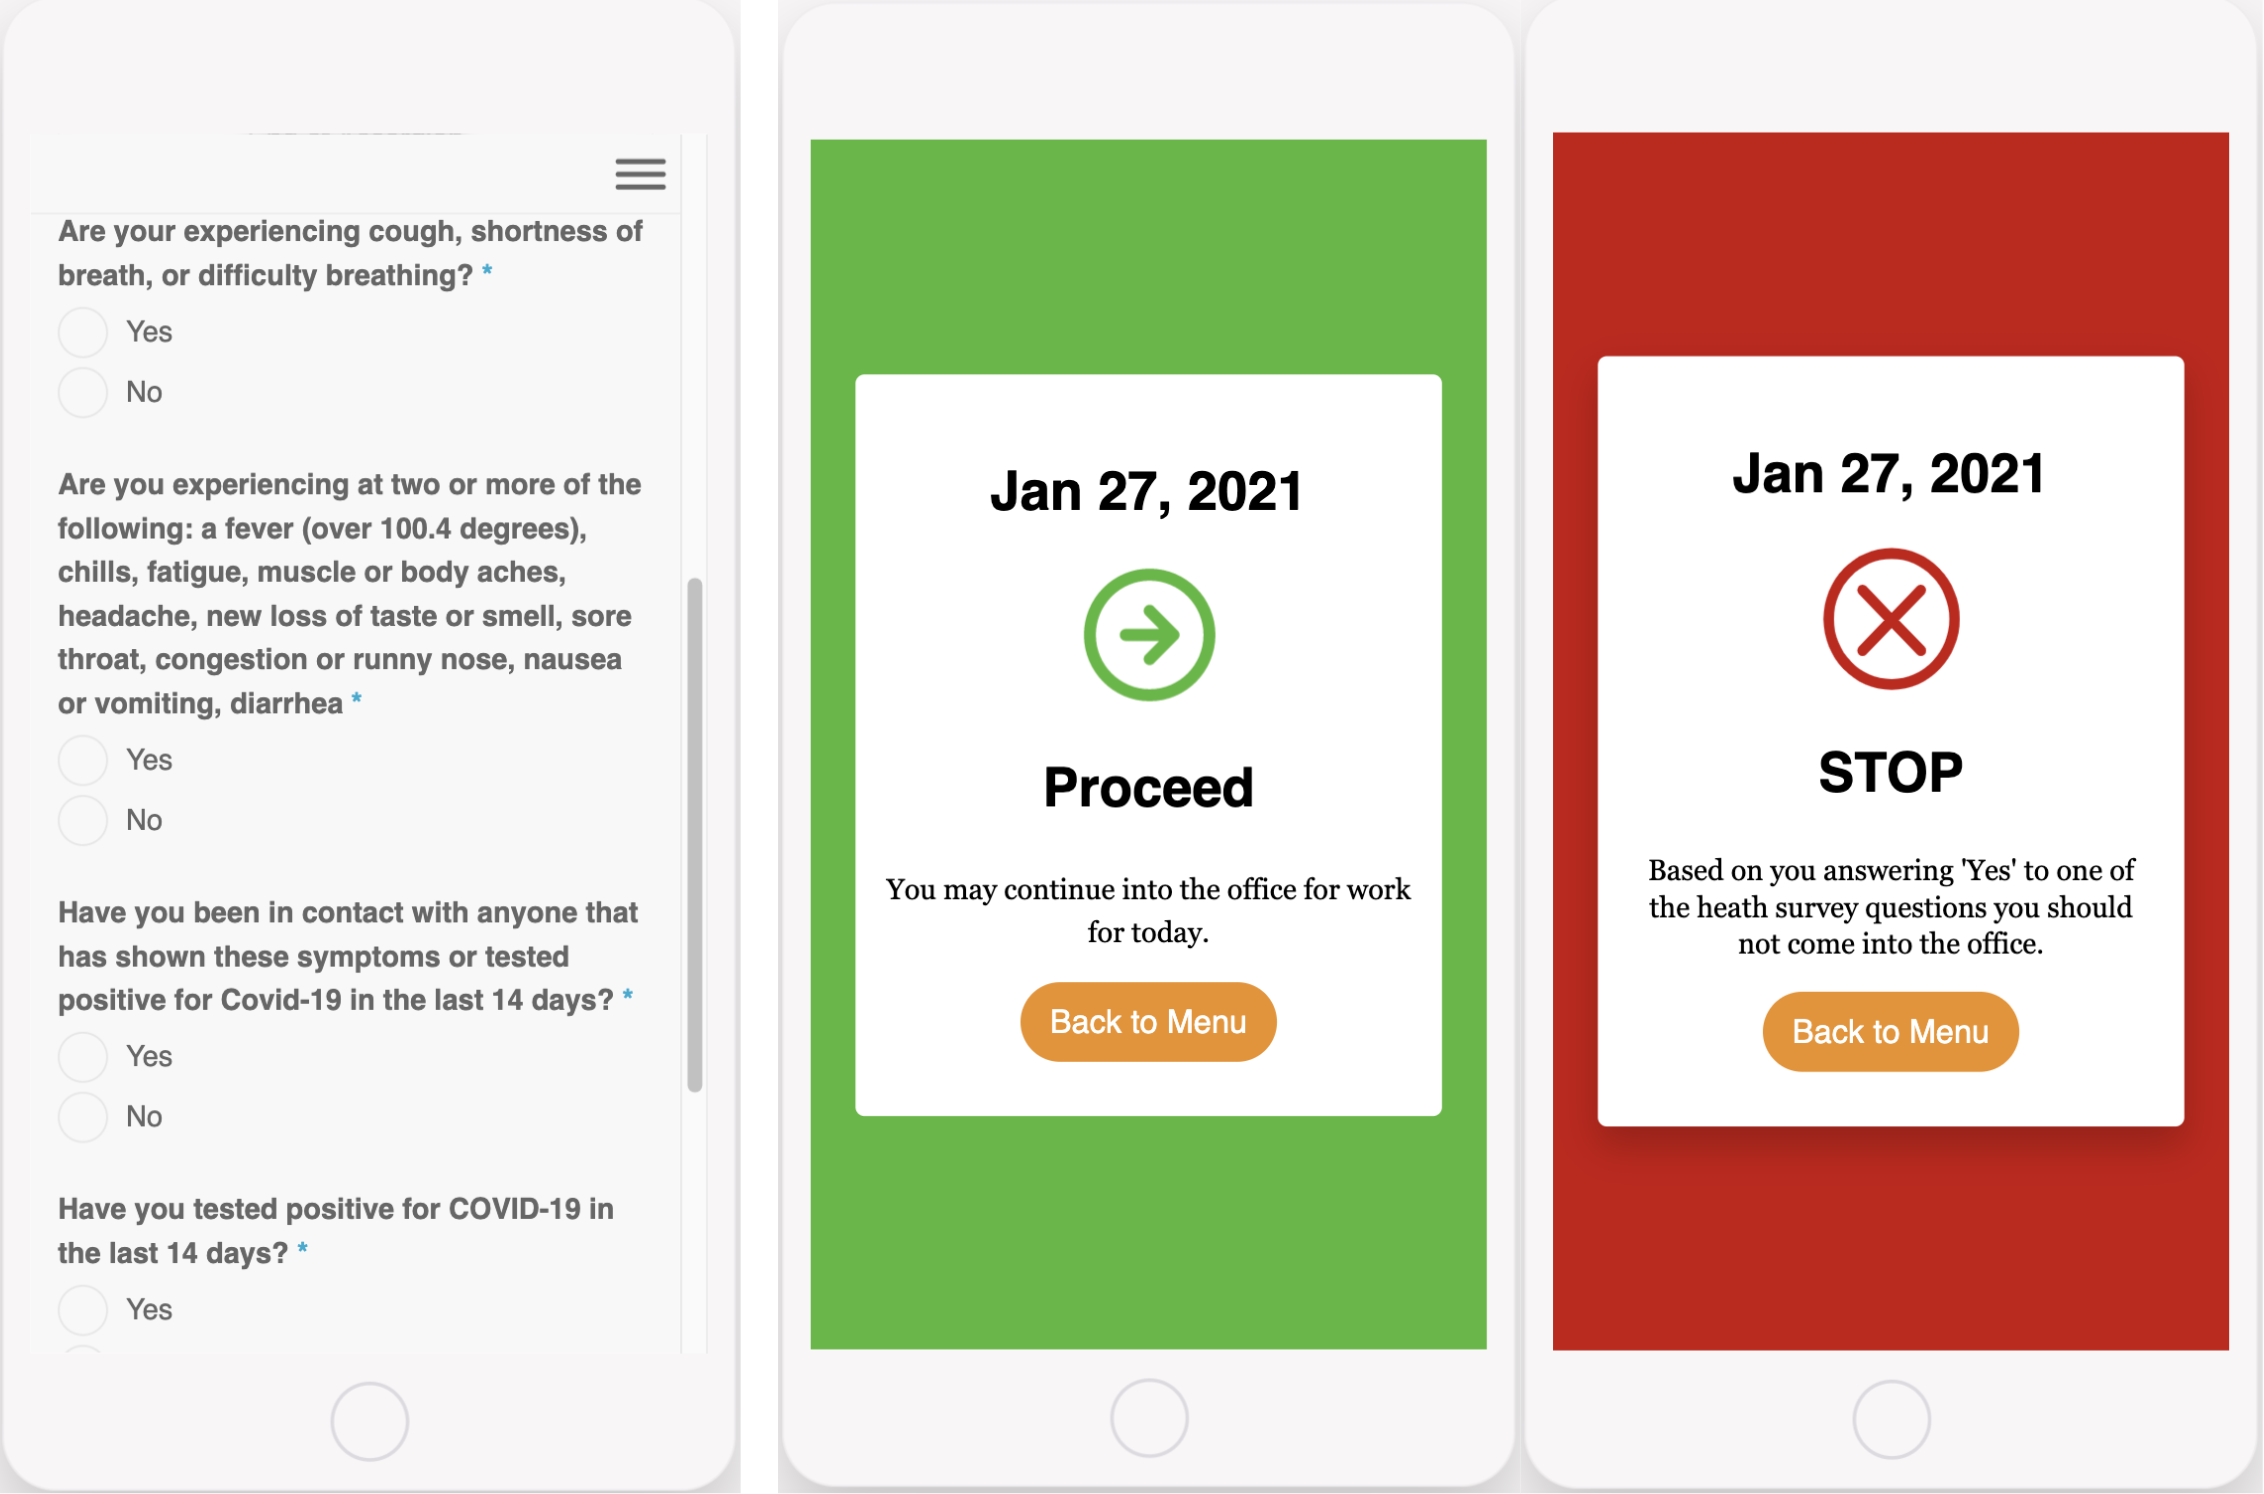
Provides a survey for colleagues to complete to determine their health before allowing entry to the office.
Will either lead the user to an approve or deny access screen upon completion of the survey, depending on the user’s answer.
Staff members should complete this before attending the office.
This survey can be configured to include any questions required but would require updates to the code.
This screen uses the form component, for more information see here.
- Manage Booking
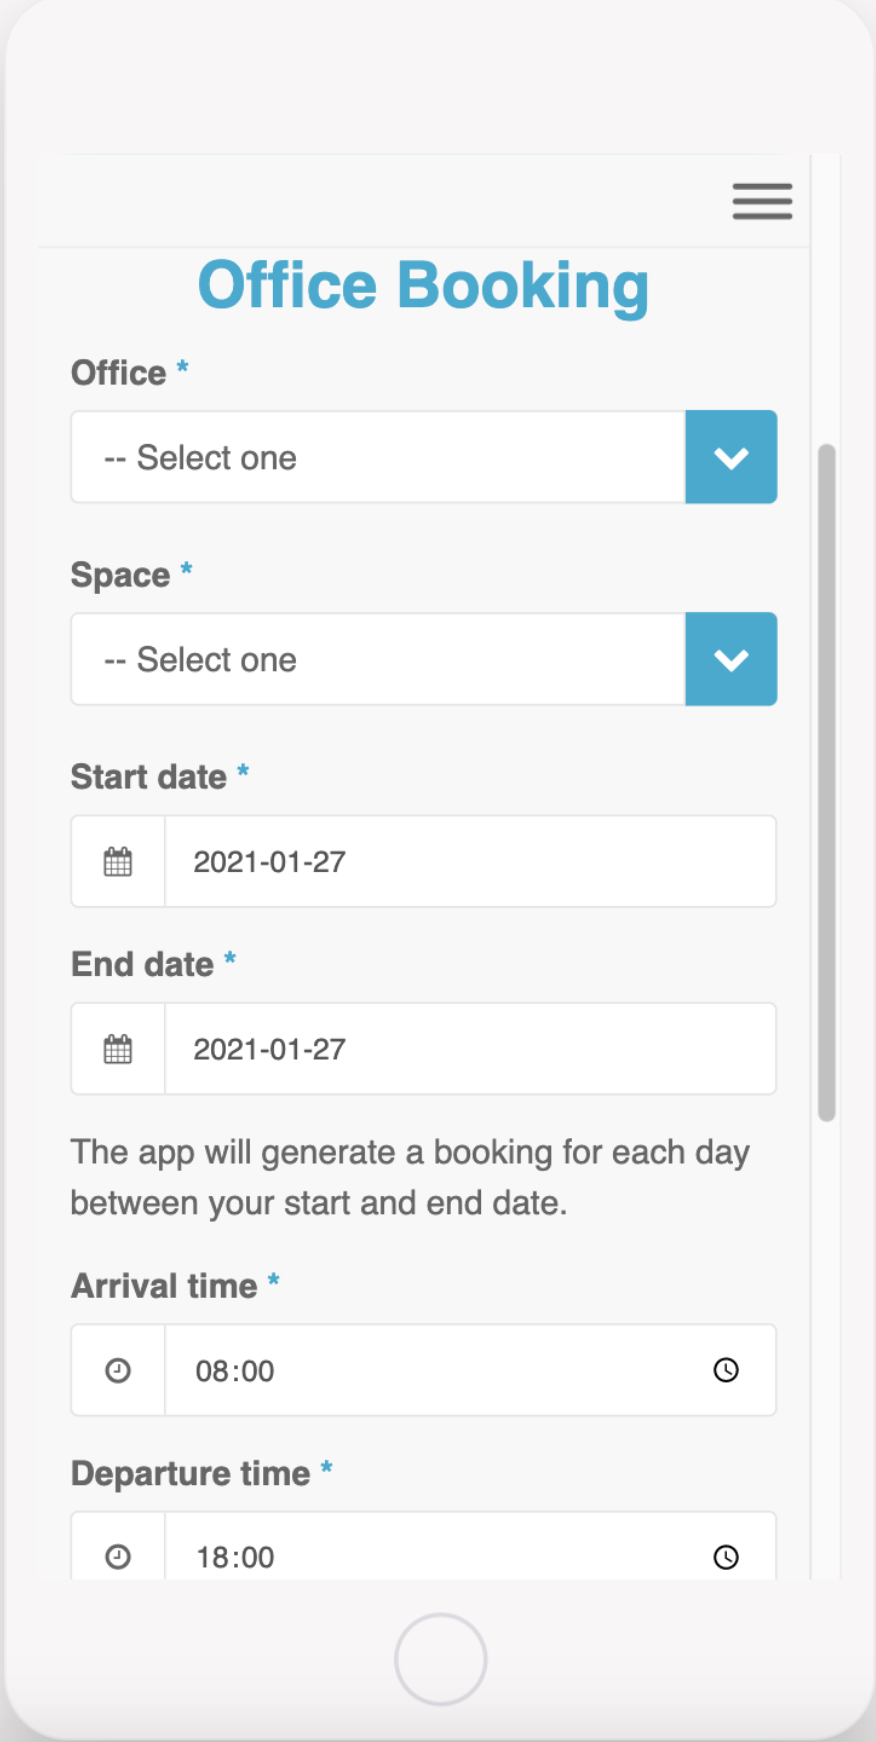
This screen will allow the user to book a space within an office for a given day or a block booking over a given number of days.
By default, bookings are automatically approved until capacity is reached, in which case the booking will be waitlisted to be approved by the office manager.
This can be configured to have all bookings needing office manager approval before confirming the booking.
This screen uses the form component, for more information see here.
- My Bookings
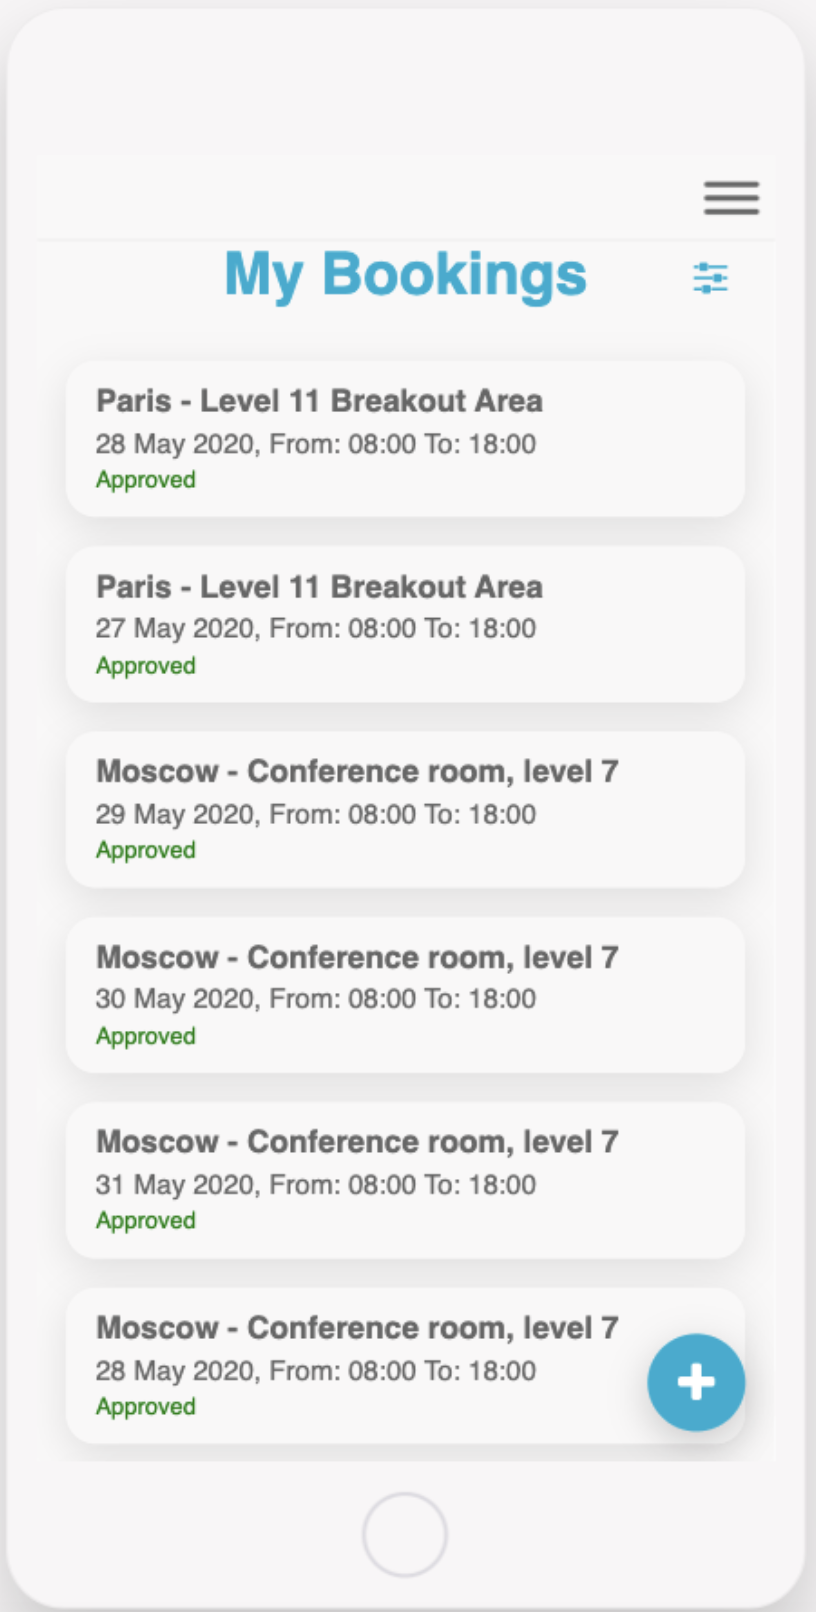
Users can view their current and future office bookings using this screen. The booking will indicate whether it has been approved or waitlisted.
Users can also cancel existing bookings from this screen.
You can configure this screen to display the required booking information.
This screen uses the list from data source component, for more information see here.
- Guidance
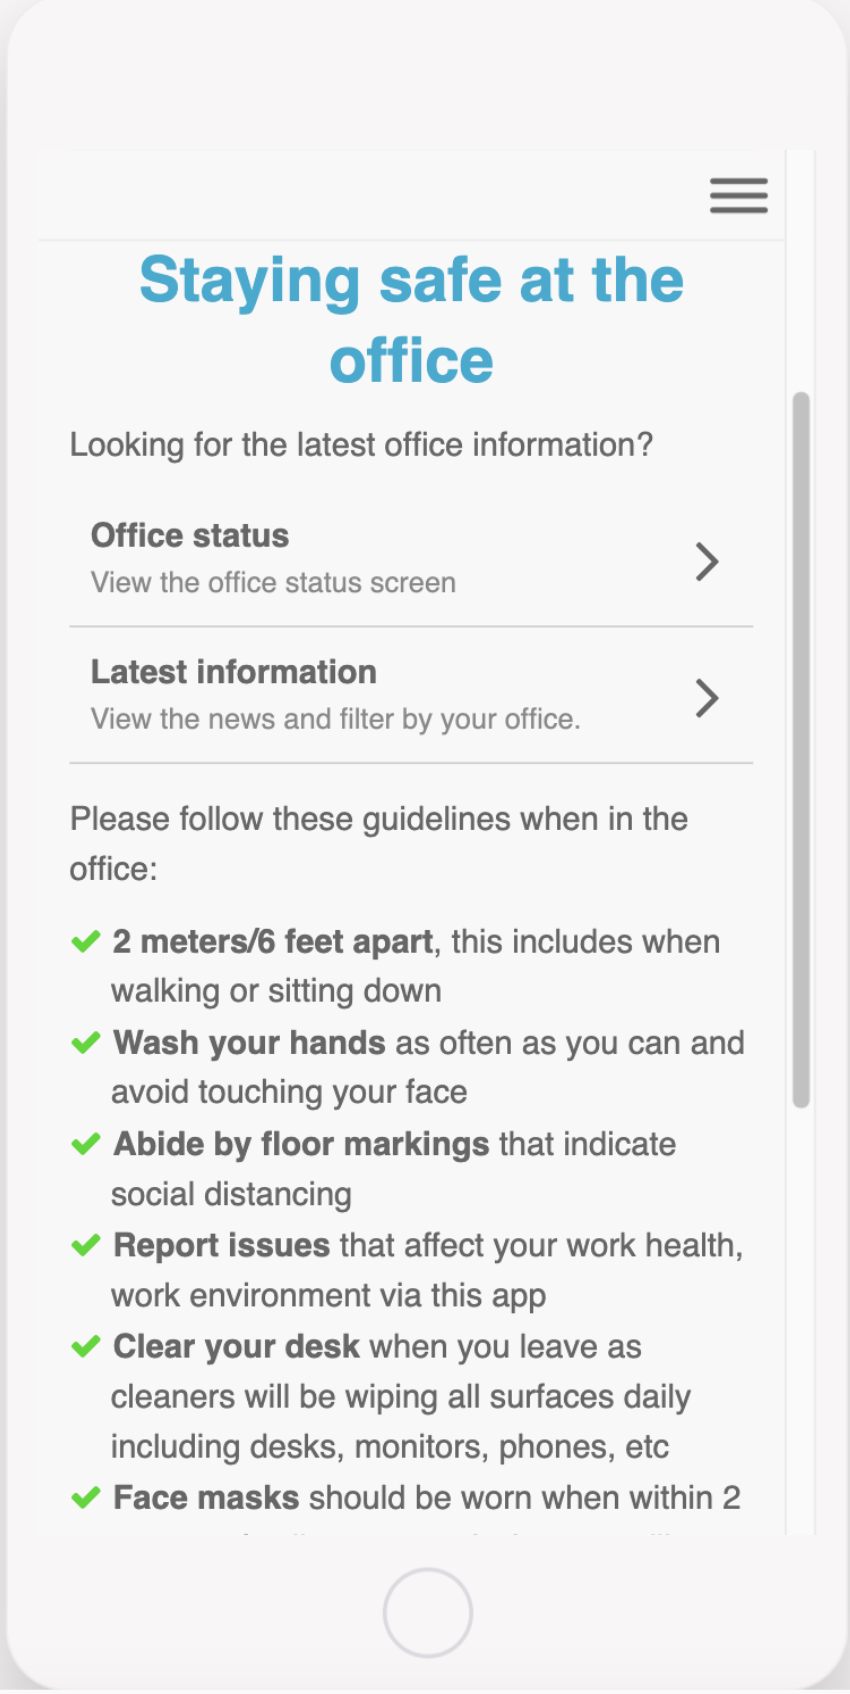
This screen can be used to check the Covid guidance when working in the office.
The screen can be configured to display your specific guidance for either the firm or the office.
This screen uses the list and text component, click for more information.
- News
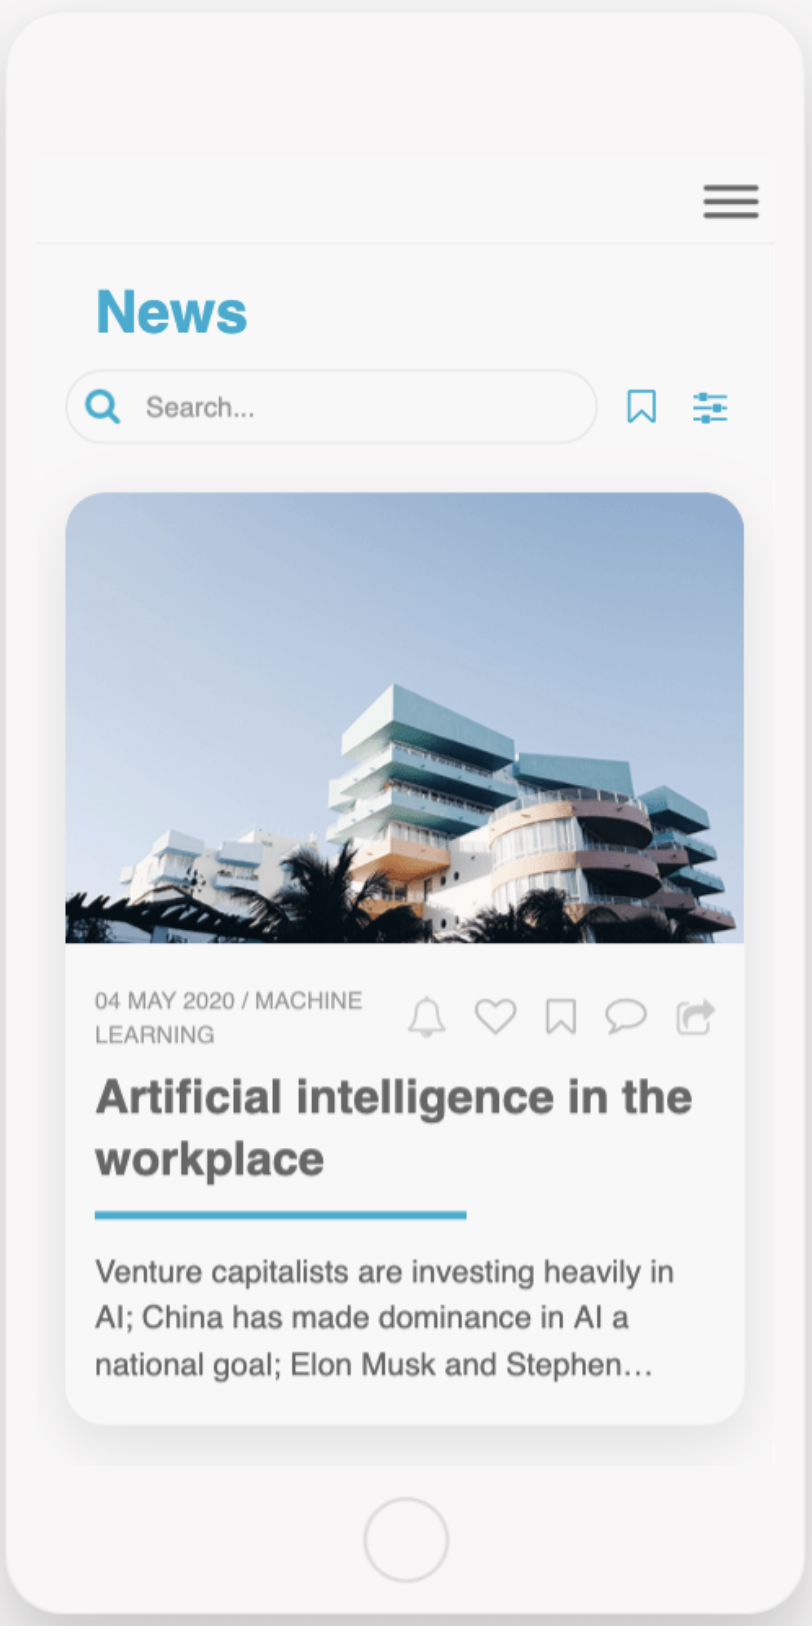
This screen can be configured to show news. You can use this to show firm news, covid news, sync to a database or use an RSS feed.
The default option uses the list from data source component. See more here.
For RSS feed see here.
- User Settings
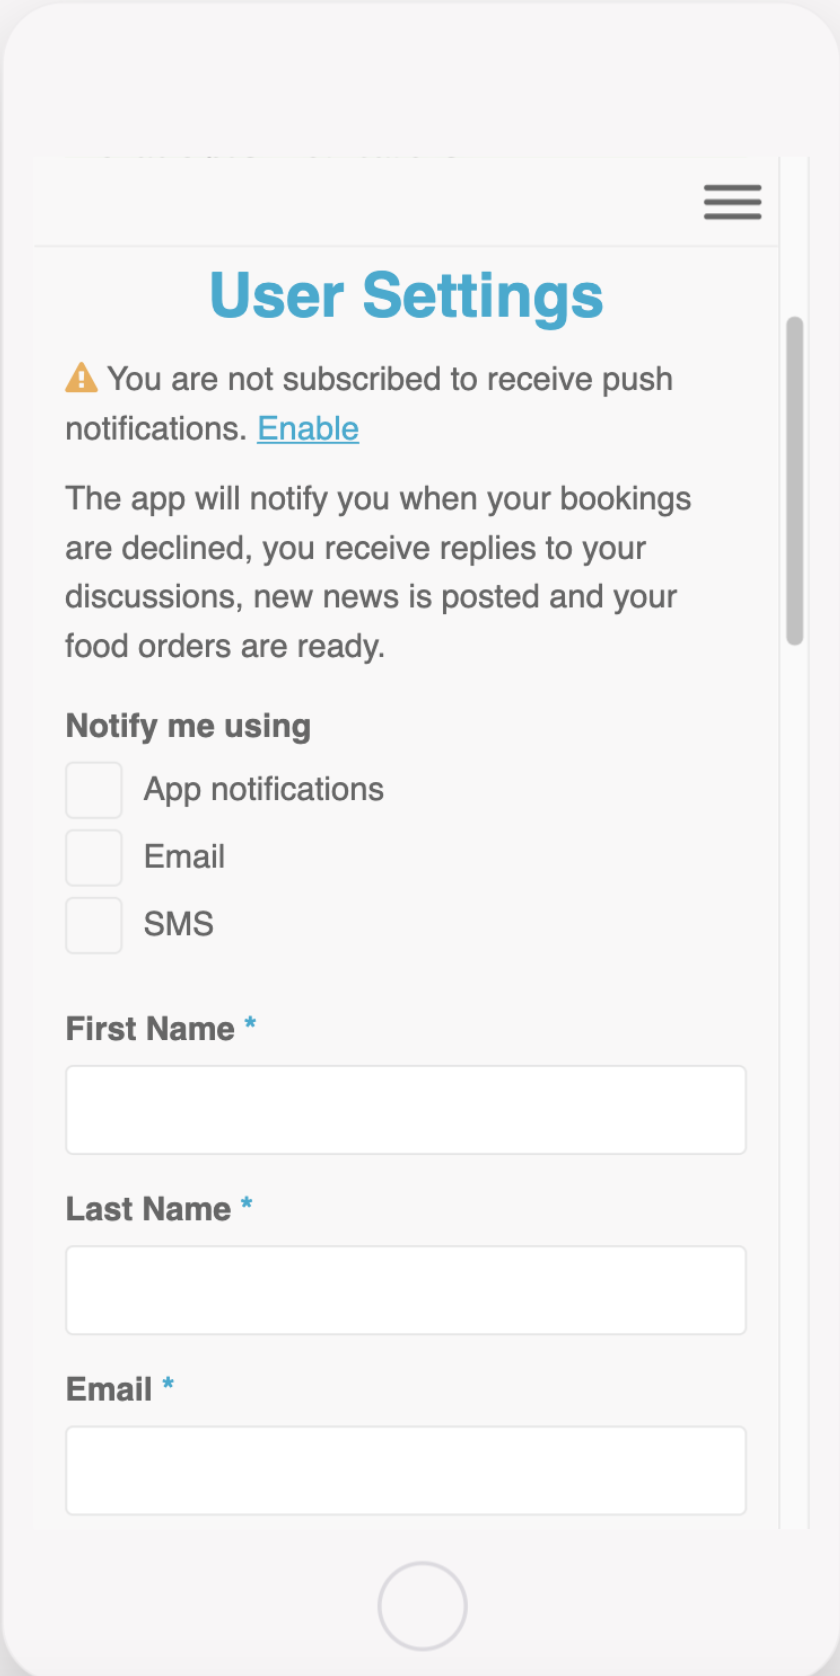
A user can use this screen to update their profile information and configure their app notification settings.
Fields can be added or removed to meet requirements.
This screen uses the form component, for more information see here
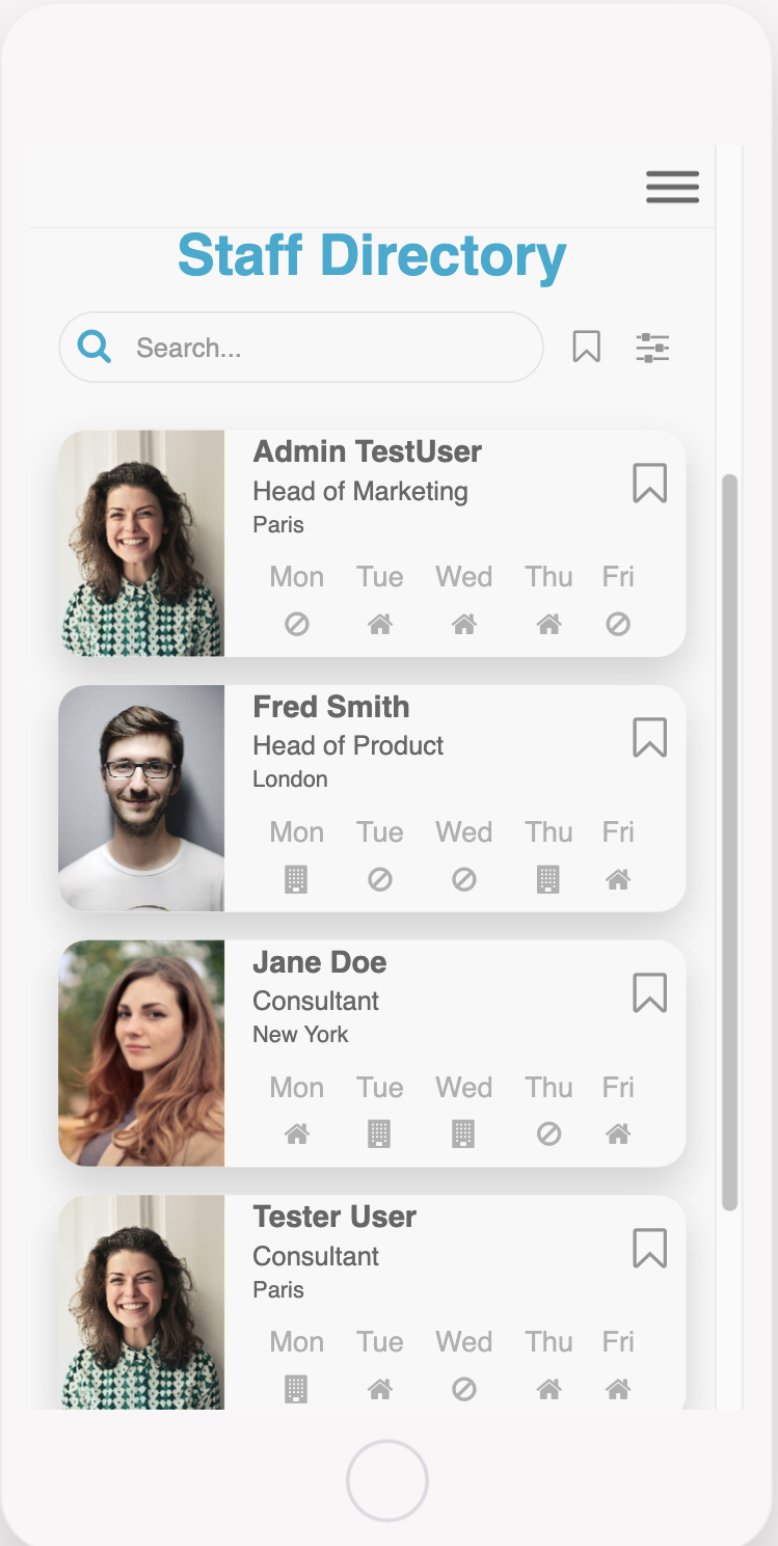
- Staff Directory
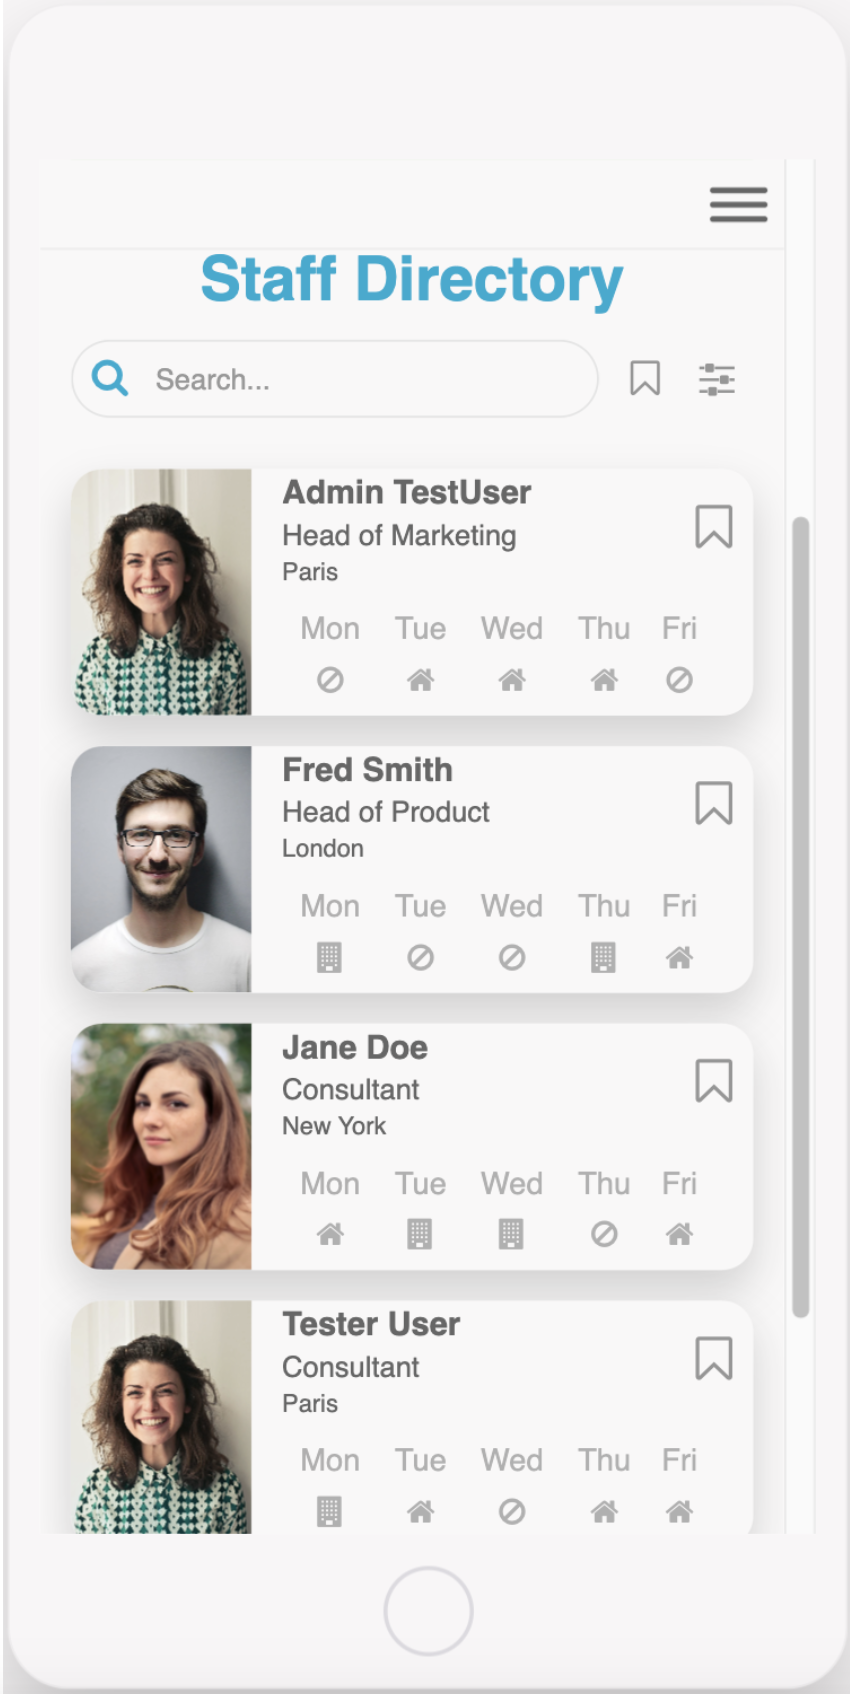
This screen will display your staff directory and images as well as displaying the status information of each staff member.
This screen can be configured to include any information required and uses the list from data source component. See more here.
- Offices
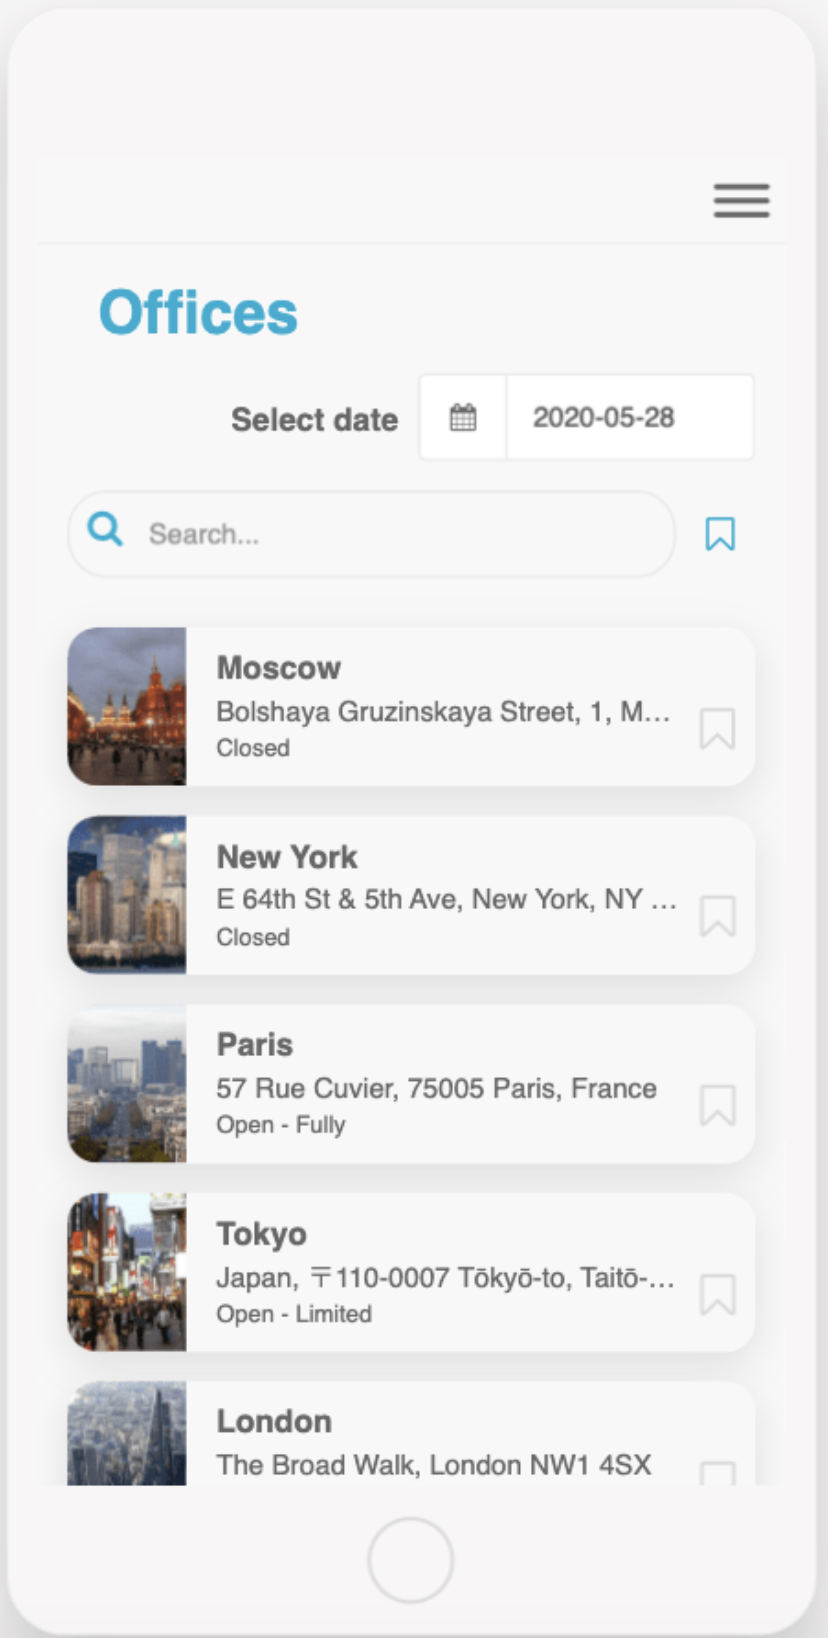
This screen provides information on your offices and the space availability on a specific date.
This screen can be configured to include all relevant office information and office managers will have the ability to amend and update this information.
This screen uses the list from data source component. See more here
- FAQ
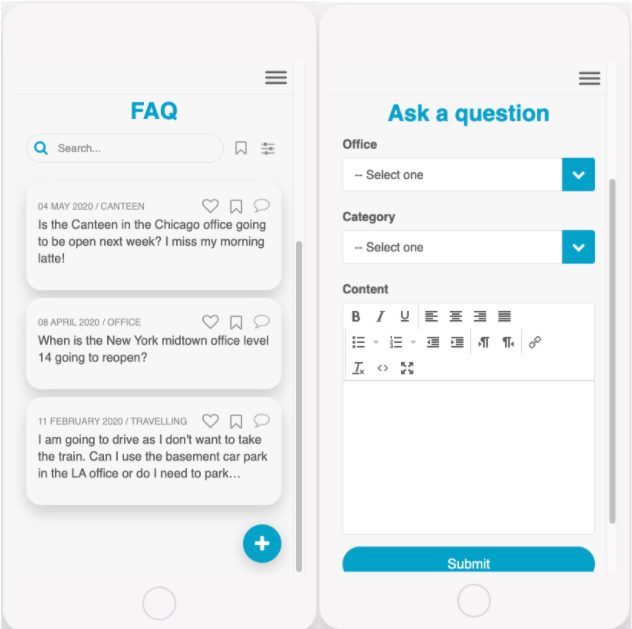
This screen provides a public question and answer forum for colleagues.
This screen can be configured to allow commenting and liking, questions can also be pre-populated, or from a set list.
This screen uses both the list from data source and form components.
- Report an issue

This screen allows users to report an issue when using the office space. The relevant office manager will then be alerted.
This form can be configured to include whichever fields are necessary.
This screen uses the form component, for more information see here.
- Notifications
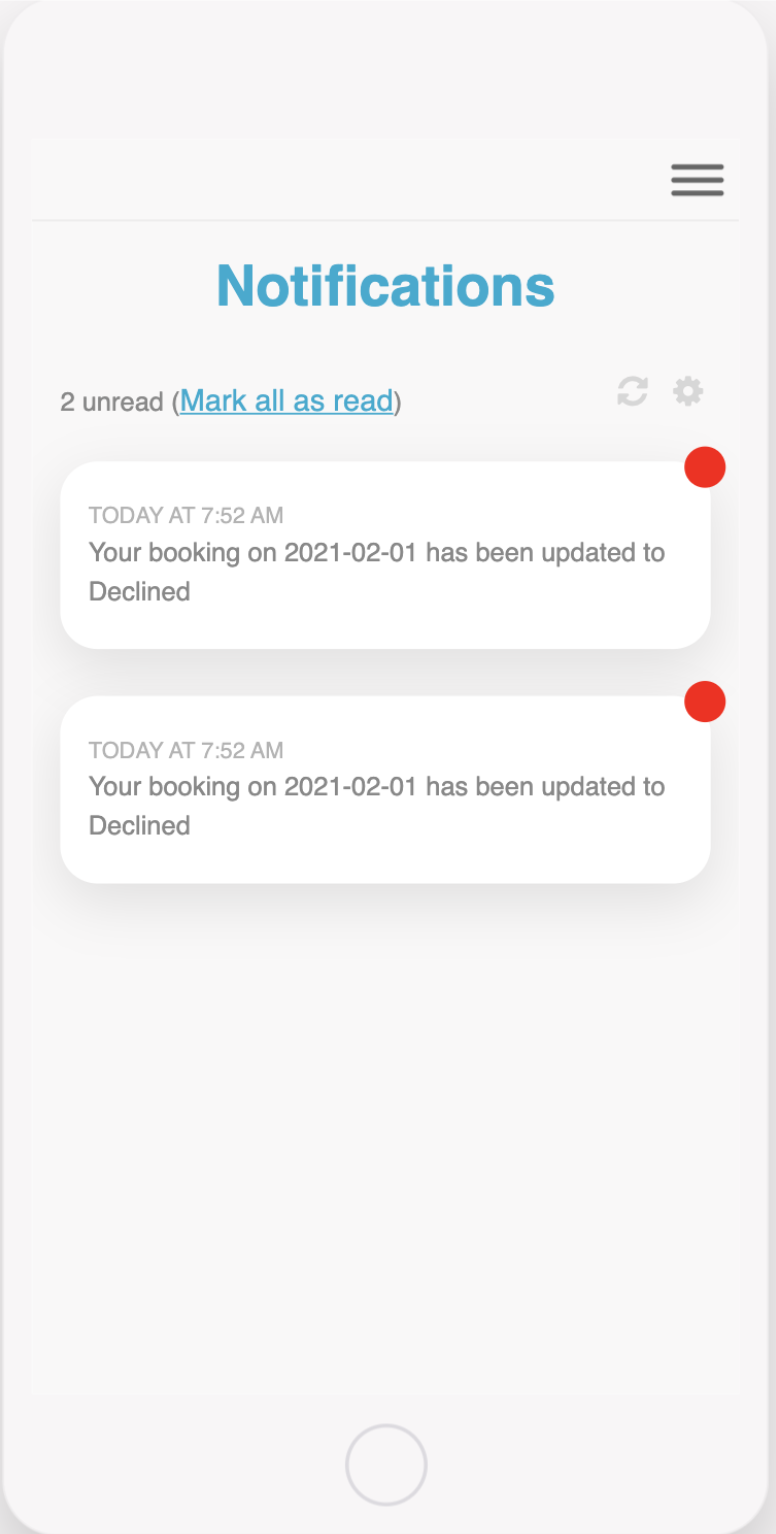
This screen displays all the notifications that have been sent to the user.
Notifications are sent automatically when there is new news, bookings are modified, the user is mentioned in comments, or an admin sends an in-app notification via Fliplet Studio.
This screen uses the notifications component, see here for more information
Office Manager Screens
- OM – News
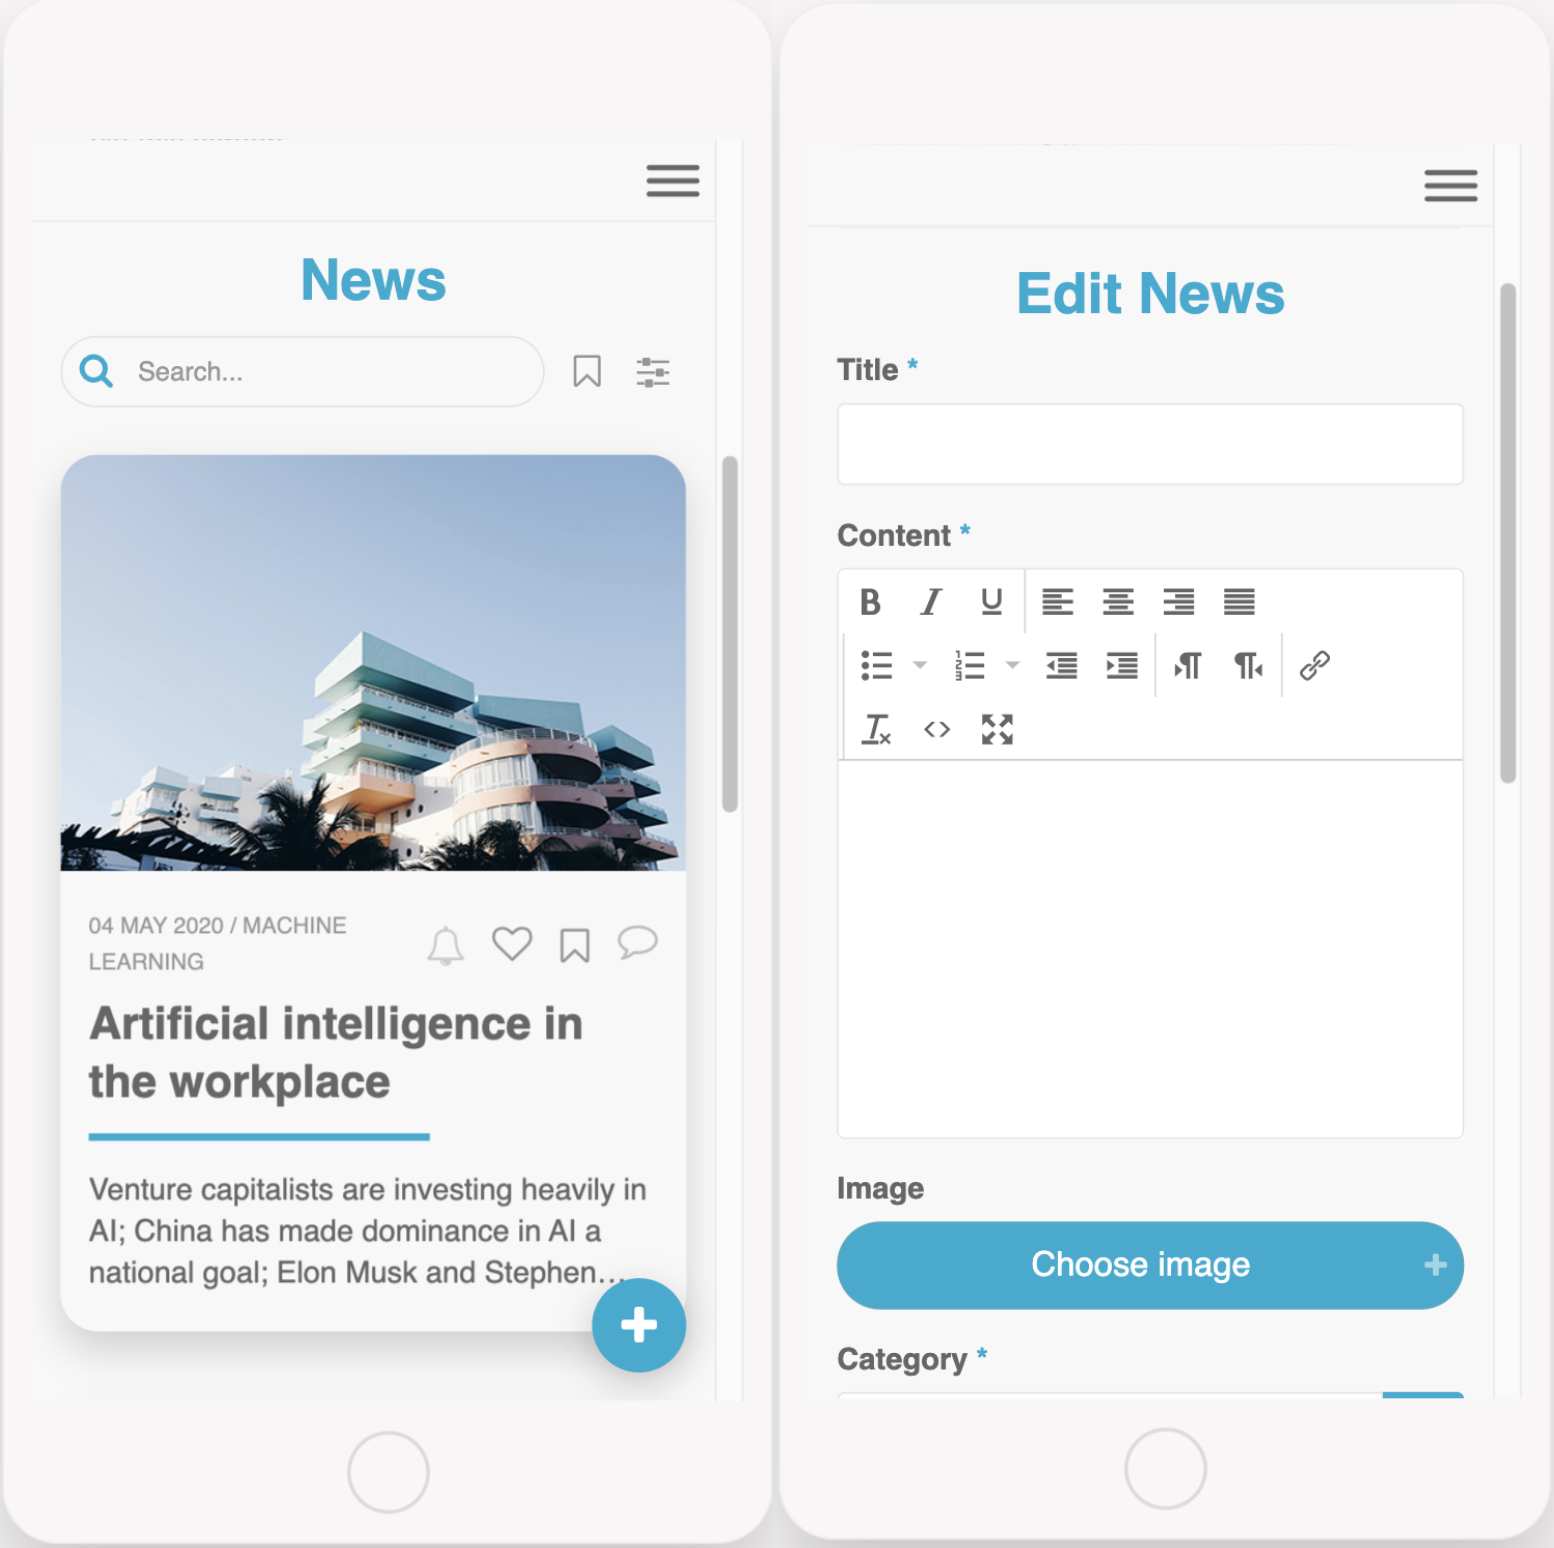
Office managers can use this screen to add a new news article, make edits to an existing article or delete an article.
This screen uses both the list from data source and form components.
- OM – Edit Offices
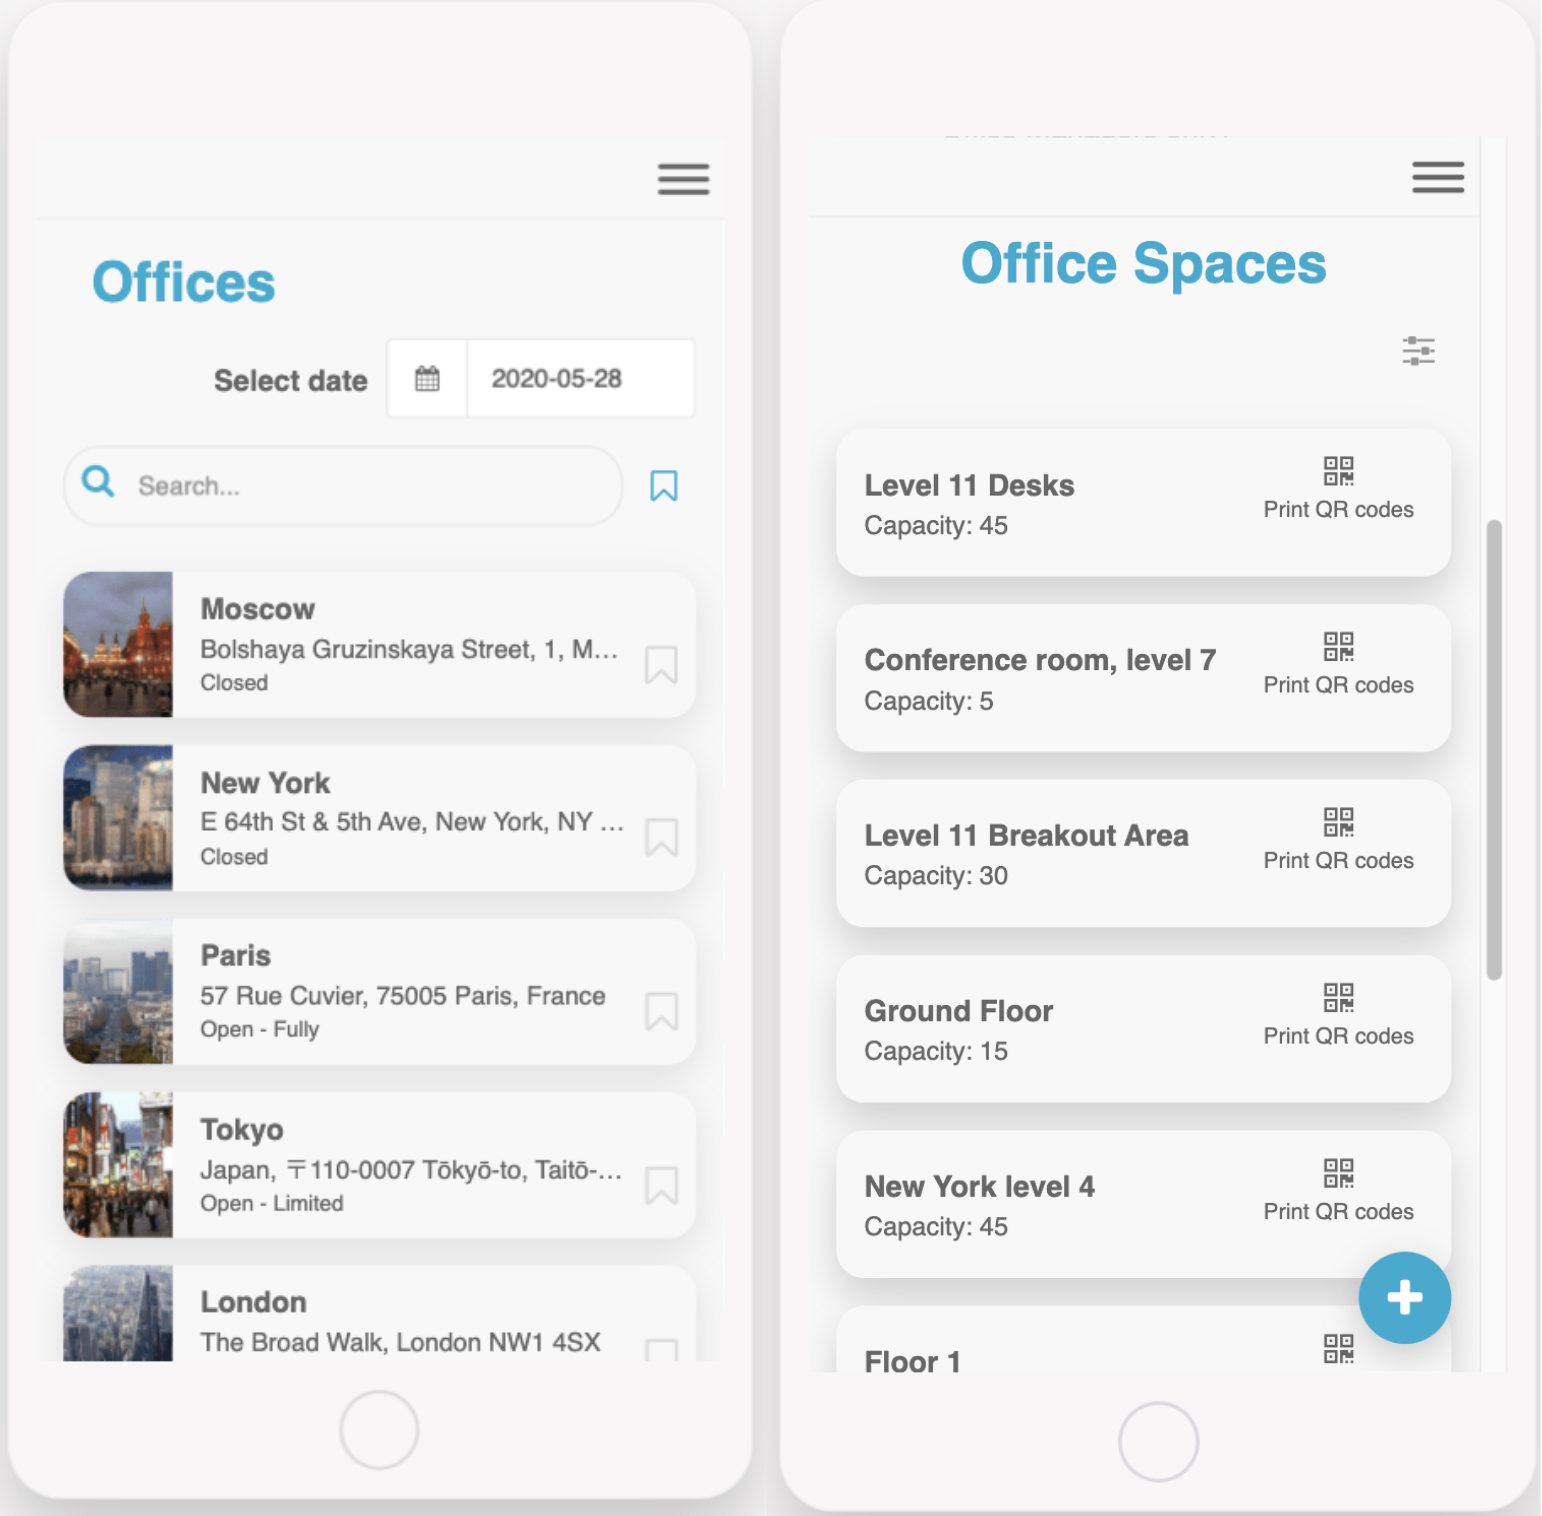
This screen will allow the office manager to access the button to edit office spaces.
This screen allows office managers to create and edit office spaces. This is where the capacity is set per space.
QR codes can also be accessed and printed from here
- OM – Generate QR Code
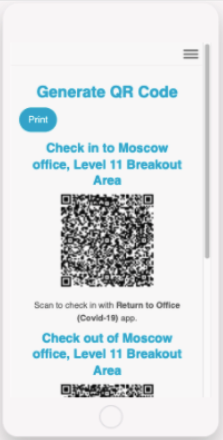
This screen will allow the office managers to generate and QR codes that can be used for colleagues to check into spaces.
- OM – Manage Bookings
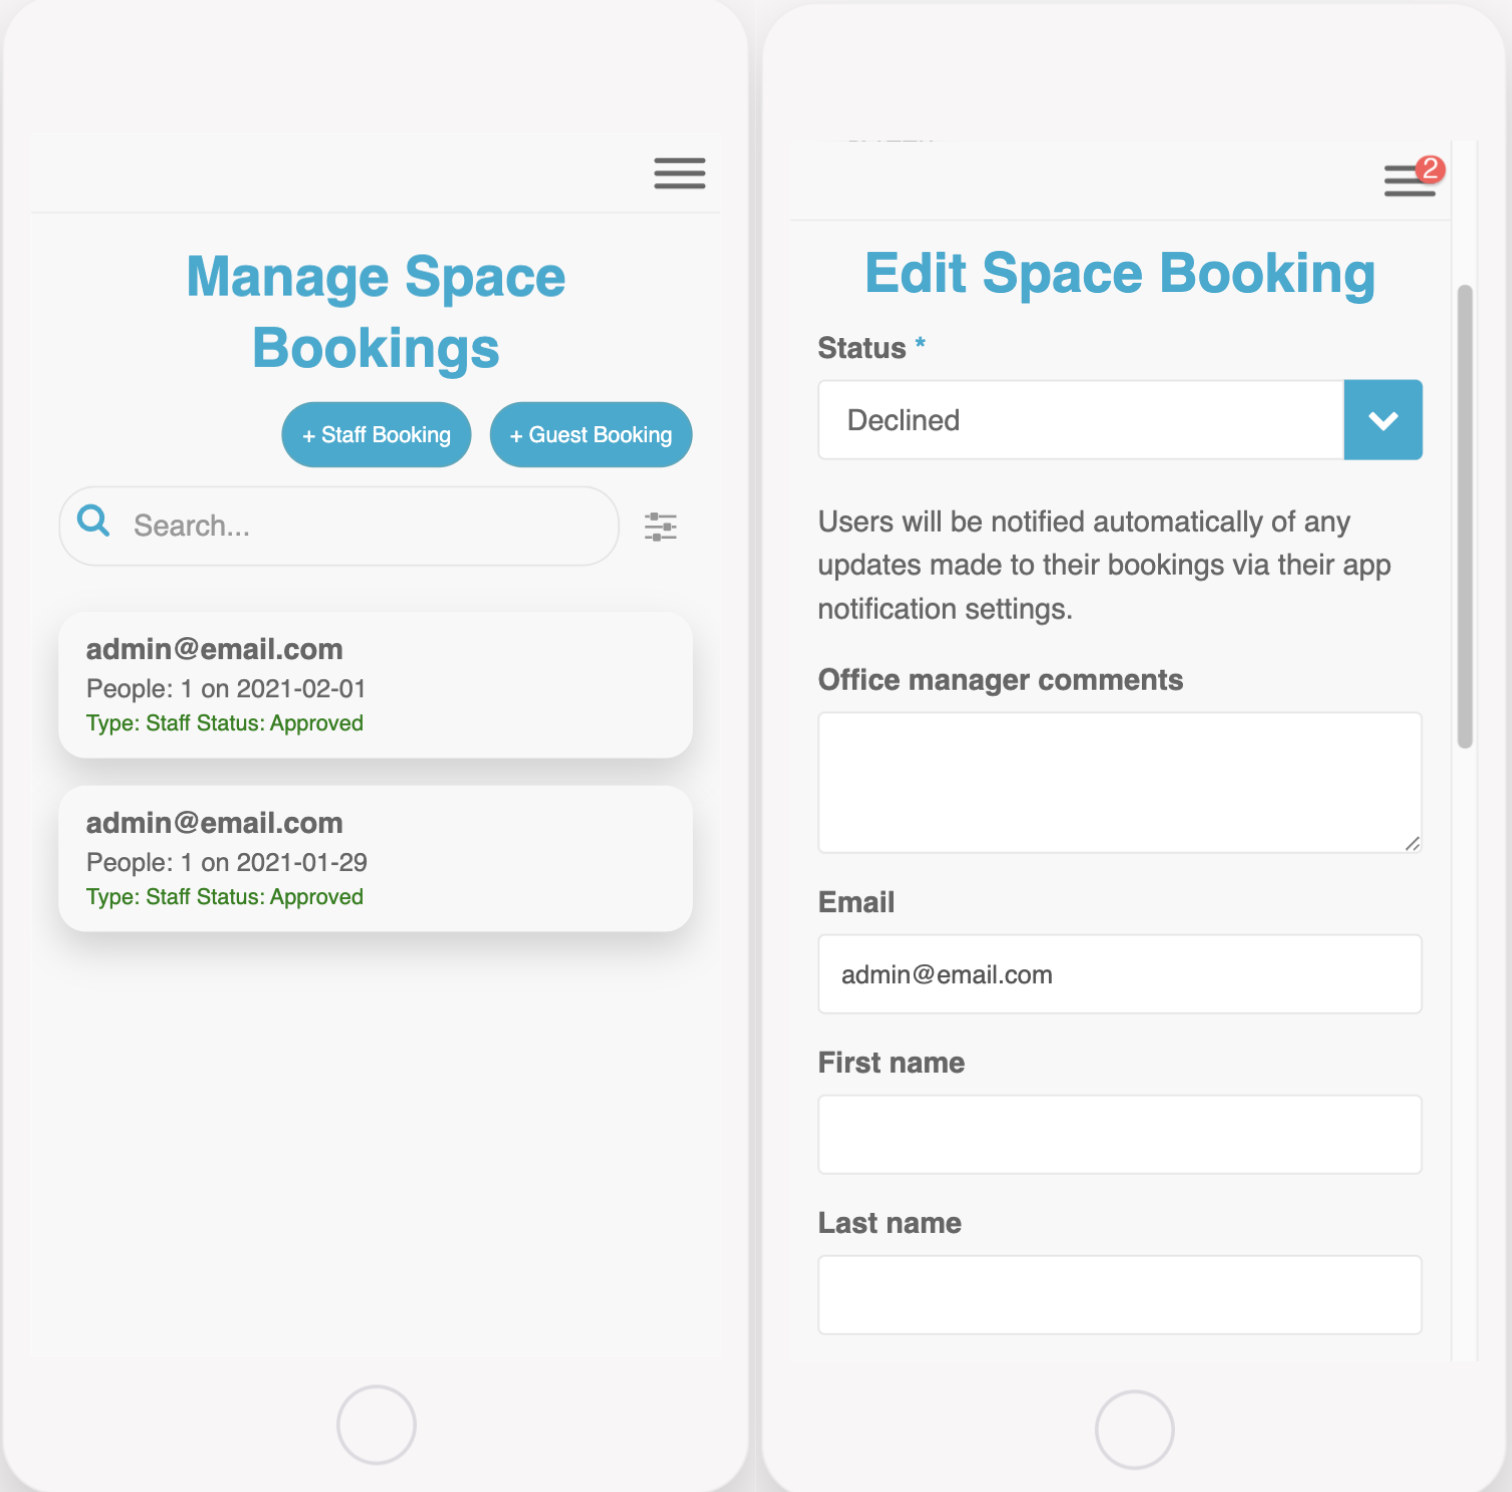
This screen will display the current bookings and allow office managers to review and edit any bookings.
They can also use this screen to create a new staff or guest booking.
This screen uses both the list from data source and form components.
- OM – Office Risk Assessment
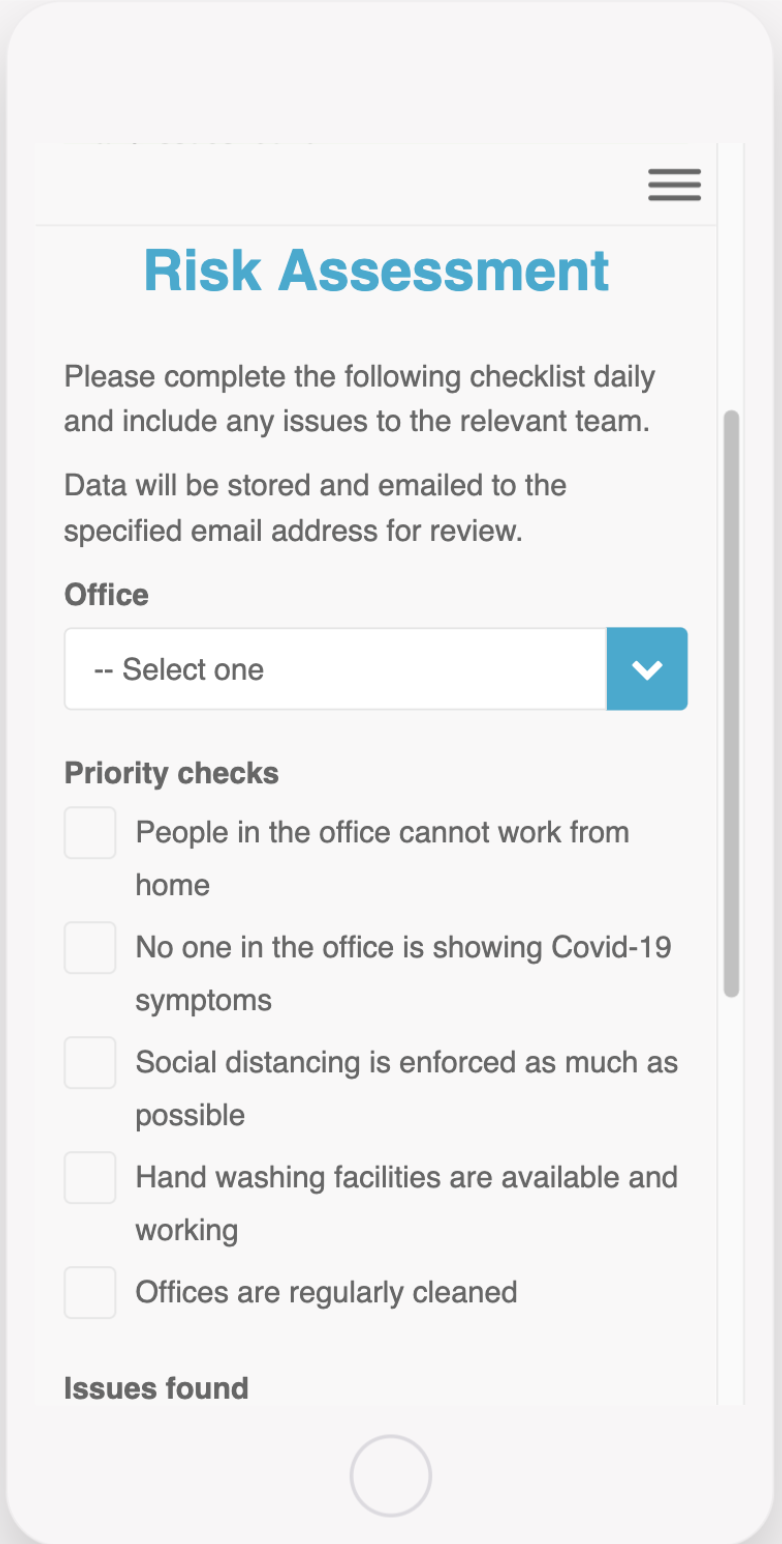
This screen can be used by the office manager to perform a risk assessment of the office.
This checklist can be configured to reflect your preferred assessment tasks.
You can also configure who is alerted via email with the report for review.
This screen uses the form component, see more here.
Admin Screens
- Admin – Manage Staff Directory
This screen can be accessed by admin and office managers to make any amendment staff profiles.
- Admin – Dashboard
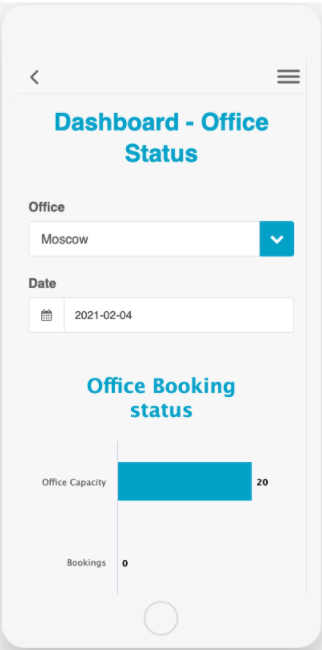
This screen is for use of office admins and managers.
The office capacity and availability will be displayed here as well as display the status of everyone who is booked in and checked in.
Can be configured to display specific client information
- Admin – Health Survey Submissions
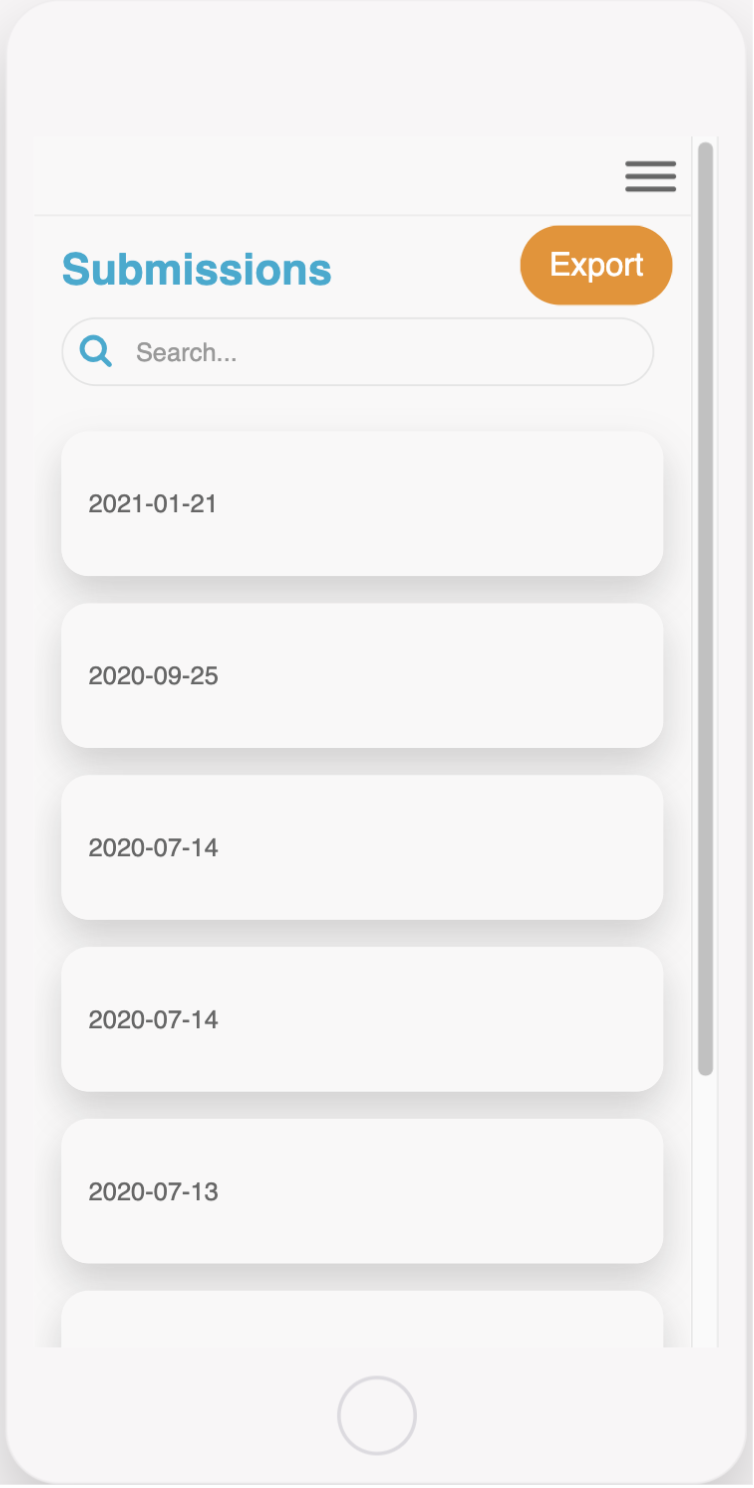
This screen will display a list of the completed health survey submissions and can be accessed by office managers and admins to see who has completed the survey and what their status is.
This screen uses the list from data source component and can be configured to display the information submitted from the survey.
Related Articles