What is a push notification?
Push notifications are clickable pop-up messages that appear on your user’s device normally with a call to action or an alert
Why use push notifications?
Adding push notifications to your app means you can reach your app’s audience when you want, even without them being in the app, encouraging better engagement.
Get started
This article will cover the following topics:
- Configure push notifications on iOS
- Configure push notifications on Android
- Test push notifications
- Rotating configuration details
Configure push notifications on iOS
To configure push notifications on iOS see the below video or guided steps
- Enable push notifications for the app ID – in your Apple developer account
- Create an APNs key – in your Apple developer account
- Upload details from APNs key – in Fliplet Studio
- Setup the app to ask users to accept notifications – in Fliplet Studio
Step 1 – Enable push notifications for the app ID
- Sign into your Apple Developer account and click on “Certificates, IDs & Profiles”
-
If you have already requested your app to be built via Fliplet studio (recommended) click identifiers, and select the app you are configuring push notifications for
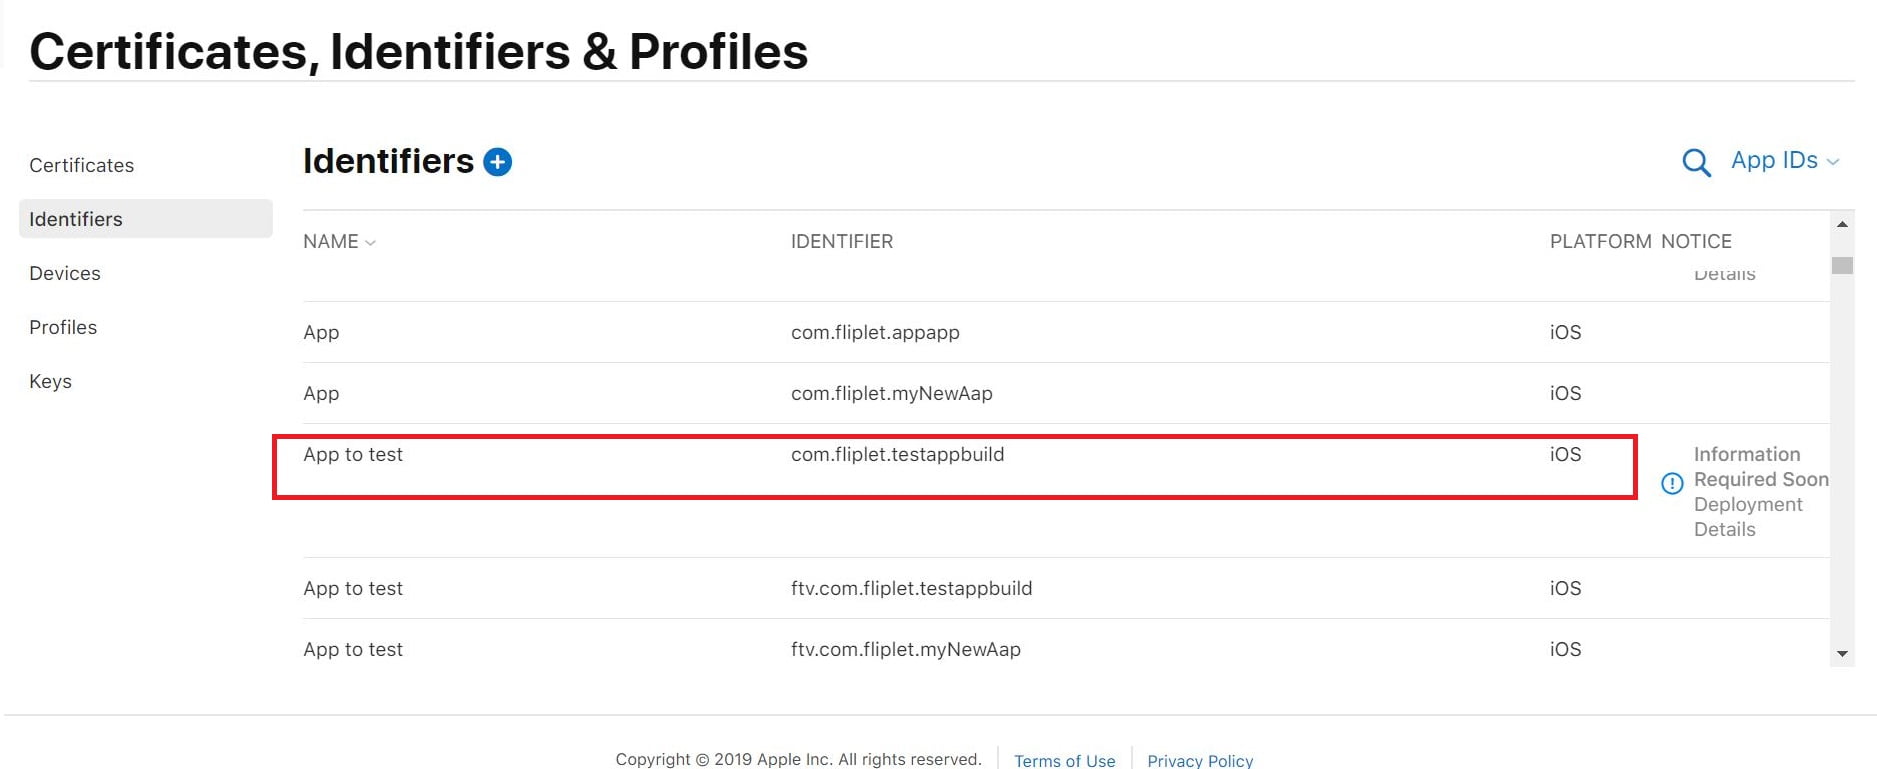
- If you have not requested your app and you do not have an app ID yet, click on the blue + button at the top and add it there.
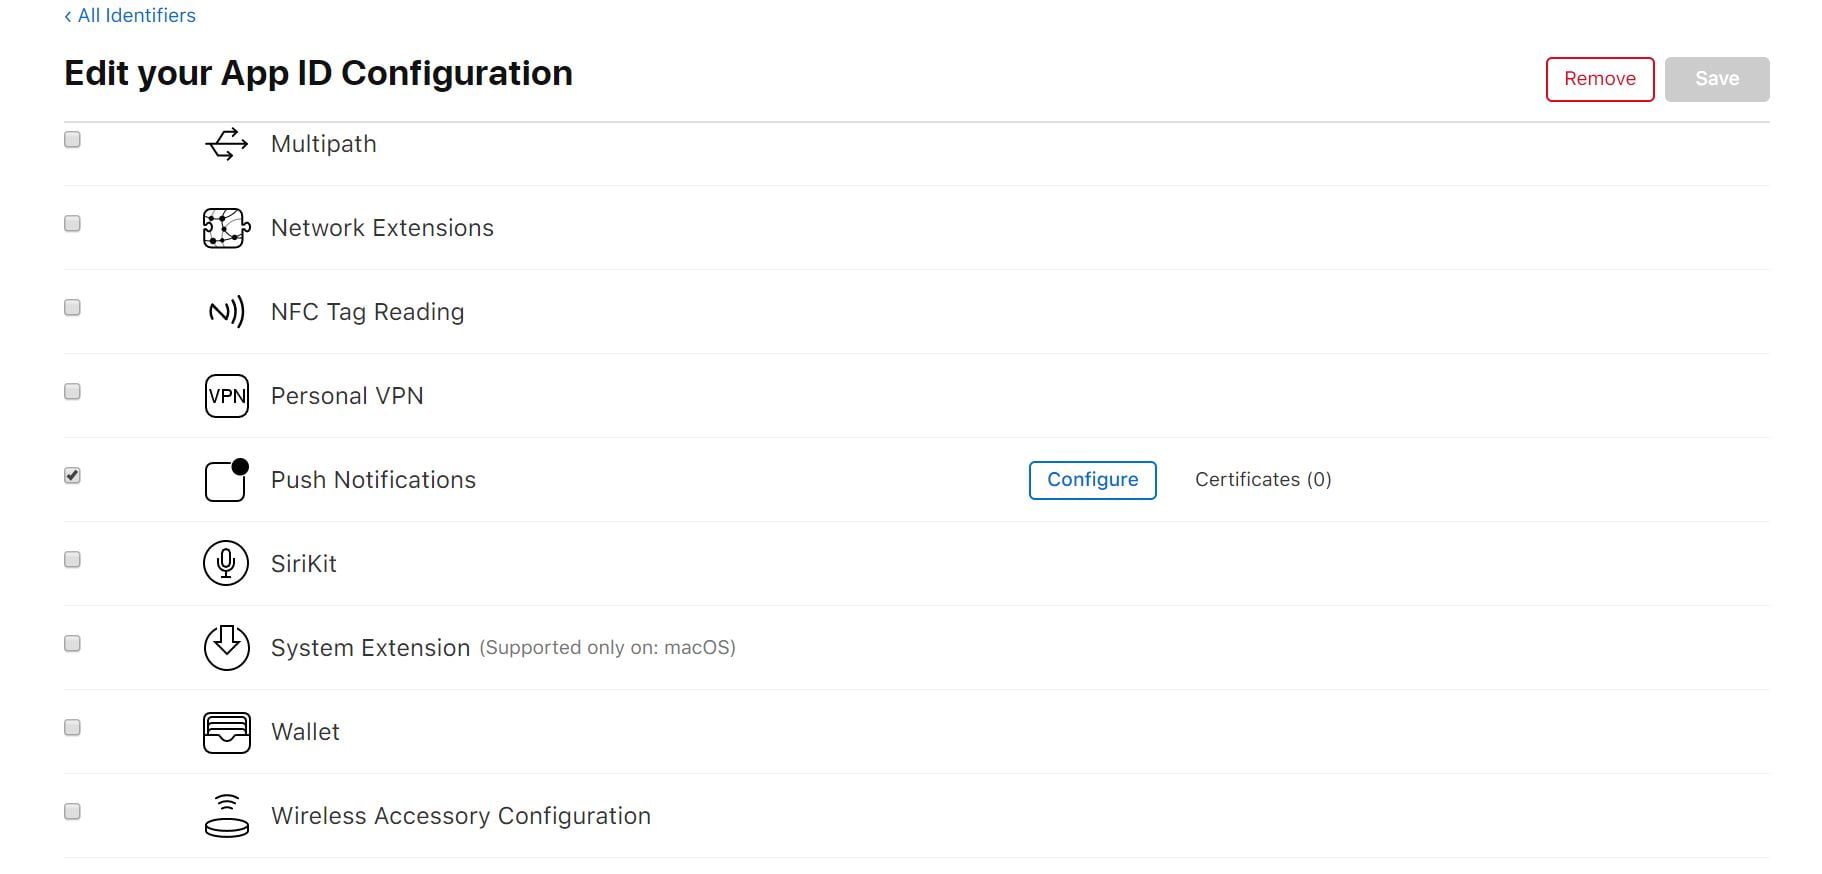
You need to make sure the bundle ID added here is the same as the one used in Fliplet Studio. You can check your apps bundle ID in the Publish section if you select ‘Publish to Apple Devices’ and go to ‘App technical details’ - Scroll down and check the box next to Push Notifications and then save your changes
Step 2 – Create an APNs key
-
Still in your Apple developer account, go to “Keys” and click the + to create a new key
-
Select the Apple Push Notification service (APNs) and give it a name
-
On the next screen, click confirm and then your APNs key is created
-
Download it from here, but make sure to store this somewhere safe as it cannot be downloaded again
-
Note: you can re-use your APNs key across any of your apps and this key doesn’t expire
Step 3 – Upload details from APNs key in Fliplet Studio:
-
Once you have downloaded your APNs key, head back into Fliplet Studio,
-
Go to the ‘Publish’ section, and click manage settngs under publish to Apple
-
Select the push notifications tab. This is where you need to add the details from the APNs key you just created
-
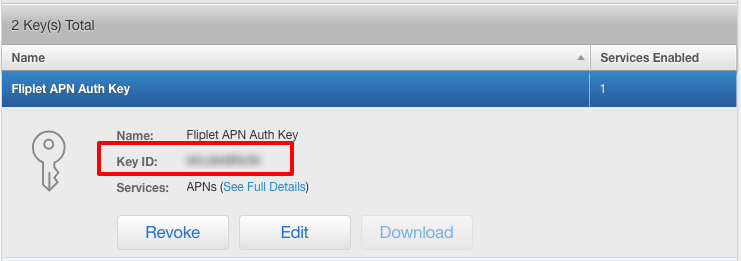
You can find the Key ID in your Apple developer account under “Keys” and “All”. Click on your specific key to see the information:
-
Paste this into the Key ID section in Fliplet Studio
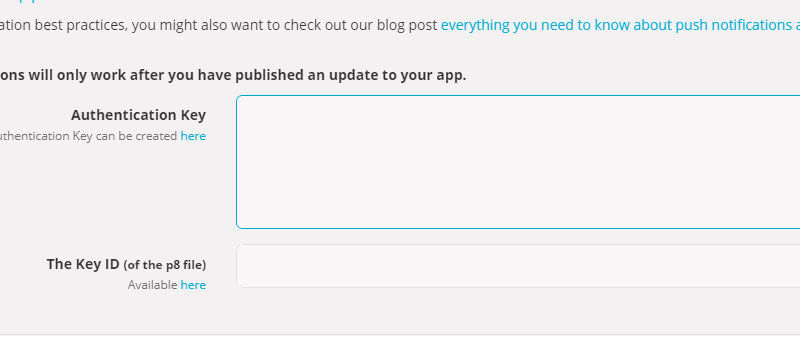
- Open the APNs file you downloaded (it should be a p8 file) in a text editor or your browser window to get the key and copy everything, including the —- Begin private key —- part
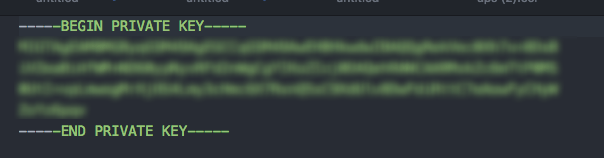
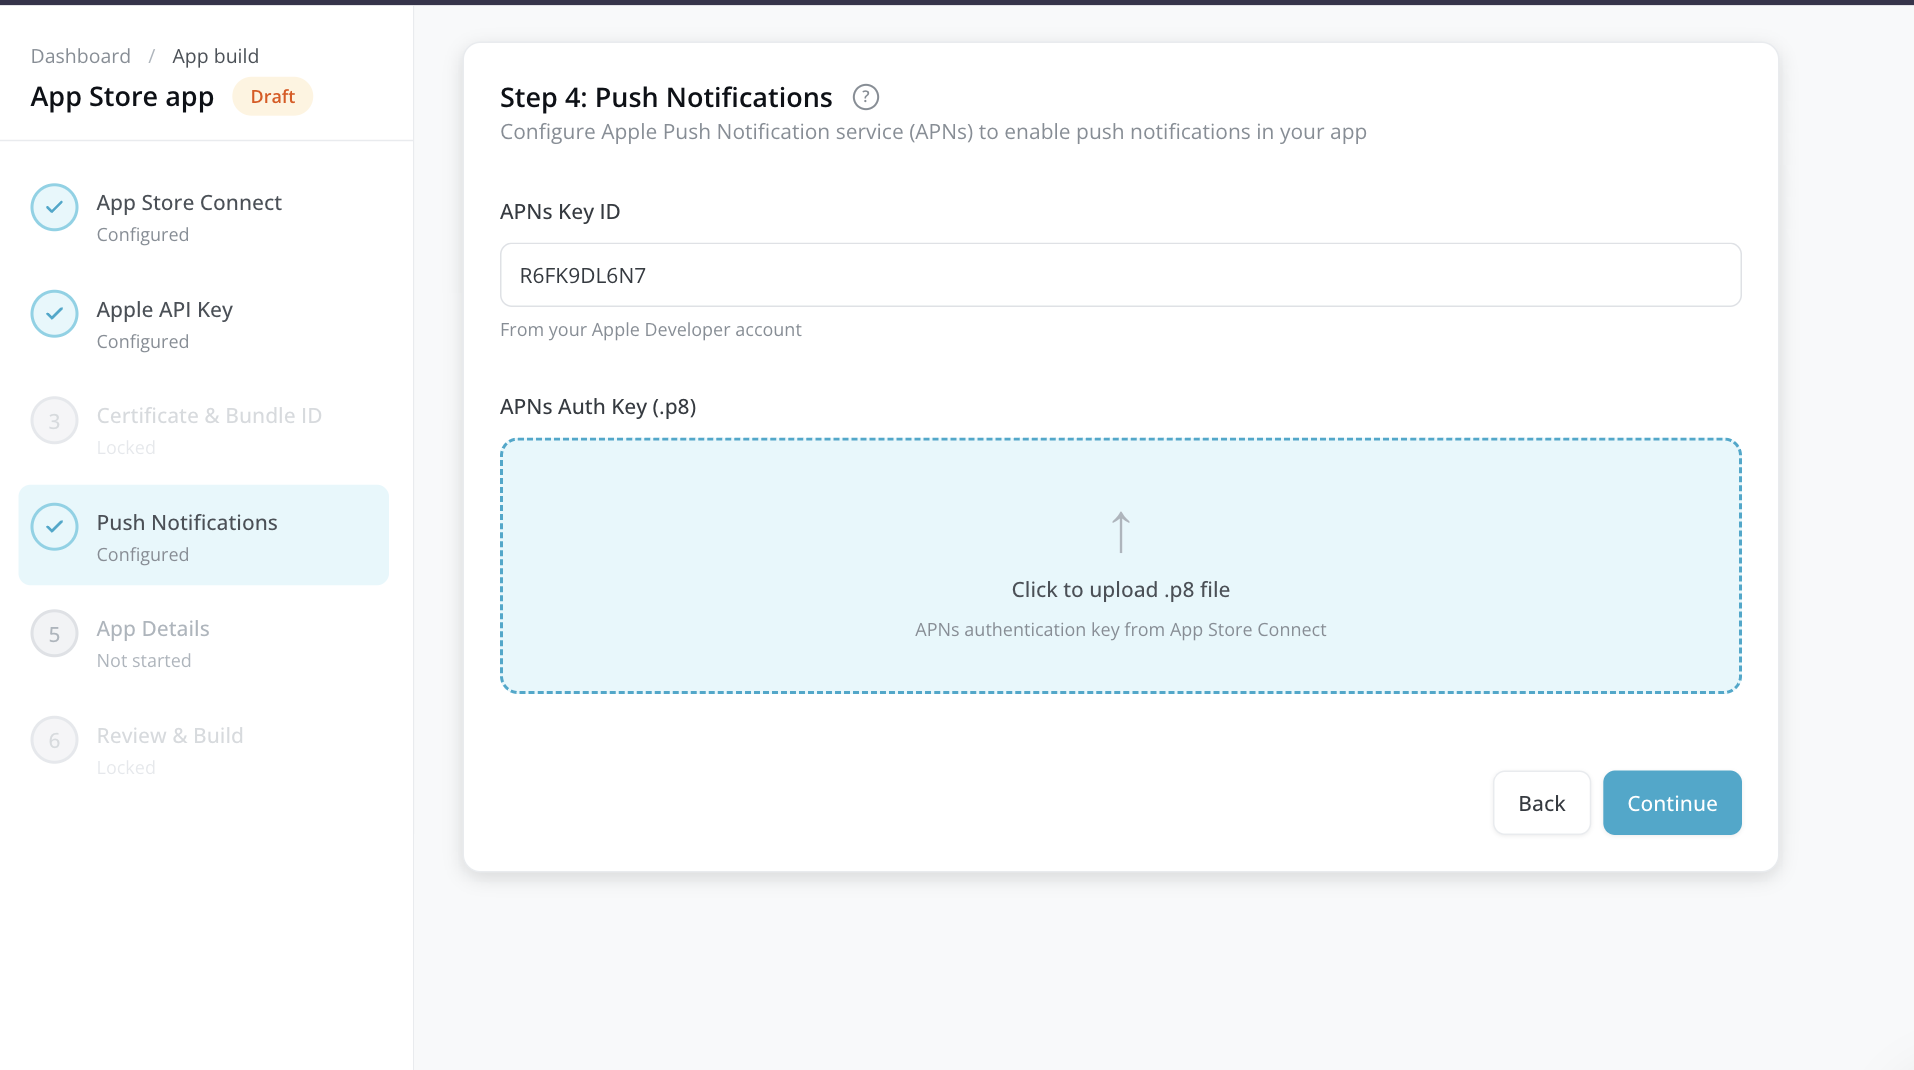
- Enter your APNS Key ID and upload your APNS Auth Key in step 4 of the IOS build process
- Click save
Step 4 – Set up the app to ask users to sign up for notifications
- In the ‘Permission popup’ tab, either select the option to “Show notification pop-up automatically” or copy the snippet and paste that into a screen of your choice if you want the user to be asked on a specific screen
- Click save
- The final step is to publish an update to your app so that the settings are applied to your live app. Your app will require a native update, you can find instructions for that here.
How to Configure Push Notifications on Android
- Create a new project in Firebase
- Visit Google Cloud to set up your FCM services
- Create service account
- Create a new key
- Submit the information in Fliplet
- Setup the app to ask users to accept notifications – in Fliplet Studio
Step 1 – Create a new project in Firebase
- Each app will need it’s own firebase project.
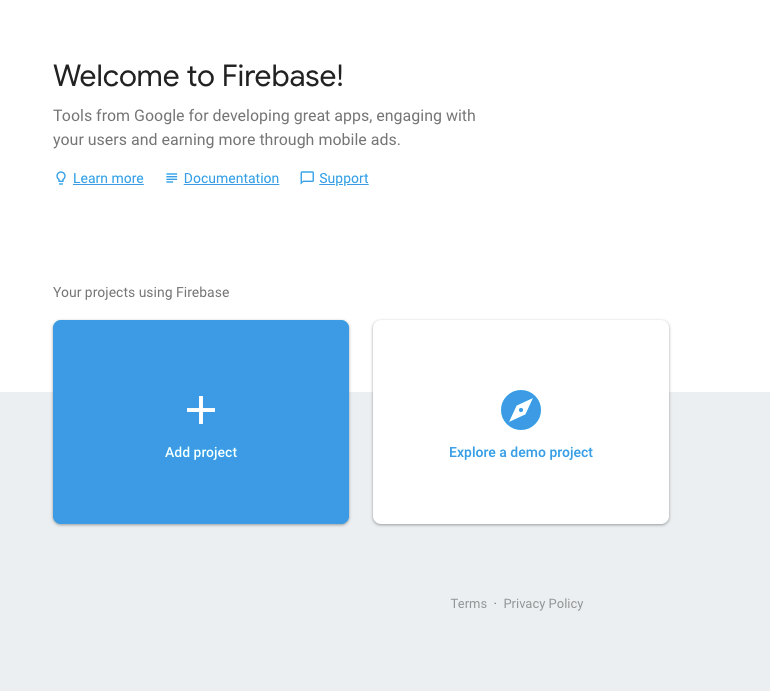
- To get started, Go to the Firebase console and click on add project
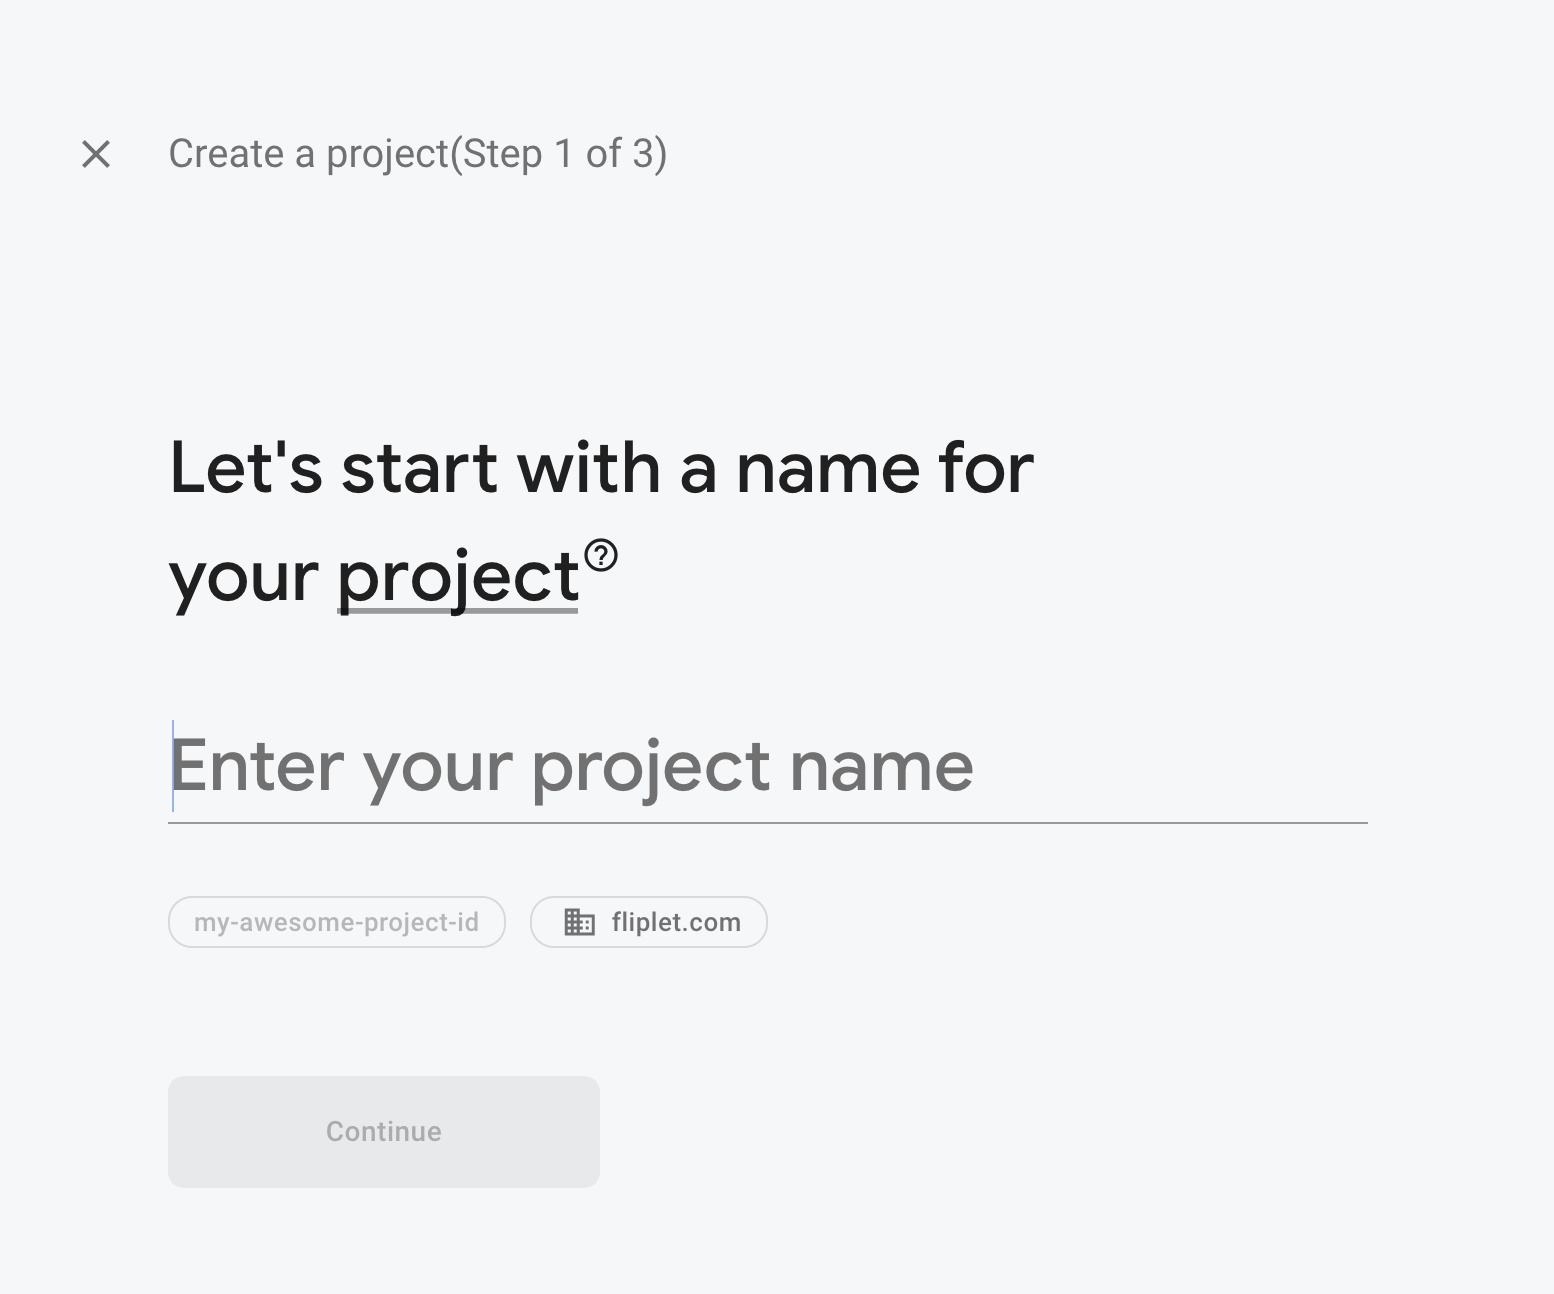
- Give your project a name, this can be anything but we recommend your app name, specify your location, and then click create project
- Select create project, and then continue
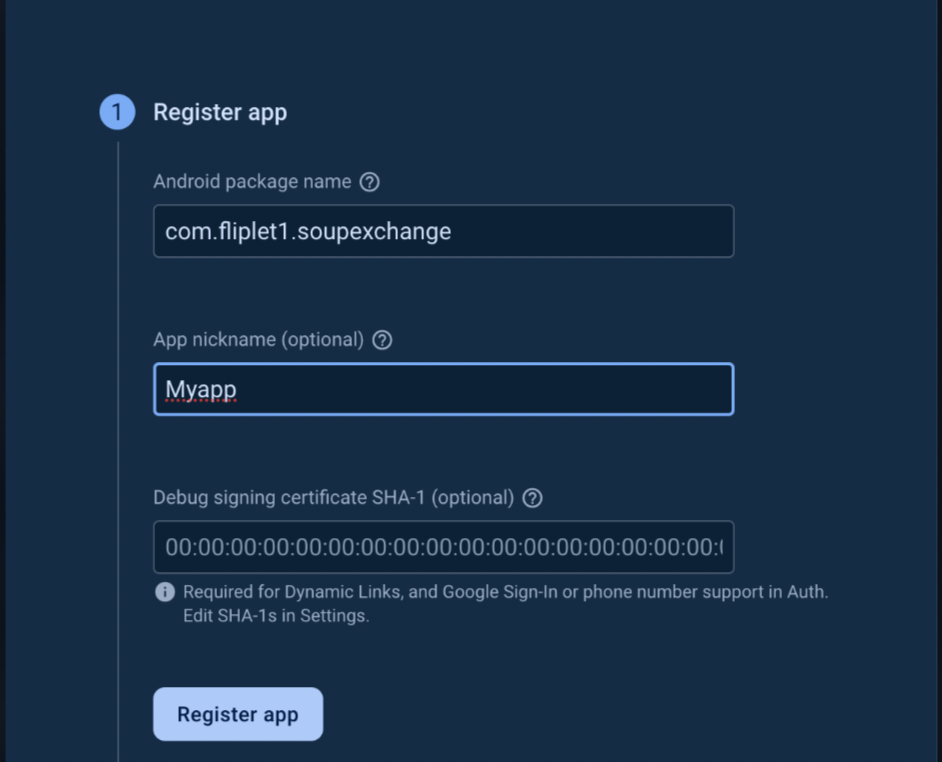
- Register your app. Each app should have a separate firebase project.
- Select the Android app in the project
- For the Android package name- Enter the Bundle id found in the Google publish tab of Studio
- Click on “register app”
- This will enable you to download the google-services file. Make sure to save this to your files, as this will be required later in the process
Note: each app will need it’s own service file
Step 2 – Visit Google Cloud to set up your FCM services
- Start by opening Google Cloud
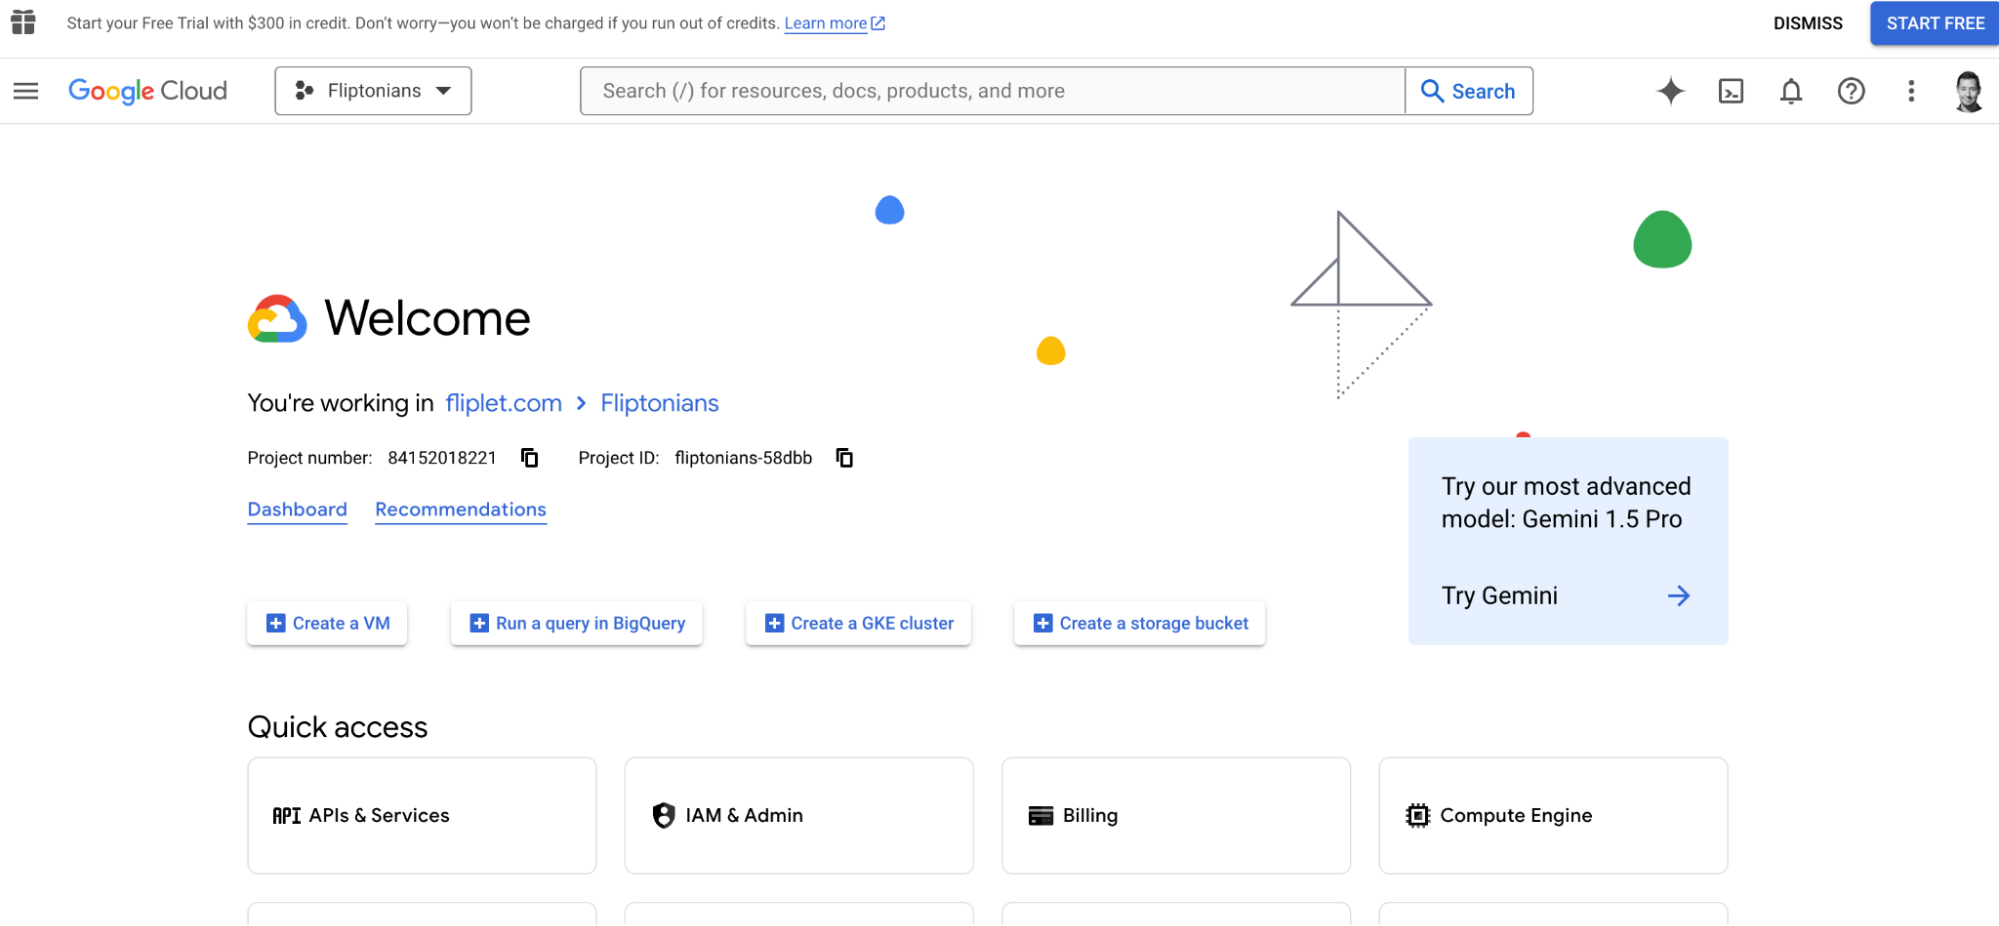
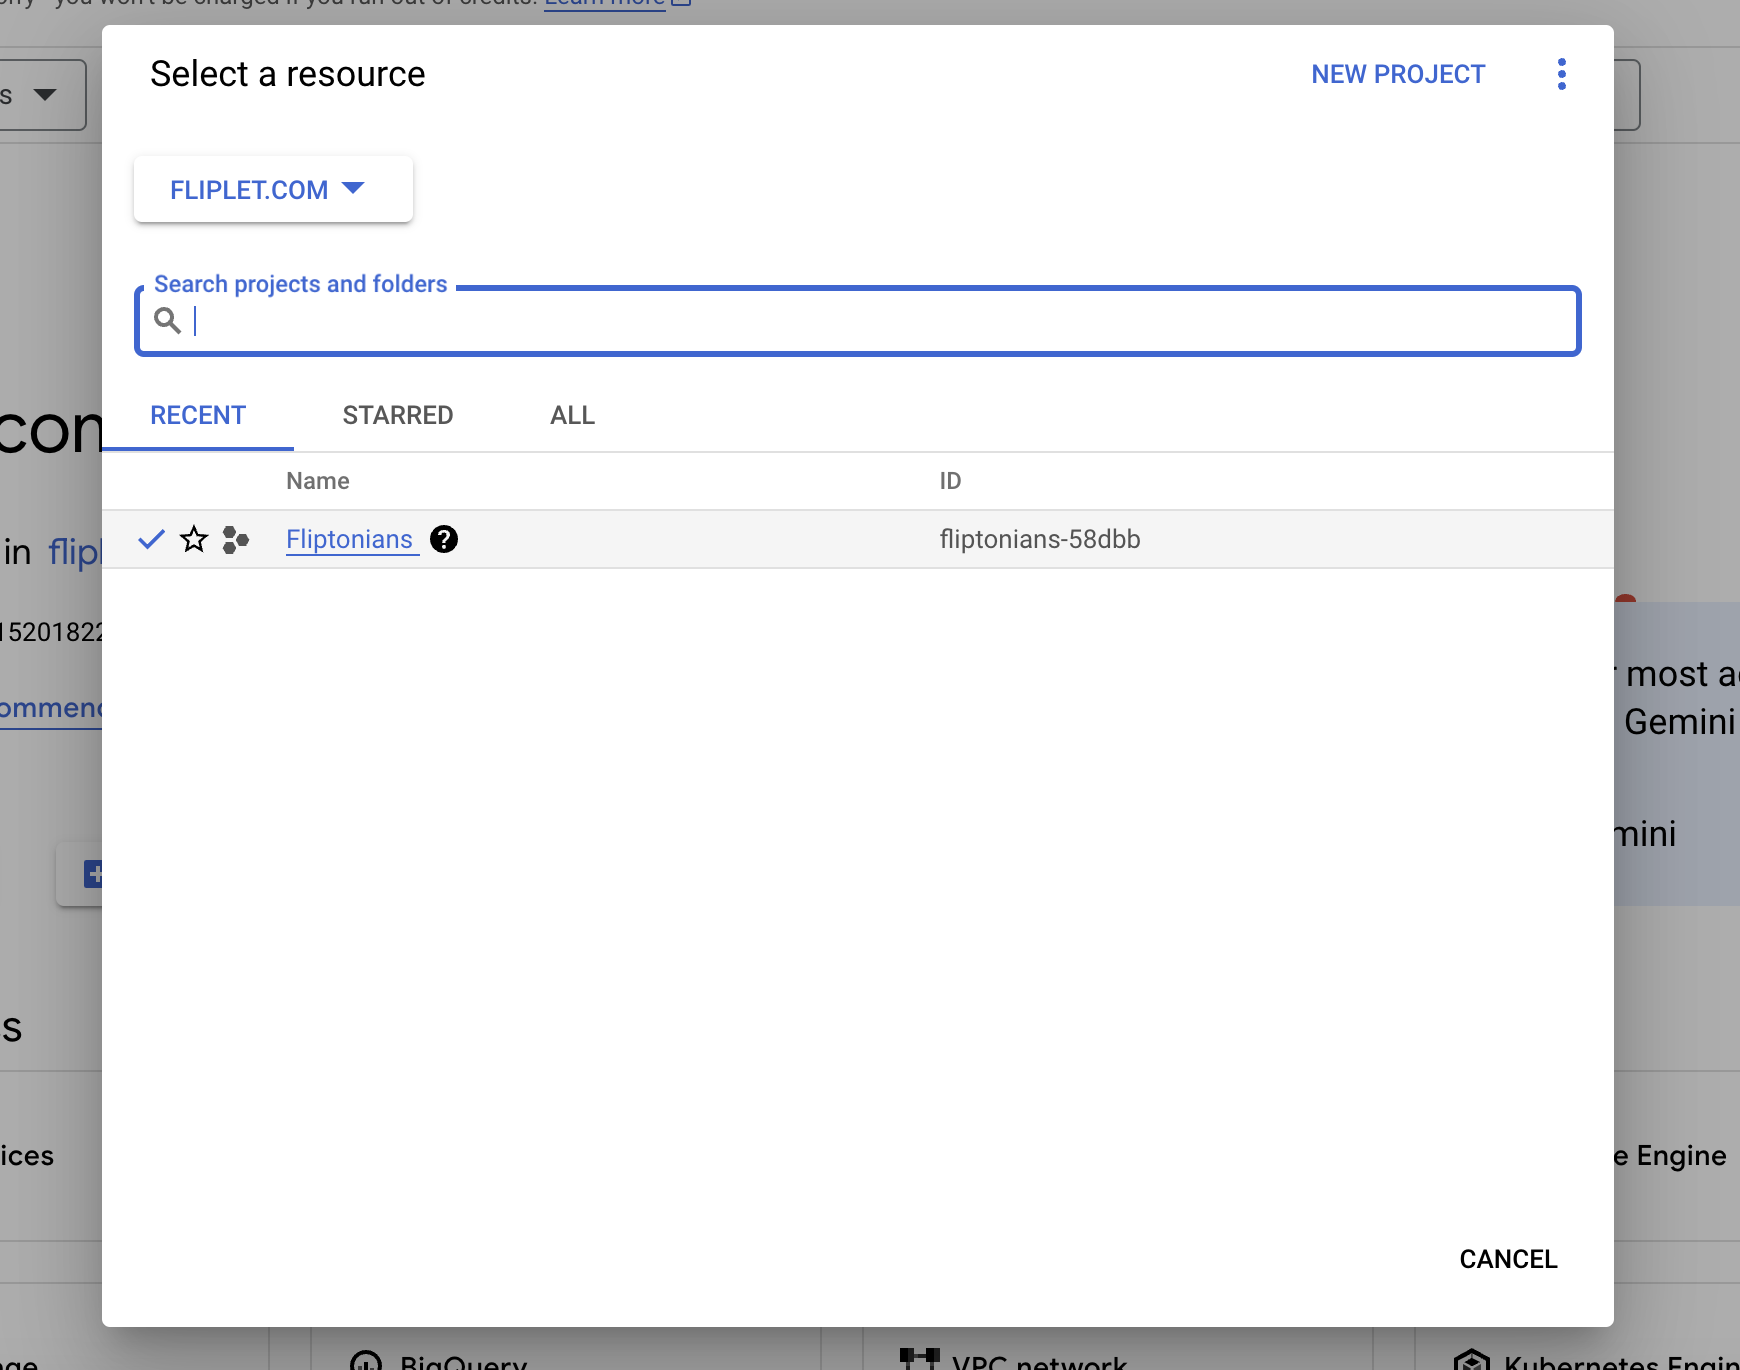
- Now, select the project that relates to your existing app from the dropdown menu
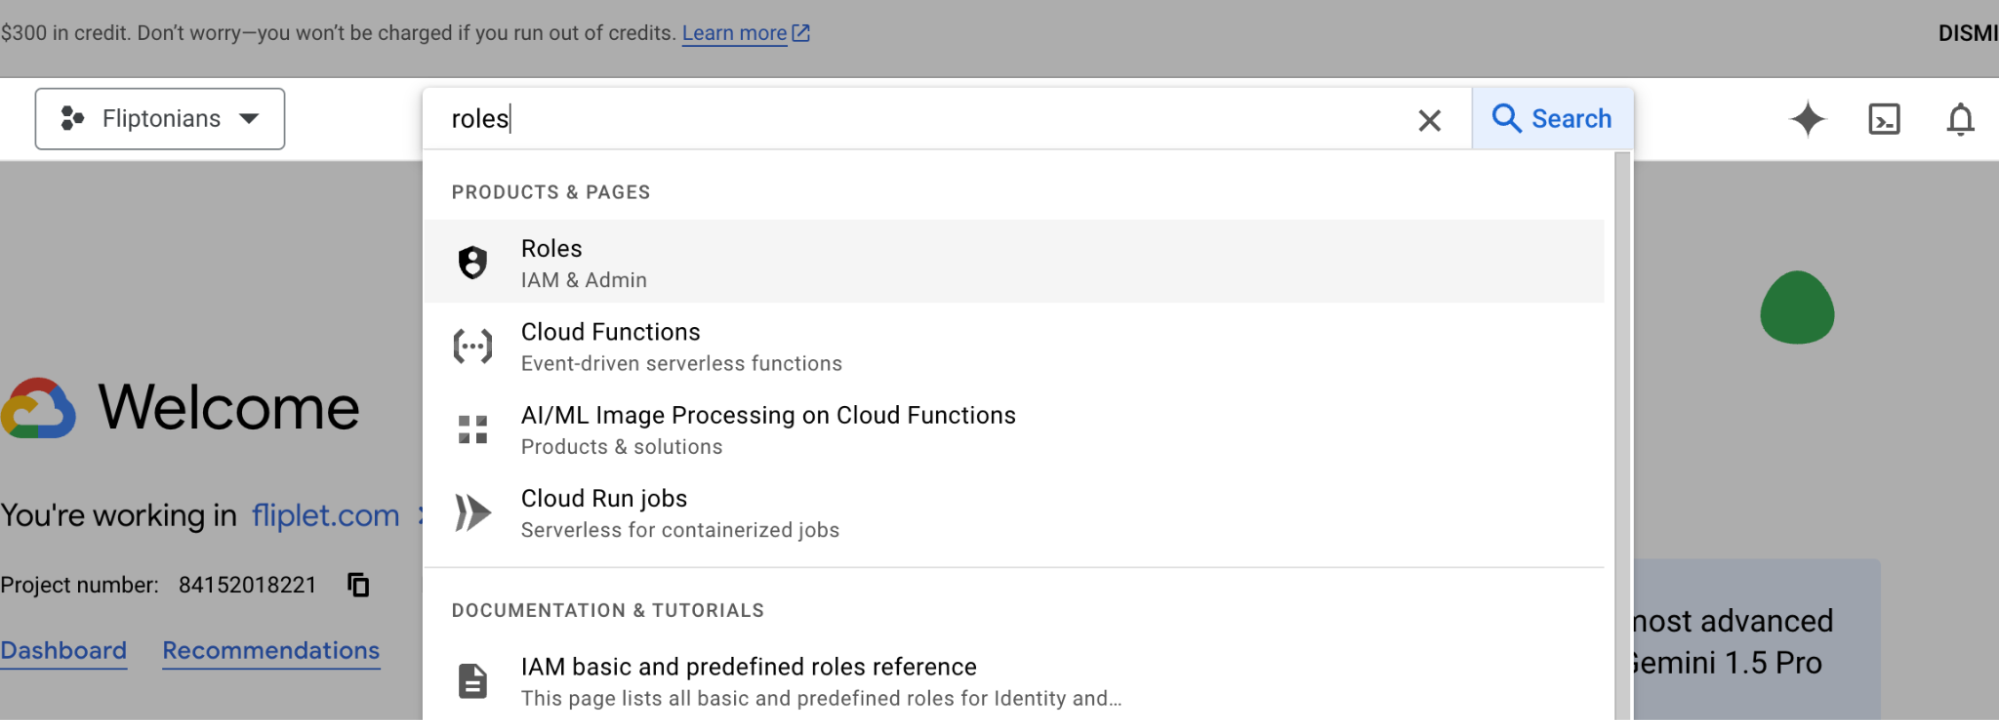
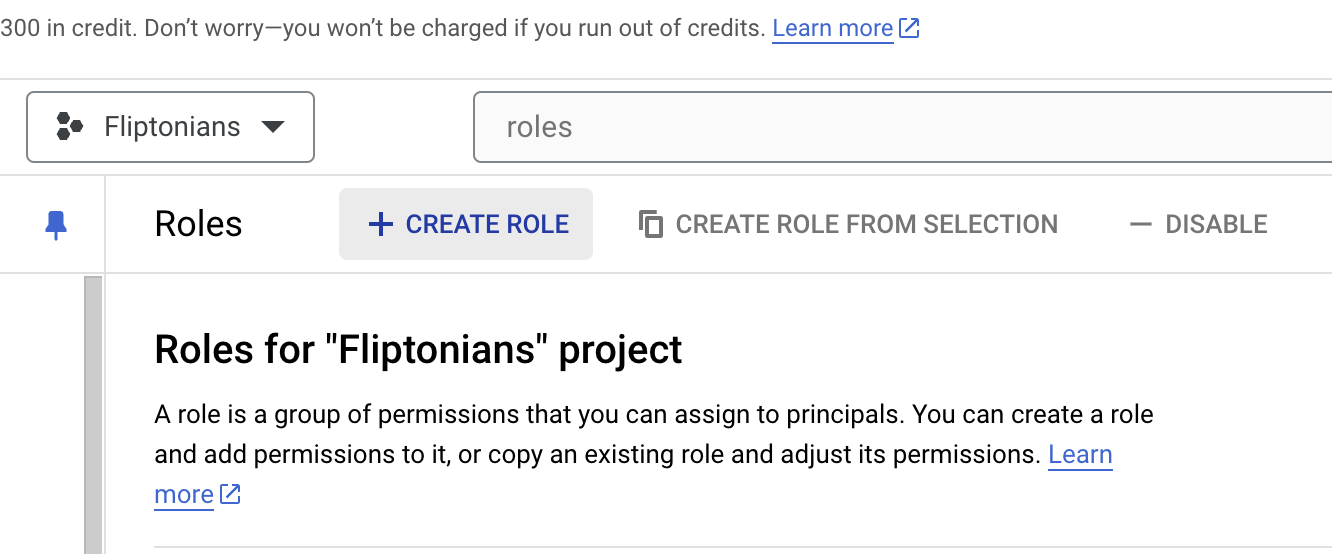
- Once you have selected the project, use the search bar to search for “roles” and select
- Now select “Create Role”
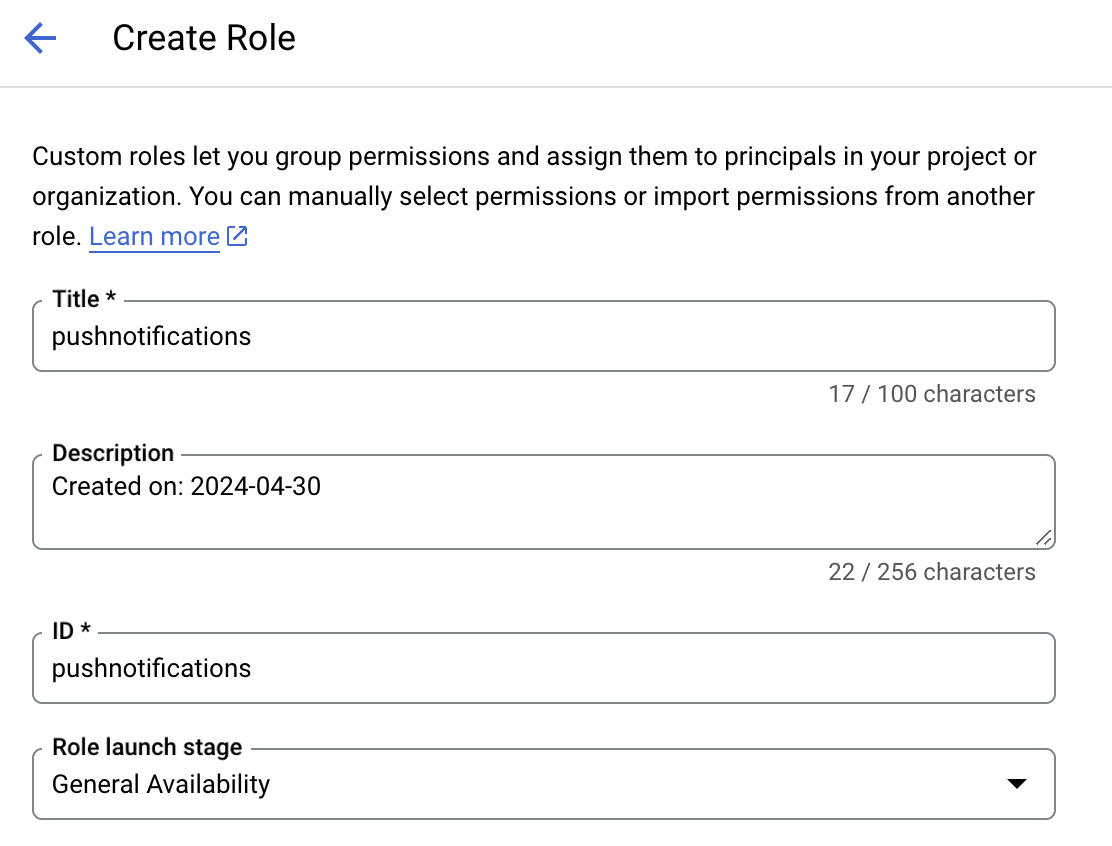
- Enter the following information in the Title, Description, ID, and Role launch stage:
Title – pushnotifications
Description – Created on “today’s date”
ID: pushnotifcations
Role launch stage – General availability
-
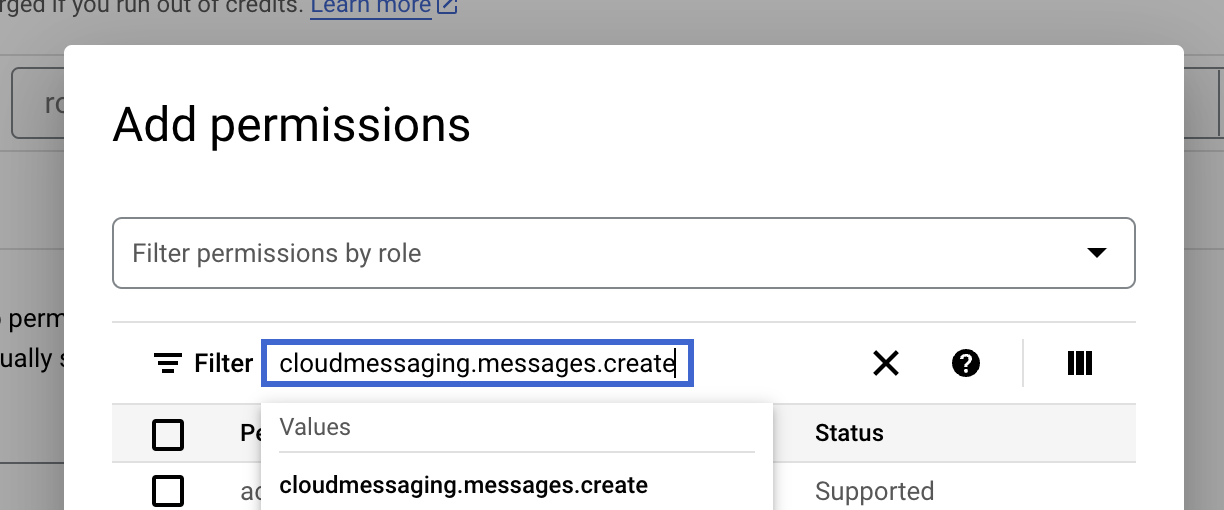
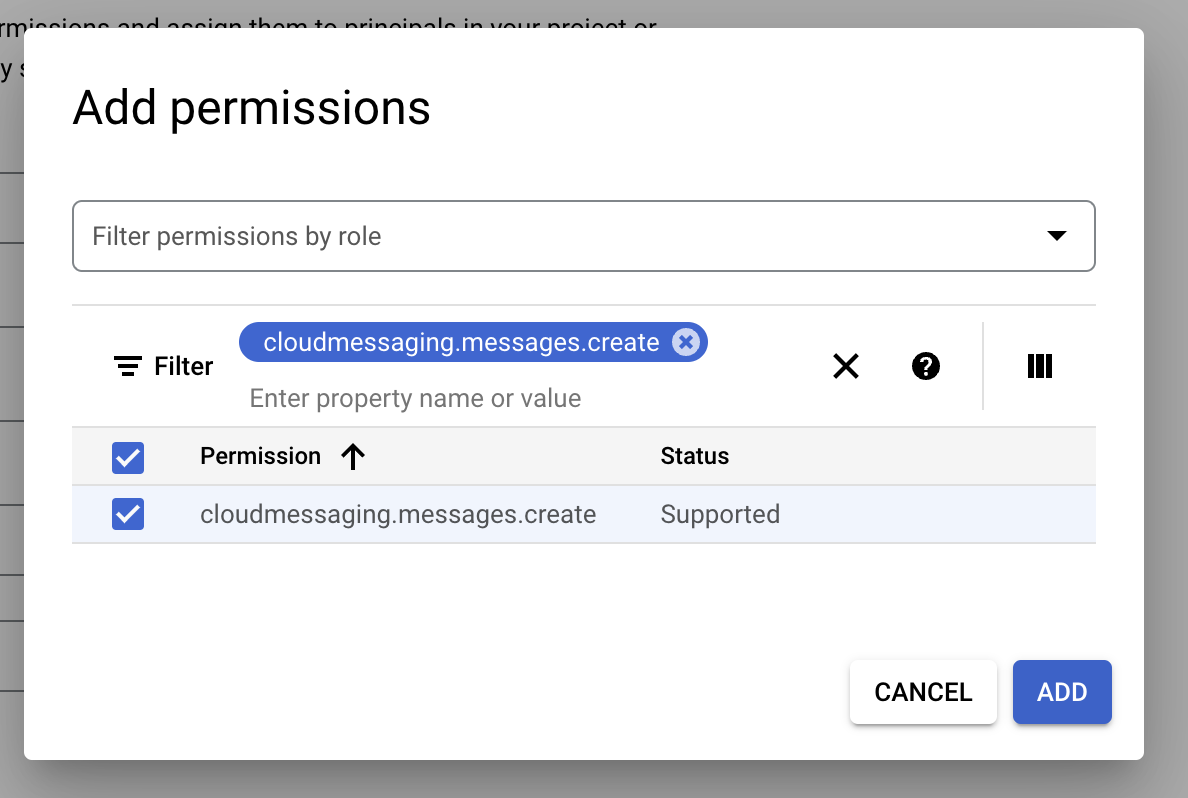
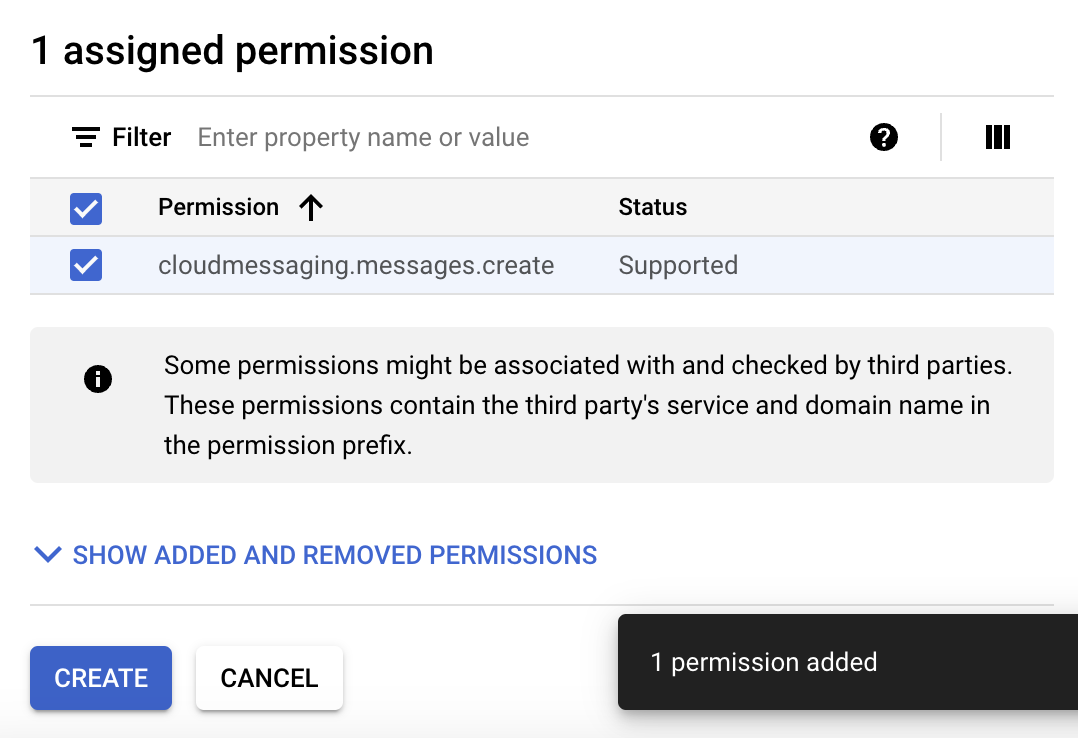
Select “Add Permissions” and filter by “cloudmessaging.messages.create”
-
Click “add” to add and save the permission
- Now, click “Create” to create the role
Step 3 – Create service account
-
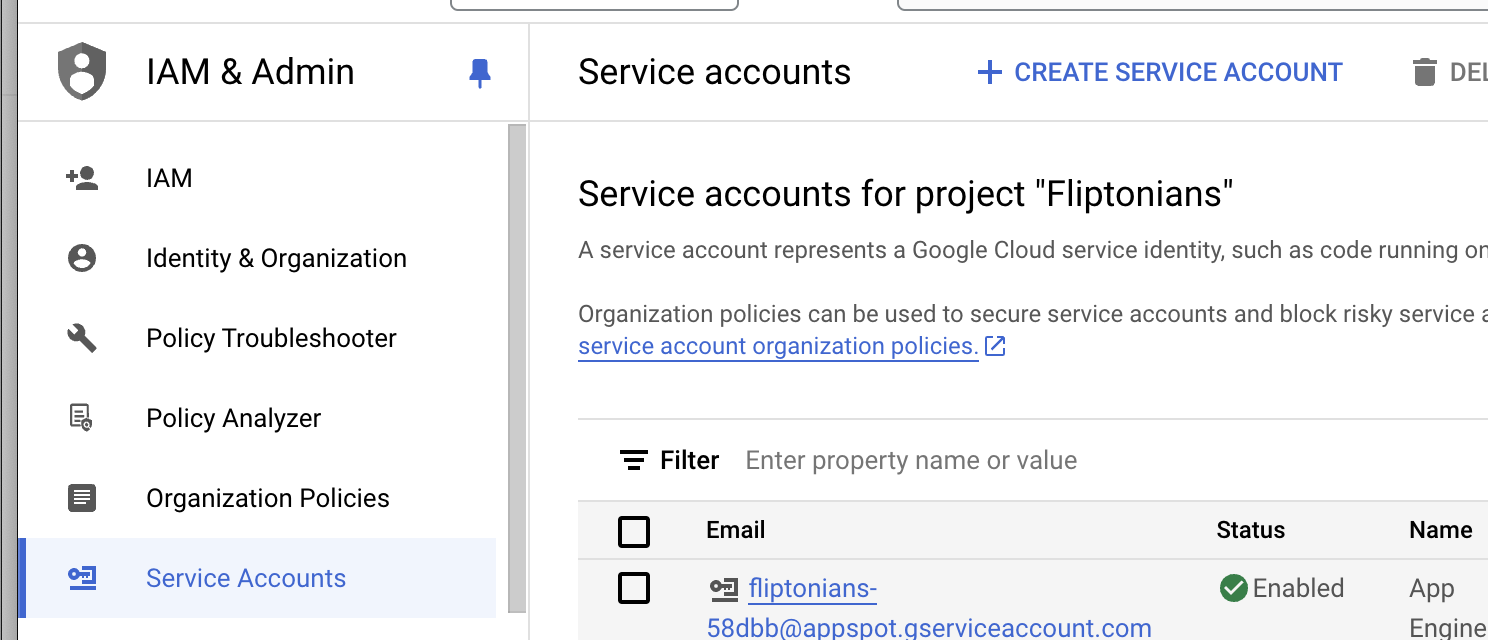
Next, go to “Service Accounts” on the left hand side menu, and select “Create Service Account”
-
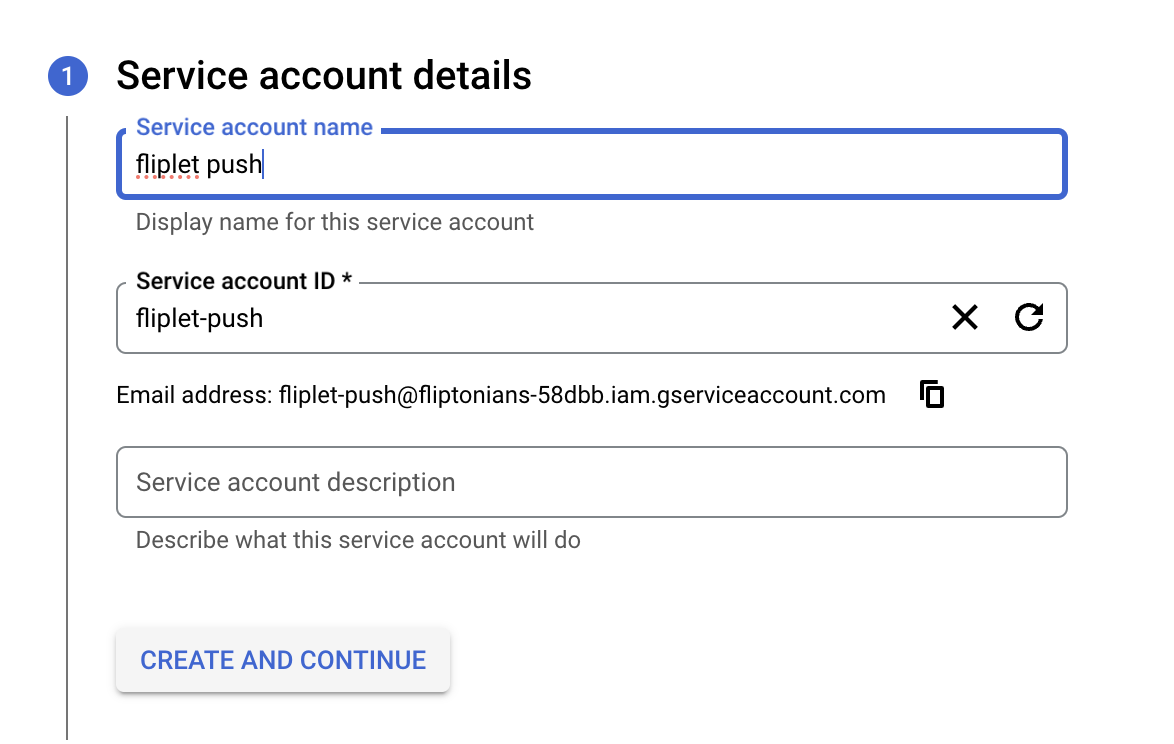
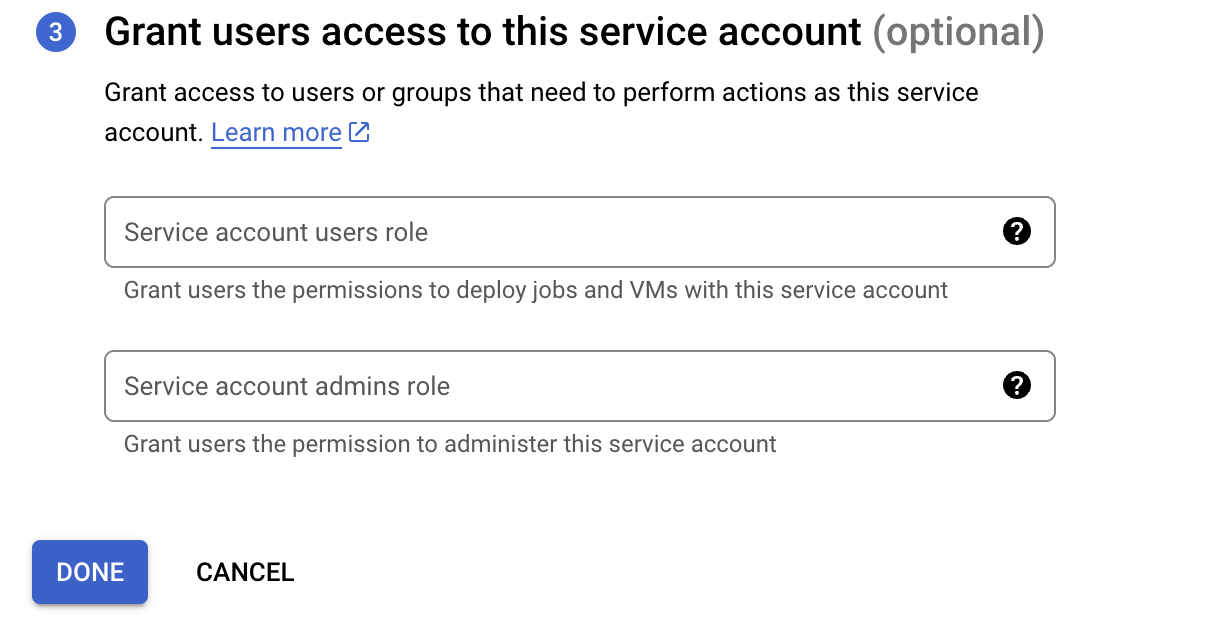
Give the service account a name and select “create and continue”
-
Under roles, search for the role you just created
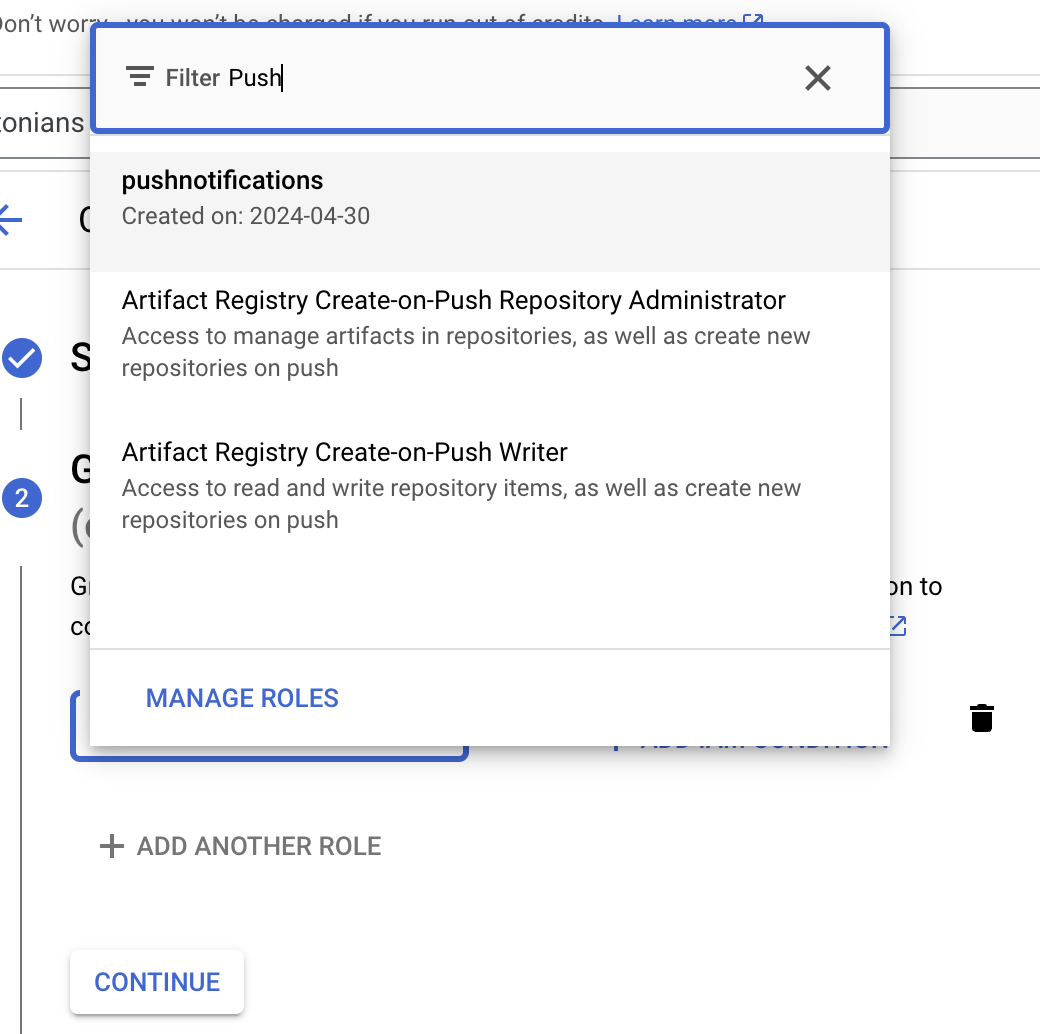
- Select “done”
Step 4 – Create a new key
-
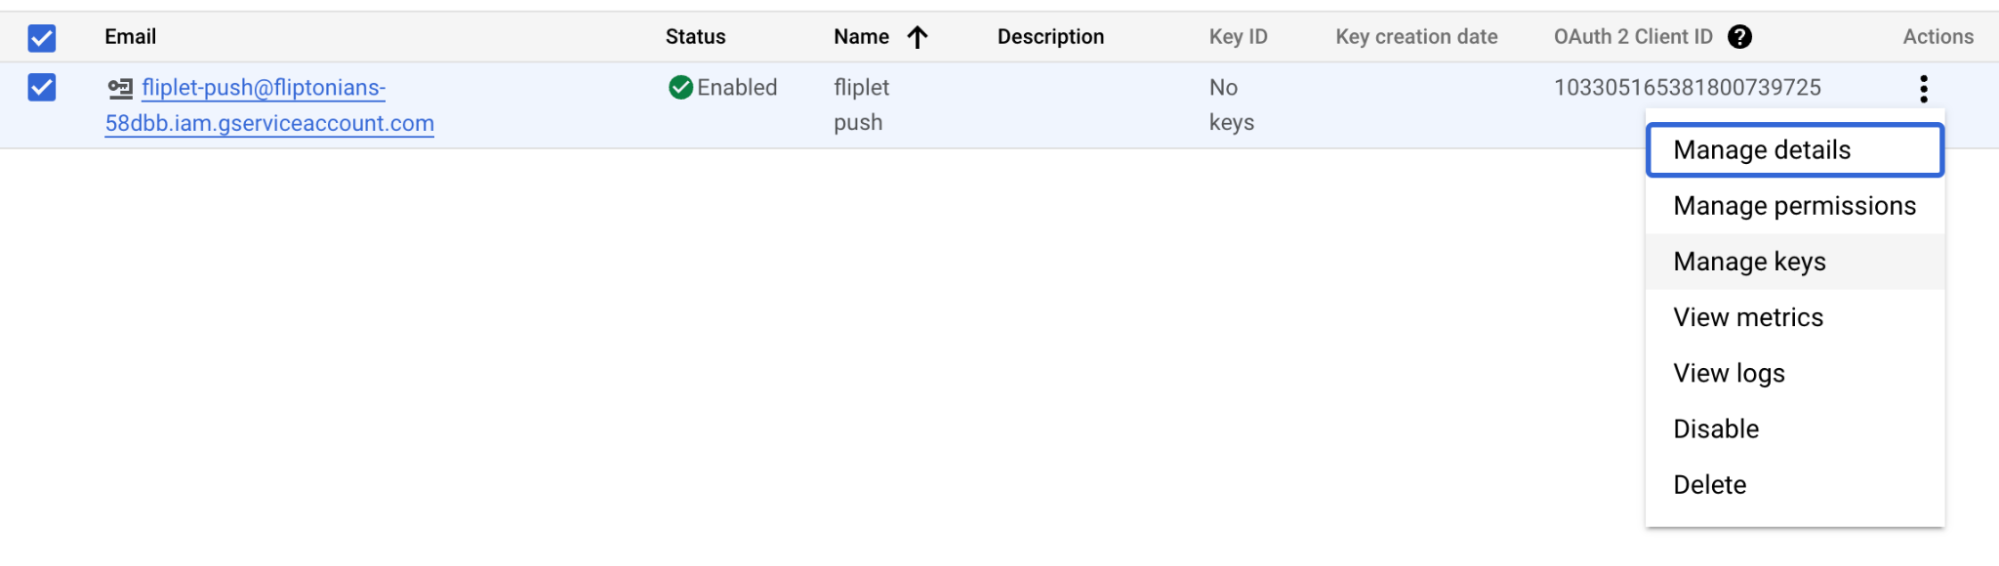
Click on the 3 dots next to the service account you named, and select “manage keys”
-
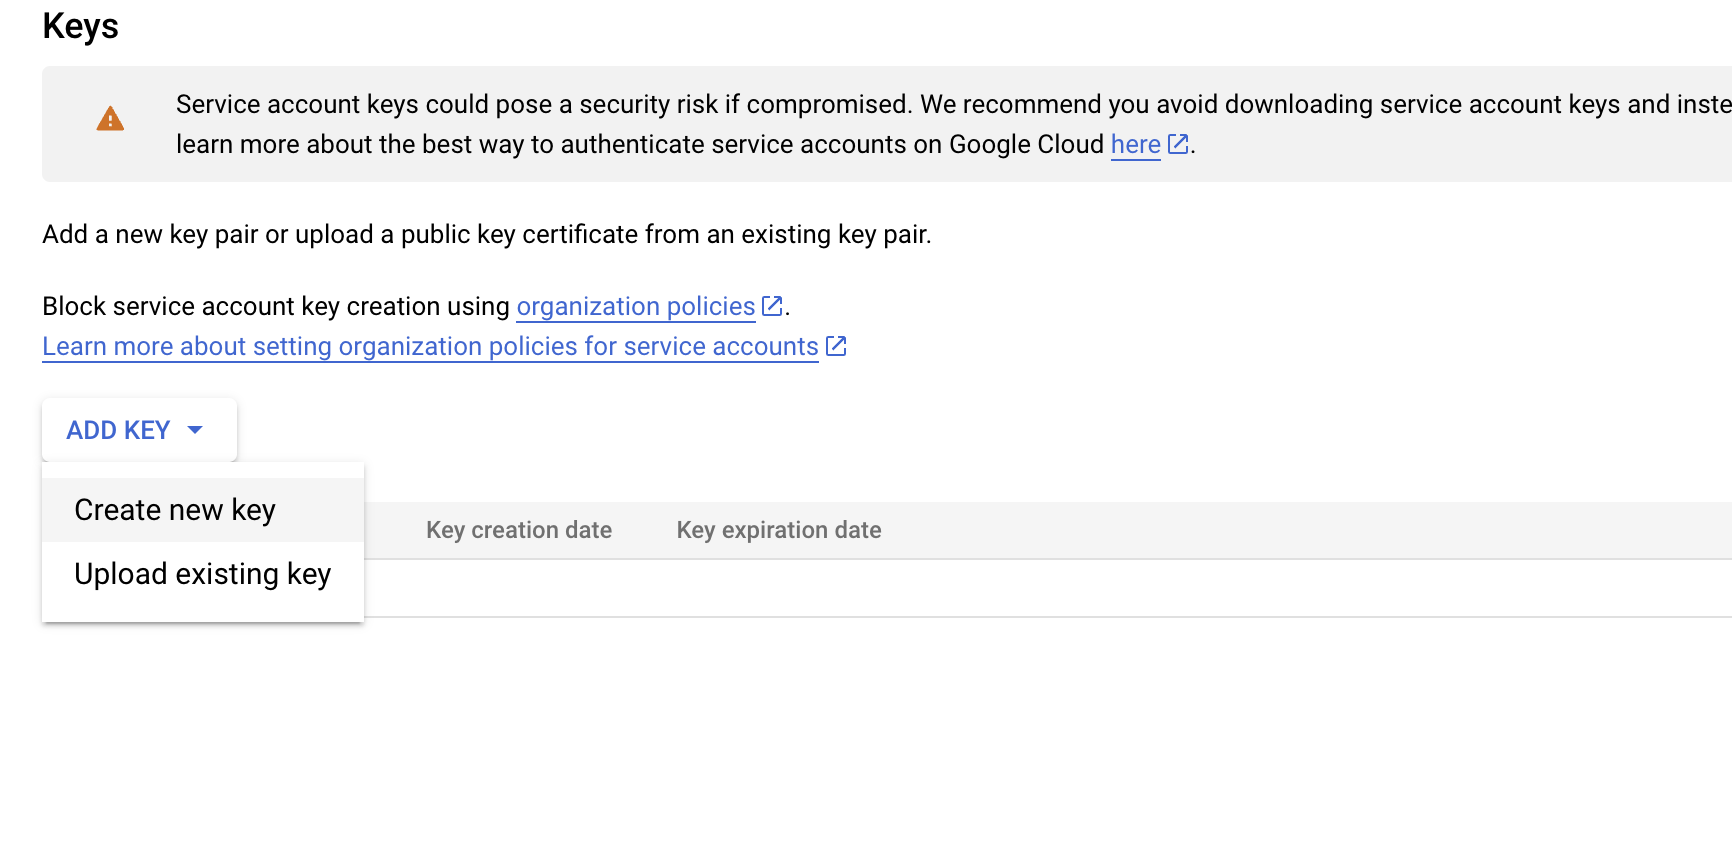
Select “Add key” and choose “Create new key”
-
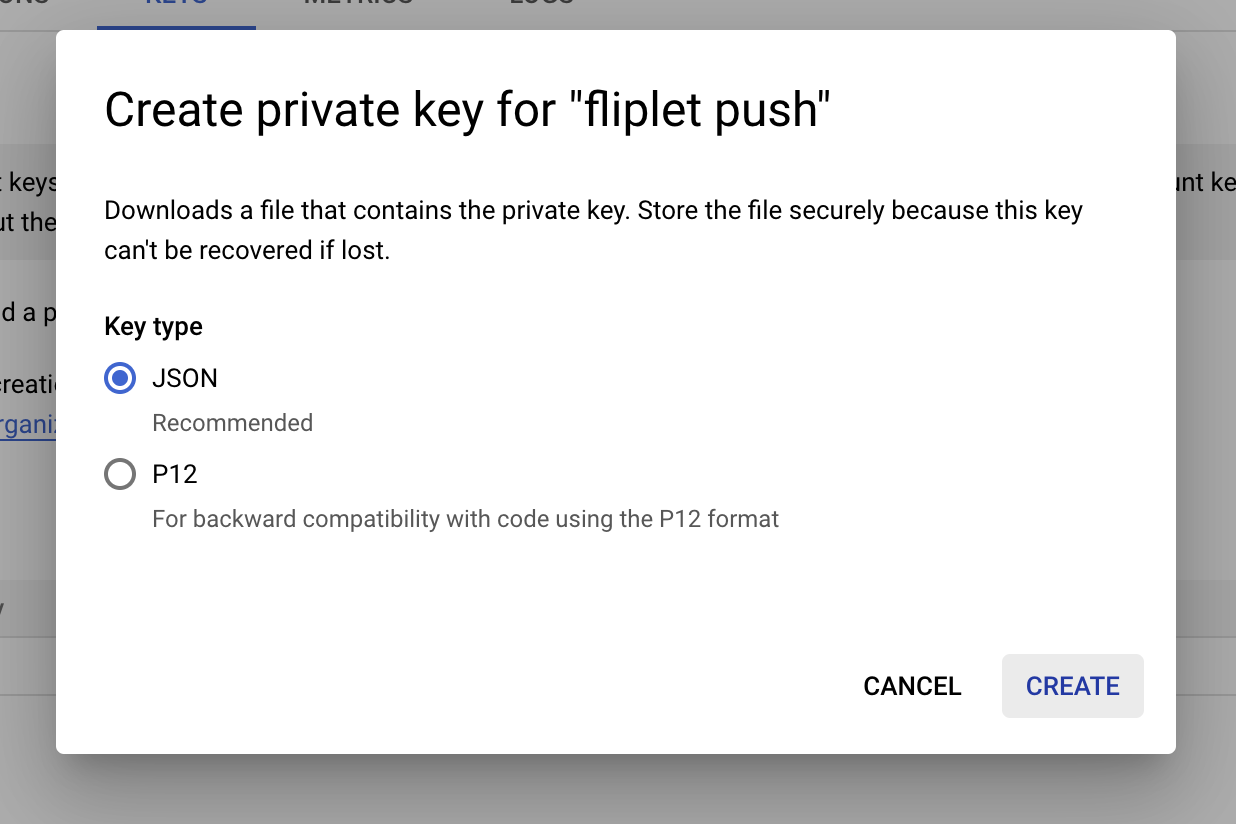
Select “JSON” and then “Create”. This will auto-download the JSON file, which you can then use to upload it into Fliplet Studio for configuring FCM notifications
Step 5 – Submit the information in Fliplet
- Open your app in Fliplet Studio
- In the top right hand corner select “publish” and choose “more publishing options”
- Select “Android”
- Continue through the first 2 steps
- On step 3 you will be prompted to provide push notification info
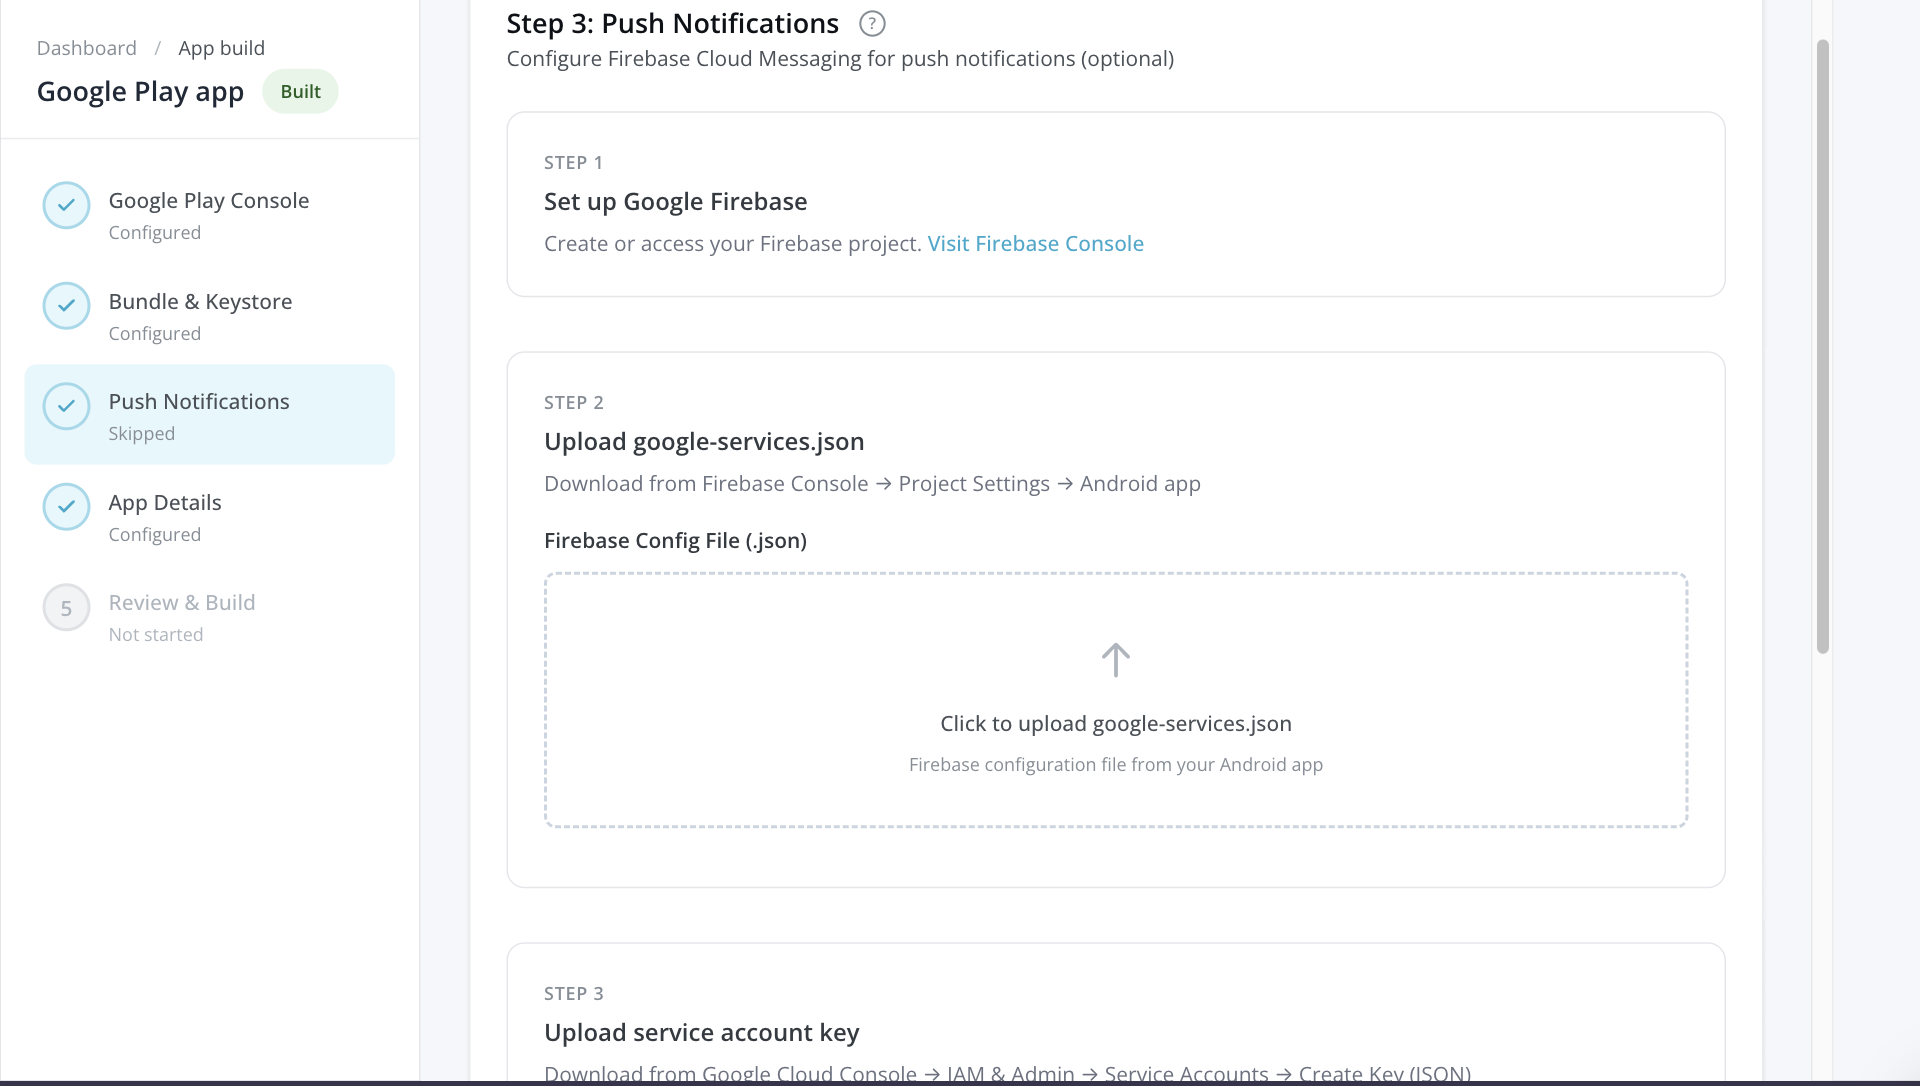
- Under “Step 2” upload the Google services file from step 1 in this article. You will see “file is valid” if the file is correct
- Under “Step 5” upload the services account file. This is the key you created in step 3 of this article. You will see “file is valid” if the file is correct
- Check your submission details
- Finally, save the updates and click “submit” to rebuild the app with the new push notification service
Step 6 – Set up the app to ask users to sign up for notifications
-
In Fliplet Studio, go to ‘Send notifications’ in the publish section
- Click settings
- Configure the settings for the notification interface that will ask the user if they want to enable push notifications
- Click save
- Finally, if you have made any changes to google-service.json file then you should publish an update. For more information read the article about how to publish to Google play store or how to publish an Enterprise Android app
- If you have only changed the service account file, you should publish an in-app update
Test push notifications
Note – Your app must have push notifications already enabled. If you have not done this please see above.
If you are looking for information on in-app notifications, read this article.
To test push notifications you’ll need to:
- Set up the push notification test
- Send the push notification test
- Send the push notification test again (optional)
Step 1 – Set up the push notification test
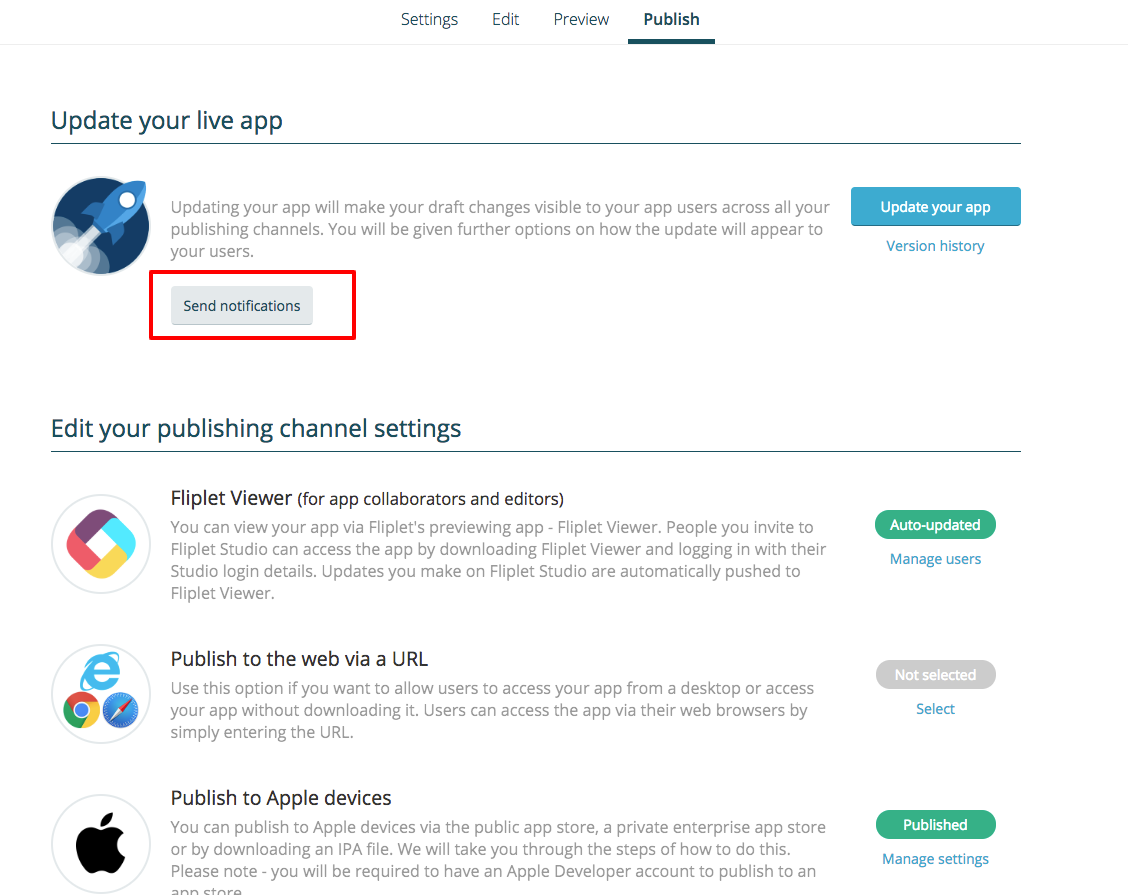
- In your app, select publish
- Select the notifications button
- Click create new
- Enter a title and a message for your test notification
- Add a link to test that the link feature is working. Select one of the following options:
Link to screen, and then select a screen from the dropdown and select an animation
Link to webpage, and enter a web page - Click select recipients
- Under send notification to, select test devices, this will show you can see the estimated number of recipients who will receive your message
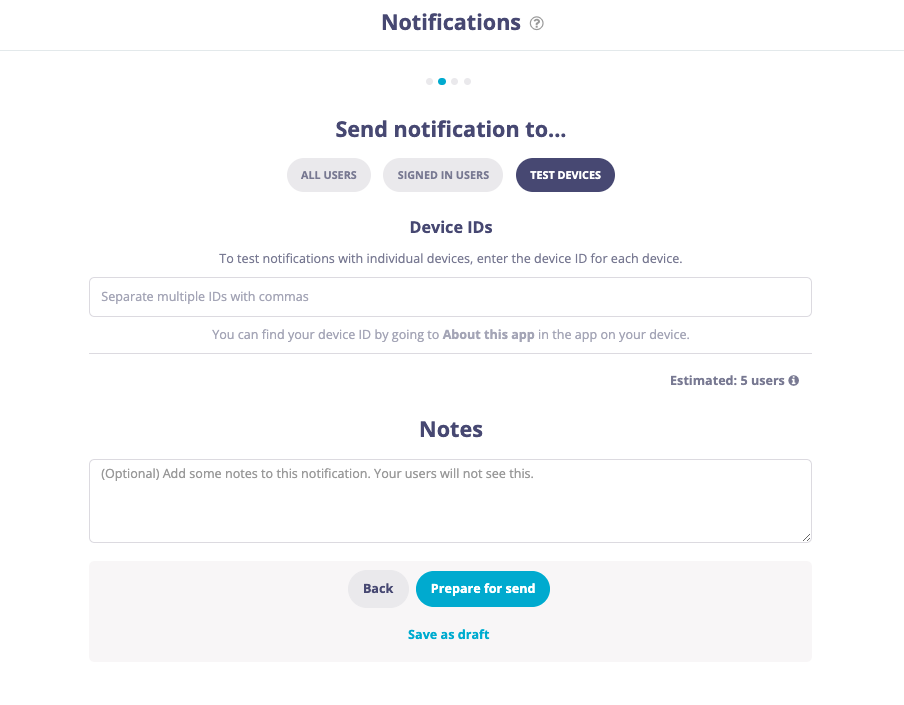
- Under device IDs enter the ID for your device. To find the ID, go into your app and click on “about this app” (usually at the bottom of your hamburger menu)
- Optionally, add notes to the recipients of your notification
- Click prepare for send
Step 2 – Send the push notification test
- Under send notification, select now
- Under Show notification as select both “in-app notification” and “push notification”
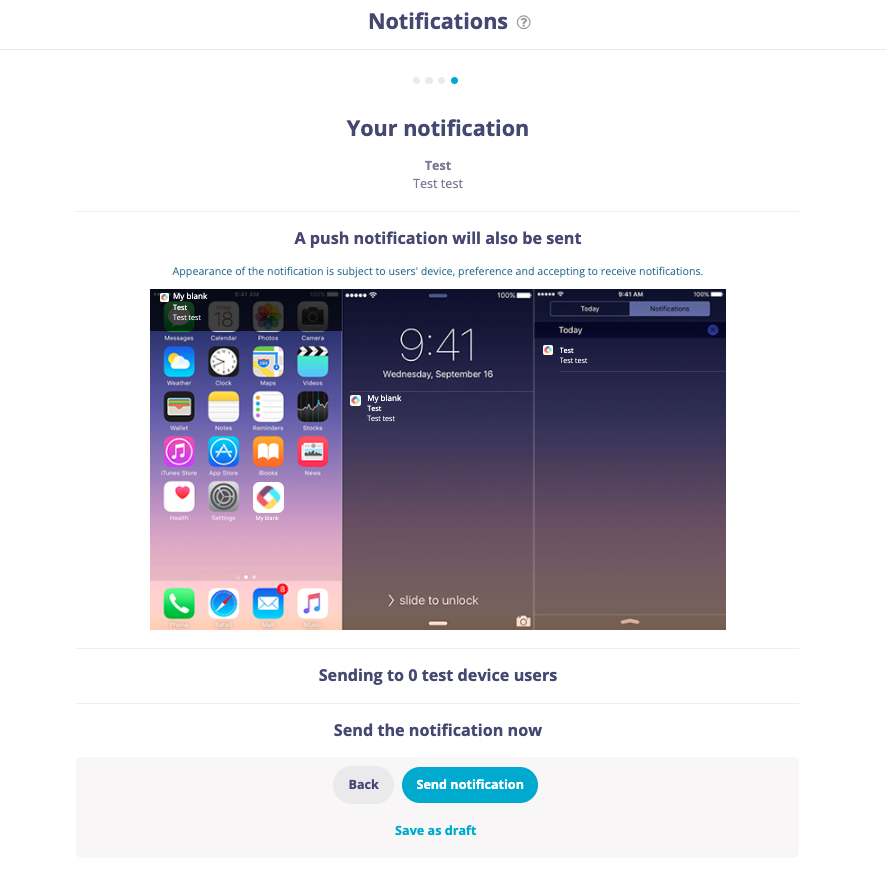
- Click review
- Check the preview of what your push notification will look like. You can see a confirmation of the message that you will see for the in-app notification but not what it will look like at this stage
- Click send notification
- A success message will appear. Click ok
- If the test was successful, you will be able to see that the notification has been sent, it will appear as a sent message rather than a draft
- The edit option will have disappeared now that the notification has been sent. However, you can click “Copy” if you wish to create a duplicate.
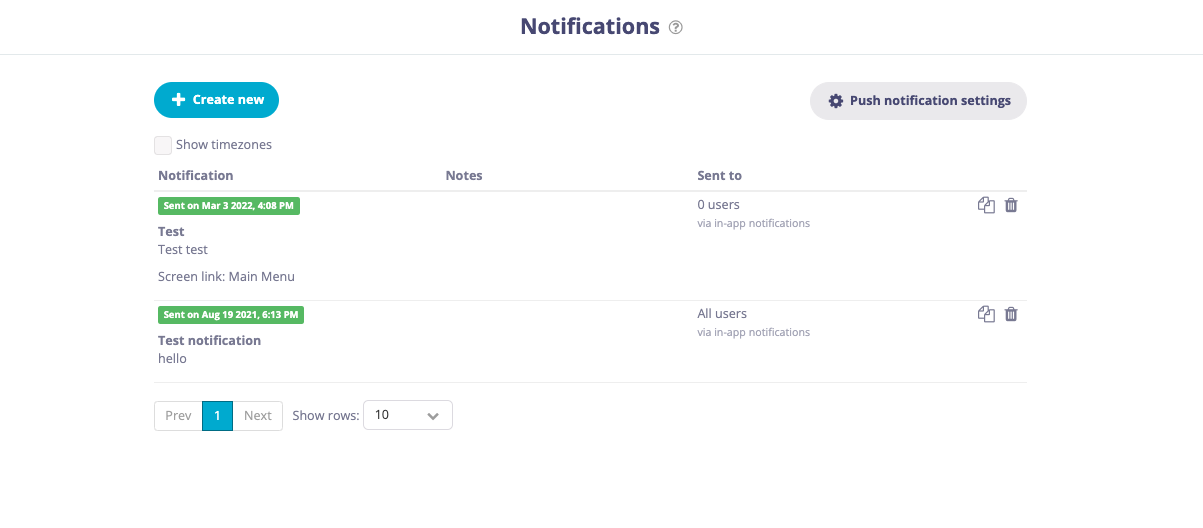
- To see the results of your push notification, click on the “Push notification result” button next to copy. You will see how many devices received the notification and how many batches of the notification were sent
Step 3 – Send the push notification test again (optional)
If you already sent the push notification test to yourself but wish to send it again to a department:
- Next to your notification, click copy
- Make any changes you require to the text and then click select recipients
- Under send notification to, select signed in users
- Under recipients must match all of the following, choose which department(s) you would like the push notification to be sent to
- Click prepare for send
- Select whether you would like to send the notification now or later
- Under show notification as select in app notification and push notification
- Click review
- If you chose to send the notification now, then click send notification and, if you chose later, click save notification
Rotating configuration details
How to rotate Apple Push Notification service (APNs) details
To rotate your APNs key details, you need to create a new APNS key and upload it to replace the old one. Here’s a step-by-step guide on how to do this:
- First, go to the Apple Developer website and log in with your Apple ID which has the necessary privileges
- Revoke your current APNs key
- Navigate to the “Certificates, Identifiers & Profiles” section
- Click into keys
- Select your current key and choose revoke
- Create a new APNs key
- Click on the “+” button to create a new key
- Name the key
- Select to enable Apple push notification service (APNs)
- Select Continue to download the key
- Upload details from APNs key in Fliplet Studio.
Note: If you have multiple apps using APNs, make sure to follow the next steps for each app- Once you have downloaded your APNs key, head back into Fliplet Studio,
- Go to the ‘Publish’ section, and click manage settngs under publish to Apple
- Select the push notifications tab. This is where you need to add the details from the APNs key you just created
- You can find the Key ID in your Apple developer account under “Keys” and “All”. Click on your specific key to see the information:
-
Paste this into the Key ID section in Fliplet Studio
- Open the APNs file you downloaded (it should be a p8 file) in a text editor or your browser window to get the key and copy everything, including the —- Begin private key —- part
- Paste the text of the Key into the Authentication Key section in Fliplet Studio
- Make sure to save any changes
- Test the new configuration by logging into your live app and sending a test notification
How to rotate Google Firebase information
To rotate your Google Firebase information, you need to create a new server key and upload it to replace the old one. Here’s a step-by-step guide on how to do this:
- Log into the Firebase Console
- Create a new server key
- Select your project
- Click on the gear icon next to “Project Overview” to enter the “Project settings”.
- Inside the project settings, navigate to the “Cloud Messaging” tab.
- Generate a new server key by scrolling to the “Project credentials” section.
- Click on “Add server key” to create a new one
- Add new project details in Fliplet Studio
- In your app, click publish in the top right corner
- Click ‘Publish to Android devices” and go to the ‘push notifications’ tab
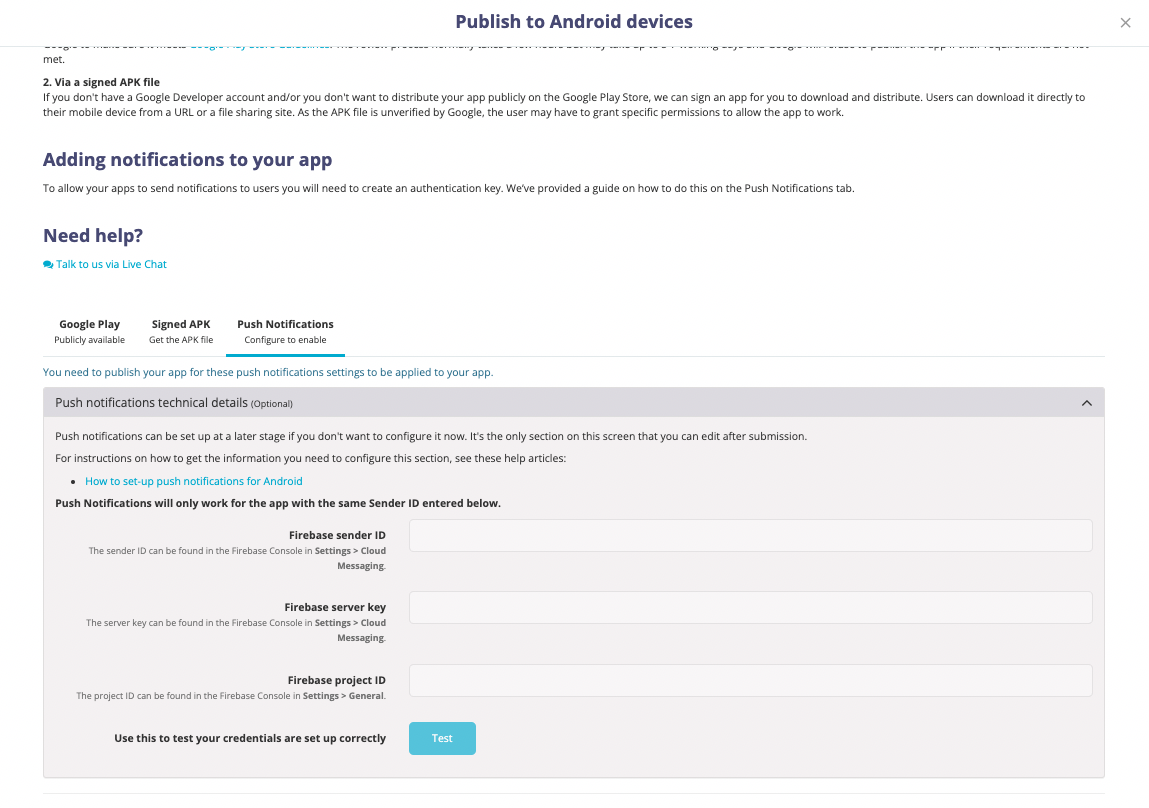
- Replace the Firebase server key but ensure that the Firebase sender ID and Firebase project ID stay the same
- Use the “test” button to verify the configuration is correct

- Save changes
- Test the new configuration by logging into your live app and sending a test notification
- Once you have confirmed the new server key is working, you can delete the old server key from the Firebase console to ensure security.
Related Articles