The portal app can be configured to create a bespoke app that provides access to each of your apps built with Fliplet, whilst also delivering company focused information for colleagues wherever they may be located.
The purpose of this document is to introduce the screens used in the template and to highlight how they can be configured to create a bespoke mobile and web app.
Screens for all users
- Onboarding
- Login
- Registration
- Portal
- Notifications
- More
- About Us
- Our Expertise
- Latest News
- Offices
- Contact Us
Admin Screens
- Admin – Menu
- Admin – User List
- Admin – Latest News
- Admin – Offices
- Admin – How to configure your portal
Screens for all users
-
-
Onboarding
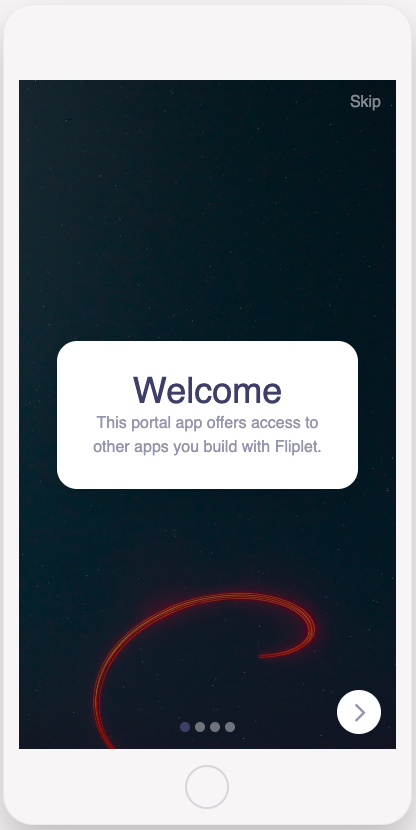
This screen introduces the user to the app and the various functions that it provides.
This screen can be configured to display on the first use of the app only.
You can configure the number of slides to display and the text and imagery can be changed to create your desired look.
This screen uses the onboarding component, learn more here. -
Login
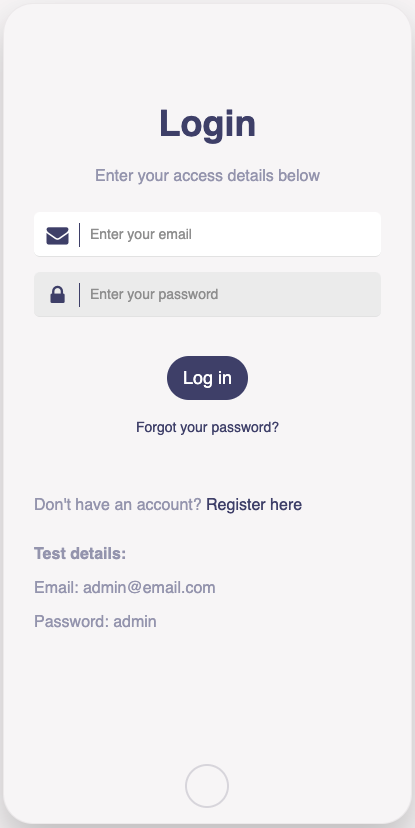
This screen provides security for the app allowing access only to registered users.
This screen can be configured to reflect your security preferences. Login can be via SSO, email and password, or email only.
By logging in this will also define the user role and ensure the correct permissions are shown per user.
Click to learn more about the login and SSO components. -
Registration
This screen is optional but if used, it provides the ability for users to register for access to the app and can allow guests and third parties to join and use the app.
This screen can be configured to include any requirements needed.
This screen uses the form component, learn more here. -
Portal
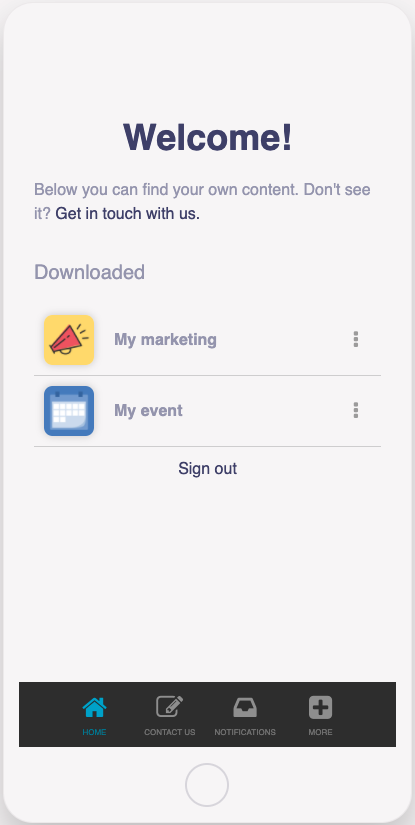
This screen provides a list of apps that can be accessed by the user.
This list can be configured to show a personalized list to each logged in user or can be set to display all apps for all users.
This screen uses the app list component, learn more here. -
Notifications
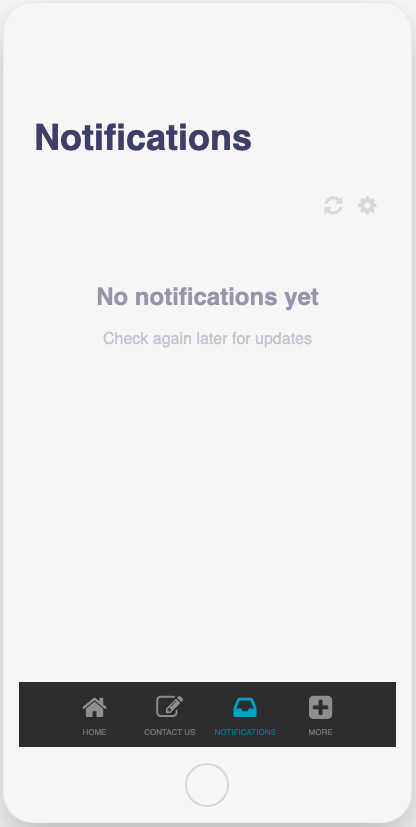
This screen displays notifications that have been sent to the user.
This screen uses the notifications component, learn more here. -
More
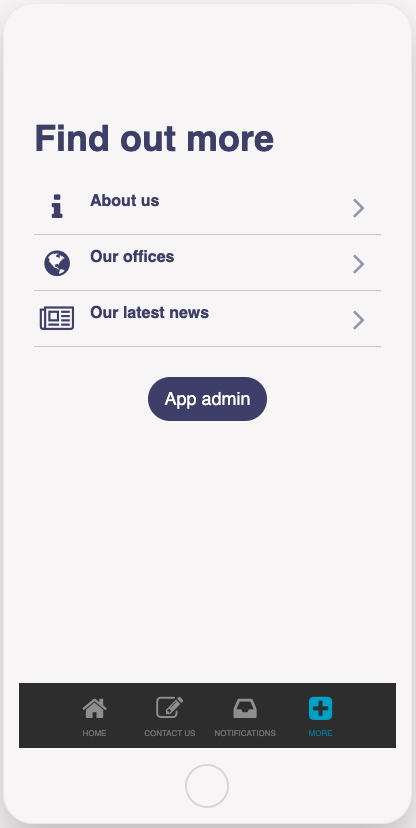
This screen is a menu screen for the user to access any additional information you want to include in the portal app.
There is also a link to the admin menu from this screen that will only be shown to users with admin status.
This screen uses the list component, learn more here. -
About Us
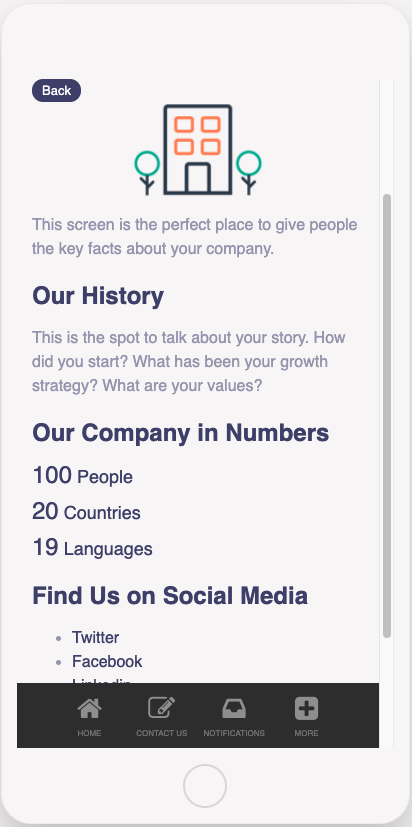
This screen provides key information about your company.
This screen can be configured to include your own copy and imagery
This screen uses the text component, learn more here. -
Our Expertise
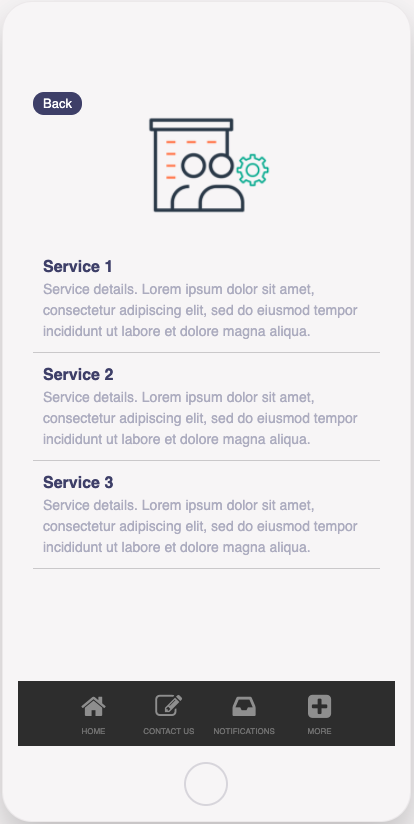
This screen can be used to display information relating to the services available within the firm and its offices.
This screen can be configured to include any information relating to the firm.
This screen uses the list component, learn more here. -
Latest News
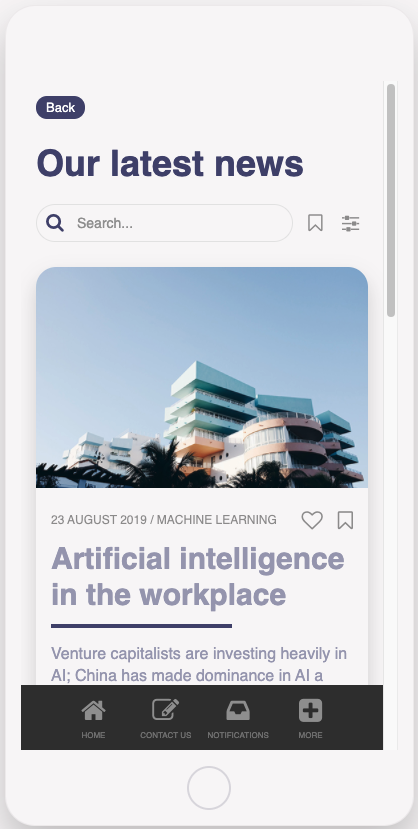
This screen can be configured to show news. You can use this to show firm news, sync to a database or use an RSS feed.
The default option uses the list from data source component. See more here.
For RSS feed see here. -
Offices
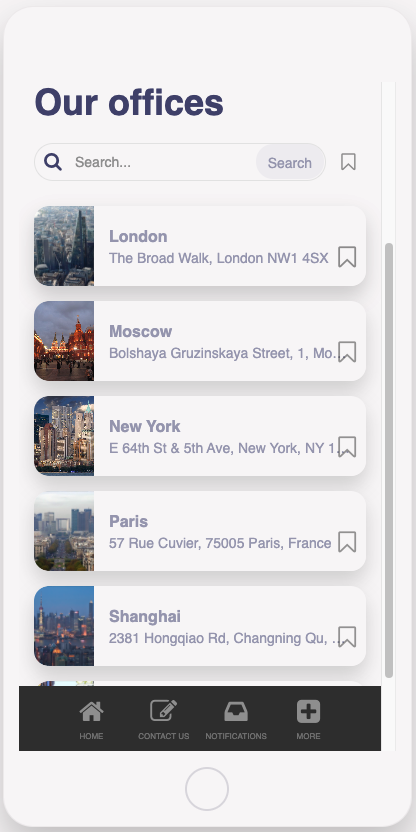
This screen provides information on your offices.
This screen can be configured to include all relevant office information and admins will have the ability to amend and update this information.
This screen uses the list from data source component, learn more here. -
Contact Us
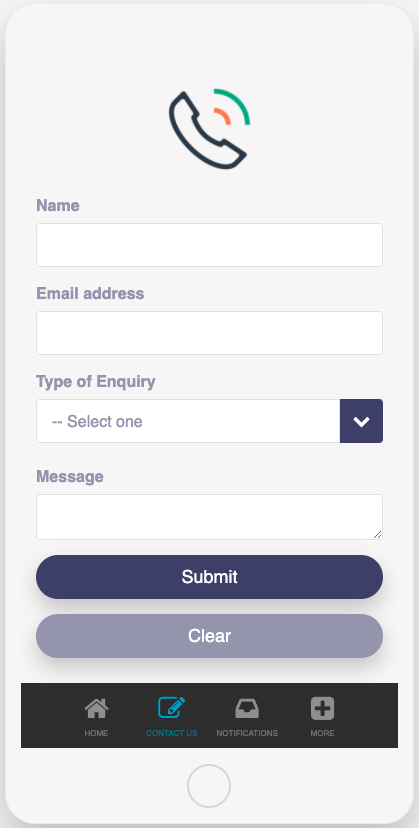
This screen allows the user to contact with feedback or questions.
The screen can be configured to meet your requirements concerning the recording and submission of feedback.
This screen uses the form component, learn more here.
-
Admin Screens
-
-
Admin – Menu
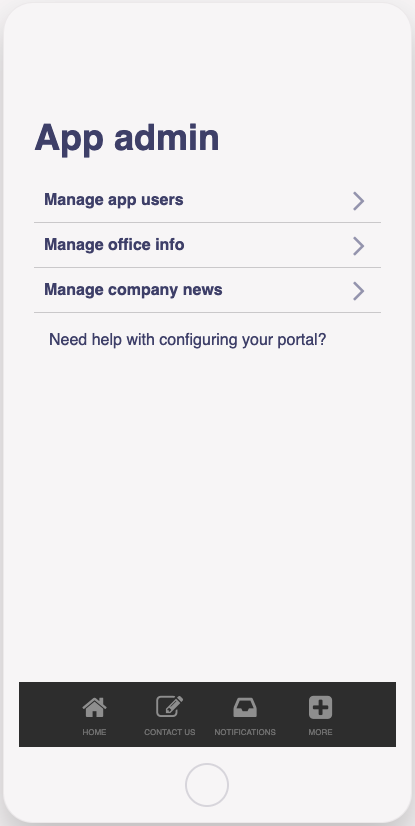
This screen allows the admin users to navigate the admin options.
This can be configured to display links to any admin screens you want to include.
This screen uses the list component, learn more here. -
Admin – User list
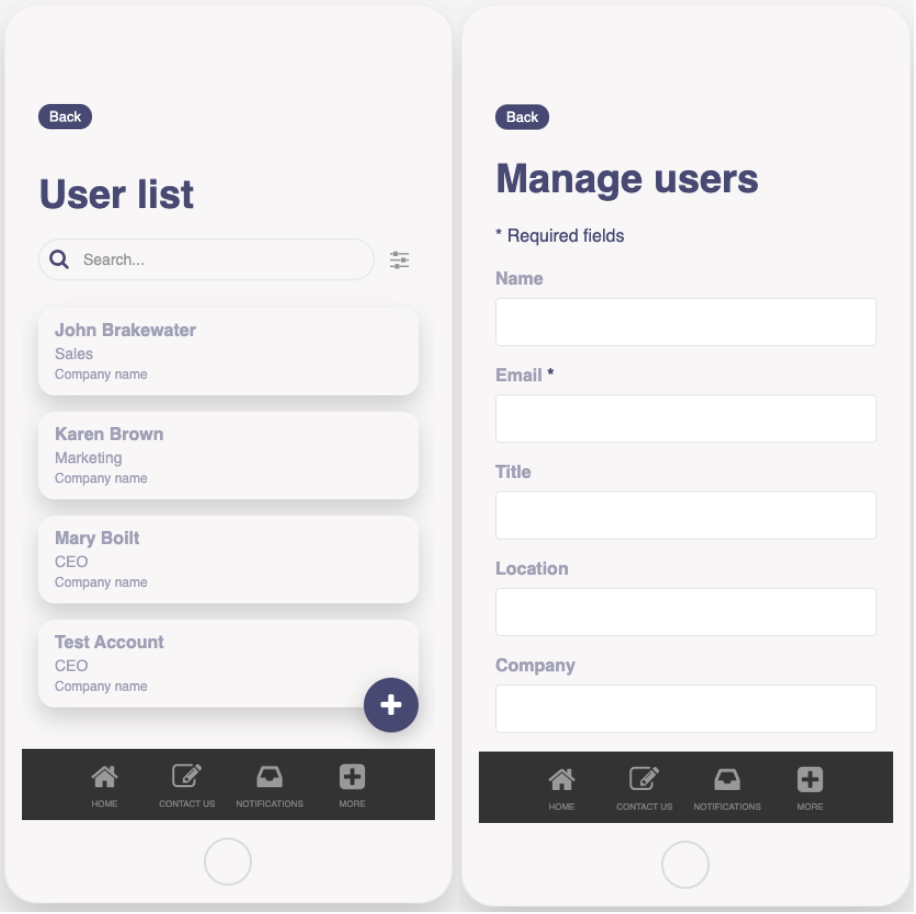
This screen shows a list of users on the app.
It will allow the admin to select and edit the detail of the user and also set admin permissions and also add new users.
This screen can be configured to include as much data regarding users and necessary.
This screen uses both the list from data source component and the form component. Click to learn more -
Admin – Latest News
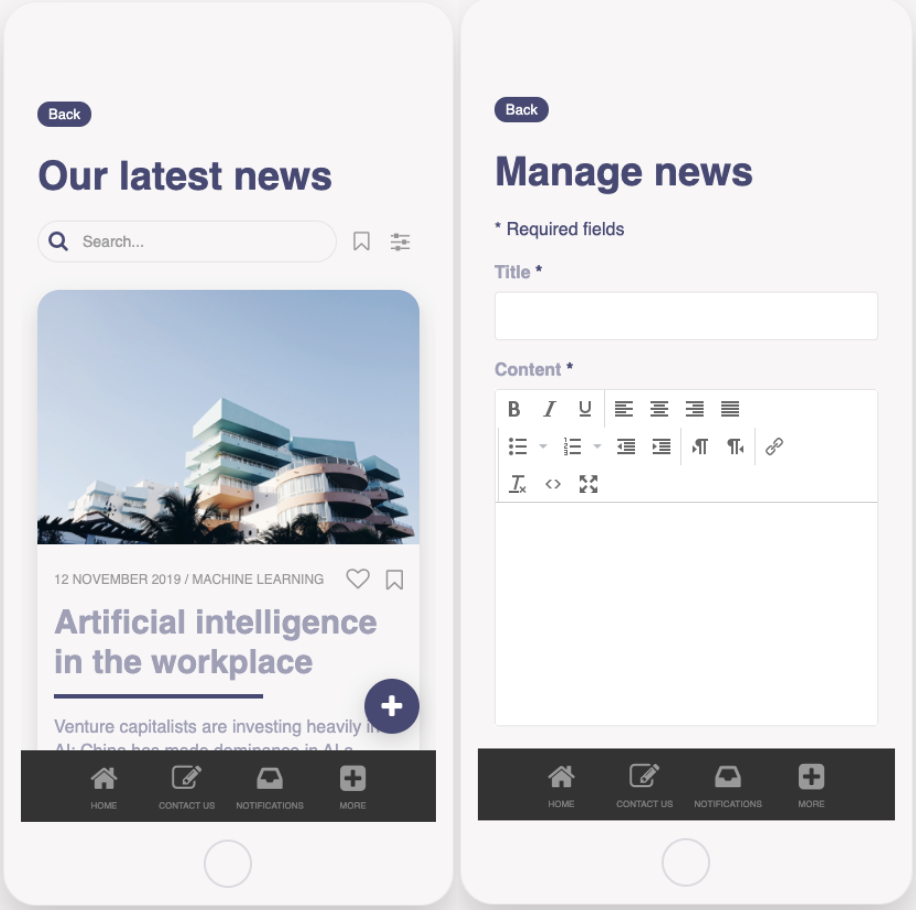
This screen can be used by admins to add a new news article, make edits to an existing article or delete an article.
Click on an existing article to edit and delete, or select the plus button to add a new article.
This screen uses both the list from data source and form components. -
Admin – Offices

This screen can be used by admins to add a new office, make edits to an existing office or delete an office.
Click on an existing office to edit and delete, or select the plus button to add a new office.
This screen uses both the list from data source and form components.
-
Admin – How to configure your portal
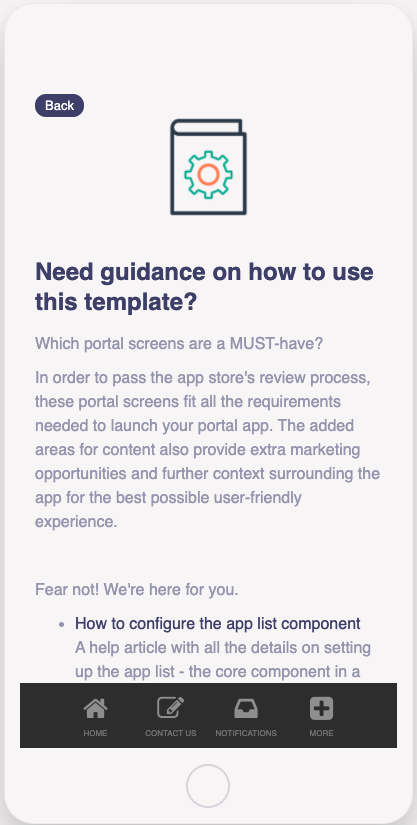
This screen provides in-app instructions for how to configure the portal.
You can also find further help and guidance in our help center, here.
If you have any further questions about the portal template and how it works, please contact Fliplet via live chat within Fliplet Studio or email support@fliplet.com
-
Related Articles