Fliplet’s Learning solution enables interactive, structured learning on mobile and web. Users can securely engage with the learning materials at any time, on any device, online or offline.
This article covers the following
Benefits
-
Flexibility and convenience – enable learners to access educational content anytime, anywhere, as long as they have an internet connection.
-
Self-paced learning – the learning solution allows users to progress through the content at a speed that suits their individual learning styles.
-
Diverse learning materials – offer a variety of learning materials, such as videos, quizzes, text, and images.
-
Tracking progress and performance – track learners’ progress and performance. Educators and learners can monitor completion rates, quiz scores, and other metrics to ensure learning goals are being met.
-
Easy updates – content can be updated and improved easily, ensuring learners can access the most current information and resources.
Use cases
- Staff training – software, process, competency, or skill
- Onboarding – team, graduates, associates
- Career path – professional development, leadership training
- Client training – free or paid
- Training updates – latest changes to software or process
- Support training course – before, during, and after content, assessments
- Reference materials – revisiting materials, revising
Features
- AI features
- Home screen
- Courses and lessons
- Reports
- Glossary
- Decision tree
- Document library
- Discussion forum
- Survey
AI Features
Home screen
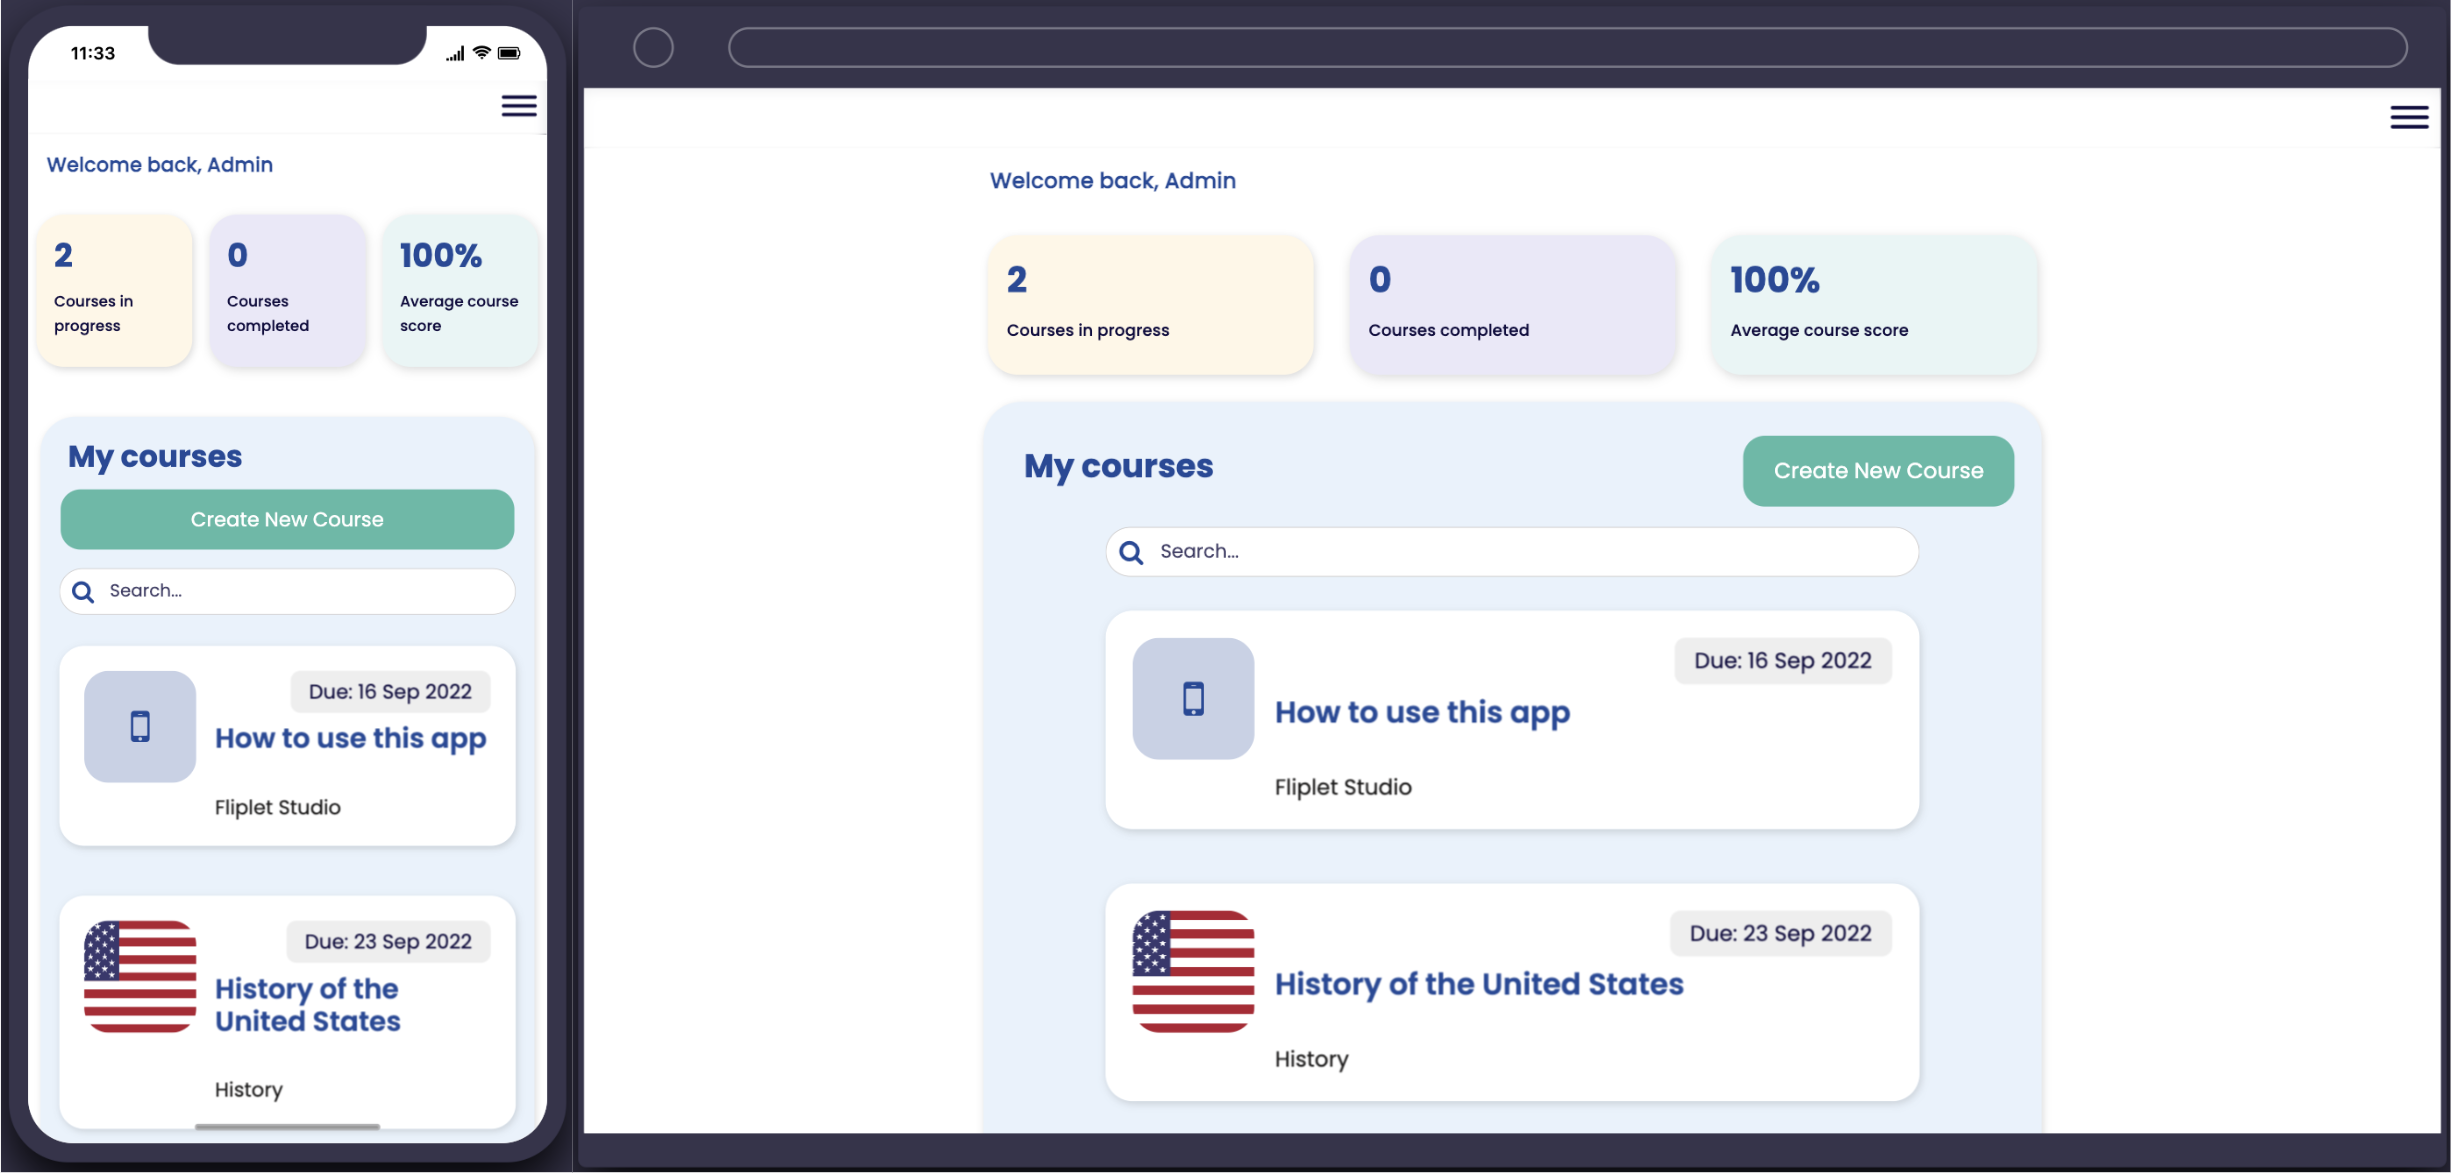
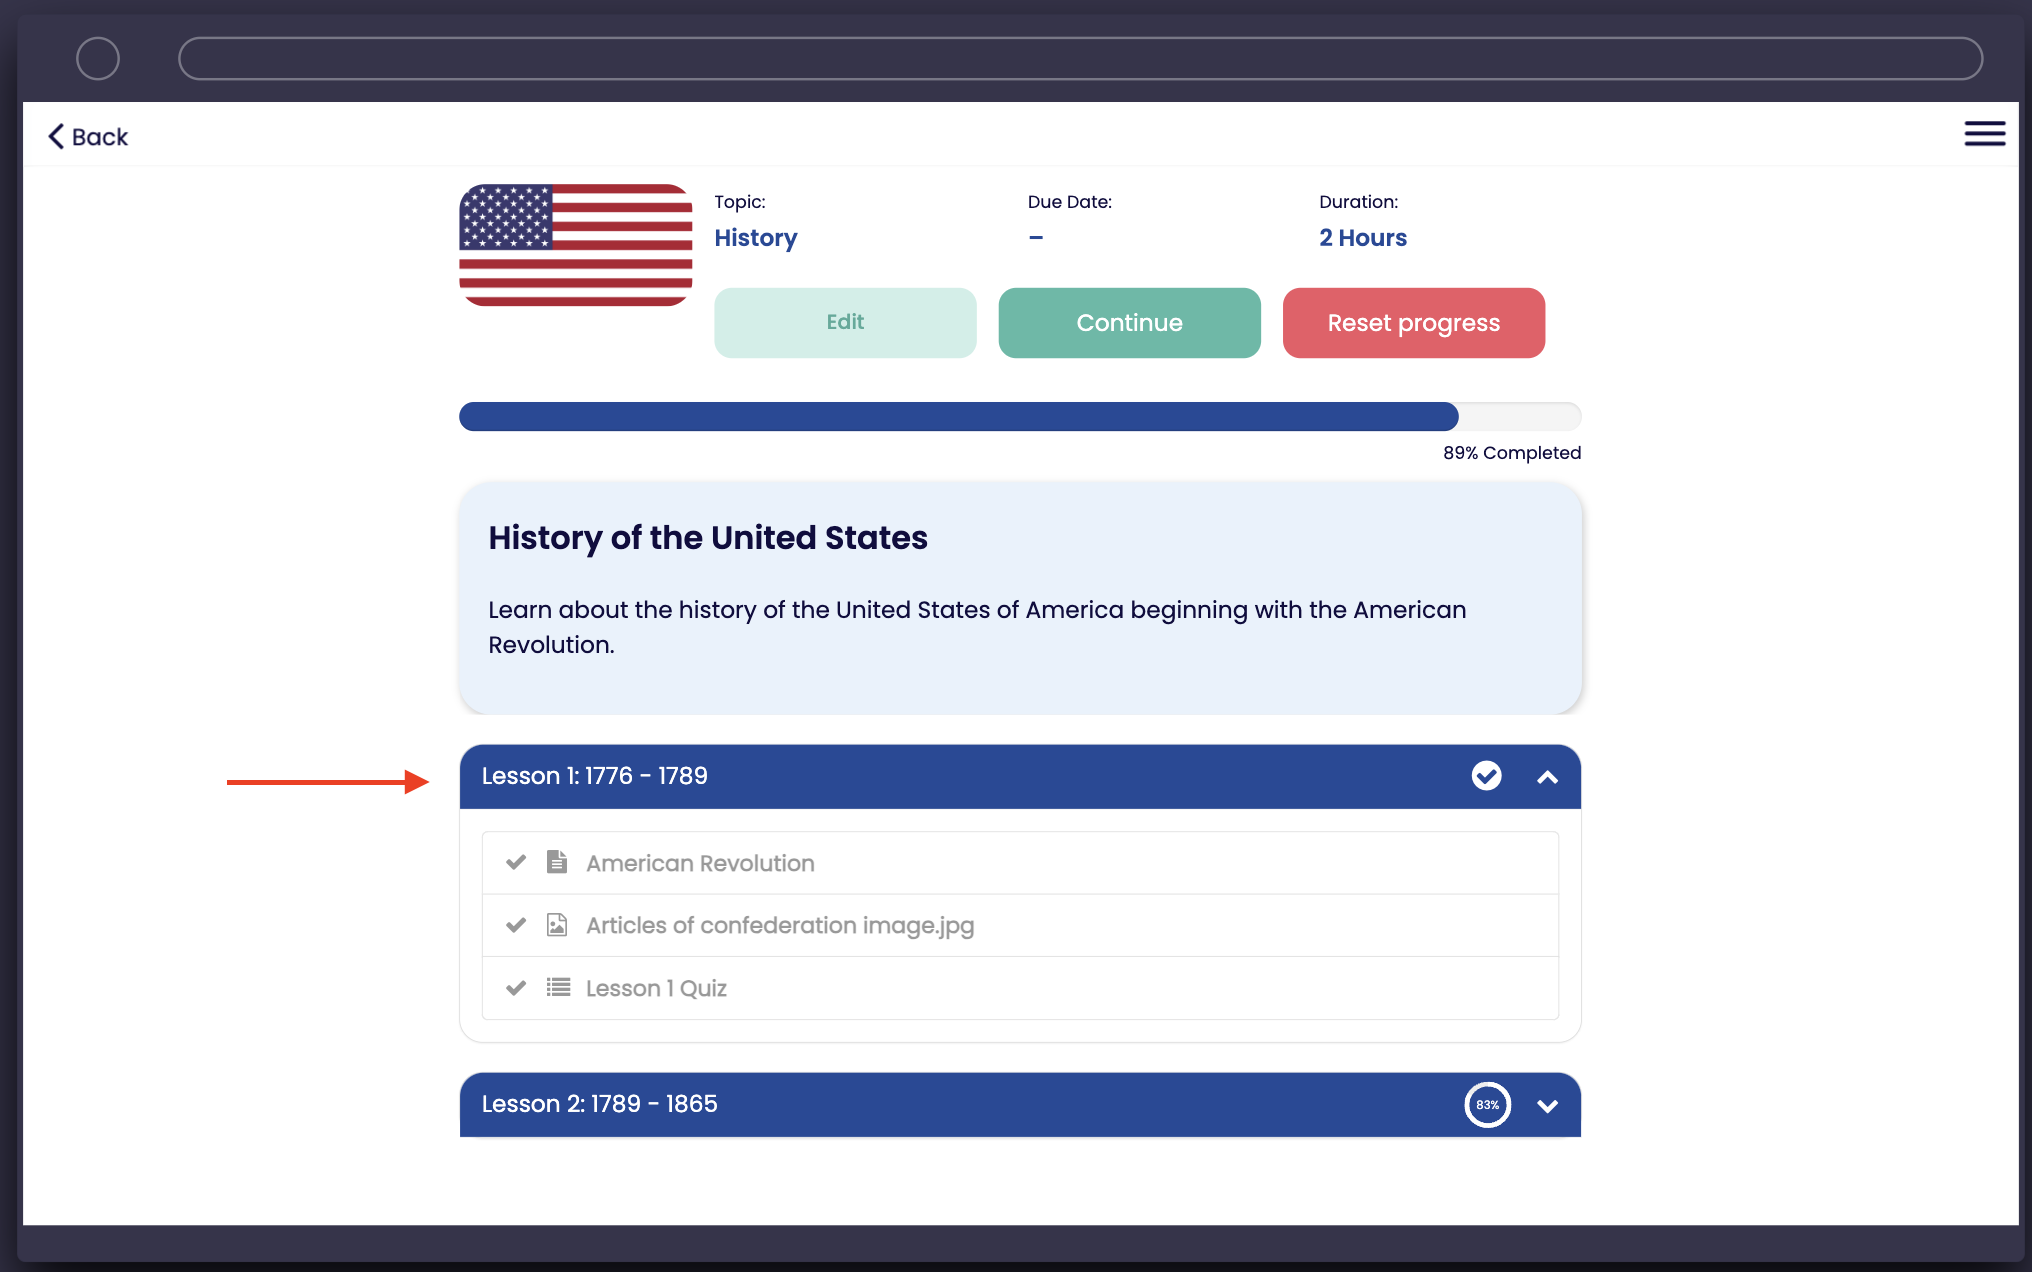
Once a user logs into the app they will be taken to the courses screen.
Users will see their progress, the courses they’ve been assigned, and any public courses.
Clicking on a course will show the course structure, including a description and a list of all lessons included, users can also begin the course here or check current progress.
Admin users will also be able to see a “create new course” button which will open the “admin – manage courses” screen.
Additional features in the app can be found in the hamburger menu.
Courses and lessons
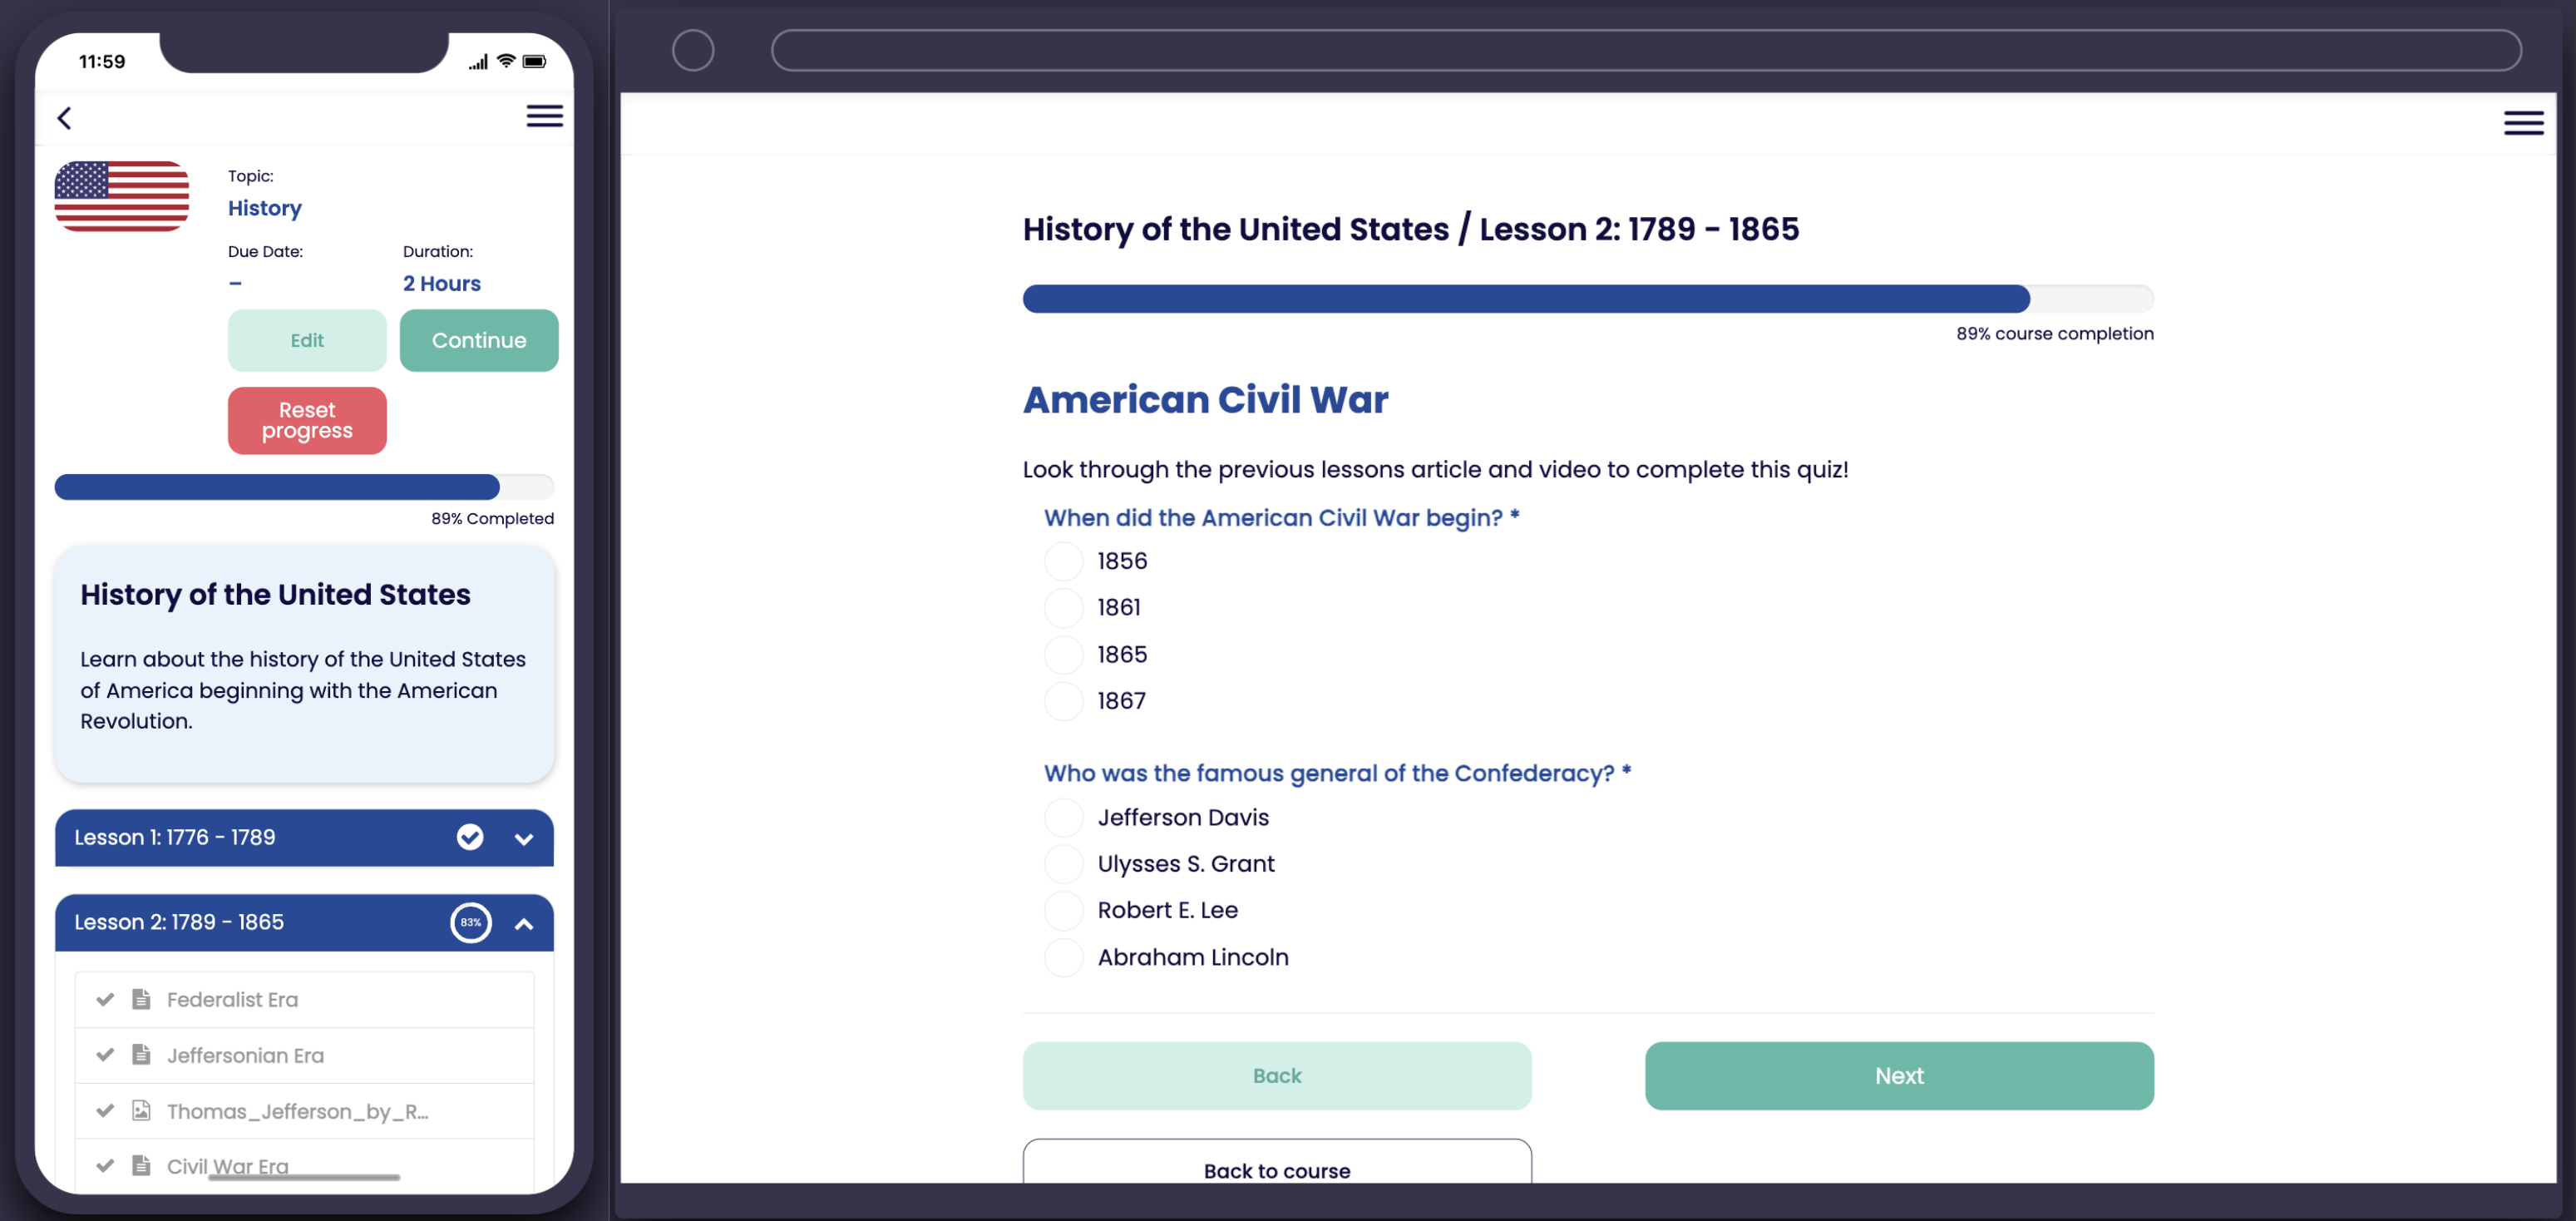
Courses can be created by admin users and, dependent on course status, taken by all or specific users.
A course can be made up of a variety of materials including text, images, documents, videos, and quizzes.
Users can make their way through a course and progress will be saved if they exit a course
Use quizzes to enable a pass mark for completion and assess a user’s knowledge.
Reports
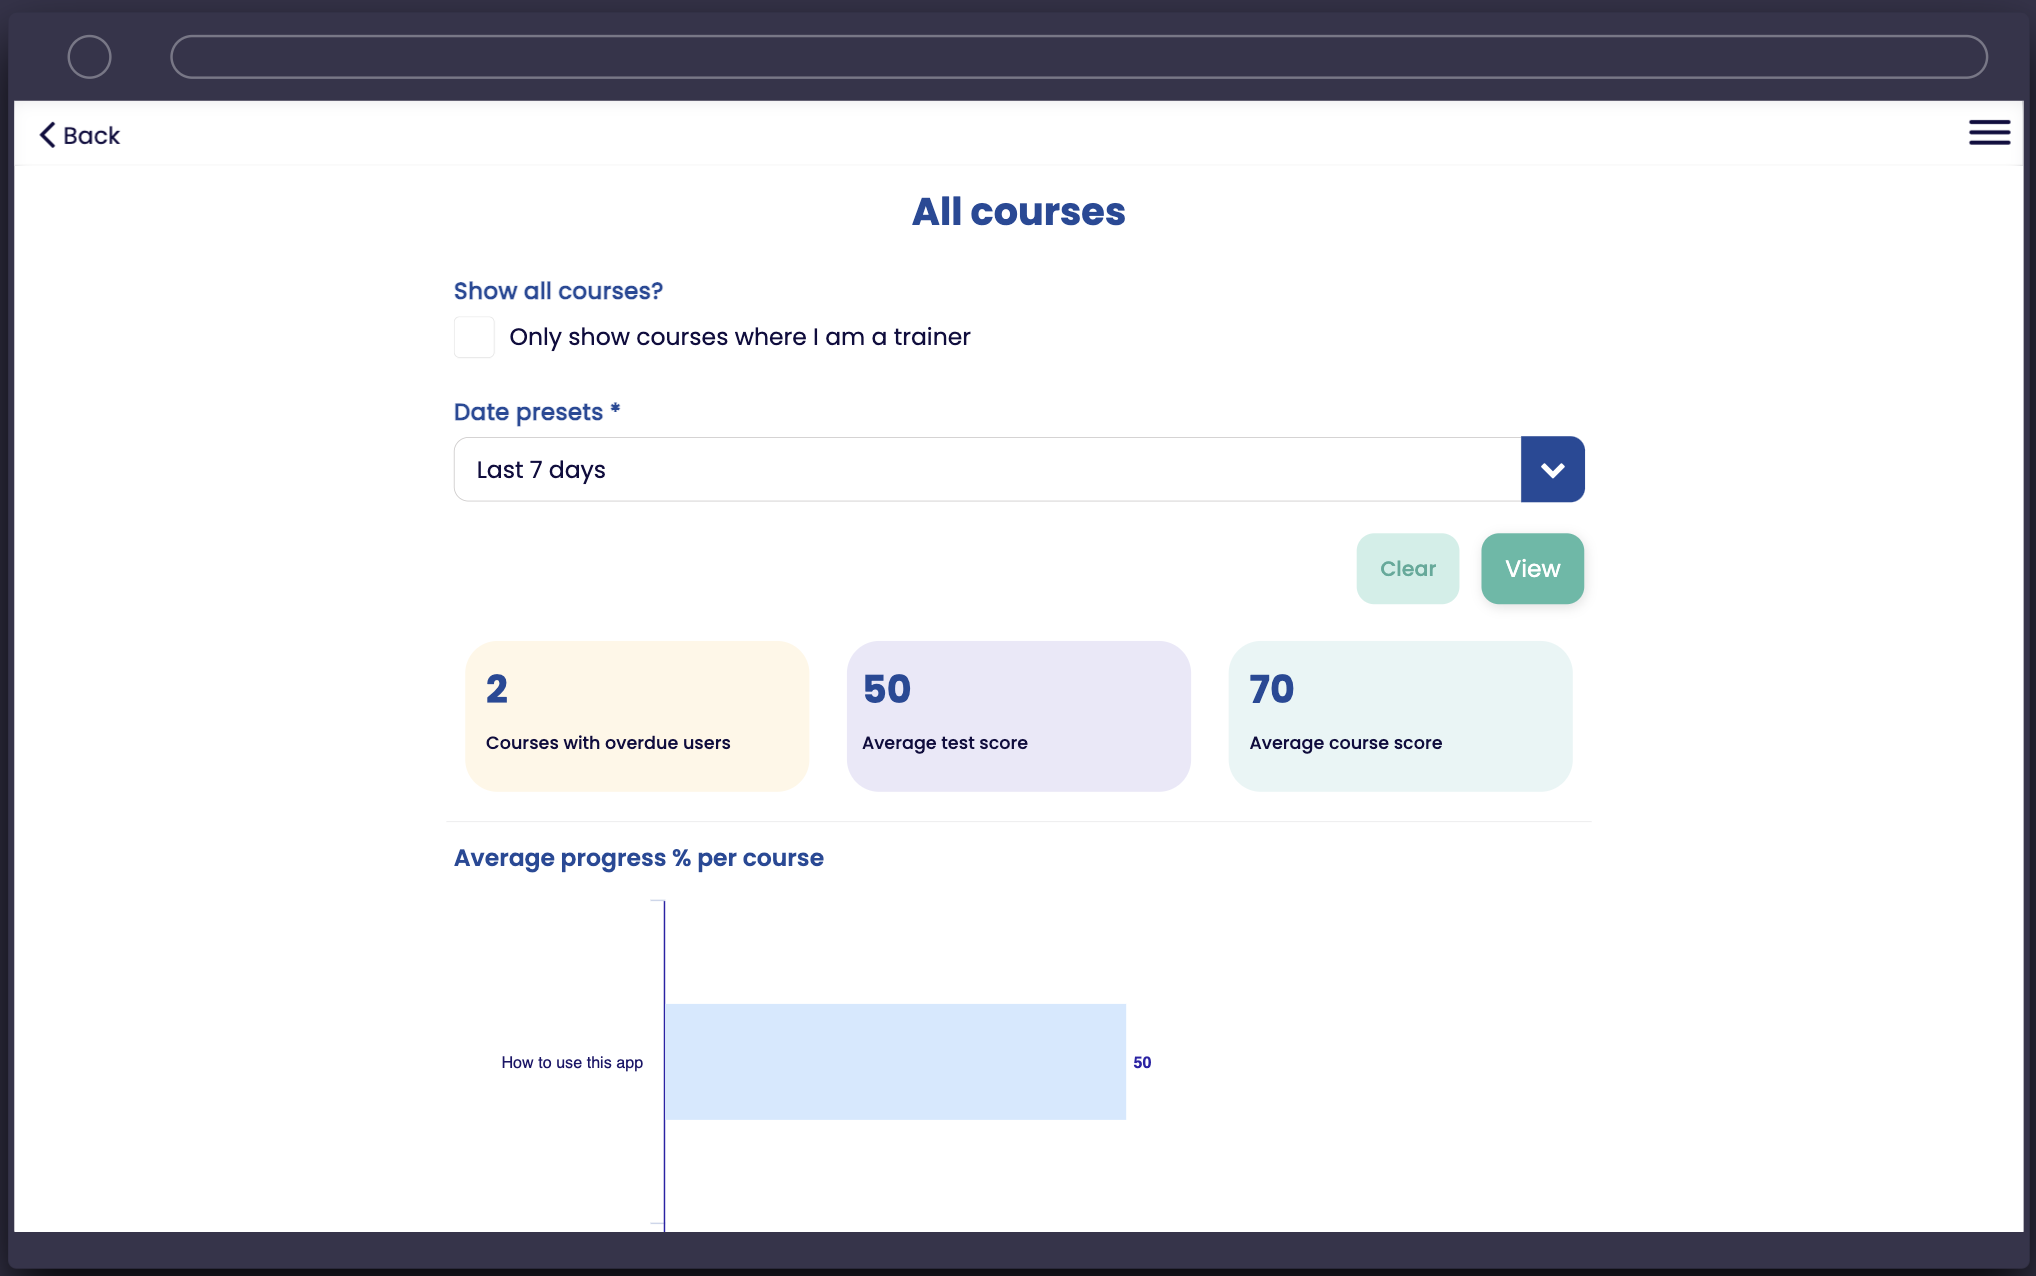
All users can access reports based on course progress and scores.
Learners and regular users will be able to see their own reports made up of an overview of progress, test scores, completed courses, assigned courses, courses overdue and courses in progress.
Admin users will be able to see their own and individual course reports, or by using the admin menu, access a full overview of the following reports:
-
- All Courses Report – see overall progress for all courses
- Single Course Report – see details of the progress on one specific course
- Quiz Report – see results for specific quizzes and questions
- All Users Report – see progress for all users
- User Report – analyze results for a specific user
Glossary
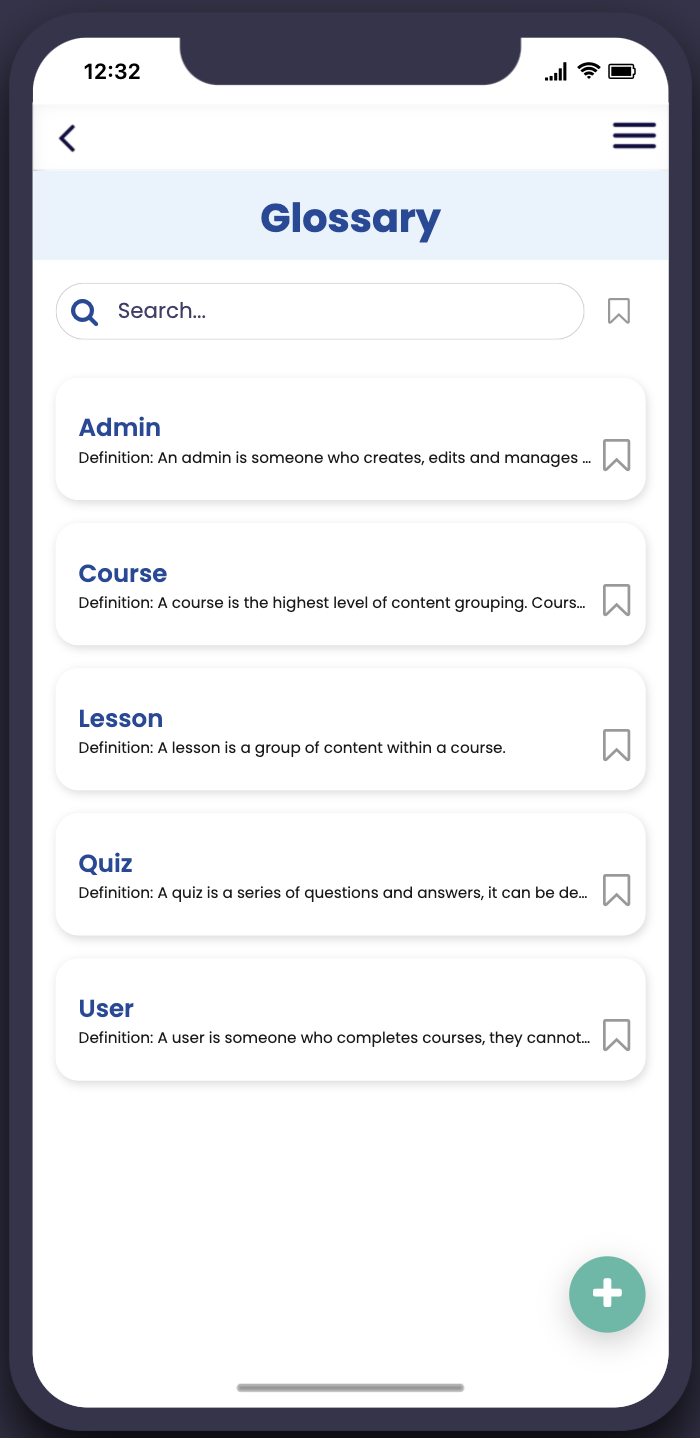
This screen can be accessed via the hamburger menu.
The glossary screen includes a list of any terms or information that need further explanation.
Admin users can add terms via this screen by selecting the “+” button.
The glossary uses the list from data source component. Learn more here.
Decision tree
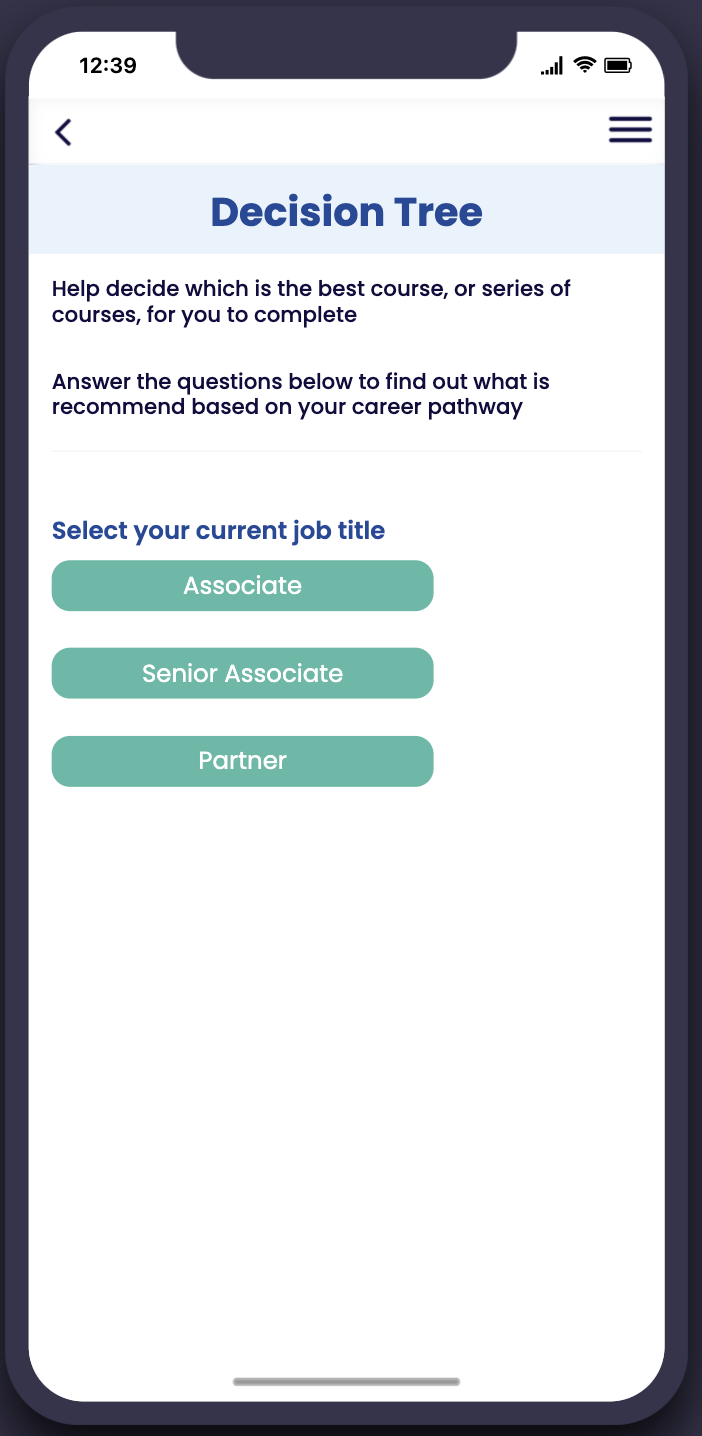
The decision tree screen enables you to create a custom decision-making assistant and help users decide on a particular topic.
Use this screen to help users decide which is the best course, or series of courses, to complete.
This screen can be accessed via the hamburger menu.
This feature uses the decision tree component, learn more here.
Document library
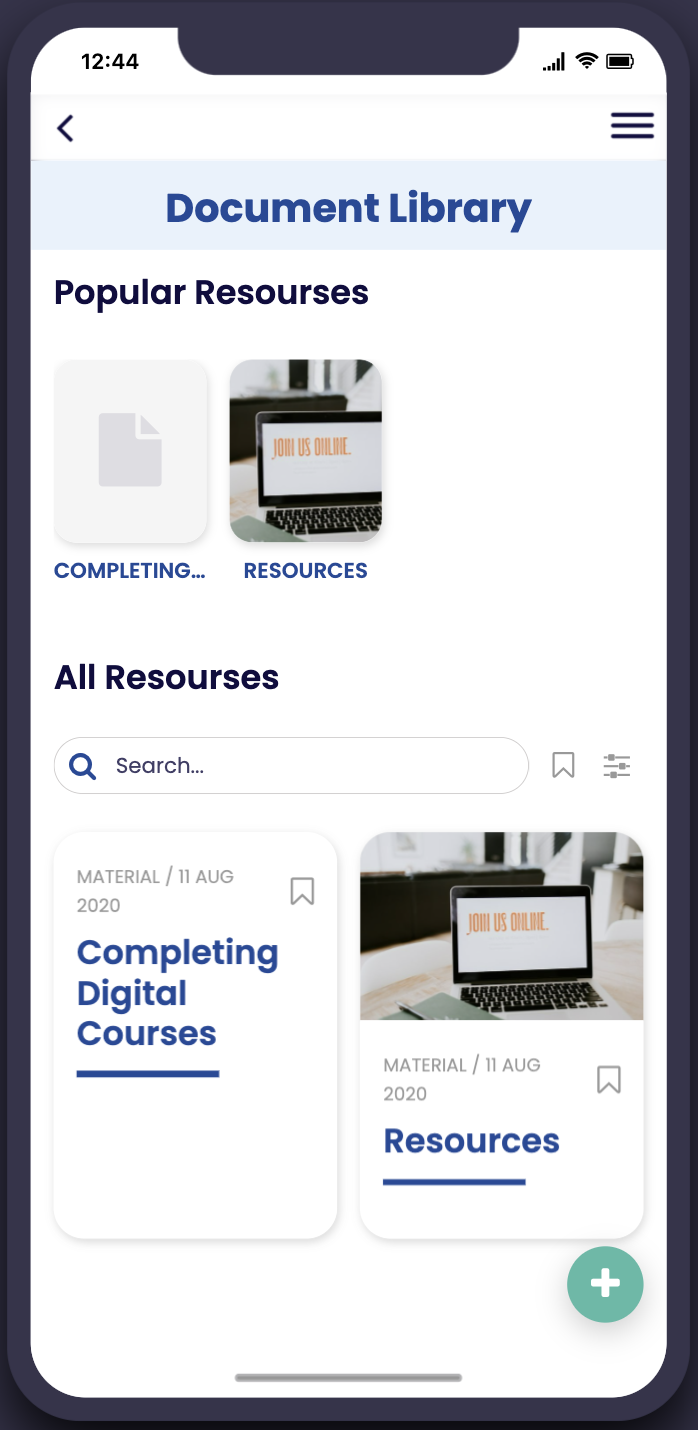
The document library enables the user to access any supporting or required documents that are not for a specific course or lesson.
Documents that have a “Yes” in the “Popular” column in the data source will be displayed under “Popular resources”.
Additional documents can be added by admin users using the “+” button.
The list can be configured to display the required document detail, you can choose to click to open the document or open a summary screen that provides a link to the document.
This screen can be accessed via the hamburger menu.
This screen uses the list from data source (LFD) component, learn more here.
Discussion forum
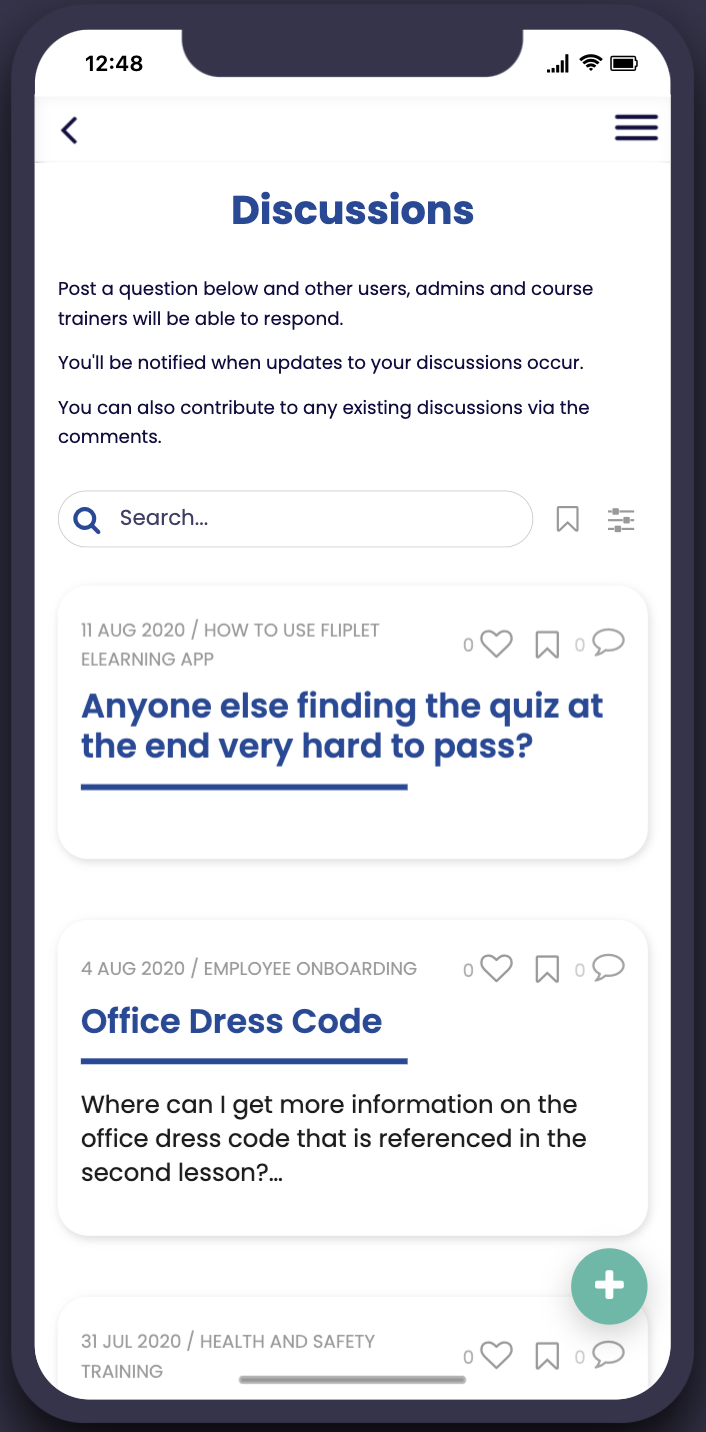
The discussion forum screen enables users to share thoughts, and engage in a discussion.
It can be used to collect questions from users and provide answers and the app will notify the author of each comment.
Content can be moderated by admin users by editing any post.
Any user can add a new thread, and other users can comment, like, and bookmark them.
To add a new discussion thread users can select the “+” button.
This screen can be accessed via the hamburger menu.
This screen uses the list from data source component and is updated using a form, learn more here.
Survey
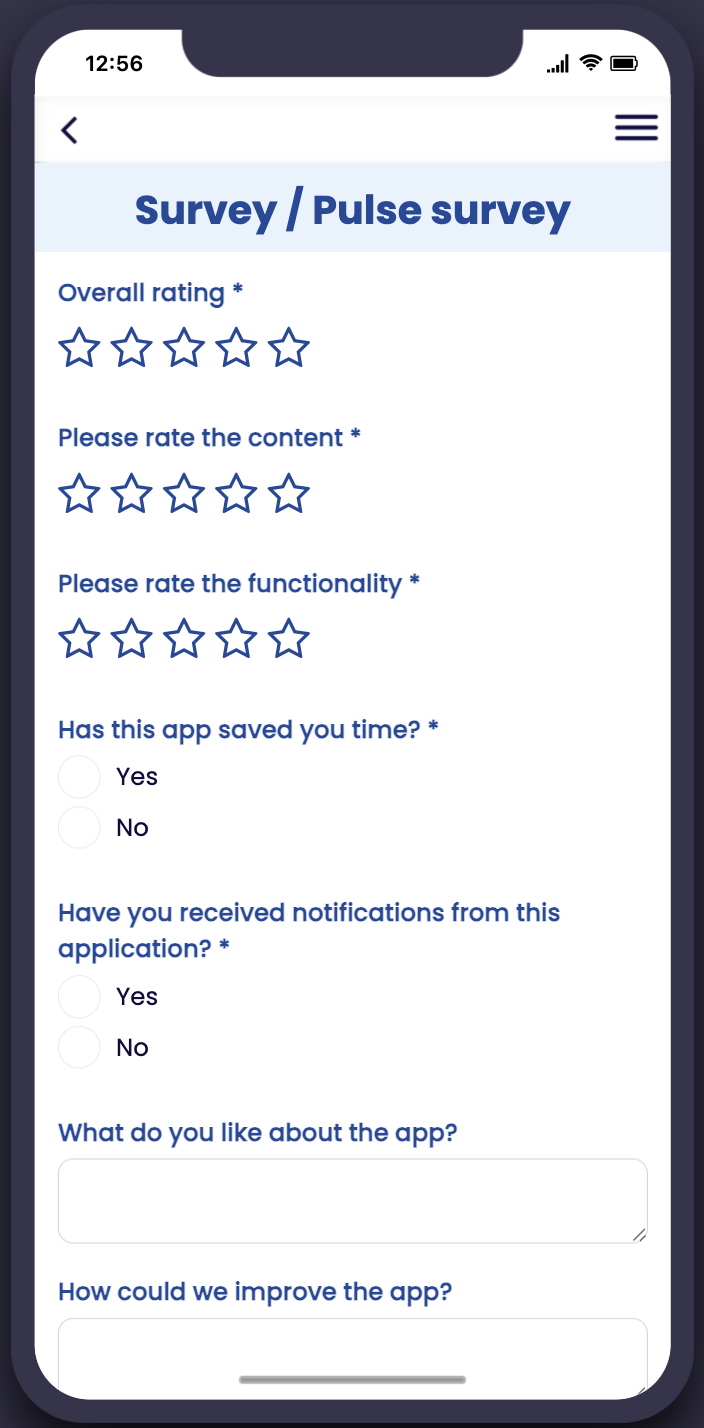
The survey screen can be used to ask users of the app for their feedback or input.
The form questions can be changed to be relevant to your use case and the input you want to gather.
This screen can be accessed via the hamburger menu.
This screen uses the form component, learn more here.
User roles
User role overview
|
User role |
Definition |
User specific features |
|
Admin |
Manage the app, content, and users |
|
|
Regular user |
Access to courses and app features |
|
Solution set up
- Adding the solution to your account
- Manage app users
- Create a course
- Send communications
- Create and manage certificates
Adding the solution to your account
When adding the learning app to your account you will be taken to the setup wizard. This will enable you to preview the app, begin the setup of your admin accounts, and choose the branding for your app. This is not final and can be amended or updated at any time.
You can skip the setup at any time by clicking “skip set up” where you will be taken to edit mode and manage your app without the setup steps.
Manage app users
This option is used to edit individual users within the app.
- Edit users – from the admin menu, choose “manage users” and then select the user you want to edit. Click on the “Edit” button. Edit required for fields. Save
- Delete users – to permanently delete users from the app, from the admin menu, choose “manage users” and then select the user you want to delete. Click on the “Delete” button. Once deleted they will no longer be able to access the app
Create a course
Courses are made up of lessons, and each lesson can consist of varying content such as images, text, videos etc.
To create a course:
Either, follow the app set up wizard and use the generate course with AI or click to manually create course and follow the instructions below:
App set up wizard
Manually create course
- Log in to the app as an admin user
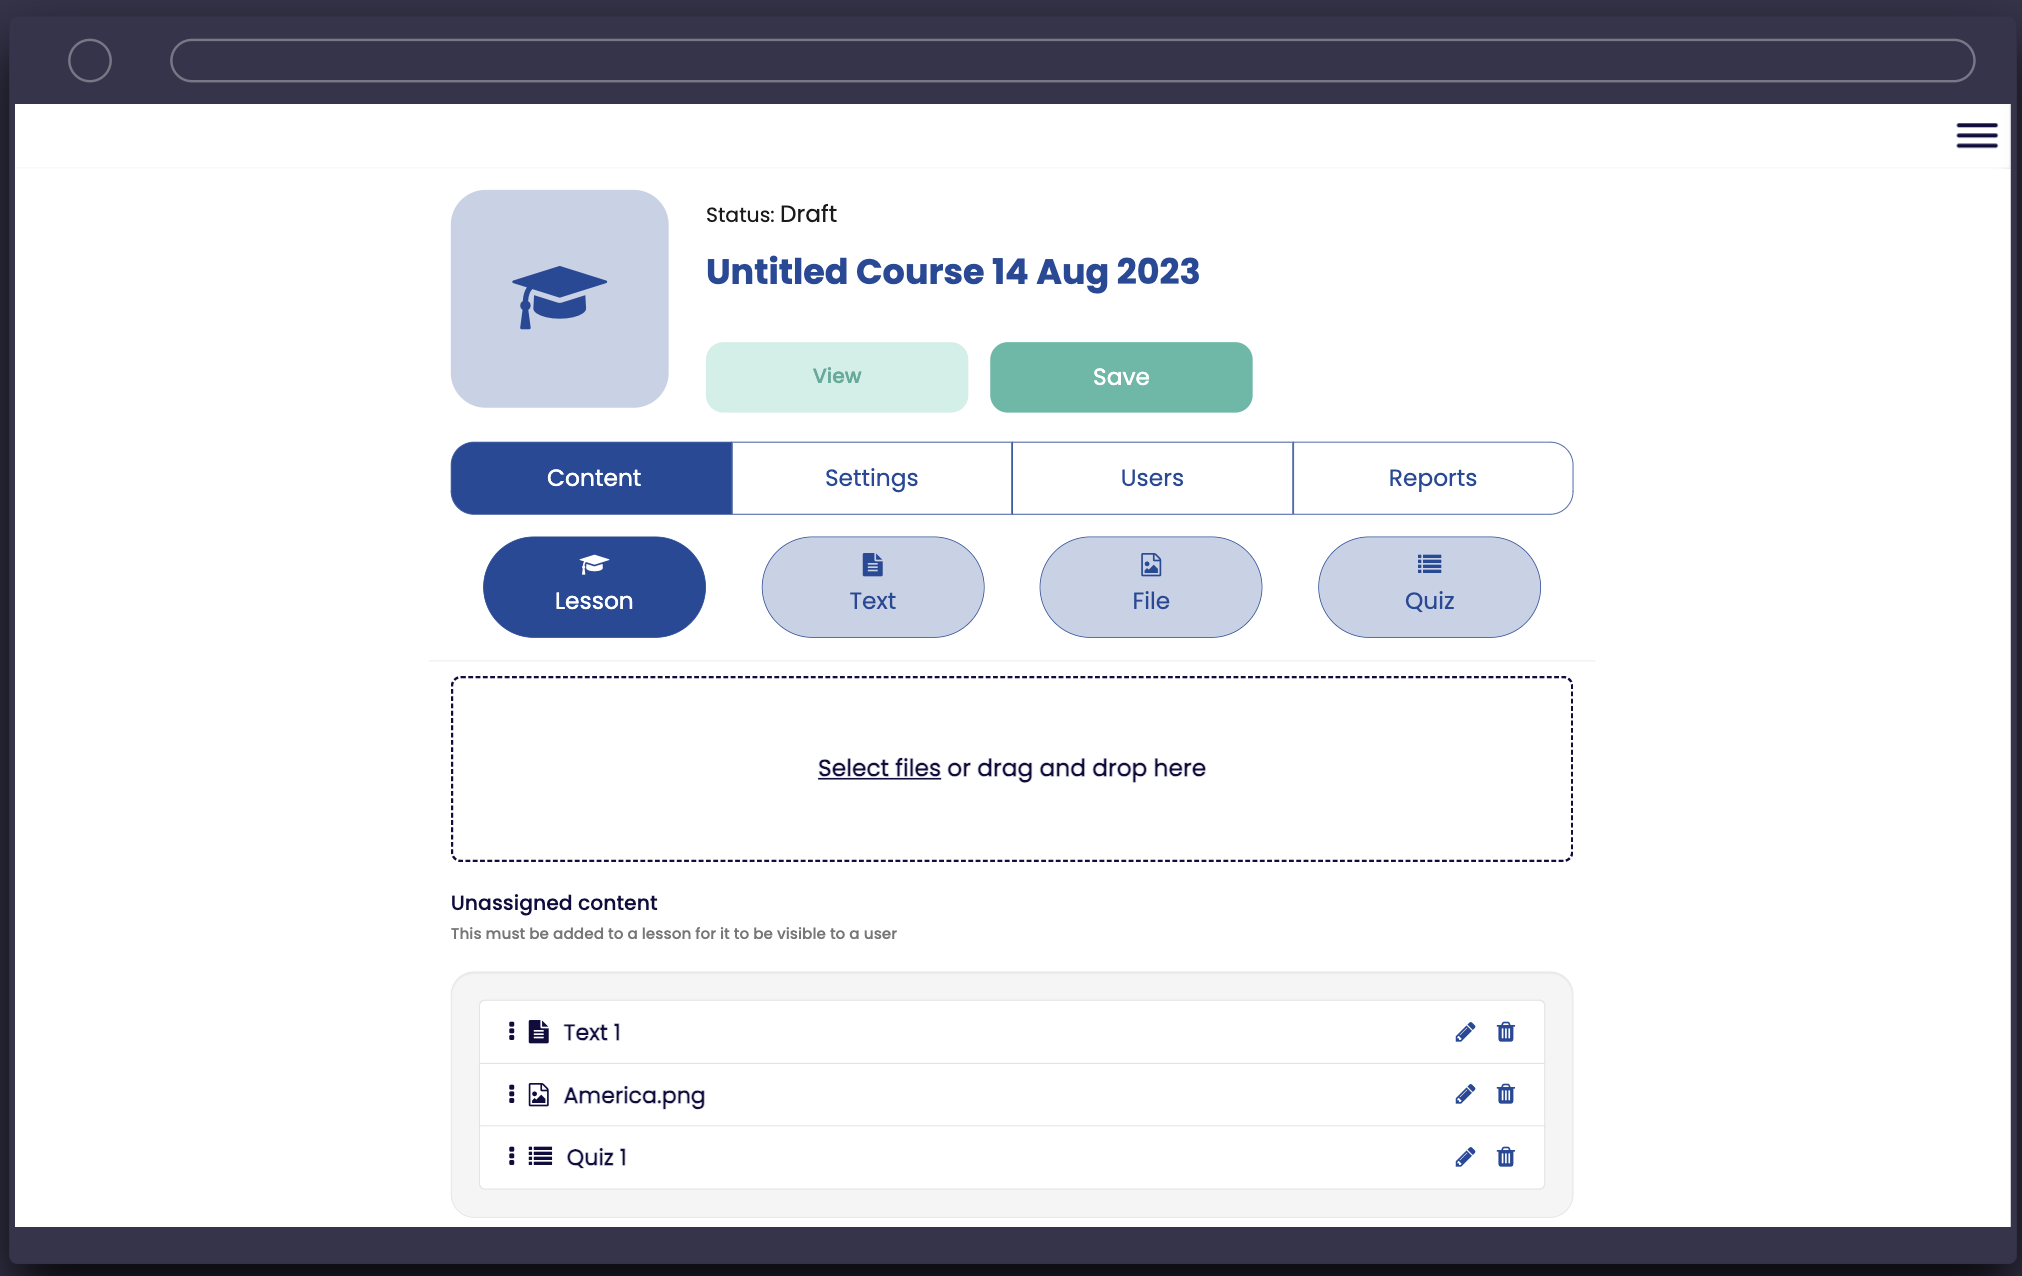
- On the home screen choose “create new course” – this screen is best used on web to make use of the drag and drop features
- Here you will see four tabs; content, settings, users, reports
- Content
Start by creating your lessons. These are what will be shown in the course overview as titles.
- Once you have your lesson in place, select the text, file, or quiz button to create content
- Text will enable you to create written content using a rich text box, and images can be added in
- File will enable you to add any images
- Quiz will enable you to create a quiz to test the users knowledge
- Once you have created some content, you will see it in the “unassigned content” area
- Drag and drop the content to the correct lesson, use drag and drop to arrange the content in the order you want users to see it when taking the course
- Settings
- Click the settings tab to access the course settings form
- Give your course a name
- Followed by a status. Choose between;
- Draft – Only visible for admins and will not show up for users in the course list
- Published – public – this will enable all users with access to the app to view and take this course
- Published – private – this will prevent users from being able to see and access the course unless they have been assigned to it. To learn how to assign a course see here
- Description – give your course a description to give the user more information and make a decision on whether this is the right course to take. This field is optional
- Choose your course image type; image or icon, and then upload the course image or choose an icon
- Add an expected time to complete, this will help give the user guidance on the expected time to complete the course. This field is optional
- Add an optional due date
- Add a category to enable a filter so that users can find suitable courses. This field is optional
- Choose whether you would like to generate a certificate for users upon successfully completing the course. To learn more about certificates, see here
- Once you have applied your settings, select save
- Users
- Click the users tab to enable adding a course manager and assign course users
- Under course manager, select any app users that you want to appear on the course overview screen as a teacher/manager
- If your course is private, here is where you should select the students to enroll in this course. Students that have completed the course cannot be removed
- Click save
- Reports
- Click here to view reports for this course
- Content
Send communications
- Admins can use the communications screens to keep users informed by sending suitable email, push, and SMS notifications
- This form has the option to submit, save, send a test, or send to users
- If you select to save this draft can be viewed and edited from the manage communication screen
- If you select to send a test, this will be sent to you to view
- This screen allows you to view previously sent communications or saved communications
- Select the communication to view, and click duplicate to load the edit communication form with the communication detail prefilled
- These screens use the list from data source and the form components. Click to learn more
Create and manage certificates
- To edit and manage certificates, when edits a course choose settings
- Under certificate, ensure yes is selected and then choose “click here” next to “Want to change your certificate template?”
- Here you can edit your certificate layout, font style and colour and add a logo
- Click save