Precursor
Features
A login screen offers the following features:
- Allows users to log in to the app
- Users can reset their own passwords
- Users can configure settings that affect the app
Get Started
To create a login screen you’ll need to:
- Create a new screen
- Add the login component and link it to the registration data source
- Test the login in preview mode, ensure security is enabled
- If your app has a registration or sign up screen, add a link from the login screen to the registration screen for new users
Step 1 – Create a new screen
- Click on the “Add Screens” button in the bottom left corner.
-
Select the “Intro/Login” category at the top and choose the “ Log in” screen.
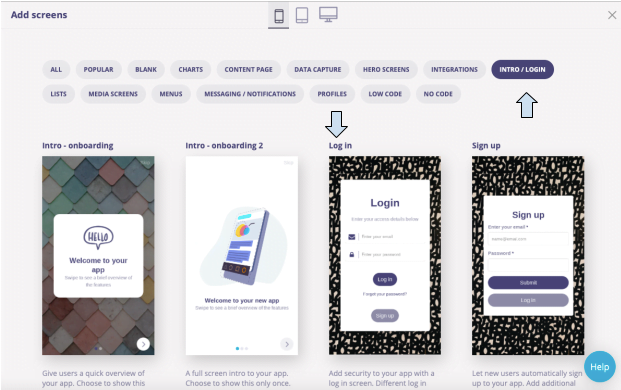
- Click the blue button in the top right-hand corner that says “Add 1 new screen”.
- Title the screen “Login” or something similar.
Step 2 – Add the login component and link it to the registration data source
-
Click on the login component to open the configuration options.
-
Under “Settings”, click the select a data source dropdown and either choose the data source you created in the registration tutorial or select “Create a new data source” and title it “Users”.
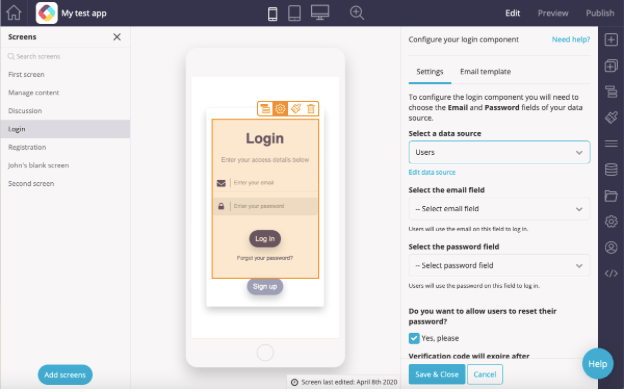
- Click the blue “Edit data source” text.
- The data source needs to have at least two fields for the login to work. Title one field “Email” and the other “Password”.
- Then select “Save changes.”
- In the “Select the email field” dropdown choose “Email” and in the “Select the password field” choose “Password”. We recommend that you allow users to reset their passwords. Then choose any screen to redirect to after logging in from the dropdown, typically your ‘Home’ screen.
Learn more about the login component and the different settings here.
- Click “Save and Close”.
Step 3 – Test the login in preview mode, ensure security is enabled
-
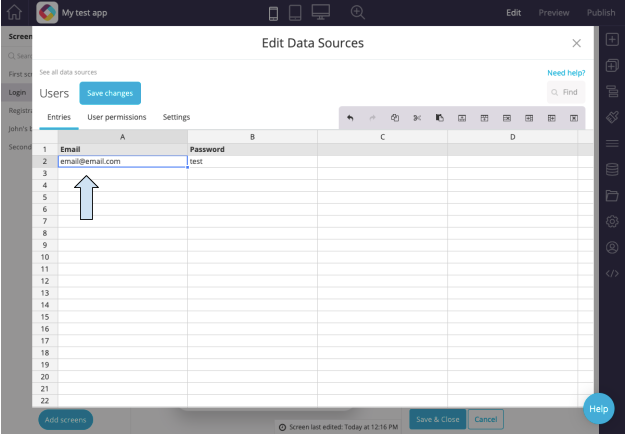
Open your data source again and add a test email and password so you can try logging in.
Note: Passwords will be automatically encrypted when saved if you have set the form to encrypt the password, so please write down the password to ensure you remember what it is.
-
Then click “Save Changes”.
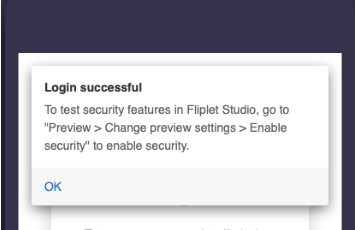
- Go to “Preview” and enter the email and password. Then click “Log in”.
- If successful, you’ll see this confirmation message:
-
To test that the login will redirect you to the correct screen in the app, select the “Enable Security” button at the bottom right of your screen and the Login should redirect to the page you specified earlier.
Step 4 – Add a link from the login screen to the registration screen for new users
This step is optional if your app allows users to register for an account using the app. If your app doesn’t have a registration delete the “Sign up” button on the screen.
- In edit mode, open the Login screen. Click on the button below the “Log in” button that says “Sign up”.
- Link the button to your screen that holds the registration form. For more information about configuring links, please see this article.
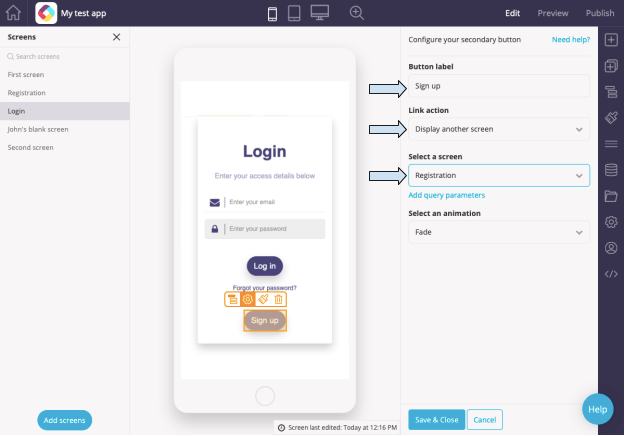
- Click “Save and Close”.
- To test it, go to the “Preview” mode, click on the “Sign up” button, and confirm it redirects to the “Registration” screen.
Related Articles