Features
A registration screen offers the following features:
- Users can create an account
- Users can enter their own details to create a profile
- Users can set a password
- Users can configure settings that affect the app, as described in the steps below
Get Started
To set up a registration screen you will need to:
- Create a registration screen
- Add a registration form and store data in a data source
- Test the registration
Step 1 – Create A Registration Screen
- Click on the blue “Add Screens” button in the bottom left corner.
- Select the “Intro / Login” option from the list of options at the top of the page.
- Click on the far right “Sign up” template.
- Click the blue “Add 1 new screen” button.
- A text box will appear that says “Enter A Screen Name.” Title the screen, “Registration.” Then click “Add Screen”.
Step 2 – Set up a registration form and store data in a data source
You may want to add some fields to your registration screen to collect information from the user. We suggest adding name, company, email, and password. However, you can set up your form to collect any data that fits your purpose.
- Click on the form component on the screen. An edit box will appear on the right.
- Click the email text box or the password text box on the right of your screen to edit the information in the existing form.
- Indicate that the fields are mandatory by marking “Yes” in response to the question “Is this field required?”.
- Choose “Yes” In reference to the question, “Should the password be encrypted”.
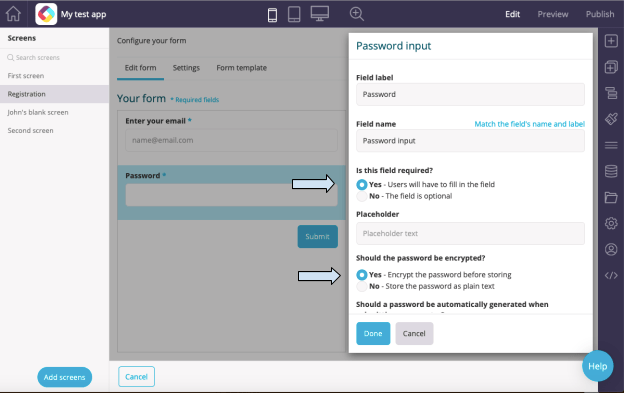
- Click the blue “Save and Close” button at the bottom of the screen.
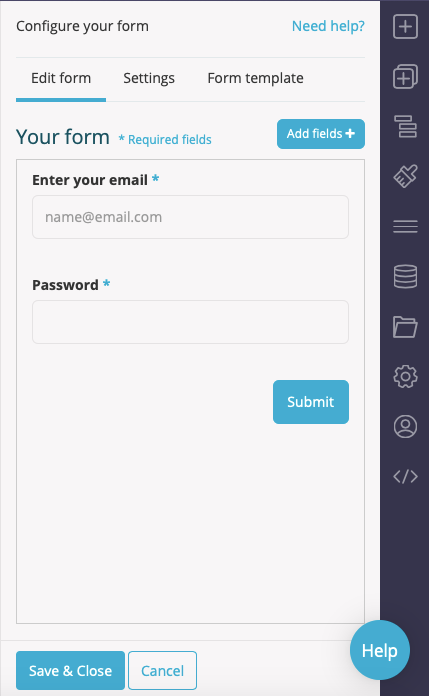
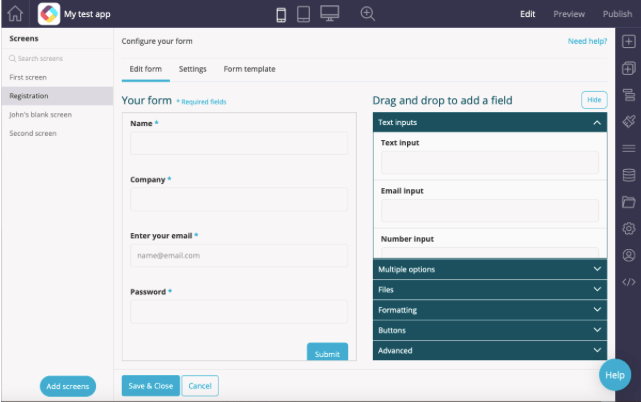
- To add “Name” and “Company” fields, click on the blue “Add fields+” button.
- To create a new field for the “Name” and “Company” fields, choose the “text input” option and change the field label to “Name” or “Company”.
- Remember to make these new fields required.
- The format of your form should look like this:
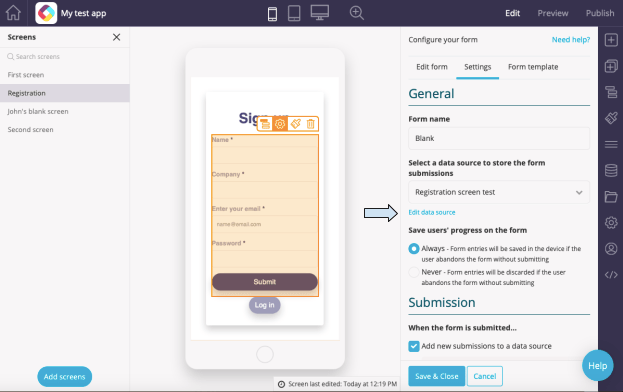
- Go to the form “Settings” tab to the right of the “Edit form” tab.
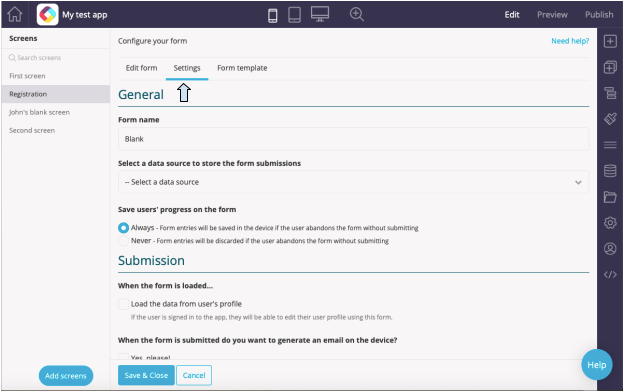
- Under the drop-down “Select a data source to store the form submissions” select the “Create a new data source” option and name it “Registration data”.
- Under “Submission”, “When the form is submitted…”, choose “Add new submissions to a data source”.
- Under “Send an email notification whenever a form is submitted”, choose “Yes, please”. The page should look like this:
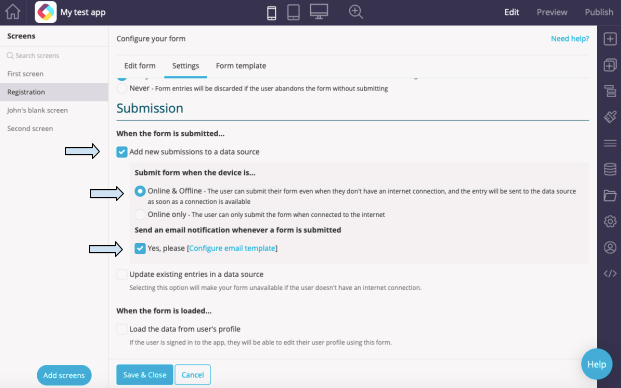
- Click “configure email template” when it appears in blue.
- Update the “To” line to the email you want to send to, and update the “Subject” line to something more relevant, for example, “New registration for my event app”.
- Configure your email template. For more information read this article about configuring emails.
- Click “Save and Close”.
Step 3 – Test the registration
- Go to “Preview” mode and enter values into the form.
- Then click submit. Make sure that you can’t submit the form unless all of the required fields have been filled in.
- After submitting the form, go back into “Edit” mode and click on the form.
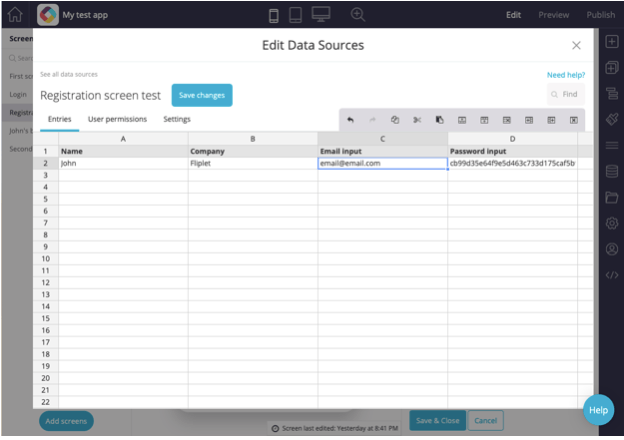
- Then go into “Settings” and click on the blue highlighted text on the right that says “Edit data source”.
- If everything was set up correctly, you should be able to see each of the values in the spreadsheet. For testing purposes, we recommend adding your own email in the “To” field in the email template. You will then be sent an email when the form is submitted.
Related Articles
Was this article helpful?
YesNo