Precursor
The app must be completed and follow Apple’s review guidelines. Apps that do not look completed or don’t follow the guidelines will be rejected. Read Apple’s guidelines here.
Get Started
Watch this video or read the article below.
- Complete the app details section
- Complete the app store listing details section
- Complete the app submission details section
- Complete the app analytics section (optional)
- Complete the app technical details section
- Request app and complete app privacy requirements
Throughout the process, you can click the blue “Save Progress” button at the bottom of your screen and return to complete the steps at a later time.
Step 1 – Complete the app details section
Note: To complete the following steps you need to have Apple Developer login details and two-factor authentication on your Apple Developer account.
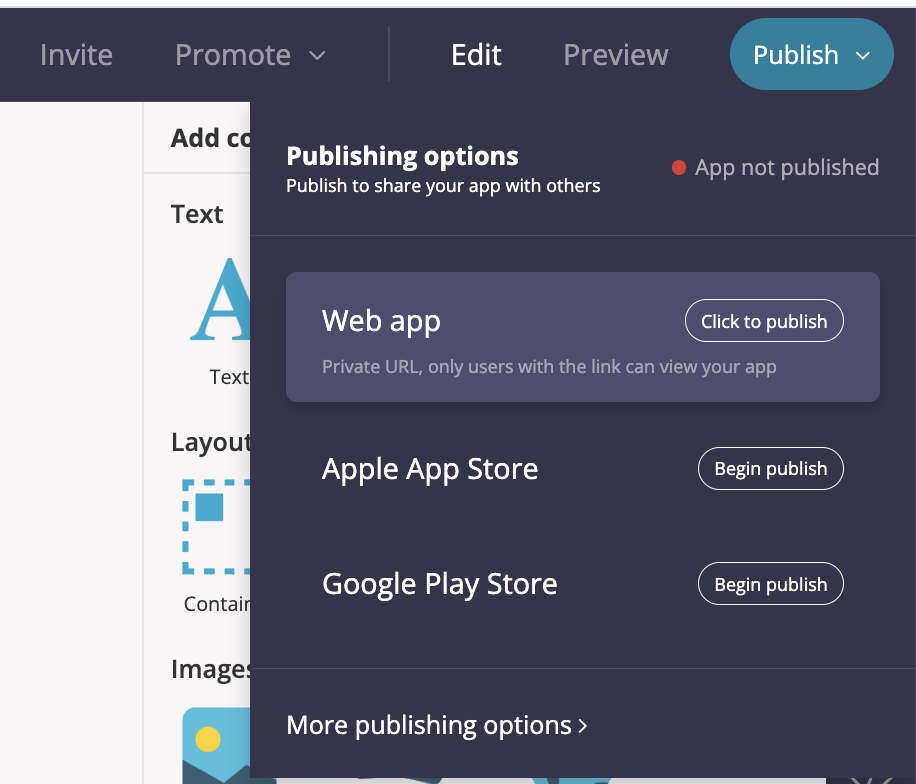
- Whilst inside your app, hover over the “Publish” button in Fliplet Studio
- Next to Apple App Store, select “Begin publish”, or select “More publishing options” and choose “Select” next to “Publish to Apple devices”
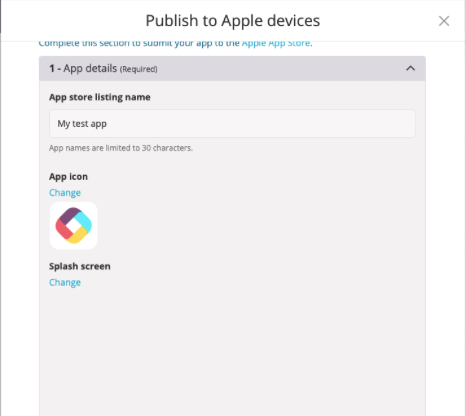
- Under the “App Store” tab, click the first dropdown option, “App details”.
- Type in the App store listing name. This is the name that will be on the app store when a user searches for your app. Note that the limit for this is 30 characters.
- Upload an App icon and splash screen by clicking the “Change” links. Learn more about the icon and splash screen in this article.
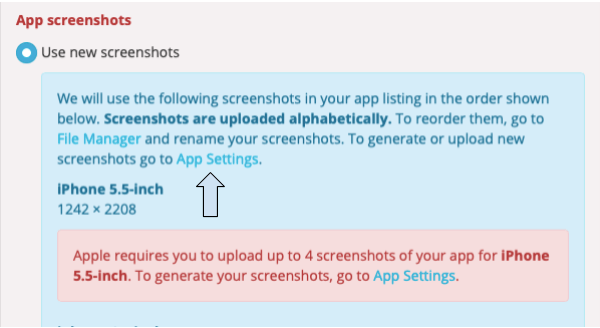
- Next, the app requires screenshots. To select the screenshots click the “App settings” link and then generate the screenshots from there. For more information, read this article.
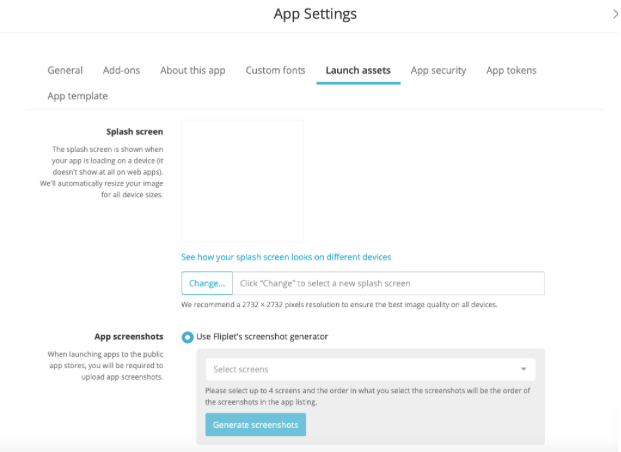
- Click on the “Launch assets” tab.
- Next to “App screenshots”, select “Use Fliplet’s screenshot generator
- Click on the “Launch assets” tab.
- Next to “App screenshots”, select “Use Fliplet’s screenshot generator”.
- Go back to the “App Store” tab in “Publish to Apple devices”.
Step 2 – Fill in app store listing details
- Under the second dropdown, “App Store listing details”, choose an “App icon name”. The name should be 13 characters or less and is the name that goes on your device, below the icon.
- Enter a subtitle if you wish. This is optional.
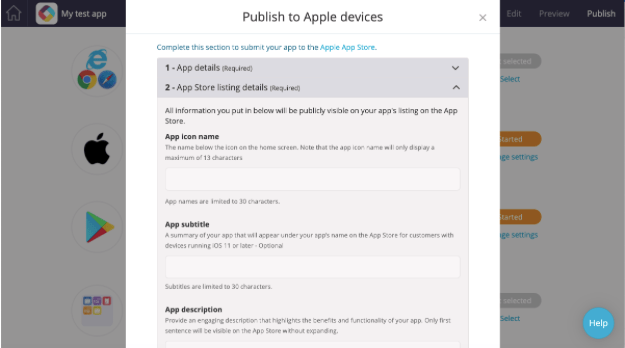
- Write the “App description” which will be used on the App Store to describe your app to potential users.
- Note that Apple does not allow you to refer to other app platforms. for example, do not write “This app is also available on Google Play”.
- The description has to match the app if Apple finds that it doesn’t match they will reject the app.
- App promotional text is optional.
- Select the “App Primary Category” and “App Secondary Category”. These should be the two categories that best represent your app.
- Choose the “Primary Language” that your app uses.
- Enter “Keywords” that describe your app. This will be used for search in the app store so enter any terms that should be searchable.
- In the “Availability” dropdown we recommend choosing “Select All” to make the app available in all countries, or select specific countries if you would like it to be available only in select countries.
- Enter a “Support page URL”, “Marketing page URL”, and “Privacy policy page URL” from your website.
- You can use your website landing for the “ Support page URL” and “Marketing page URL” if you don’t have specific pages for the app.
- Fill in the “Copyright” information.
- The “Release Notes” can be kept blank since this is the first time you are publishing the app to the Apple App Store. If it’s an update, this would list the changes and is public to app users.
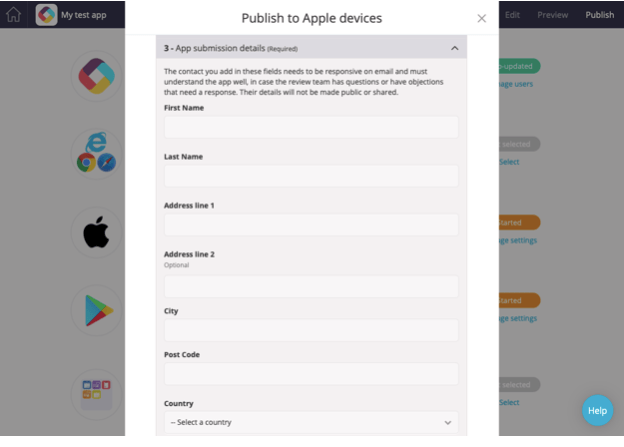
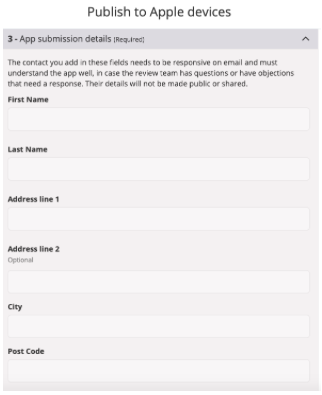
Step 3 – Complete the app submission details section
This section describes who Apple should contact if they have questions about the app or when they have made a decision about whether to accept the app.
- Fill in contact details in the spaces provided so that Apple can get any questions they may have answered. Make sure the contact details you list are for someone who knows all of the specifics about the app.
- Under “Release Configuration”, select the box if you don’t want the app to be released automatically once it has been reviewed and approved by Apple. Selecting this option will require you to manually release the app from your account when you want it to go live.
- Fill in the “Review Notes” with the contact information of the person who Apple should contact with any questions. Note: Review notes should not exceed 4000 characters
- The “Demo User” is optional but if the app has a login, Apple needs access to a test account or they will reject the app. Fill in test account details in the “Demo User” and “Demo Password” sections. The login and password data should also be added to your app’s login data source.
- In the “Notes” section, describe the purpose of the app, its benefits to users, and why Apple should approve it. We have given you a template for the reviewer notes which you can fill in, just be sure to replace what’s in the square brackets with your app’s features. This section is important, without good reviewer notes the likelihood of rejection is high.
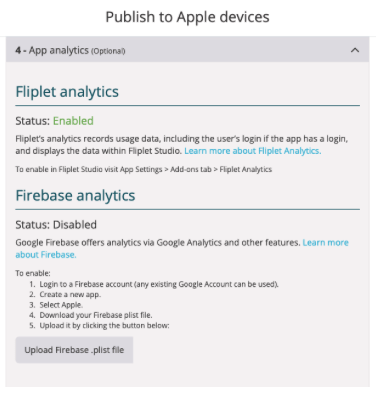
Step 4 – Complete the app analytics section (optional)
- Fliplet’s analytics are “Enabled” by default. If you want to turn this off go to App Settings – Add-ons – Fliplet Analytics. Click the blue highlighted text under “Fliplet analytics” to read more about this. The article can also be found here.
- Enable “Firebase Analytics” (Google Analytics for apps). Learn how to enable Firebase analytics here.
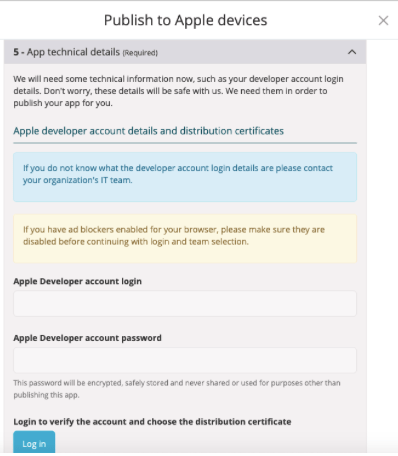
Step 5 – Complete the app technical details section
To complete this section, you must have Apple Developer account login details.
- Log in with your Apple Developer account. a. The account needs to have a 2-factor authentication setup and you will be asked to enter your 2 step verification when logging in. Note that the request will come from either Dublin or San Francisco as this is where the Fliplet server is making the request from.
- Once verified, a new “Select A Developer Account Team” box will appear. Click the dropdown and select the relevant team.
- Next, to Provide us with a distribution certificate choosing from the following options you will see three options:
- “Generate a new distribution certificate”. This is recommended wherever possible, as it means the certificate will be generated automatically. You won’t have to create anything in your Apple account. Click the blue “Generate certificate” button to select this option.
- If you have reached the maximum number of certificates in your account, you will not be able to choose that option. In that case, select the “Upload your own distribution certificate” option.
- If you have created an app with Fliplet before, you can choose the “Use distribution details from your latest submissions” option. In order to choose this, you have to have completed the process before. Note: If you have reached the maximum number of certificates and you don’t have one to upload, the easiest way to complete this step is to log in to your Apple developer account, revoke a certificate, and then choose the “Generate a new distribution certificate” option. For apps on the public app store, revoking a certificate doesn’t have an impact on any apps built with the certificate previously.
- Log in to your Apple ID Account and set-up an App-specific password. See Apple’s documentation for how to create an App-specific password here.
a. For your account to be able to create an App-specific password, you need to have two-factor authentication set up on your account. - Once you have set-up an App-specific password, enter it in the “App-specific password section”.
Under “App version and bundle ID” leave the values as they are.
a. Unless you are replacing an existing app on the app store with a new app. Learn more about updating an existing app here.
Step 6 – Request app and complete app privacy requirements
- Click the green “Request App” button.
Due to changes with Apple’s privacy, when requesting the app you will be required to complete the submission in App Store Connect. The failed message is expected and you should follow the below steps to complete the submission.
The App Store now helps users better understand an app’s privacy practices before they download the app on any Apple platform. On each app’s product page, users can learn about some of the data types the app may collect, and whether that data is linked to them or used to track them. You’ll need to provide information about your app’s privacy practices, including the practices of third-party partners whose code you integrate into your app, in App Store Connect. This information is required to submit new apps and app updates to the App Store.
After your app is submitted to the app store, an Apple user with Account Holder or Admin role permissions needs to log into App Store Connect and complete the privacy questions.
This only needs to be completed once for each app and must be kept up to date.
- Log into app store connect and select your app
- Navigate to the App privacy tab on the left-hand side
- Complete the following 3 sections
- Privacy Policy – A link to your company privacy policy
Here you should enter the URL to your publicly accessible privacy policy - Data Types– Is data collected from the app & What types of data are collected
Here you should confirm the type of data that will be collected.
Select from the list (For most apps the following will likely always be collected and need to be checked off: Name, Email, Phone Number, Analytics, App Functionality) - Product Page Review – What portion of data is shared
Here you will need to outline how each data type is used by you or your third-party partner.
For Each data source selected, indicate how data collected from this app is being used by you or your third-party partners.
Next, indicate if the data collected from this app is linked to the user’s identity (via their account, device, or details).
Finally, indicate if names will be used for tracking purposes. Once you have answered all required questions click Publish
Repeat the above steps for all selected data types.
- Privacy Policy – A link to your company privacy policy
-
Once published your Product page preview will show you what your users will see when reviewing the app’s privacy.
Data Type How is data being used? Data collected linked to user identity Used for tracking purposes? Name App functionality Yes No Email address Analytics, Product personalization, App functionality Yes No Phone number App functionality Yes No Device ID Analytics, App functionality Yes No Product interactions Analytics, App functionality Yes No
Related Articles