This article covers how each option behaves, what happens when an account already exists for your email, how to add or remove sign-in methods later, and what to expect from email verification.
Contents
- Signing in
- Signing up for a new account
- When an account already exists for your email
- Linking sign-in methods to your account
- Email verification
- Related resources
Signing in

Go to studio.fliplet.com/signin. The sign-in page shows three options:
- Email and password — Enter your email, then your password.
- SSO buttons — Continue with Google, Continue with Microsoft, and Continue with Apple. Fliplet redirects the whole page to the provider’s sign-in screen, and once you authenticate there you return to Studio signed in.
- Enterprise SSO (SAML2) — If your organization enforces SAML2 SSO, enter your email and Studio redirects you to your organization’s identity provider. You do not pick this from a button — it activates automatically when the email belongs to an SSO-enforced organization.
Two-factor authentication
If two-factor authentication is required for your account, Studio prompts for a verification code after your primary sign-in. Depending on your sign-in method, this may follow password authentication or your organization’s SSO. Enter the code from your authenticator app or the code sent to your email to complete sign-in.
Forgot your password?
Click Forgot password? on the sign-in page. Enter your email and Fliplet sends a reset code. Enter the code along with your new password to regain access.
Signing up for a new account
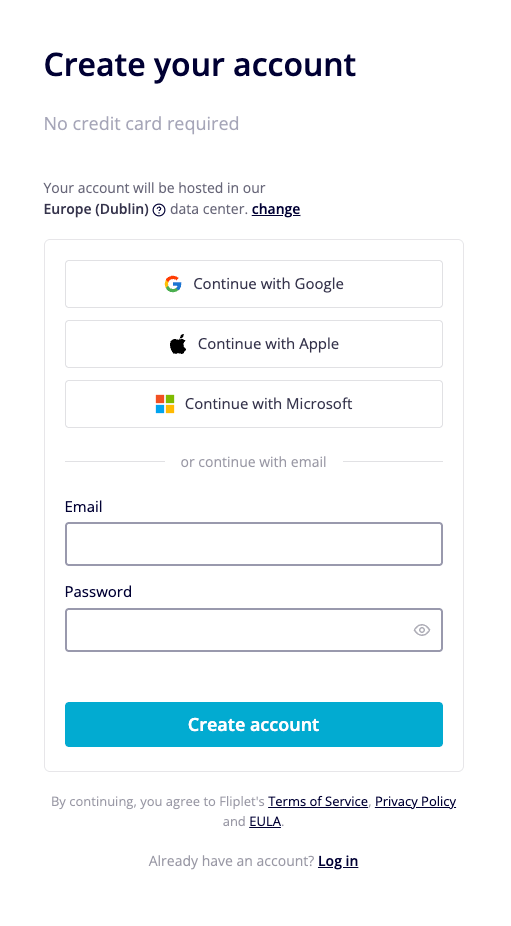
Go to studio.fliplet.com/signup. You can create an account in two ways:
- With an SSO provider — Click Continue with Google, Continue with Microsoft, or Continue with Apple. Fliplet creates the account using the email verified by that provider, so no separate email verification step is needed.
- With an email and password — Enter your email and choose a password that meets all the requirements shown (uppercase letter, lowercase letter, number, and symbol). Fliplet sends a verification link to the address you entered.
After signing up with email and password, Studio shows a verification screen with three steps:
- Click the verification link in the email Fliplet just sent.
- Check your account is verified.
- Return to Studio to continue.
If the email does not arrive, check your spam folder. You can also click Resend verification link on the same screen, or Use different email address if you entered the wrong one.
When an account already exists for your email
Fliplet uses your email address as the unique identifier for your account. What happens when you try to sign in or sign up depends on which method you choose and how the existing account was set up.
You sign in with a provider that is already linked
You are signed in normally. This is the typical case after you have used that provider before.
You sign in with a provider that is not yet linked, but an account exists for the same email
Fliplet returns you to the sign-in page with an error explaining that an account with that email already exists. To use the provider going forward, sign in with your existing method first (password or a provider that is already linked), then add the new provider from Account settings > Sign-in methods. See Linking sign-in methods to your account.
You sign up with an email that already has an account
The sign-up form shows “This email already exists. Please log in” with a link back to the sign-in page. Use the existing account’s method to sign in.
You belong to an organization that enforces SSO
If your organization enforces single sign-on, you must use your organization’s SSO to sign in — even if you have a password set, and even if you also belong to other organizations that do not enforce SSO. Studio redirects you to your organization’s identity provider after you enter your email.
If your account is in multiple organizations and any one of them enforces SSO, the SSO requirement applies. This keeps centralized identity policies (for example, mandatory MFA at the IdP, or off-boarding via the IdP) effective even when the same email is used across organizations.
Linking sign-in methods to your account
You can add or remove sign-in methods at any time from your account settings. Linking a provider lets you sign in with that provider’s button instead of (or in addition to) your password.
Where to manage sign-in methods
- Sign in to Studio.
- Click your name or avatar in the top right.
- Click Account settings.
- Scroll to the Sign-in methods section on the Details tab.
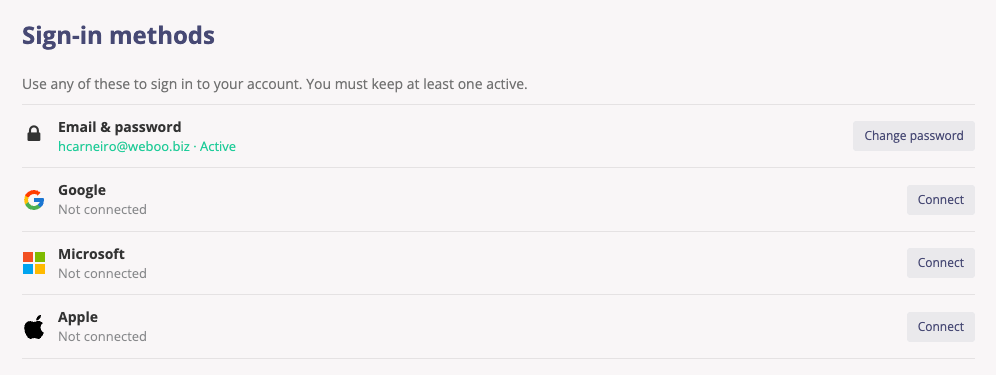
The section starts with a one-line reminder: “Use any of these to sign in to your account. You must keep at least one active.”
Each sign-in method appears as its own row:
- Email & password — shows “Active” when a password is set, or “Not set” when not.
- Google, Microsoft, and Apple — show the email returned by the provider followed by “Active” when connected, or “Not connected” when not.
Set or change your password
From the Email & password row, click Set password to add one (the row shows “Not set”), or Change password if a password is already in place. Enter your current password if changing, then your new password, and confirm. The row updates once saved.
Connect a provider
- Click Connect next to Google, Microsoft, or Apple.
- Sign in with the provider in the window that opens.
- The provider’s verified email must match the email on your Fliplet account. If the emails don’t match, Studio shows an error and the provider is not linked.
Tip: When connecting with Apple, choose “Share My Email” rather than “Hide My Email”. Apple’s relay email addresses are not accepted because they don’t match your Fliplet account email.
Disconnect a provider
Click Disconnect next to the provider you want to remove. The row updates to show “Not connected”.
You must keep at least one active sign-in method. If a method is the only thing keeping you able to sign in, the Disconnect button is disabled and a tooltip explains: “Add another sign-in method before disconnecting this one.” Add a password or connect another provider first, then disconnect.
When your organization enforces SSO
If your organization enforces SSO, you must keep your organization’s SSO method connected. Studio shows a notice in Sign-in methods: “Single Sign-On is enforced for your organization.” with a Connect with <provider> button if you haven’t linked it yet, or a confirmation that your account is connected.
Personal Google, Microsoft, and Apple options are hidden in this state to prevent sideloading a method that bypasses the centralized policy. Organization admins are an exception — they can still add alternate sign-in methods so that an IdP outage doesn’t lock them out of administrative access.
Email verification
When you sign up with an email and password, Fliplet sends a verification link to your address. Verifying your email confirms you own the address and unlocks the features that depend on a confirmed identity.
Accounts created through Google, Microsoft, Apple, or SAML2 are verified automatically using the verified email returned by the provider — no separate verification step is required.
The 24-hour grace period
For the first 24 hours after your account is created, you can sign in and use Studio without having clicked the verification link yet. A banner at the top of Studio reminds you:
“Verify your email to unlock all features like publishing apps and managing billing.”
During the grace period you can browse Studio, edit screens, work with data sources, and explore the platform. The following actions are blocked until your email is verified:
- Publishing apps and triggering builds
- Inviting users to apps
- Managing organization billing and subscriptions
- Managing organization credentials and API tokens
- Managing organization users
After 24 hours without verifying
If you don’t verify within 24 hours of creating your account, Studio blocks sign-in until you verify. You’ll see the message:
“Your email address has not been verified. Please click the verification link in your inbox to continue. A new verification email has been sent.”
Every blocked sign-in attempt sends a fresh verification email. Click the link in the most recent one and you can sign in again. Older verification emails stop working when a new one is sent.
Resending the verification email
You can request a new verification email in three places:
- The banner in Studio — Click Resend verification email.
- The post-signup verification screen — Click Resend verification link.
- A blocked sign-in attempt — A new email is sent automatically.
Each verification email is valid for 24 hours from when it was sent. Resending extends that window.
If the wrong email was used
From the post-signup verification screen, click Use different email address to start over with a different email.
Dismissing the banner
The banner has a dismiss button (the X on the right). Dismissing it hides the reminder for about two hours; it reappears after that until your email is verified.
Related resources
- Social Single Sign-On (Google, Microsoft, Apple)
- How to set up SAML2 (SSO) for Fliplet Studio
- Single sign-on (SSO) with SAML2 (Drag & Drop builder)