This feature enables you to send emails from your own custom domain (e.g., yourname@yourdomain.com) rather than a generic Fliplet email, ensuring consistency in your branding and improving user trust.
This article will walk you through the steps required to configure a custom email domain for your organization, including updating DNS records and verifying the setup. By following these instructions, you can seamlessly integrate your domain with the platform and start sending emails that reflect your organization’s brand identity.
Why use a custom email domain?
Better deliverability – Custom domains are less likely to be marked as spam, which can improve email deliverability rates
Brand recognition – A custom email domain can reinforce your brand and help with brand recognition and recall
How to set up a custom email domain
Step 1 – Access the Organization Settings
Note: You will need to be an organization admin to access these settings
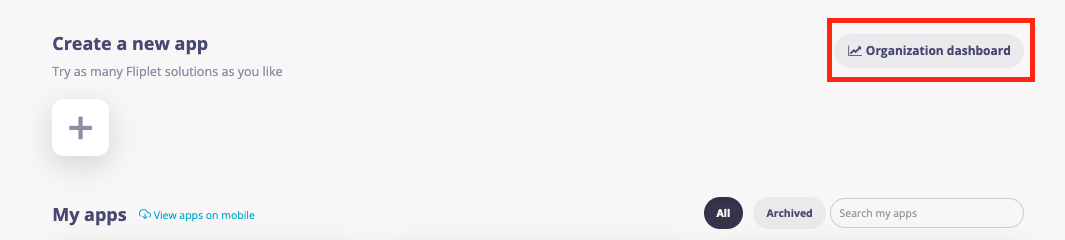
- From the Fliplet Studio home screen, select Organization Dashboard in the top right corner
- Now, click on the Settings tab
Step 2 – Configure the Custom Email Domain
- Scroll down to the custom email domain section of the organization settings

- In the Custom domain field, enter the domain you wish to use (e.g., apps.example.com)
- Specify an email address by entering the email address you want to use to send emails from in the “Email address you wish to use to send emails” field (e.g., custom@apps.example.com)
Note: the domain you use here must match the domain you entered in the previous field
- After entering the necessary information, click on the Next button to save
Step 3 – Update DNS Records
- Copy the DNS Records:
- After proceeding, you’ll be provided with DNS records to update on your domain provider’s site:
- After proceeding, you’ll be provided with DNS records to update on your domain provider’s site:
- Update the DNS Records in Your Domain Provider:
- Log into your domain provider’s management console
- Add or update the DNS records as specified
- Make sure each record is entered correctly
- Verify the DNS Configuration:
- After updating the DNS records, return to the settings page and click the Verify button
- Note: DNS verification might take up to 27 hours
Step 4 – Verification and Final Setup
- Wait for Verification:
- The platform will verify the DNS records. This process may take some time
- Once verified you will receive a test email from the selected email domain to confirm the set up is complete. Once you have received this your custom email domain will be ready to use for sending emails
- Email Confirmation:
- Once verified you will receive a test email from the selected email domain to confirm the setup is complete
- After you have received this email, your custom email domain will be used for all emails sent from your apps and organization
Set Up Recommendations
We recommend a new, segregated subdomain for custom email use to minimize risk and protect day-to-day business operations.
A separate subdomain ensures no dependency on the app, preventing issues or downtime from affecting your main domain.
We also recommend keeping naming general as it will be used for all apps and communications coming from your Fliplet organization.
Examples
- support@yourdomain.com – For customer support and technical help
- feedback@yourdomain.com – For collecting feedback or suggestions
Base domain –
example.com
Subdomain – part of, but segregated from the base domain
app.example.com
Using Fliplet as an example:
Our domain is fliplet.com
Subdomain option:
We recommend using subdomain to avoid handing over your mail exchange control to a 3rd party to deal with something specific to an app. In Fliplets case, we would use something such as “myapp.fliplet.com”. This prevents conflict with our primary mailbox and has news@myapp.fliplet.com as the from address.
Base domain option:
Alternatively – you may want to set a completely different domain. For example, “myapp-fliplet.com” this retrains familiarity but the email would be sent from news@myapp-fliplet.com
FAQ
- What emails will come from this new domain?
-
- All emails from your apps and Fliplet organization
-
How long does it take to verify my custom email domain?
- After you update your DNS records, verification can take up to 27 hours. This time is needed for the DNS changes to propagate. Once verified, you’ll receive a confirmation, and your custom email domain will be active.
- What if my domain verification fails?
-
- If domain verification fails, double-check that you’ve correctly entered the DNS records provided by the platform into your domain provider’s settings. Ensure there are no typos and that the values match exactly. You will also want to ensure the details you have entered in Fliplet are correct. If all is correct you can try to verify again.
- Do I have to pay for this feature?
-
- All paying plans will have custom email domains accessible and available for use on their plans. This feature is not part of our freeing plans. Customers on free plans will need to upgrade to use the feature.
- Can I change my configuration if my domain info changes?
-
- Yes. You can change your email address at anytime as long as it is associated with the provided subdomain. To change use the “update” button
- To change your domain and email address use the “remove this domain” button and start from the beginning of set up
- Can I use more than one custom domain?
-
- Currently, the setup process supports one custom domain per organization.
Related Articles