Fliplet makes it easy to publish your app to the web so that users can access it directly from any browser without needing to download it to their device. This article explains how to publish your app using Fliplet and outlines the two available publishing options: a standard Fliplet-generated URL or a custom domain.
Publishing options
When publishing your app to the web with Fliplet, you have two options:
- Use a Fliplet-generated URL: The fastest and simplest method—ideal for internal use, prototypes, or general availability. Fliplet will host your app on a subdomain such as
https://apps.fliplet.com/your-app. - Use your own custom domain: Best for public-facing apps where branding and trust are important. Additional steps are required to configure DNS records and verify ownership.
Get started
Option – Publish using a Fliplet URL
Option 2 – Publish using a custom domain
- Configure your custom domain in Fliplet Studio
- Verify domain ownership and enable SSL
- Finalize subdomain association
Option 1 – Publish using a Fliplet URL
- Whilst inside your app, hover over the “Publish” button in Fliplet Studio.
- Next to “web app” select “click to publish.
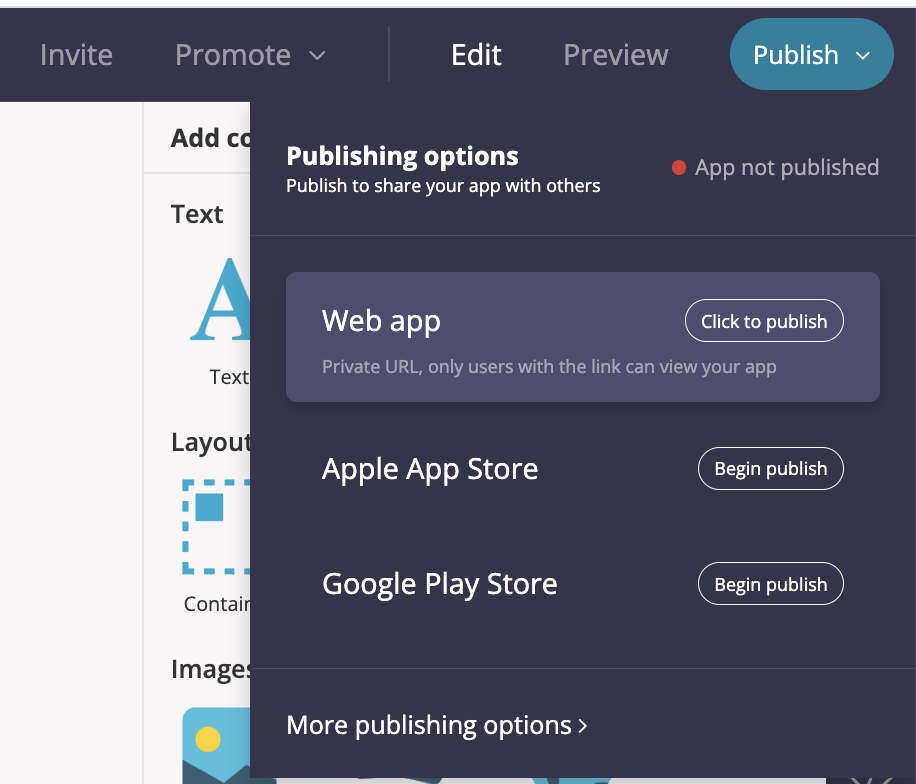
- Your app will instantly be published
- Hover over the tab again, where you will see a QR code, and the view button that will take you to your app
- Your app will automatically be given a URL, but to edit this, select “more publishing options”
- Next to “Publish to the web via a URL ” choose edit
- From here, you can also copy the URL and unpublish the app
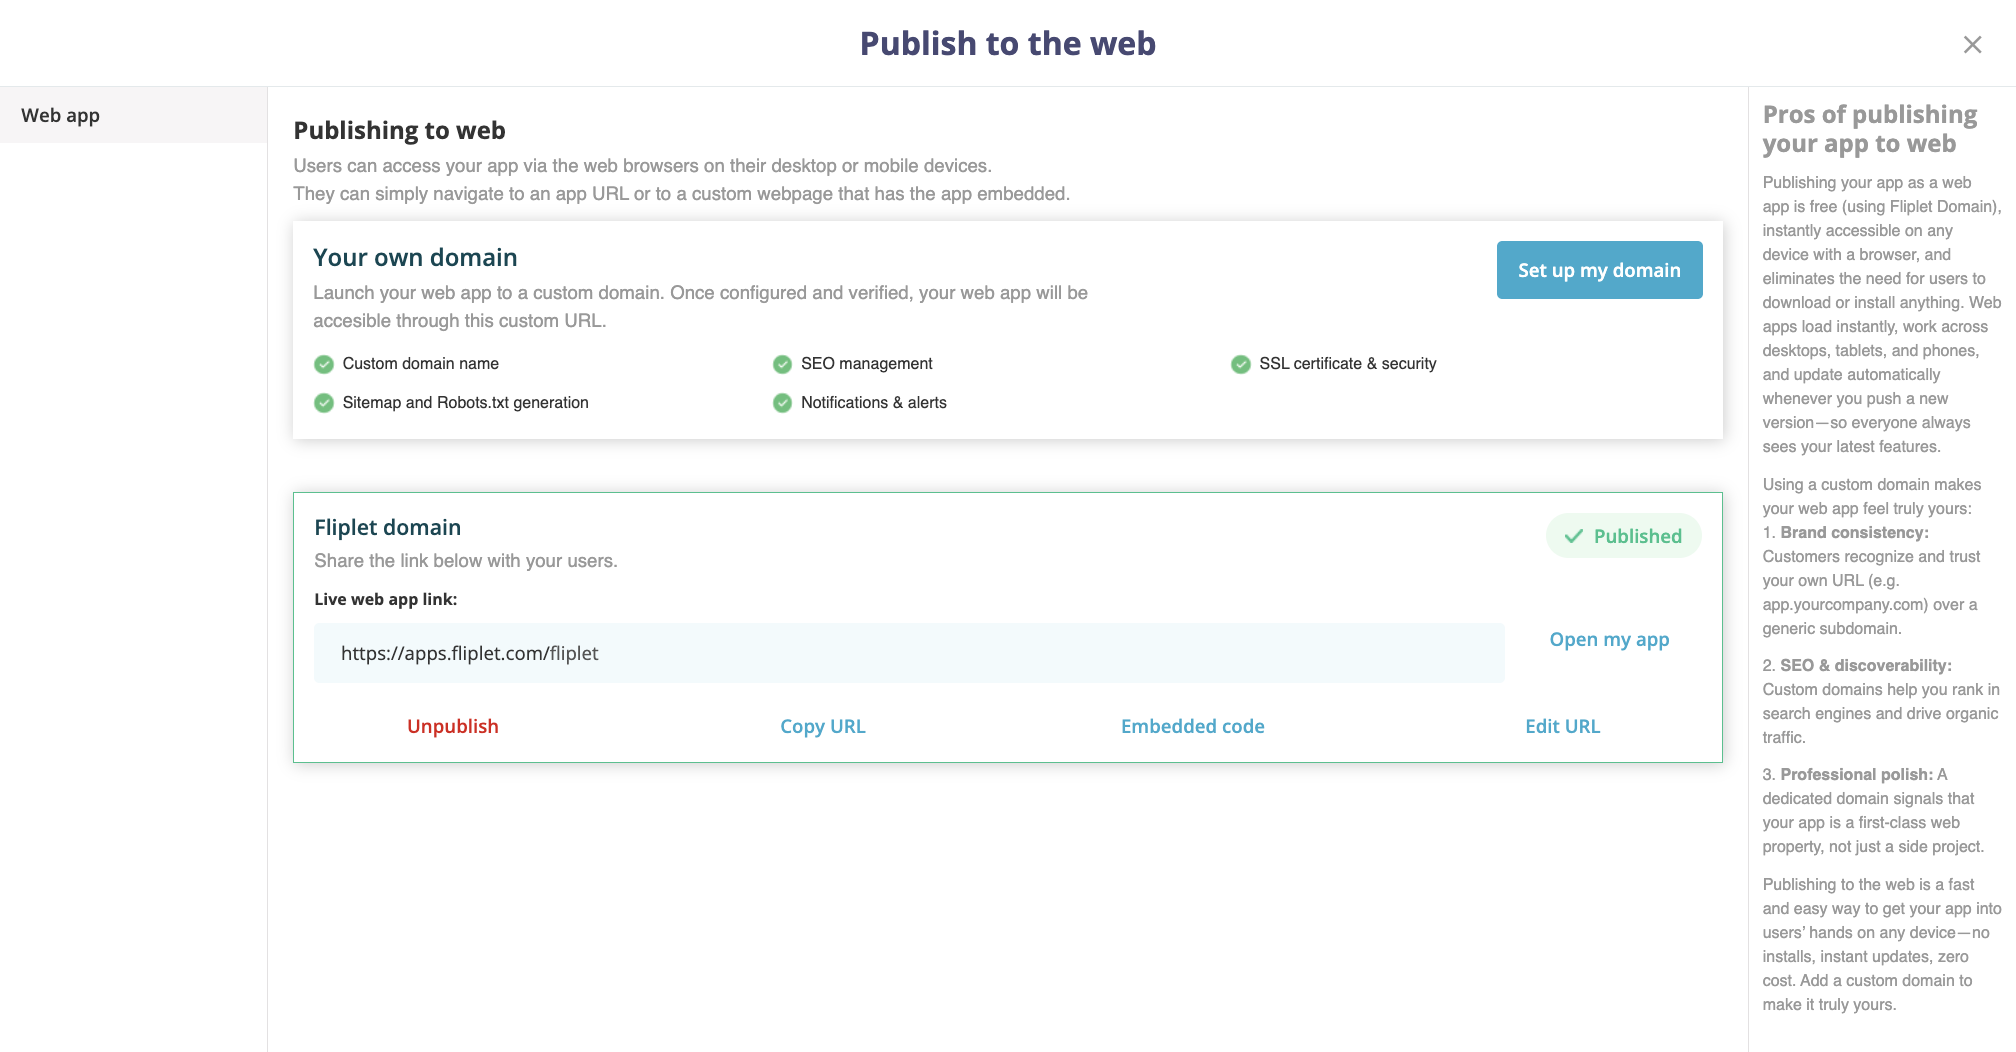
- You can also show the embed code that will allow you to embed the app on another web page
- After you have published your app, you will also have access to share individual screens. Click the settings icon next to a screen in Edit mode and you will see this dropdown:
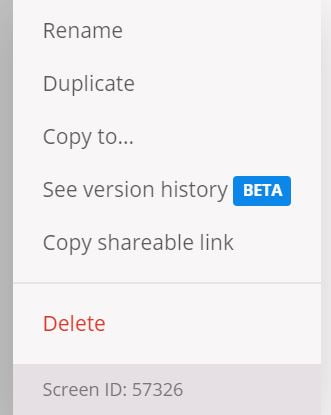
- “Copy shareable link” will add the link to your clipboard so you can paste it in an email or wherever you’d like.
Options of distributing your web app
- URL from Fliplet
When publishing your web app you will be provided with a URL that users can use to access the app. - Embed web app within an existing web page
When publishing your app you will be given the option to “see embed code”. This will allow you to embed the app on another web page. For more help see here. - Redirect an existing URL to your Fliplet web app URL
For example, redirect https://example.com/my-app to https://apps.fliplet.com/my-app
To redirect from your web page you will need to use JavaScript, HTML meta tags, or your web server.- For JavaScript put this code into the webpage you want to redirect users from
window.location.replace("http://www.w3schools.com"); - For HTML meta tag put this code into the webpage you want to redirect users from
<html>
<head>
<meta http-equiv="refresh" content="1;url=https://apps.fliplet.com/my-app" />
<title>Page Moved</title>
</head
- For Windows IIS web server see here.
- For Apache web server see here.
- For JavaScript put this code into the webpage you want to redirect users from
Option 2 – Publish using a custom domain
Get started
- Configure your custom domain in Fliplet Studio
- Verify domain ownership and enable SSL
- Finalize subdomain association
Step 1 – Configure your custom domain in Fliplet Studio
- Open your app in Fliplet Studio
- Click the Publish button in the top right corner
- Click on More publishing options
- Next to “Publish to the web via a URL”, click Select
- Next to “Your own domain”, click on the Set up my domain button. This will open the “Setup my domain” overlay
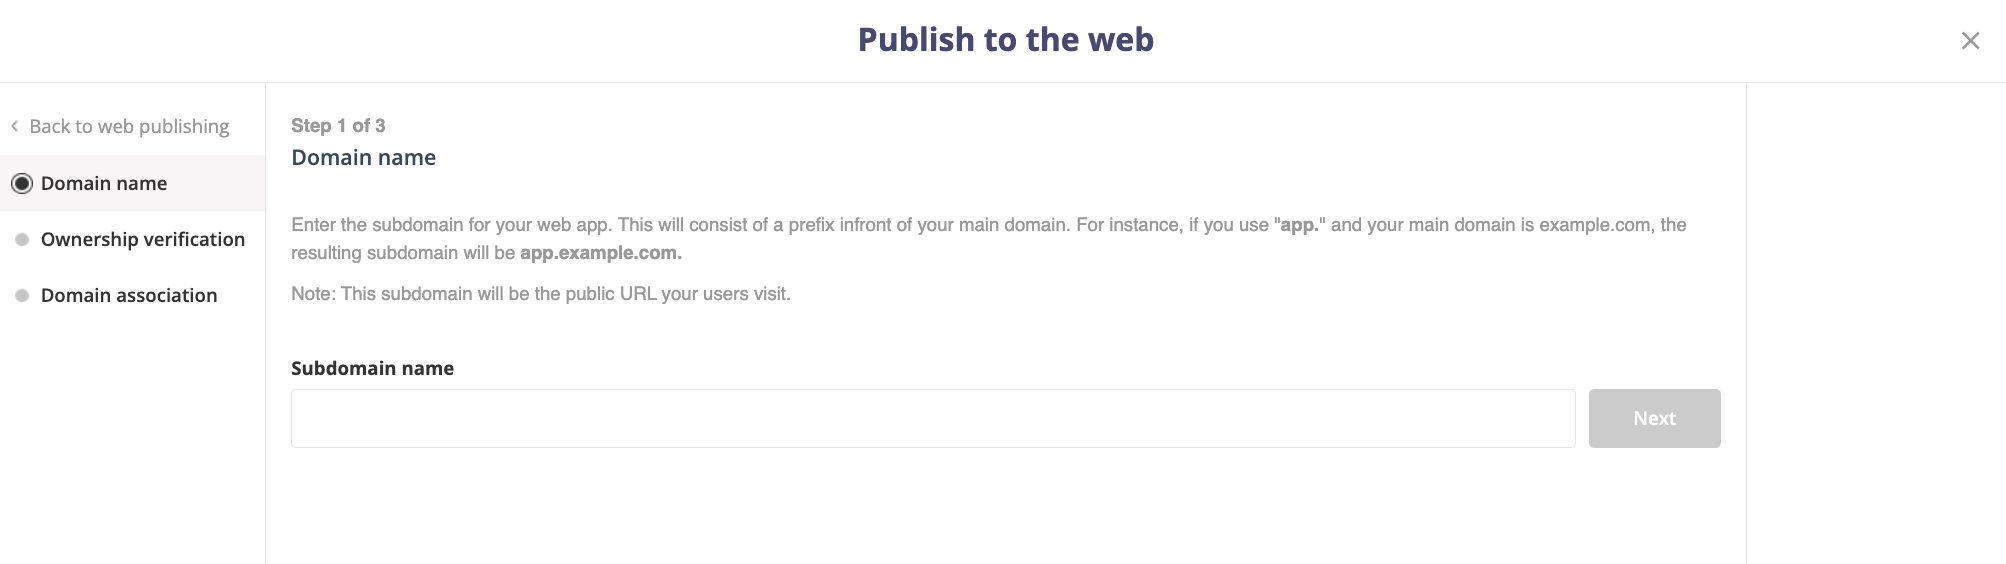
- In the Domain name input field, type in the subdomain you want to use. For example:
app.example.com - Remember to use a subdomain (like
app.,portal.,info.) of your primary domain (e.g.,example.com). You cannot use your root domain directly - Click the Next button to save your subdomain choice and proceed to the next step
Step 2 – Verify domain ownership and enable SSL
This crucial step is to confirm your ownership and triggers automatic SSL setup.
- After you enter and save your custom subdomain in Fliplet Studio, you will be taken to the “Setup my domain” screen showing “Setting up domain DNS records”
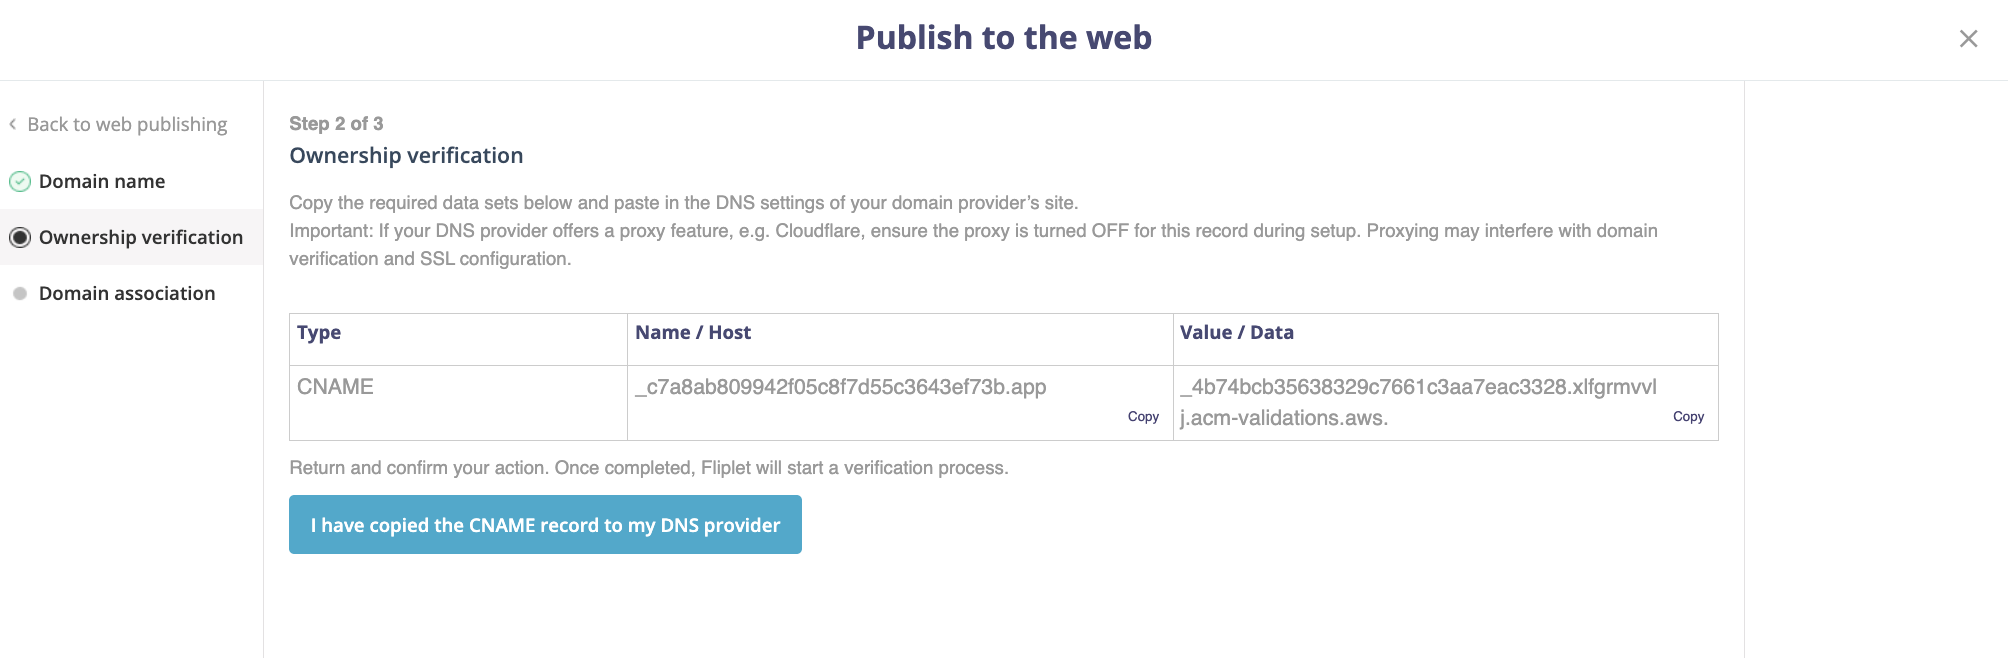
- Carefully copy the Name / Host and Value / Data values from this table. These are the CNAME record details you need. You can use the “copy” icon next to each value for convenience
- Log in to the control panel or DNS management interface provided by your domain registrar (e.g., GoDaddy, Namecheap, Cloudflare, etc.) or DNS hosting provider
- Navigate to the DNS settings for your domain. This is often found in a section labeled “DNS Management,” “DNS Records,” or similar
- Look for the option to add a new DNS record, and choose CNAME as the record type
- In the Host or Name field, enter the Name / Host value that you copied from Fliplet Studio
Note: Some DNS providers might automatically append your domain name, so you might only need to enter the subdomain part here (e.g.,appinstead ofapp.example.com). - In the Value, Target, or Points to field, enter the Value / Data that you copied from Fliplet Studio
- Save the new CNAME record within your domain provider’s DNS settings
- Return to Fliplet Studio
- Click the I have copied the CNAME record to my DNS provider button. This button signals Fliplet Studio to check for the CNAME record you’ve just added
- Fliplet Studio will attempt to verify the CNAME record. If successful, the status will change to “Verified” and you will receive an email to confirm
Step 3 – Finalize subdomain association
Once your domain ownership is verified, Fliplet will provide another set of CNAME records for associating your subdomain with your web app.
- Return to your domain provider’s DNS settings interface
- Add another new DNS record of type CNAME
- In the Host or Name field, enter the Name / Host value of the second CNAME record from Fliplet Studio
- In the Value, Target, or Points to field, enter the Value / Data of the second CNAME record from Fliplet Studio
- Save this second CNAME record
- Once you have done this, go back to Fliplet Studio
- Click the I have copied the CNAME record to my DNS provider button again
- Fliplet Studio will perform a final check to ensure the subdomain is correctly set up and associated with your app
- Your custom domain may take a few minutes to publish. The web app will go live automatically, and you’ll receive an email notification once it’s ready to use
Final steps & confirmation
Once both verification steps are successful:
✅ Your custom domain will be linked to your Fliplet web app.
✅ An SSL certificate will be automatically applied for security.
✅ You can now access your app via your custom domain. Please note that it may take up to 72 hours for your domain and DNS to verify and URL to become available.
If you encounter any issues, check your DNS settings or contact your domain provider for assistance.
Troubleshooting tips
If you experience any issues during the domain verification process:
- Carefully review cname records: Double-check that you have entered both the Name / Host and Value / Data of the CNAME record(s) exactly as provided by Fliplet Studio into your domain provider’s DNS settings. Typographical errors are a common cause of verification failures
- Account for DNS propagation delays: After adding or modifying CNAME records, allow sufficient time for DNS propagation. Wait for at least an hour, and then try the “Verify now” step in Fliplet Studio again. In rare instances, full propagation can take longer
- Check for typos: Carefully re-examine your entered subdomain in Fliplet Studio and the CNAME records in your DNS settings for any spelling mistakes or extra spaces
If you continue to encounter problems, please contact Fliplet support team or your DNS provider
Related Articles