The task management solution can be used to quickly create a task-tracking app.
Users can create two types of lists, a simple checklist and a project.
Simple checklist
With a simple checklist, users can create a to-do list by typing the items into a text field and tapping/clicking enter.
Users can mark items as done by tapping/clicking on them which then moves the items into a “Done” list.
Project
The project enables users to create a task management system. Each task can be assigned to different users, and have various priority labels, different statuses, and due dates, users can also leave comments on each task.
The purpose of this article is to provide you with a view of the screens that form the application and give you an understanding of the configuration opportunities within the app. One important thing to note here is that you are able to choose which type of user can read, add or edit the data. You can find more information on this here.
App screens list
- Onboarding
- Terms
- Login
- Sign up
- My tasks
- Lists
- Manage list
- Simple checklist
- Project
- Manage task – Project
- Edit profile
- Notifications
App screens
- Onboarding
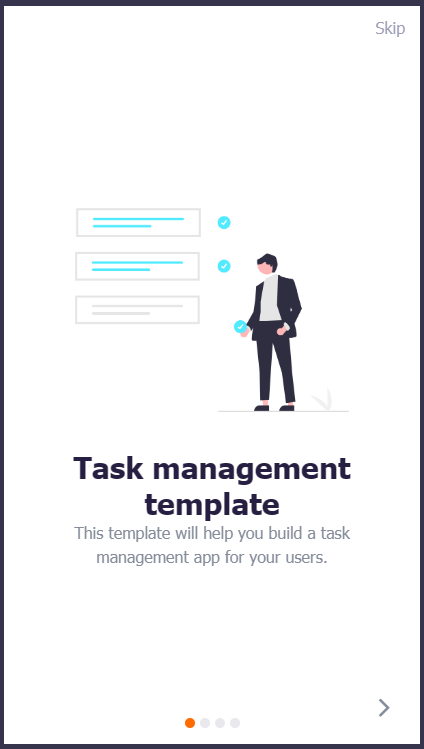
This screen introduces the user to the app and the various functions that it provides.
This screen can be configured to display on the first use of the app only, and a skip link.
You can configure the number of slides to display and the text and imagery can be changed to create your desired look.
This screen uses the onboarding component, learn more here. - Terms
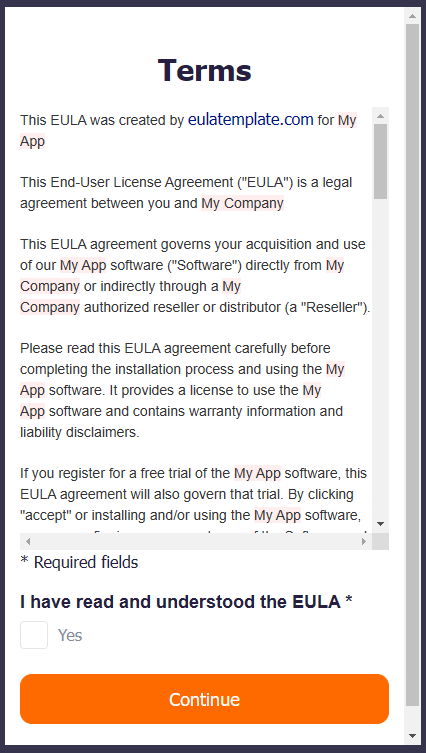
This screen will display the “terms of use” text and will be shown only the first time a user opens the app.
The text displayed should be amended to reflect the terms required for your app.
This screen uses the text component, learn more here. - Login
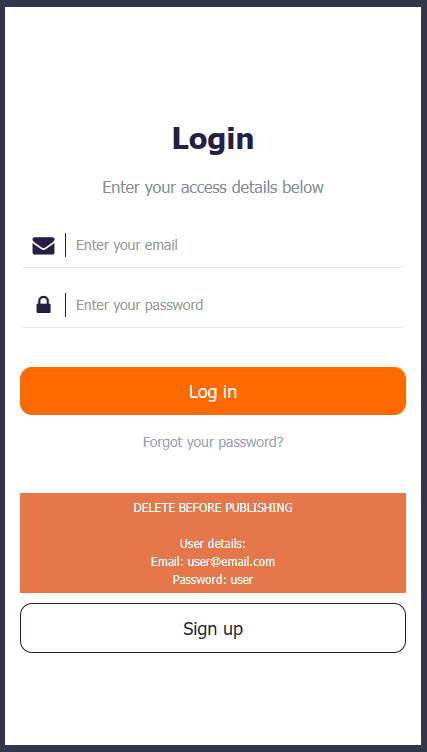
This screen provides security for the app allowing access to only registered users.
This screen can be configured to reflect your security preferences. Login can be via email and password or email only.
Logging in will also define the user and ensure the correct permissions are shown per user.
Click to learn more about the login component. - Sign up

This screen provides the ability for users to register for access to the app, simply delete the screen if you do not want to enable self-registration.
This screen can be configured to include any signup requirements needed by adding or removing form fields.
This screen uses the form component, learn more here. - My tasks
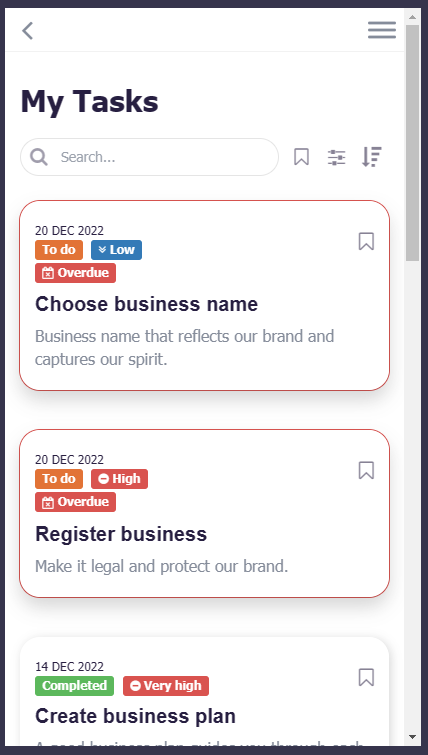
The My tasks screen is where users will be taken once logged in and where all of their assigned tasks will be shown.
If a task is from a project it will open the task detailed view when a user clicks on it, if it’s a simple checklist task then it will show the entire checklist.
Users will be asked if they want to enable push notifications on this screen. The Push notification settings can be updated on the Edit profile screen.
This screen uses the list from data source component, learn more here. - Lists
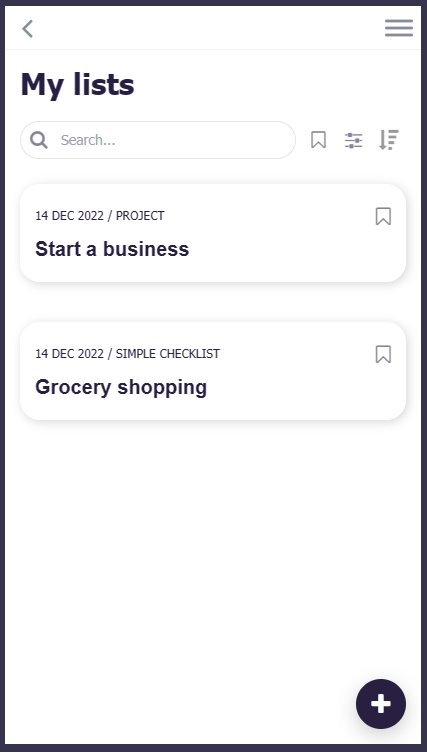
The List screen displays all of the logged in users’ lists. New lists can be added by clicking on the plus button.
This list is private to the logged in user, meaning that users can only see the lists they created or are assigned to.
Users can filter the list by checklist type, categories, and date, they can also sort the list by date. Both the filters and sorting functionality can be configured in the list from data source settings.
This screen uses the list from data source component, learn more here. - Manage list
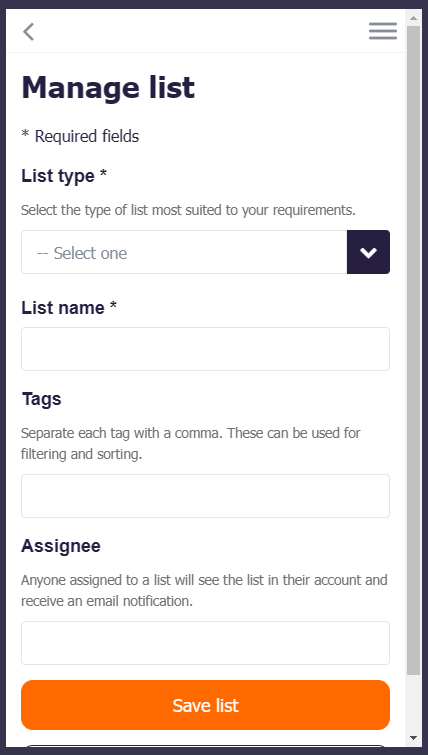
Users will be taken to this screen when clicking the plus button on the Lists screen, or when editing a list by clicking on the three dots at the top right corner of the checklist screen.
The form enables users to create a new list or edit an existing list.
The list will be visible only to the user that created it and to the users the list was assigned. A push notification and an email will be sent to any existing users assigned to the list, and just an email notification to any new users. Users can update their notifications settings on the Edit profile screen.
Each field can be configured in the form settings, and more fields can be added as necessary.
This screen uses the form component, learn more here. - Simple checklist
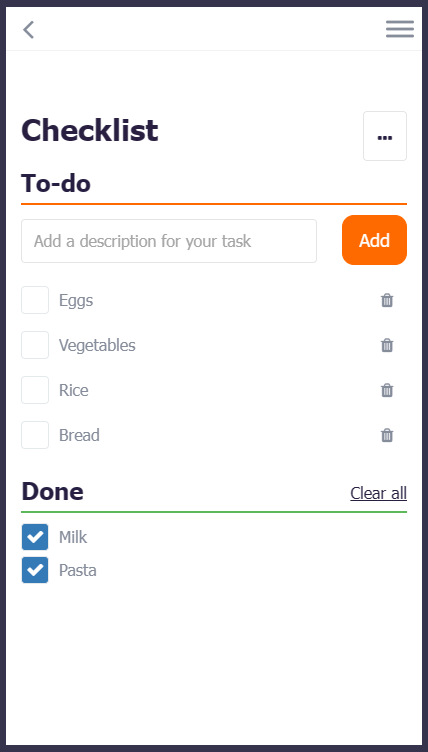
This screen lists the tasks of a simple checklist and users can quickly add new tasks by typing on the form field and pressing enter or tapping/clicking on the Add button.
Once a task is done, users can simply tap/click the task and it will automatically be moved to the “Done” section.
Users can delete tasks in the list and they can also clear the entire “Done” section.
The list creators can edit, duplicate and delete the list using the three dots at the top right corner of this screen.
This screen uses the form component and the text component. - Project
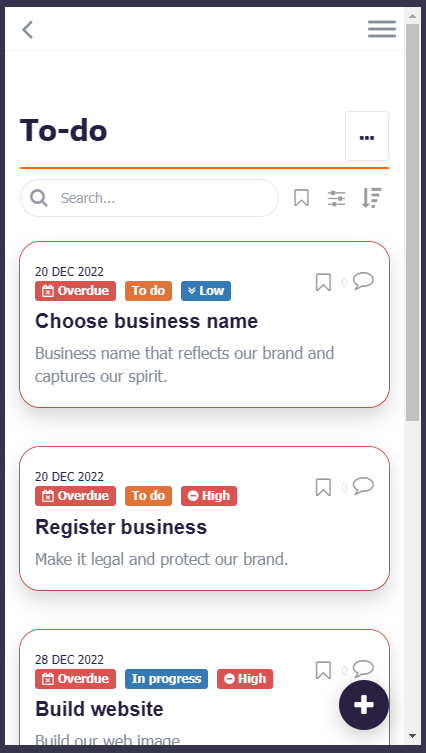
This screen lists the tasks of a project. Users can add new tasks by tapping/clicking the plus button.
The tasks are visible to all users with access to the list. Tapping/Clicking on a task will open the detailed view, and users can comment.
Users can edit, duplicate, mark as complete, and delete a task via the menu in the task details.
Users can filter the list by status, priority, tags, assignee, created date, and due date. Users can sort the list by status, priority, created date, and due date. The Filters and Sorting can be configured in the list from data source settings.
The list creators can edit, duplicate and delete the list via this screen.
This screen uses the list from data source component, learn more here. - Manage task – Project
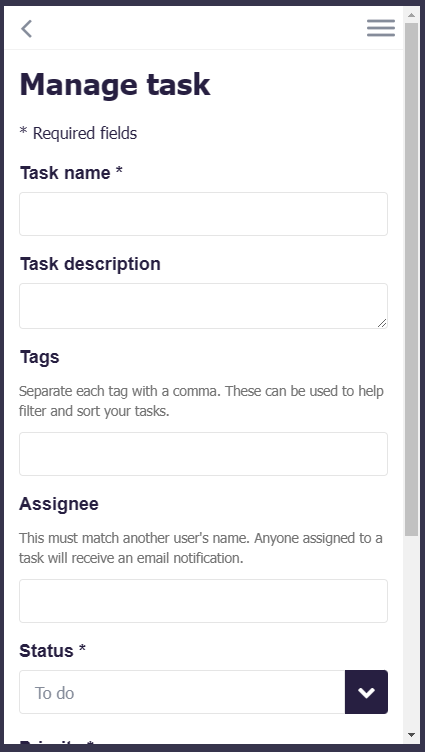
Users will be taken to this screen when clicking the plus button on the Project screen, or when editing a task by clicking on the three dots at the top of the Project screen.
The form enables users to create a new task or edit an existing task.
The task will be visible to all users with access to the list. A push notification and an email will be sent to any existing users assigned to the task, and just an email notification to any new users. Users can update their notifications settings on the Edit profile screen.
Each field can be configured in the form settings, and more fields can be added.
This screen uses the form component, learn more here. - Edit profile

This screen enables the user to edit their profile. It can be accessed from the app menu by selecting “Edit profile”.
Users will also be able to adjust their notification settings by enabling or disabling push and email notifications individually. Email notifications are enabled by default.
Users will be shown a confirmation screen once saved.
This screen uses the form component, learn more here. - Notifications
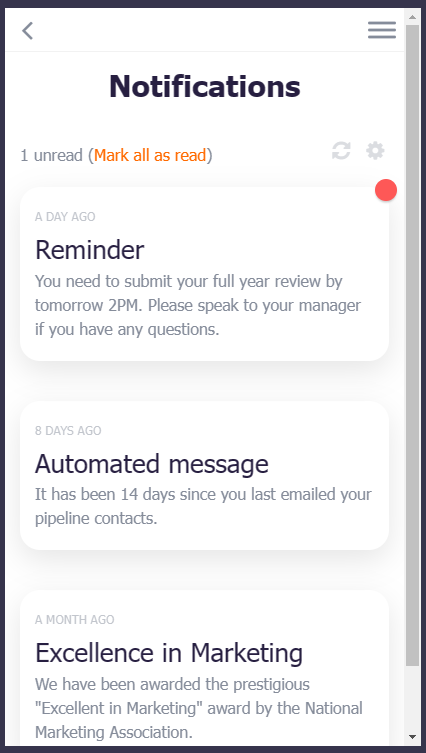
This screen displays all the notifications that have been sent to the user.
Push notifications are sent by the app when a list or task is assigned to the user or when an admin sends an in-app notification via Fliplet Studio.
This screen uses the notifications inbox component, learn more here.
Related Articles