Fliplet can deliver notifications to users of your published web app via their browser when they grant permission. This is particularly useful for time-sensitive updates, such as event announcements, agenda changes, and last-minute changes.
This article explains how to enable and use web browser notifications for your Fliplet web app so users receive time-sensitive updates like event announcements, agenda changes, or room updates directly in their browser.
Availability and requirements
- Published web app – users must access your app via its direct URL
- Permissions – users need to allow notifications in their browser
- Embedding – web push does not work when the app is embedded in another website via an iframe
- Browser support – behavior varies by browser and OS. If unsupported or permission is denied, users will still receive in-app notifications in the Notifications component
Get started
- Add an in-app Notifications inbox (optional)
- Configure the permission popup
- Test in the browser
- Send a notification to web users
- Troubleshooting
- FAQs
Step 1 – Add an in-app Notifications inbox (optional)
- Open the screen where you want users to see a history of messages
- Add the Notifications component (Inbox)
- Save your changes
Note: This is optional for web push, but recommended so web users also see messages inside the app.
Step 2 – Configure the permission pop-up
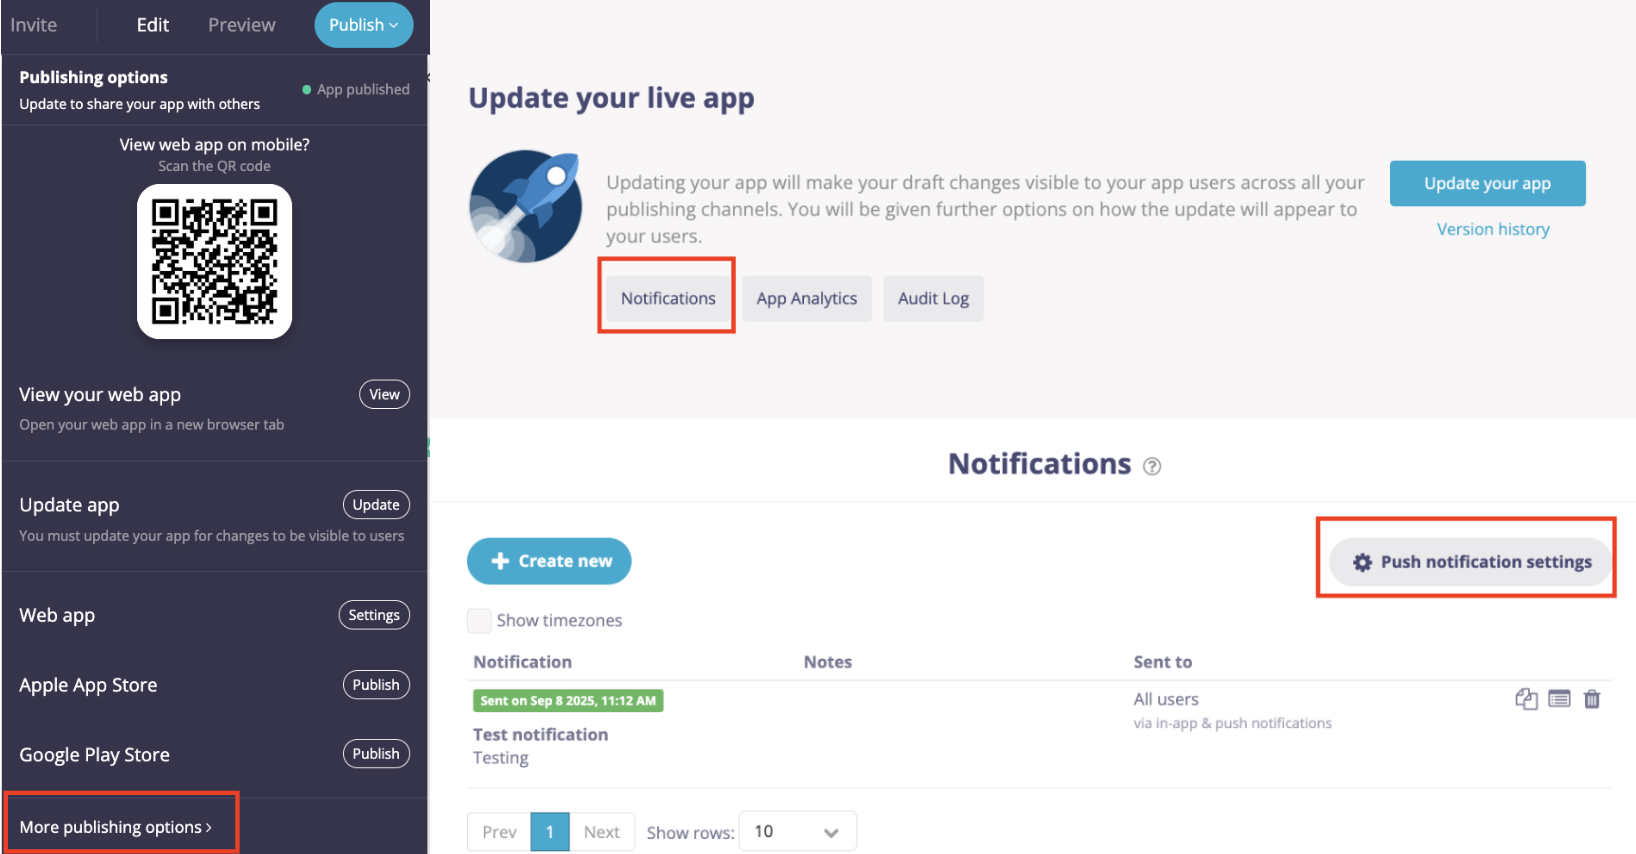
- In Fliplet Studio, go to Publish > More publishing options> Notifications > Push notifications settings
- Optionally customize the title and message shown to users
- Enable Show notification pop-up automatically to request permission on first visit, or copy the code snippet shown to trigger the prompt on a specific screen
- Click Save and publish your changes
Step 3 – Test in the browser
- Open your published web app URL in a supported desktop browser
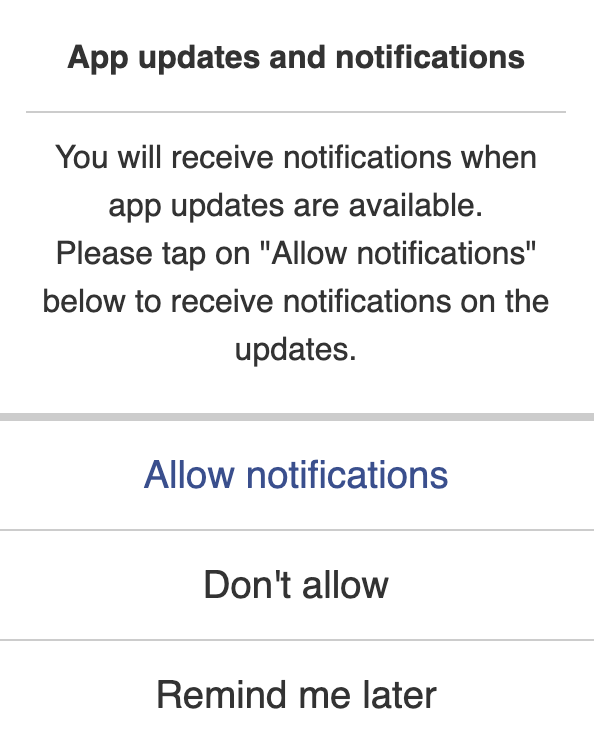
- When prompted by the browser, choose Allow
- Keep the browser open or minimized. Notifications appear even if the tab is not focused
Tip: If the prompt does not appear, check the browser’s Site settings and ensure notifications are not blocked for your domain.
Step 4 – Send a notification to web users
- Go to Publish > Publish > More publishing options> Notifications
- Click Create new and enter a title and message
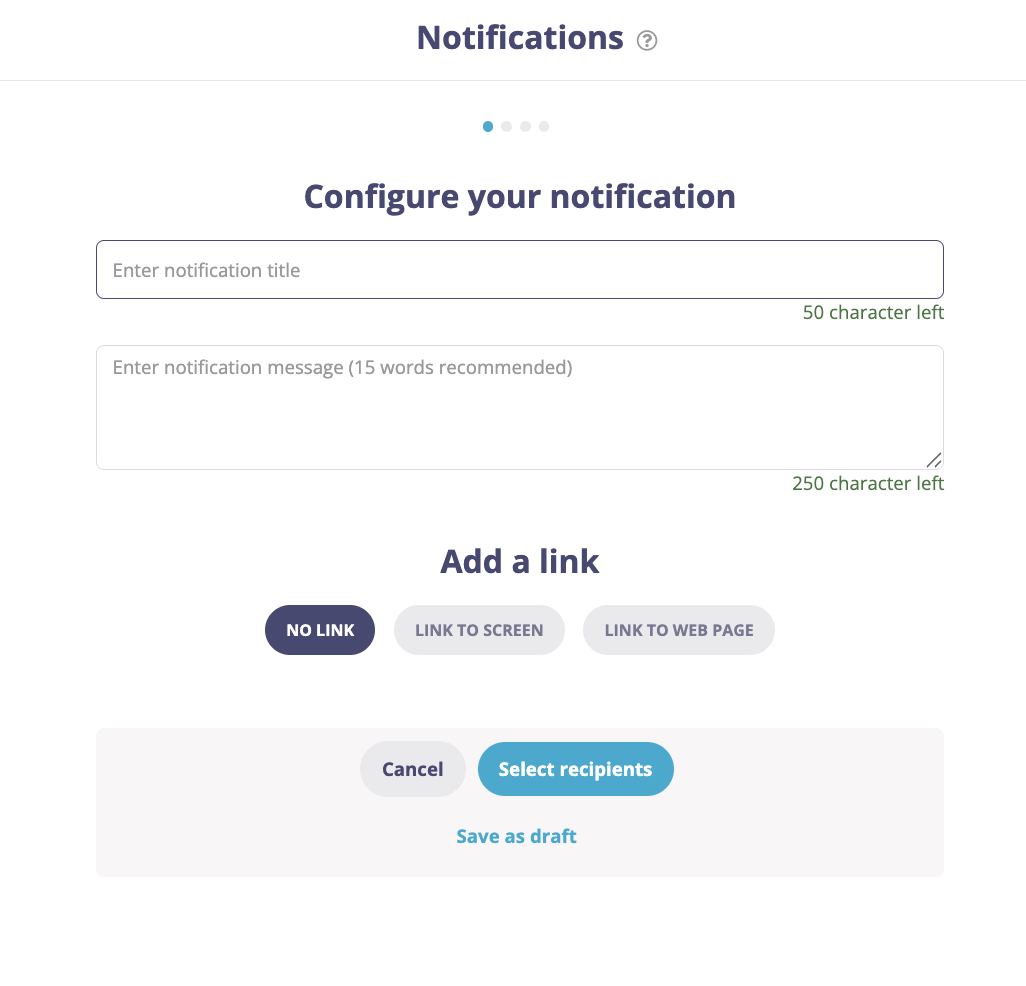
- Optionally add a link to open a screen or webpage when clicked
- Select your audience (All users, Signed in users, or a filtered segment)
- Under Show notification as, select In-app notification
- Choose Now or schedule for Later, then click Review and Send
Why “In-app notification”? When web permissions are granted, in-app notifications also appear as browser notifications for web users.
Troubleshooting web notifications
Users do not see the browser permission prompt
- Confirm the Permission popup is enabled or triggered on a specific screen
- Ask users to allow notifications in their browser’s Site settings for your domain
A user is not receiving web notifications
- Confirm the user allowed notifications and did not block them
- Verify the user is included in the notification audience and any filters
- Ask the user to reopen the web app to refresh their browser subscription
FAQs
Do I need Apple or Google push keys for web notifications?
No. Web notifications rely on the browser’s permission model. Apple and Google keys are still required if you also send native push to iOS and Android. Learn more here
Can I test web notifications in Studio preview?
Use Studio preview to test in-app notifications. To see actual browser notifications, test in the published web app.
Do web notifications work when my app is embedded?
No. Web push does not work when your app is embedded via an iframe. Share the direct app URL for users who want browser notifications.
Related Articles