Project Management is an all-in-one solution designed to help individuals and teams efficiently plan, organize, track, and execute projects.
It provides a centralized platform to manage tasks, resources, timelines, and communication, facilitating collaboration, improving efficiency, and ensuring successful project delivery.
This article covers the following
Benefits
-
Organization and centralization – provide a centralized platform to organize and track all project-related information, including tasks, deadlines, resources, and communication.
-
Task Management – Break down projects into smaller tasks and assign them to team members. This enables for better task tracking, progress monitoring, and helps ensure that all tasks are completed on time.
-
Collaboration and communication – facilitate seamless collaboration and communication among team members.
Use cases
Here are some of the many possible projects that can be added to this solution
- Marketing
Create a marketing plan
Content creation - Sales support
IT
System maintenance
Ticketing/troubleshooting
Compliance management - HR
Onboarding/Offboarding
Promotion/Salary Review
Training and development - Innovation
Ideation/innovation challenges
Research and development - Design
Rebranding campaign
Creative requests
Features
- Mobile and desktop view
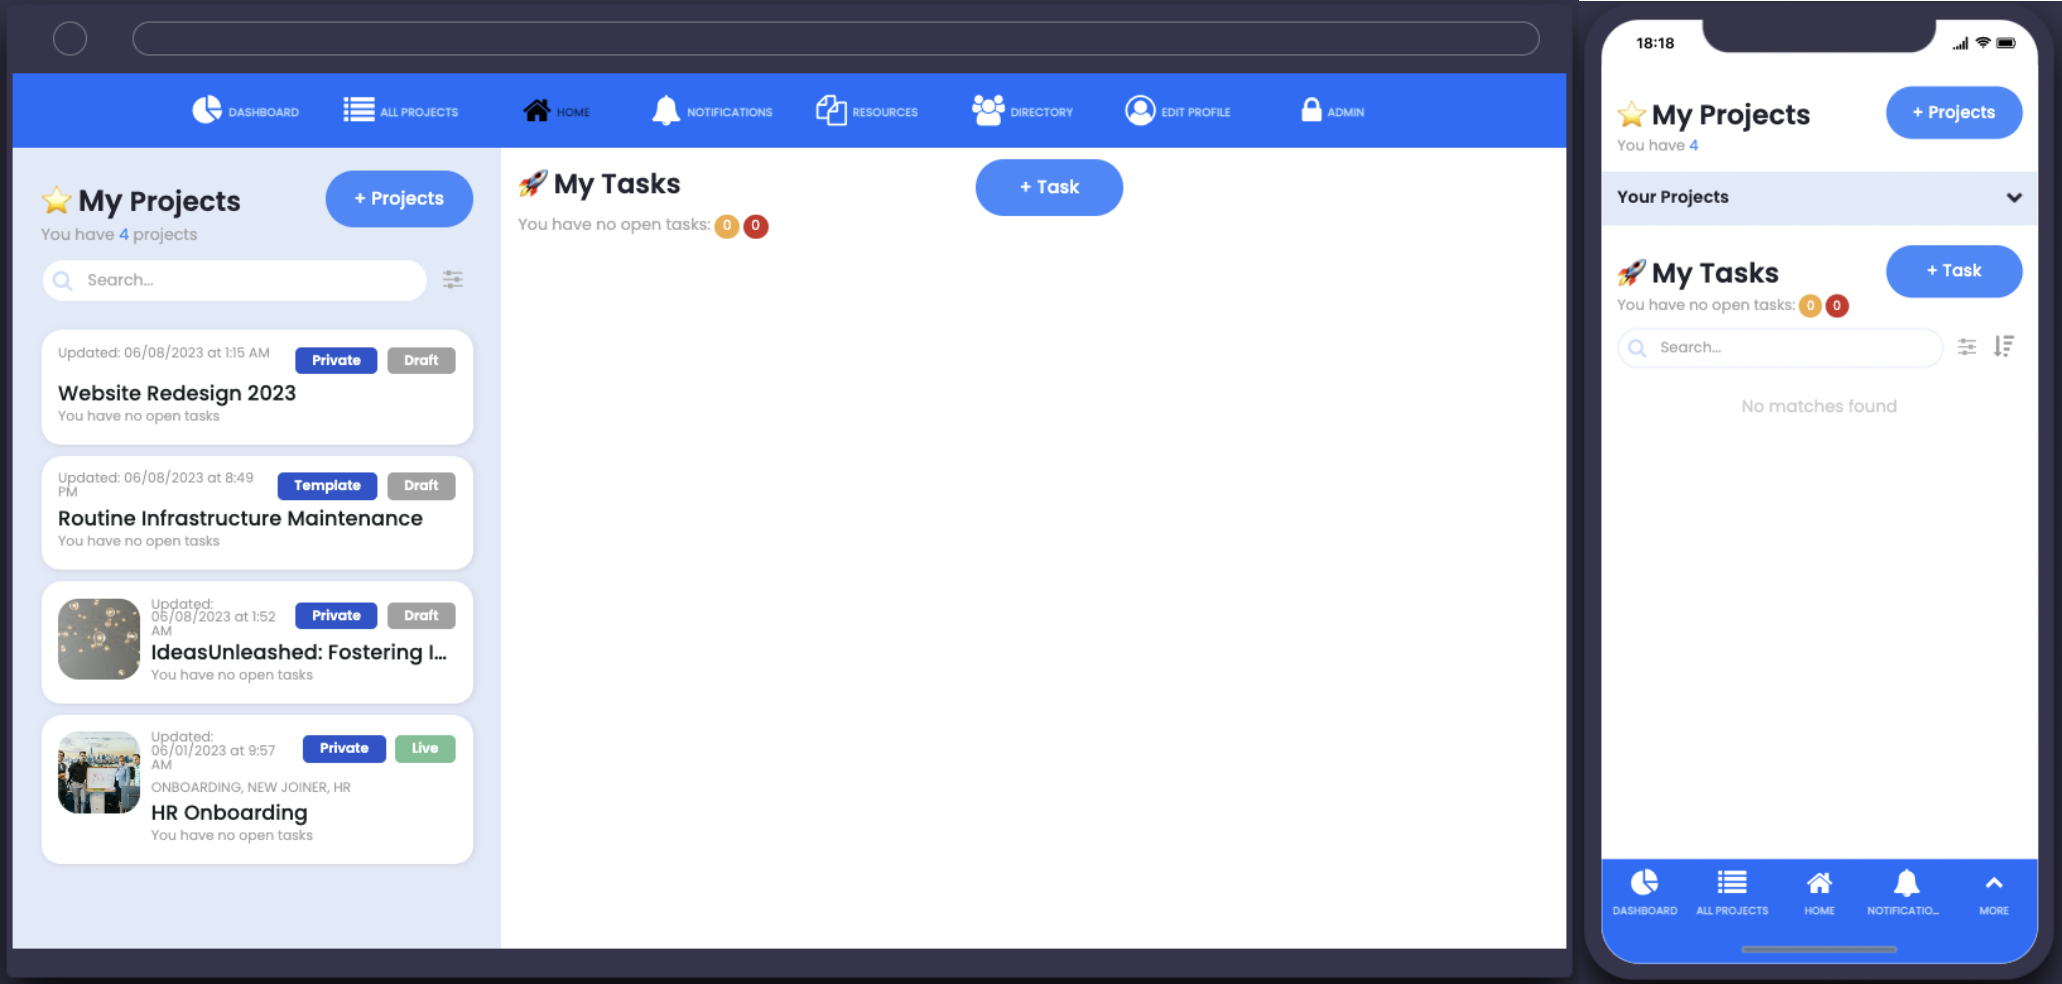
With both mobile and desktop views available for the app this offers flexibility and accessibility, enabling users to access and manage projects from anywhere. It enhances collaboration, provides real-time updates, and improves task management, resulting in increased productivity and user satisfaction. - Projects
Projects can be created by admins. When creating a new project you will be able to start from scratch. copy an existing project or use a template.
A project is essentially a group of tasks that need to be completed.
Regular users will be able to view a project where they can; view task details, update a task status, add comments or files, and receive notifications regarding task assignments or updates.
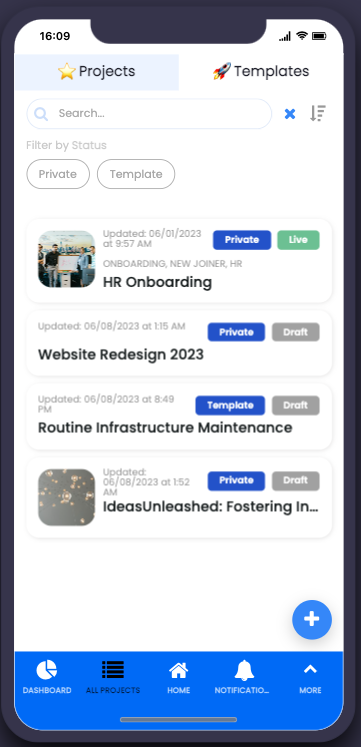
Admins can make a project template for all users of the app to use - Templates
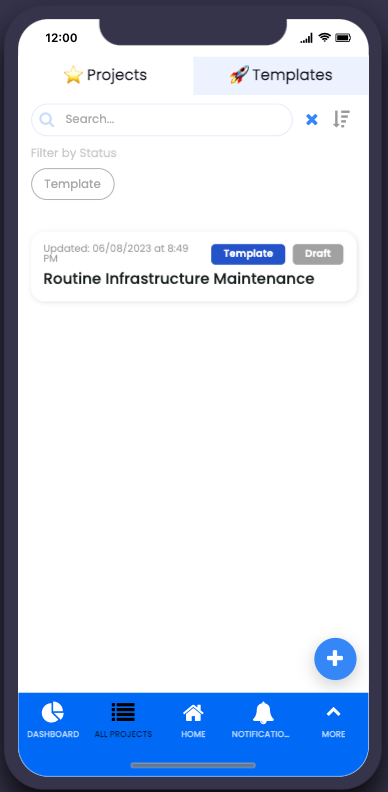
When adding a new project, it can be saved as a template to be used for future or additional projects, enabling faster setup.
Templates can be selected when adding a new project or viewed in the templates tab on the “all projects” screen - Tasks
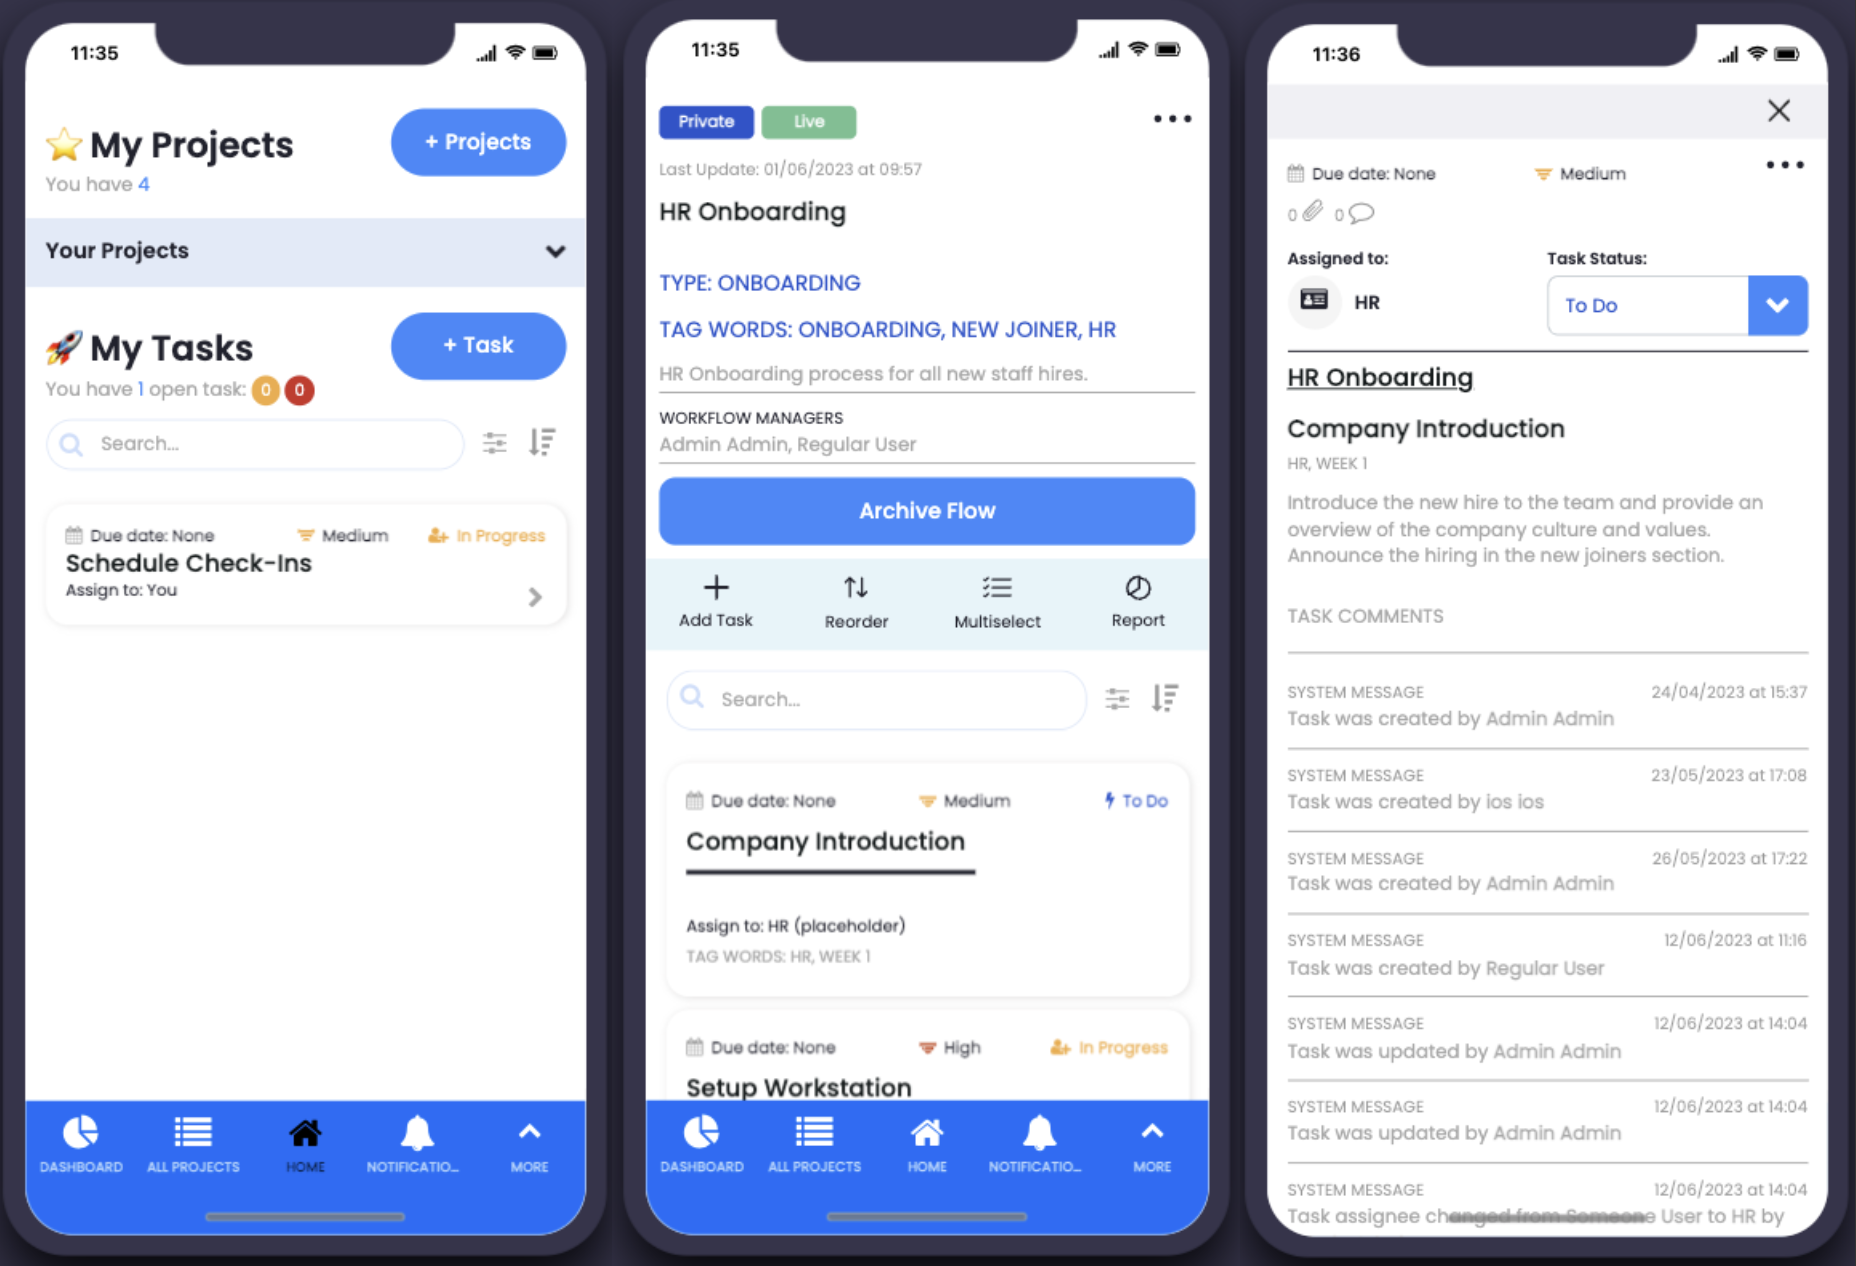
Once a project has been set up, tasks can be added.
Each task will require an assignee. Assignees can be an individual, a group or a placeholder.
The task visibility can be set to either the
Each task can be updated with comments, status, and files by users or groups, with automated notifications and system messages notifying users of these updates. - Project reports
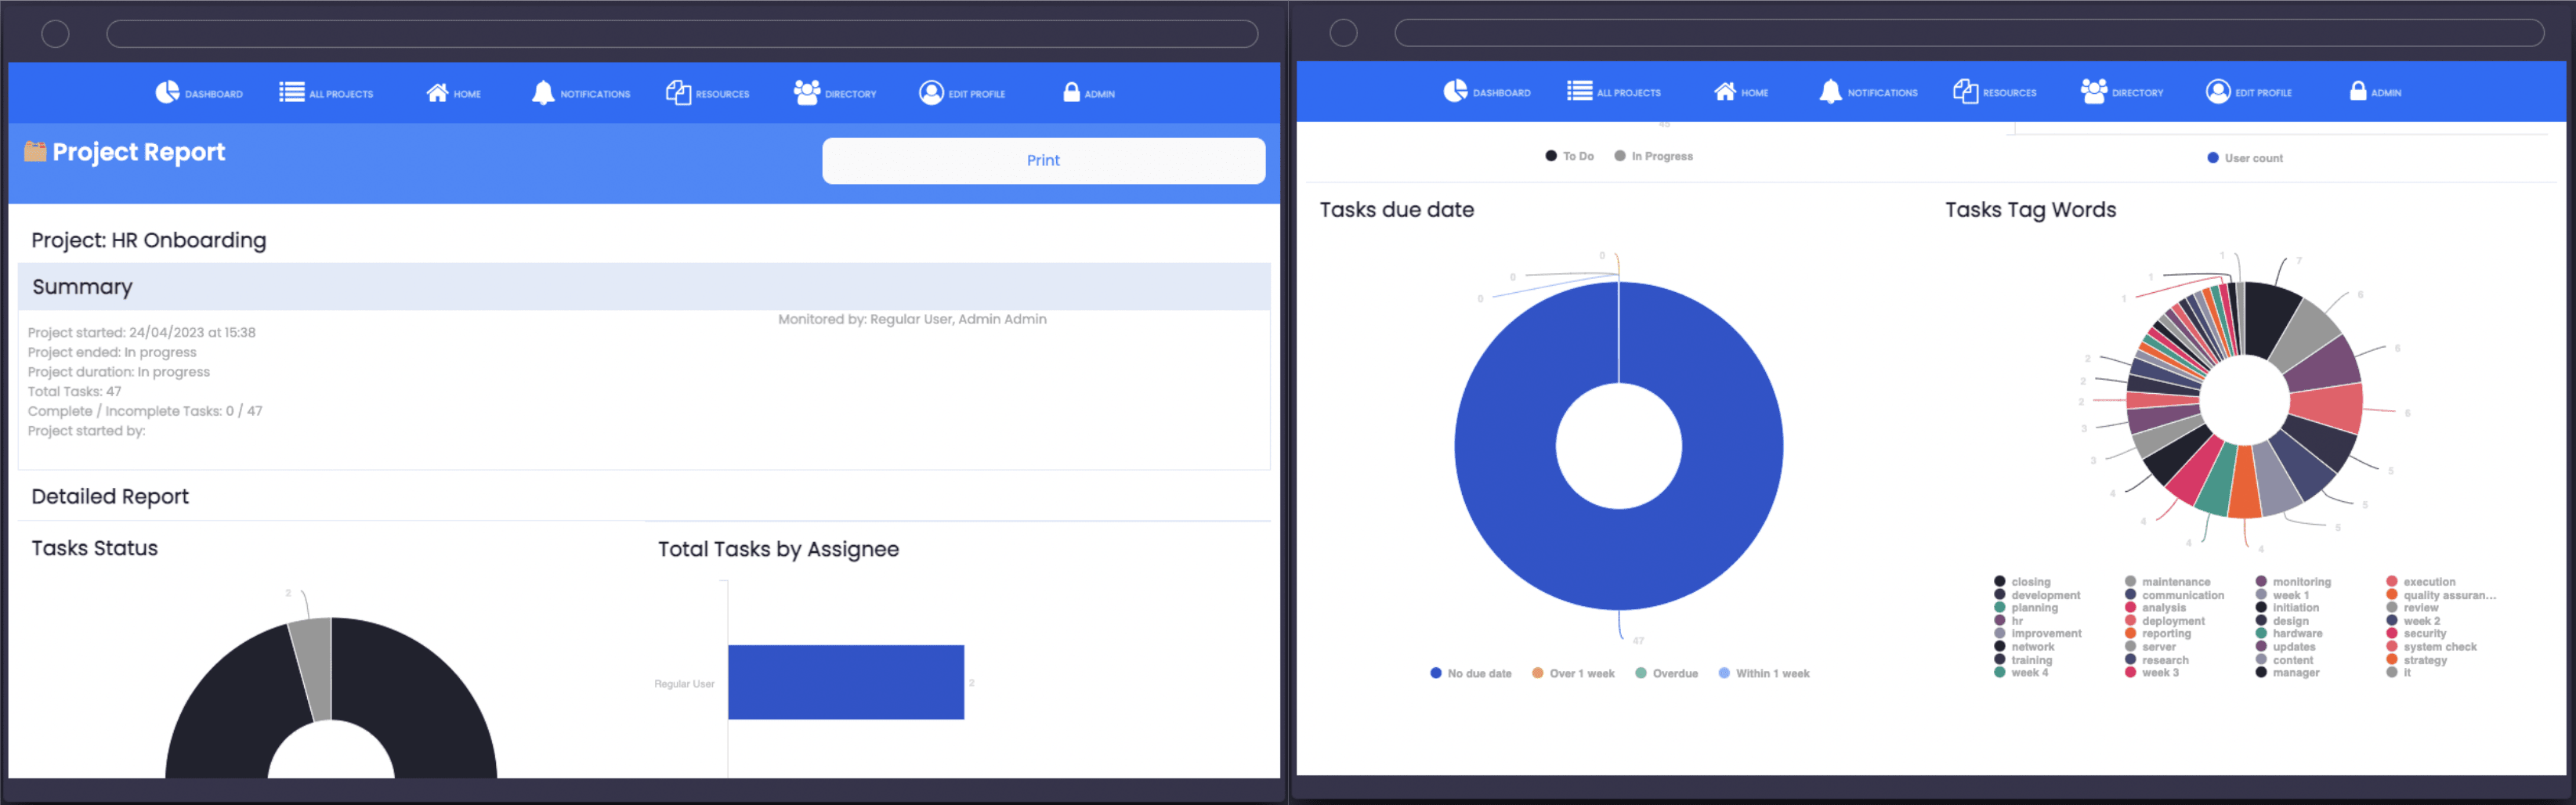
Use the project report to view and monitor the progress of the project - Directory
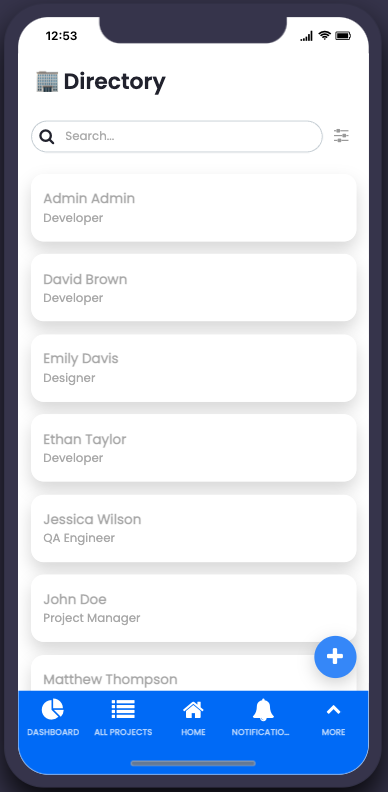
Use the directory screen to view other users of the app and their contact details such as; photo, full name, title, department, location/office, expertise, and email.
Any user in the directory can be assigned to a project - Dashboard
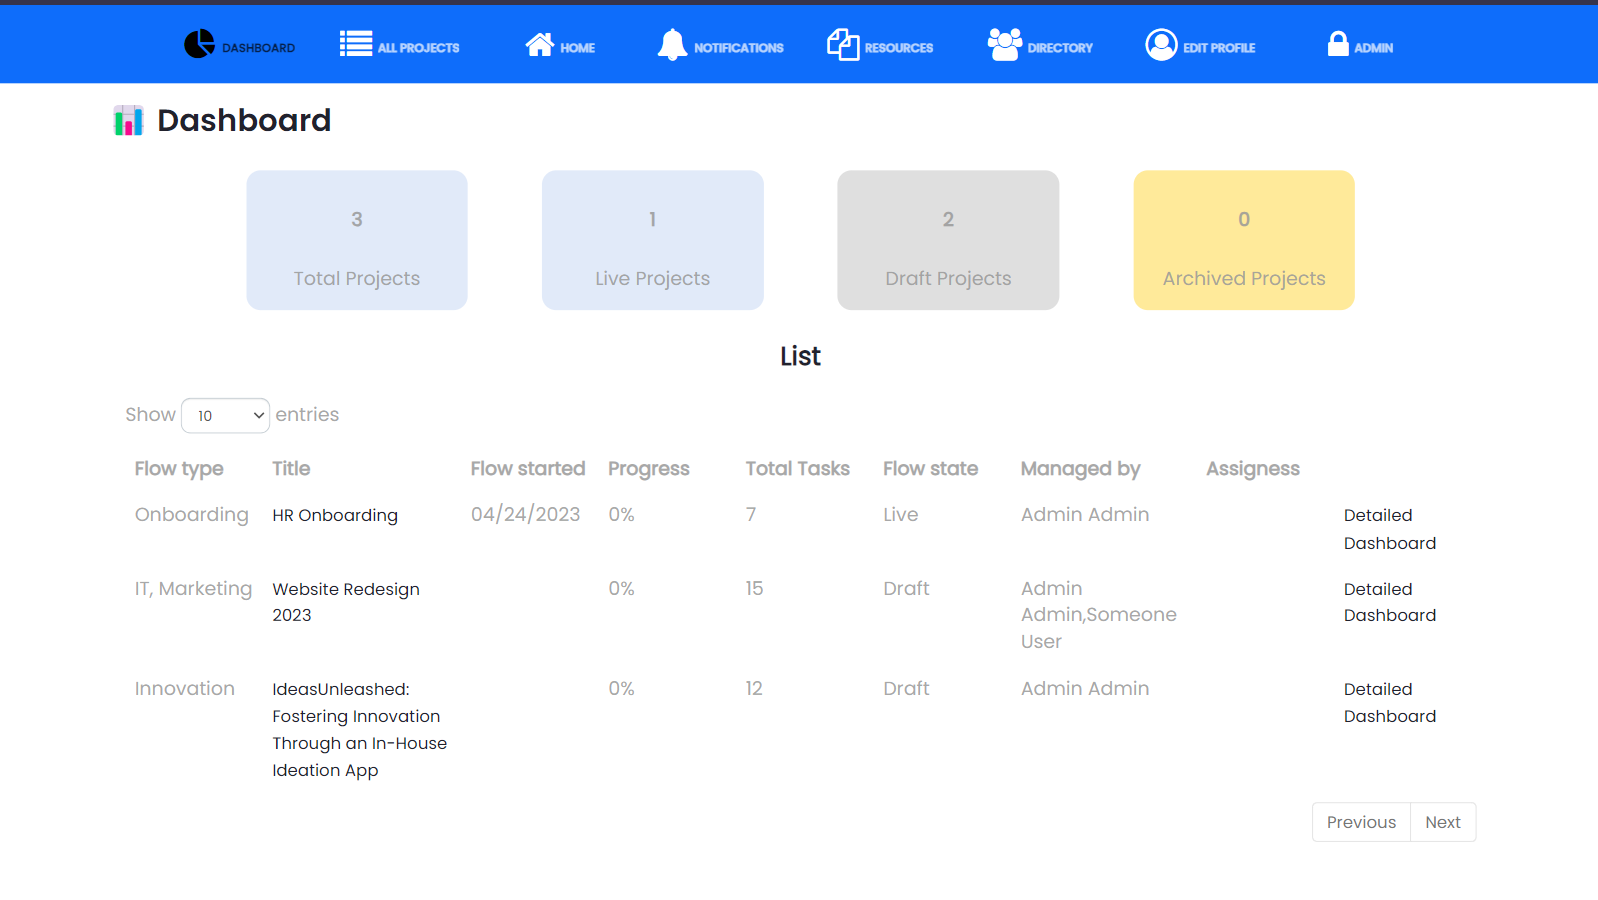
Use the dashboard to get an overview of current and previous projects
User roles
User role overview
|
User role |
Definition |
User-specific features |
|
Admin |
Manage the app and users |
|
|
Regular user |
Access to app features |
|
Solution set up
How to add a project
- First, open the home screen
- Choose the “+projects” button
- From scratch – create a project from scratch (see instructions below)
- Copy of existing – select from a list of existing projects
- From template – create a new project using a saved template
- Next, give your project a title, a type, and a description
- Choose the project state – draft, live, or archive
- When a project is set live, all users assigned to the task list and any associated admins will receive a notification alerting them to the project
- Once the project and associated tasks are completed, update the status from “live” to “archived”
- A report of the project data can be found in the “reports” tab of the archived project
How to add a task
- First, open the home screen
- Choose the “+ task” button
- Select the relevant project from the drop-down
- Give the task a name, add any required content, link to another screen if necessary, link to another task if necessary, and attach any required files
- Chose the assignee type; user, group, or placeholder and then select the assignee
- Select your visibility
- Add any tag words to make the task searchable
- Finally, add a due date if required
- Submit the task
- Any assignees will be notified of the new task
Manage app users
This option is used to edit individual users within the app. Admin users have the option to bulk upload a CSV file or edit an individual user.
- Bulk upload – admin users can use this screen to bulk upload data into a data source. In the settings of the form select the data source your upload should be added to
Note: column names must match the column names in the data source you are uploading to - Edit users – from the admin menu, choose “manage users” and then select the user you want to edit. Click on the “Edit” button. Edit required for fields. Save
- Delete users – to permanently delete users from the app, from the admin menu, choose “manage users” and then select the user you want to delete. Click on the “Delete” button. Once deleted they will no longer be able to access the app
How to send notifications
- Admins can use the communications screens to keep users informed by sending suitable email, push, and SMS notifications
- This form has the option to submit, save, send a test, or send to users
- If you select to save this draft can be viewed and edited from the manage communication screen
- If you select to send a test, this will be sent to you to view
- This screen allows you to view previously sent communications or saved communications
- Select the communication to view, and click duplicate to load the edit communication form with the communication detail prefilled
- These screens use the list from data source and the form components. Click to learn more
Before launching
Before publishing your app you should consider the below setup tasks:
- Remove test data
- Set up any existing projects and tasks if desired to get the app started. This is not mandatory but recommended to encourage activity from your users
- Brand materials – including colors, fonts, images
- Users – a list of users to invite or add to the app
Additional information
- New Projects:
- From scratch – a new project with no additional details or tasks
- Copy of existing – copy all details of an existing project including tasks
- From template – choose from a list of templates to copy the project details and tasks
- Project details:
- State – Draft (recommending while setting up), Live (users will begin to receive notifications), Archive (when completed)
- Visibility – Public (all users see), Private (only users with assigned tasks and admins see), Template (anyone can make a copy)
Related articles