App merge copies selected screens, data sources, files and app configuration from one existing app into another. Use it when you need to move related content together and review what Fliplet expects to copy or overwrite before starting.
Contents
- Before you start
- Choose the apps
- Select content
- Review and start
- Monitor and troubleshoot
- Related resources
Before you start
App merge changes an existing destination app. Some changes happen immediately when the merge completes and the whole merge cannot be automatically rolled back.
Before starting:
- Confirm that App merge is enabled for the organization containing your apps. If the destination app belongs to a different organization, enable it there too. An organization administrator can go to Manage organization > Security > App merge and turn on Allow merges. If the setting is unavailable, contact Fliplet Support or your Customer Success contact.
- Confirm that the destination app already exists and appears in the destination selector.
- Use eligible source and destination apps. Apps built with AI are not currently supported.
- Review the destination app and make a record of any content or configuration that you may need to restore manually.
- Allow for plan limits when copying data source rows. A merge may copy fewer rows than the source contains.
Important: A merge can complete only some stages. After a Partial or Failed result, inspect the destination and the merge logs before starting another merge.
Choose the apps
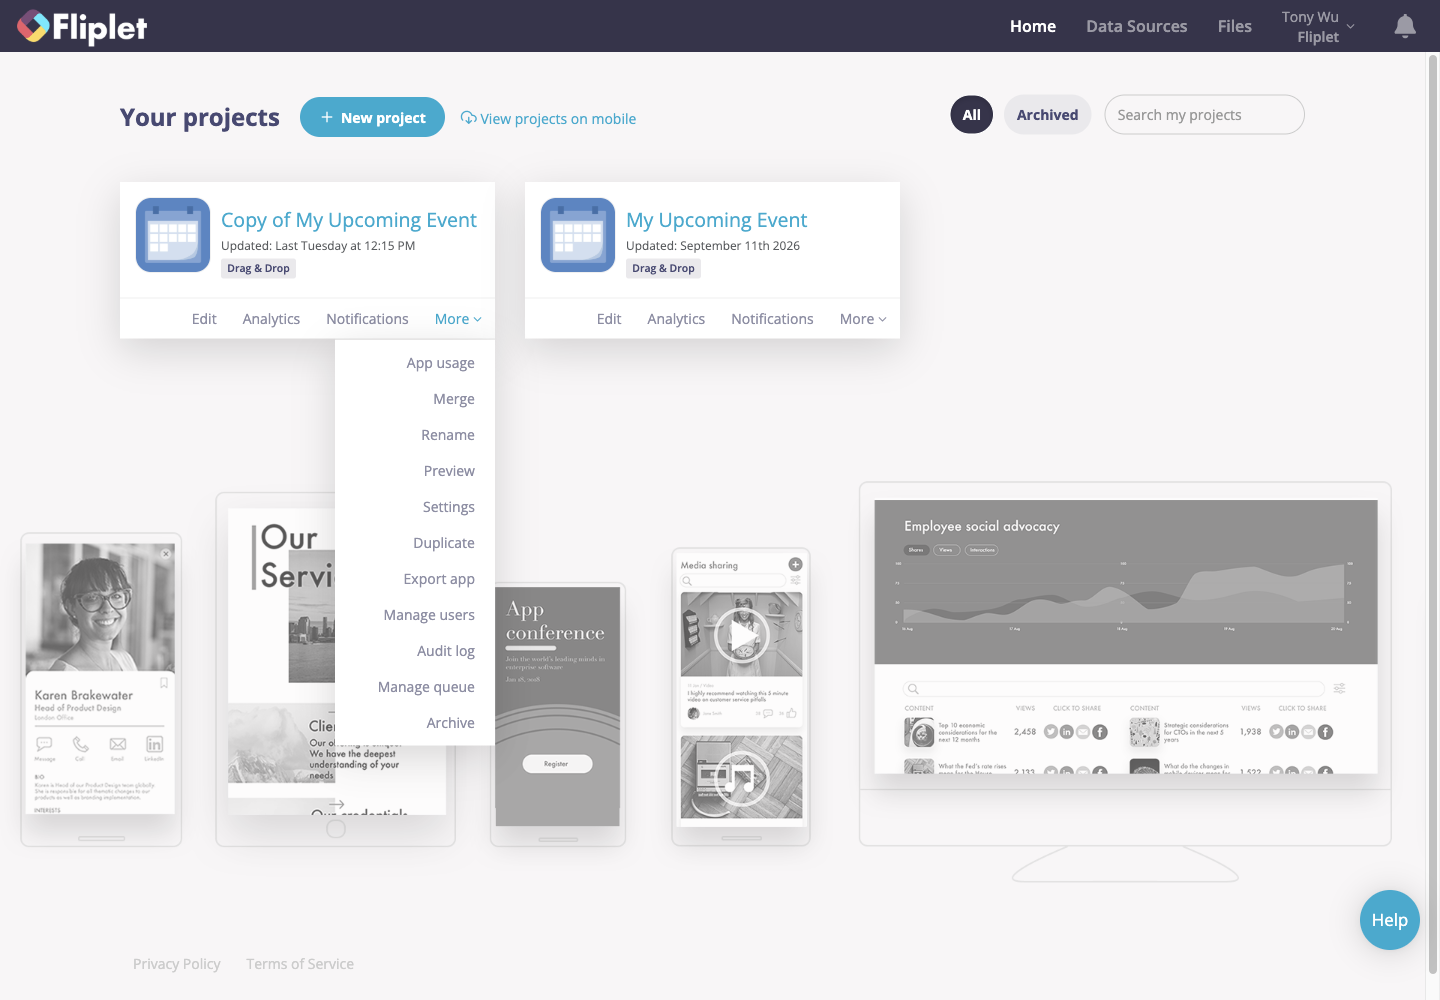
- In Fliplet Studio, go to Home.
- Find the app you want to copy content from. This is the source app.
- Open More and click Merge.
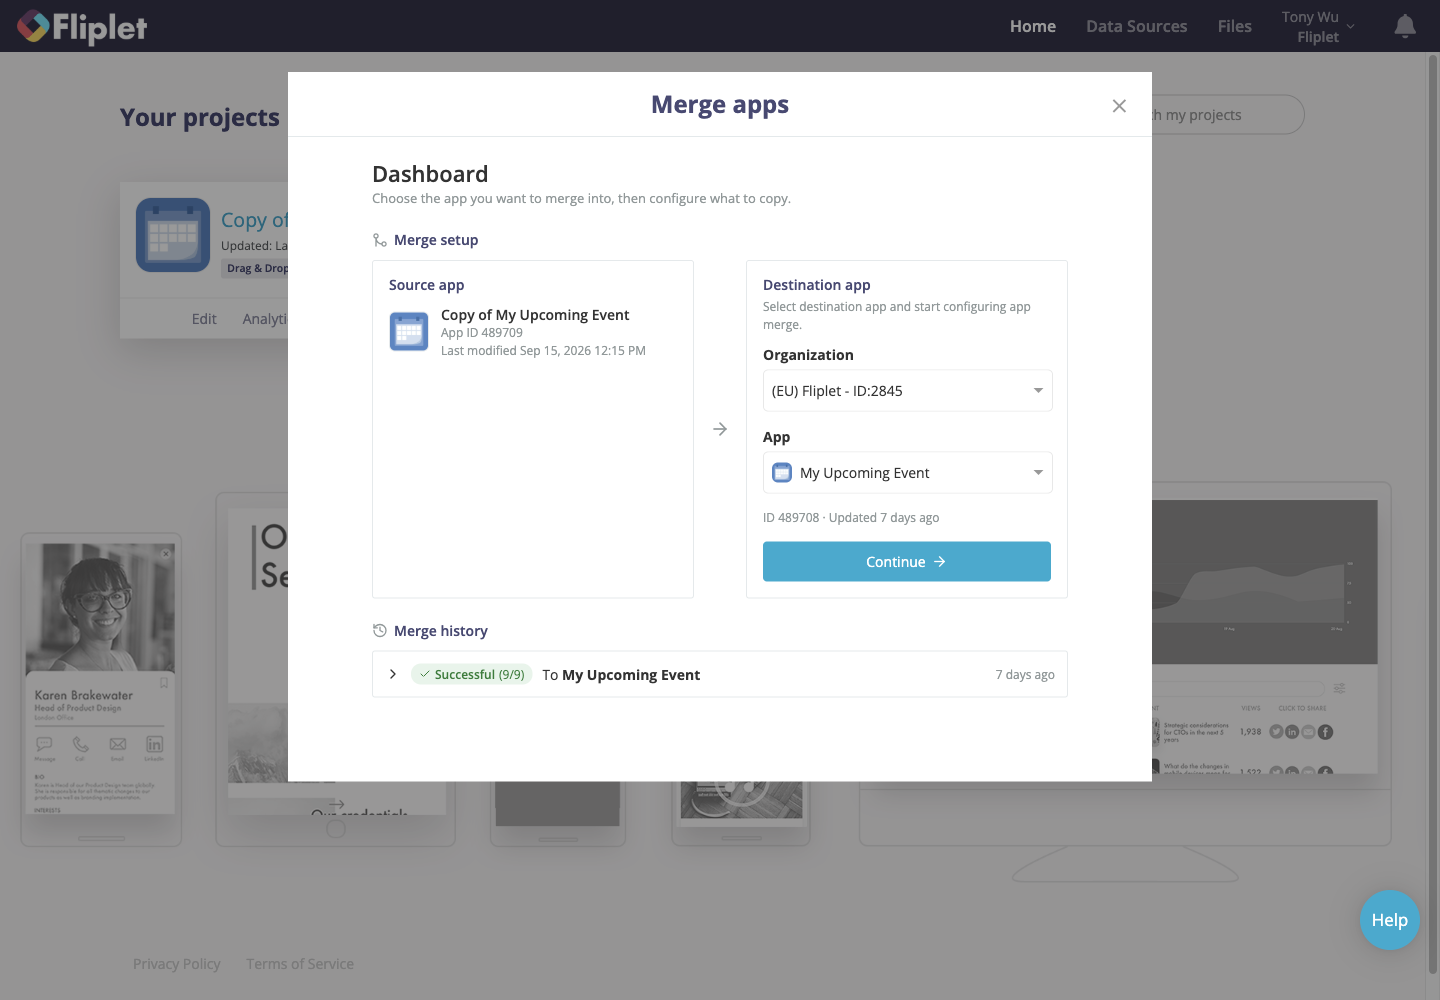
- On the Dashboard, select the destination organization if the organization selector appears.
- Select the existing app you want to copy content into. The source app is not available as a destination.
- Click Continue.
If an organization or app is missing, confirm that App merge is enabled for both organizations and that you can access the app in Studio. If Studio cannot load the available apps, use the reference shown in the error when contacting Fliplet Support.
Select content
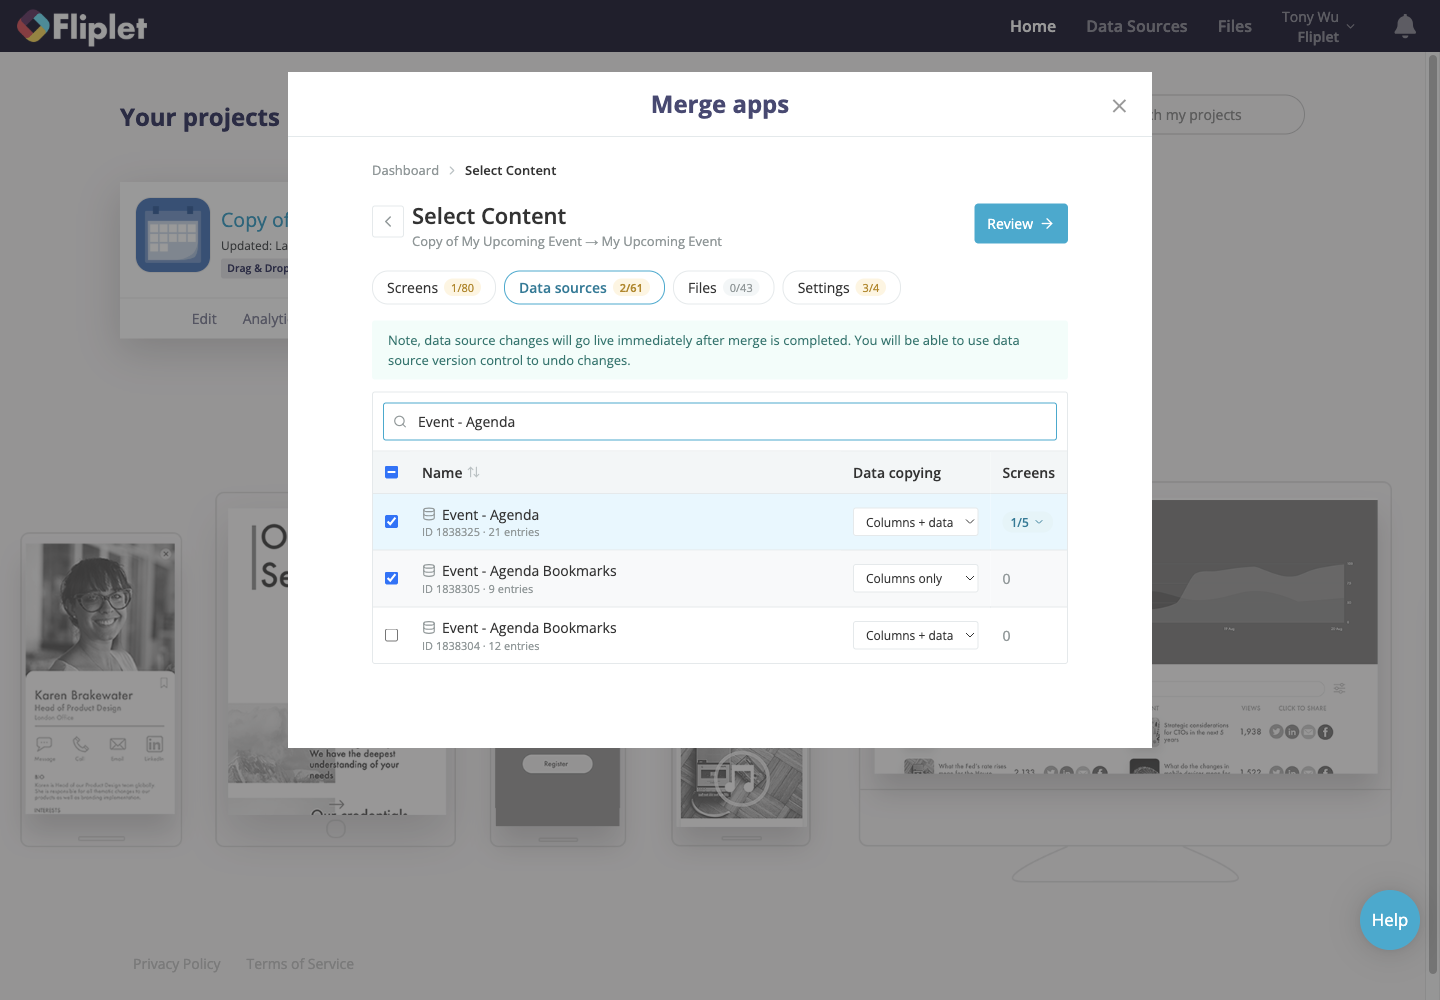
Use the tabs on Select Content to choose what Fliplet copies. The number on each tab shows how many items are selected.
Screens
Select each screen you want to copy. Expand a screen to review and select related data sources or files.
If the destination already has a screen with the same title, the review normally classifies it as Overwrite. Fliplet saves a screen version before replacing the destination screen content.
Data sources
Select a data source and choose its copy mode:
- Columns + data copies the columns and rows. For a destination data source with the same name, this replaces its current columns and rows. Row copying is subject to the destination organization's plan limits.
- Columns only copies the column structure without copying source rows. For a destination data source with the same name, its existing rows remain.
Data source changes go live when the merge completes. Do not rely on version history as a complete backup of every row. Inspect important destination data before starting.
Files and folders
Select individual files or select a folder and choose:
- Folder + files to copy the folder structure and its contents.
- Folder only to copy the folder structure without its files.
When a copied file has the same name as a destination file, both files remain in File Manager. Check their names after the merge before updating links or removing either file.
App configuration
Open the Settings tab and select only the settings you intend to replace:
- App settings includes languages, About this app and custom fonts.
- Menu settings includes the menu type, links and styles.
- Theme appearance settings includes theme values and referenced media files.
- Global code customisations includes global JavaScript, CSS, SCSS and dependencies.
App settings, Menu settings and Theme appearance settings are selected by default. Global code customisations is clear by default. App configuration overwrites cannot be automatically undone after the merge.
When you finish selecting content, click Review. If you selected only app configuration, confirm that you want to continue without screens, data sources or files.
Review and start
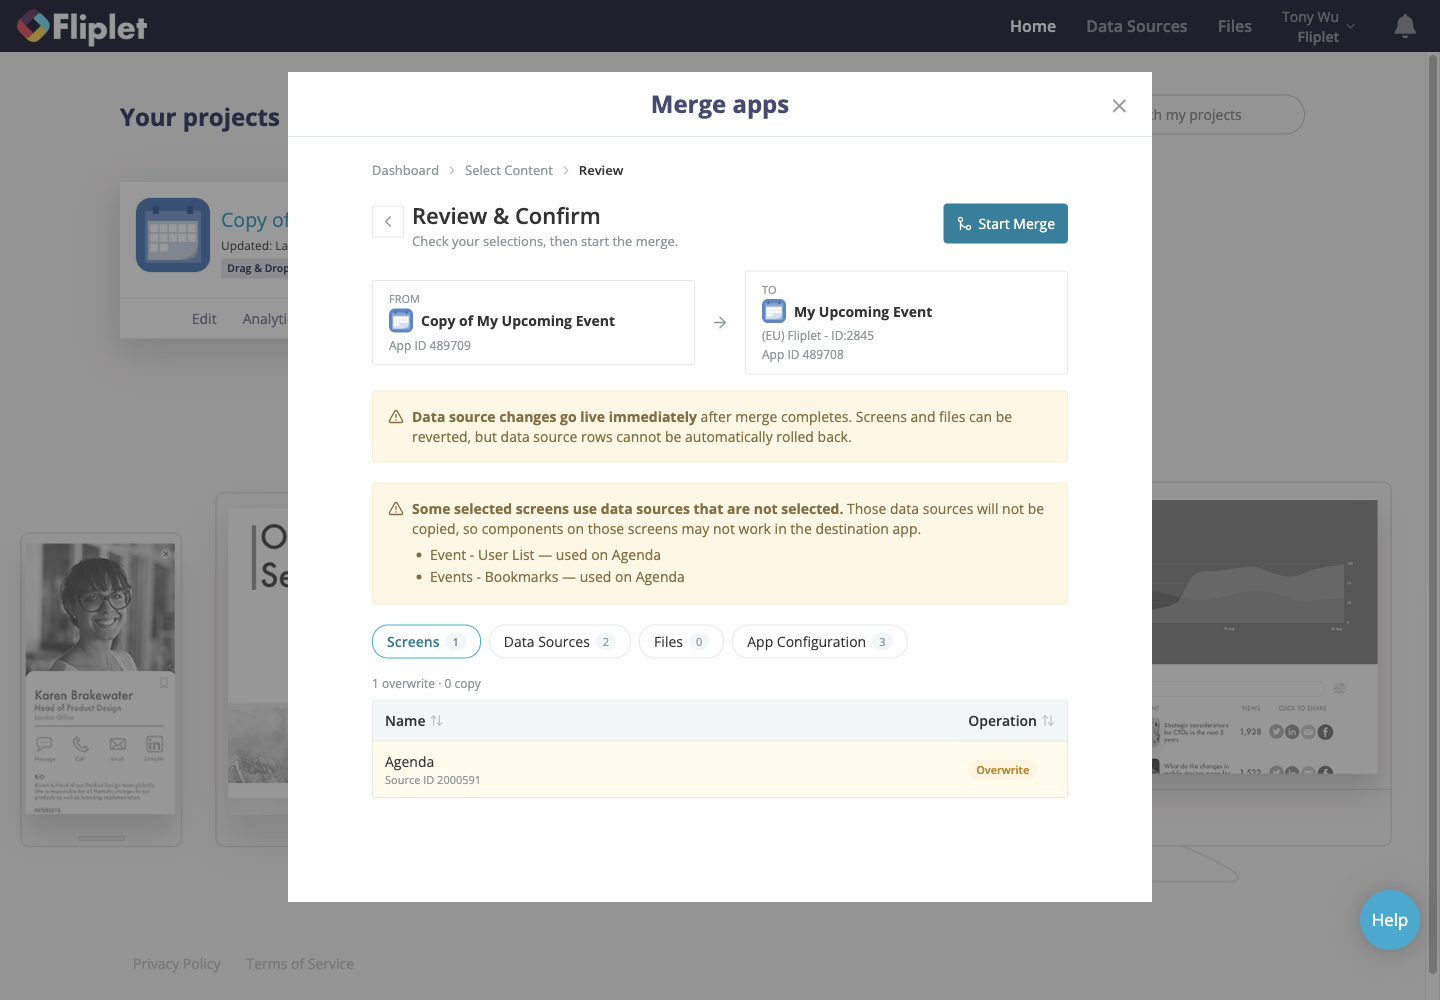
On Review & Confirm, verify the source and destination apps first. Then check each tab and its operation:
- Copy adds the selected item to the destination.
- Overwrite replaces matching destination content or an enabled app configuration group.
- Skip leaves that app configuration group unchanged.
Resolve any warning that says a selected screen uses a data source that is not selected. Either return to Select Content and include the data source or accept that components on the copied screen may not work in the destination app.
If Studio cannot load the overwrite preview, it temporarily shows reviewed items as Copy. You can still start the merge, but treat the preview as unavailable and inspect the destination carefully afterward because the merge still handles matching content.
Before continuing, check the overwrite count and any immediate data source changes. Then:
- Click Start Merge.
- Review the confirmation, including the destination app and overwrite count.
- Click Start merge.
Studio returns to the Dashboard and adds the operation to Merge history as In Progress.
Monitor and troubleshoot
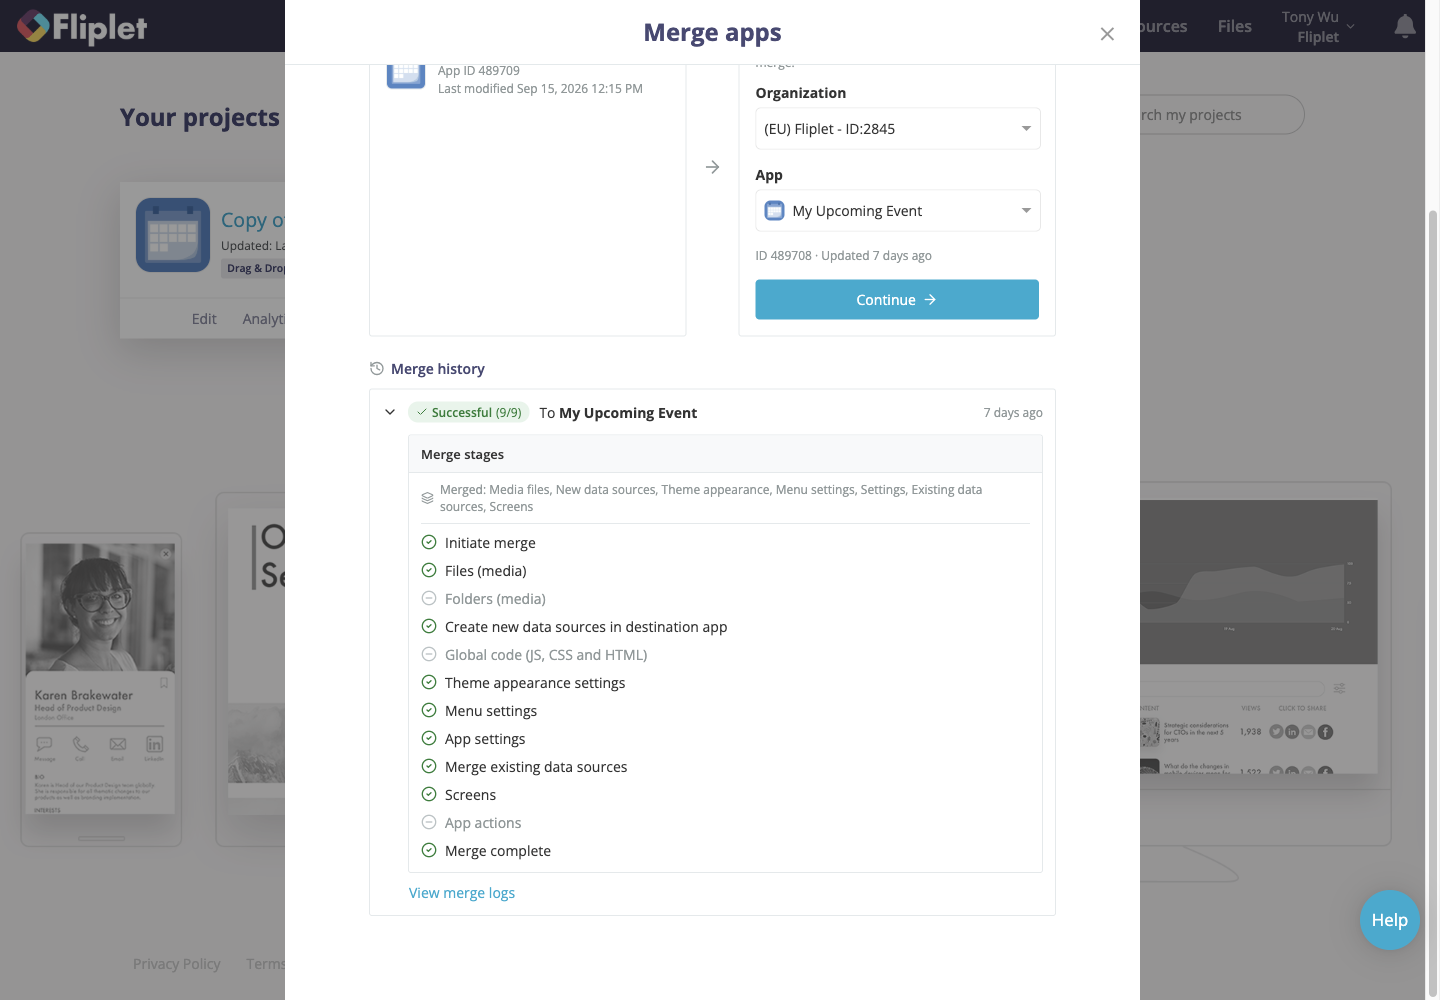
Use Merge history on the App merge Dashboard to monitor the operation. Expand an entry to see its stages and click View merge logs for more detail.
History can show these results:
- Successful means the history entry reports completion without a failed stage.
- Partial means some stages completed and at least one stage reported a problem.
- Failed means the merge did not complete successfully.
- In Progress means the history entry does not yet contain a completion result.
The person who starts the merge and publishers of the destination app are notification recipients. Depending on availability, they may receive email, Studio notifications and device notifications. A notification can reopen the destination app or the related merge information, depending on the recipient's access.
If the merge reports a problem
- Expand the entry in Merge history.
- Click View merge logs and note any reference ID.
- Inspect the destination app, including screens, data sources, files and selected app configuration.
- Correct the cause of the problem or contact Fliplet Support with the reference ID.
- Configure and start another merge only after confirming which changes already reached the destination.
There is no Retry action and no automatic rollback for the whole merge. If a notification and the history entry show different outcomes, use the merge stages, logs and destination content to determine what changed.
Related resources
- How to copy screens between apps for copying an individual screen without the App merge workflow.
- Using multi-environment for the wider process of preparing and testing separate environments.
- Data Sources for general data source concepts and version history.