Precursor:
The app must have a login if entry management is enabled
Features
A directory offers the following features:
-
Users can produce contact entries and add them to the directory
-
Users can bookmark the content
-
Users can edit their own content
Get Started
To create a directory you’ll need to:
Step 1 – Create and name the directory screen
-
In Fliplet Studio, click on the blue “Add screens” button in the bottom left.
-
In the heading options, choose the “Lists” option.
-
Choose the first option “List-directory”.
-
Click on the blue “Add 1 new screen” button in the top right corner.
-
Name the screen “directory” and then click “Add screen”.
Step 2 – Create list data
-
Click your list component on the screen and the options will open on the right.
-
Click the “Create list data” button and name the data source “My directory”, then click “OK”.
Step 3 – Set the data view settings
-
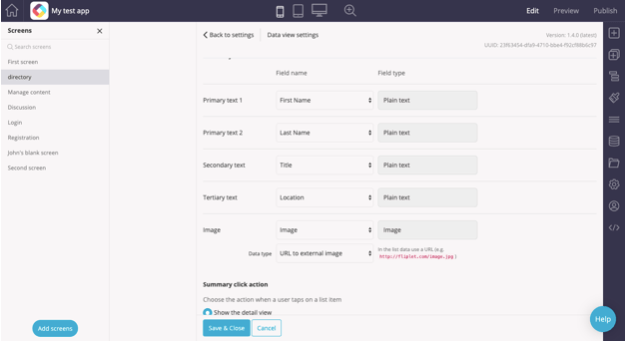
Click on the “Data view settings” button. This is where you can map what data you want to display and where you want to display it. It also shows what type of data it is. We recommend “First Name”, “Last Name”, “Title”, “Location”, “Image” in the first section.
-
Under Summary click action, choose the “Show the detail view” option.
-
If you wish to add more “Detail view fields”, click the “Add new field” button at the bottom.
-
When finished with the Data view settings, click on the blue “Save and Close” button.
Step 4 – Create a form
To create a form, follow the steps outlined in this article. When you reach the directions related to the “Settings” tab in the linked article, return to this step and complete the settings using the information listed below.
-
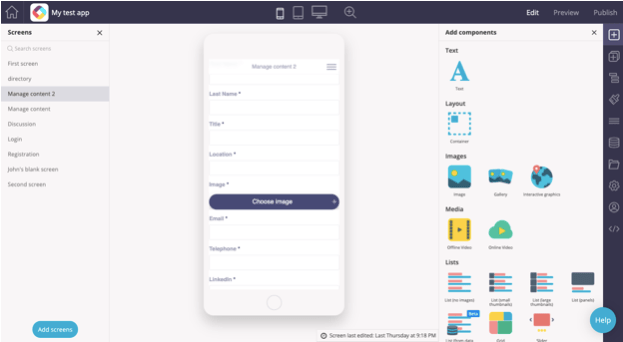
When you are finished creating the form, it should look something like this:
-
Go to the “Settings” tab.
-
Click the dropdown menu under Select a data source to store the form submissions and choose “My directory”.
-
Under “Submission”, When the form is submitted mark the box next to “Add new submissions to a data source”.
-
Scroll down and where it says After the form has been submitted…, click “Take the user to another screen”.
-
In the “Select a screen” dropdown, select the “directory” screen.
-
Click “Save and Close”. Return to the “directory” screen.
Step 5 – Continue configuring your list
-
Under How do you want to sort your list? choose from the dropdown and add a “Add a new sort condition” if you wish.
-
Under How do you want to filter your list? choose if you wish to filter in a specific way and how.
-
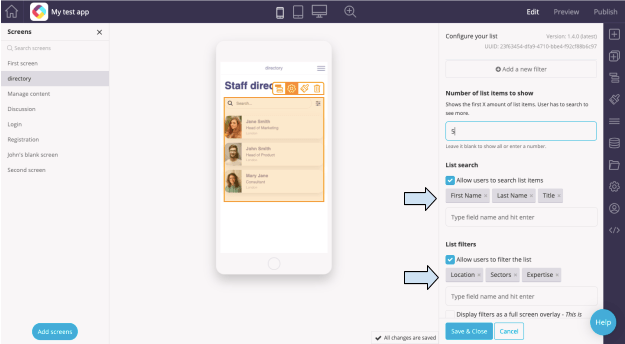
Under Number of list items to show choose how many list items you wish to show the user before they have to search in order to see more. If you have a large directory it is recommended you use this to improve the app’s speed.
-
Next, choose what fields from the data source you wish for users to be able to use in order to search for a contact or filter the directory list. Start typing a field name and then click on the desired value.
-
If you have a long list of filters, select the “Display filters as a full screen overlay” option.
-
Under the “Social features” dropdown, choose to allow users to bookmark items in the list.
Step 6 – Finish configuring your list
Note: If you are creating a company directory, you may want to mark “Users can edit their own list items”.
-
Under the “Entry management” dropdown select “Add list items” and then choose “Only admins can add”. Under “Select a screen”, choose the form you created earlier.
-
Select “Edit list items” and then select “Only admins can edit list items”. Then choose the form you just created under the “Select a screen” dropdown.
-
Select “Delete list items” and then select “Only admins can delete list items”.
-
Under Select field where the post author’s email is stored, select “Email” from the dropdown.
-
Under Select the data source where app users are listed, select the “My directory” data source you created in step 2 from the dropdown. Under “Username data field(s)” select “First Name” and “Last Name”. Under “User email data field” select “Email”.
-
Click “Save and Close”.
Step 7 – Test the directory in preview mode
-
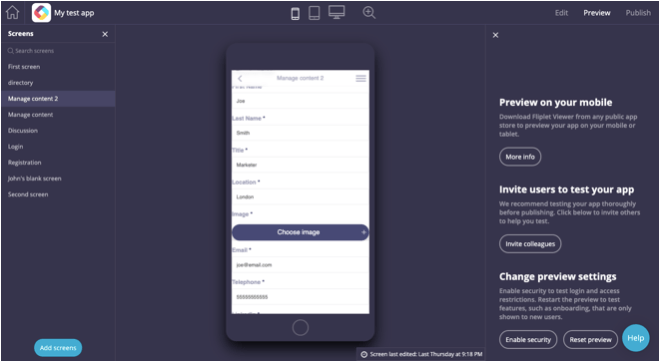
Go to “Preview” mode.
-
You should be able to bookmark the directory list. The test was successful if you were able to bookmark the different directory entries when logged in.
-
Try to submit a new directory entry by clicking the + in the bottom right corner.
-
Enter all of the fields including First Name, Last Name, Title, Location, Image, Email, etc. and click “Submit”.
-
Go back to “Edit” mode.
-
Go to the screen you set up in Step 4 and click on it.
-
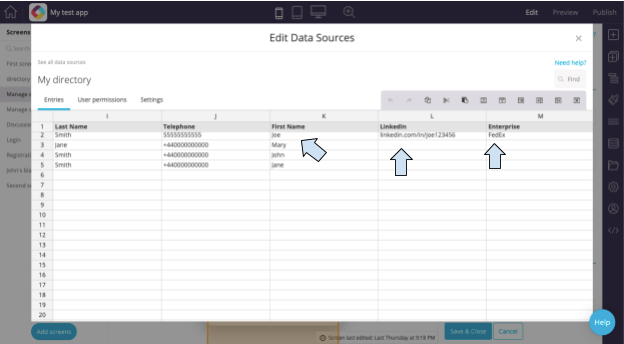
Scroll up and click on the blue “Edit data source” text. The data you entered earlier should appear in the spreadsheet under the appropriate headings.
-
Exit this view and scroll to the bottom of the settings.
-
Click “Save and Close”.
-
To test, go to “Preview” mode and test that when you click “Submit” on the screen you set up in Step 4, it redirects to the “directory” screen. If you are logged in you should see “Edit” options on the “directory” screen. Also, if you entered data into the form, the data should appear as an entry in the directory list.
Related Articles