The form with drop-down from data source template is a low code screen. It enables you to populate drop-down fields using data from a data source.
This article explains the steps required to create your drop-down list.
Get started
For this example, we will use countries and regions. Using a data source with two columns, one containing countries and the other one containing regions.
The first field on the form will populate with the countries.
Depending on which country is selected in the first field, the dropdown will display any regions associated with that country.
Once the form is submitted, it will save the data submitted to your selected data source. Note, this should be a separate data source to the one holding the country and region information.
To use the screen template you will need to:
Step 1 – Set up the form
- Add the “form with drop-down from data source” screen template to your app using the ‘Add screen’ button
- Click on the form component to open the settings, and then select the settings tab

- Now you will need to add a new data source to save the submitted data to. To do this, select “change data source” and click “create new data source”.
The data source should include a column for both fields of the form. For this example, the data source has a “Country” column and a “Region” column.

- Next, complete the submission configuration according to your needs and then select save & close
Step 2 – Configure the code
- On the same screen, click on the ‘Developer Options’ icon in the right menu and open the screen JavaScript.
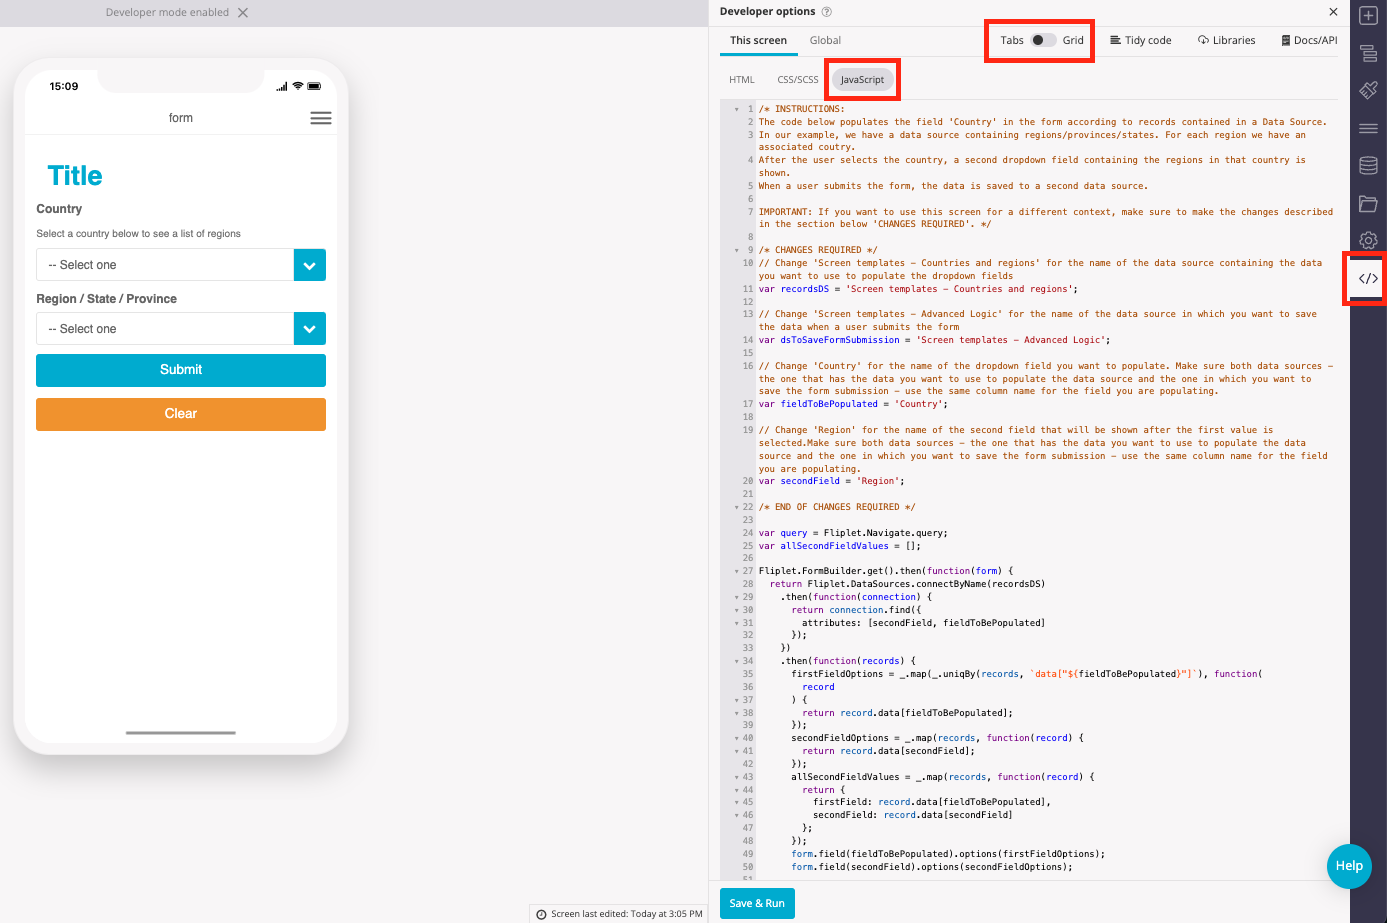
- Read the instructions in the code (these are in brown)and make the following changes required for your scenario:
- To use a different data source to populate the dropdown fields, replace “Screen templates – Countries and regions” (line 12) with the exact name of the data source you want to use
- Replace “Screen templates – Advanced Logic” (line 15) with the exact name of the data source you created in step 1 for the form submission
- If you have different field names instead of ‘Country’ and ‘Region’, replace “Country” and “Region” (lines 18 and 21) with the exact field names you are using between simple quotes. Please note that the name of the fields should match the names of the columns in both data sources.
- Finally switch over to preview mode and test your screen.
Related Articles