This article explains how to use the Single Submission setting in the Form component so that each user or identifier can only submit a form once to a data source.
Single Submission is a setting inside the Form component that ensures each user, or more precisely, each identifier, only submits the form once. When enabled, the form checks the linked data source for an existing record with the same value in a specific column, called the Identifying column, before allowing a new submission or an update.
Use Single Submission any time you want one and only one record per:
- Person (for example, email or user ID)
- Registration (for example, booking reference)
- Entity (for example, employee ID, company ID, membership number)
Prerequisites
Before you turn on Single Submission, make sure that:
- You have an app in Fliplet Studio with a screen that uses the Form component
- Your Form component is linked to a data source
- Your data source has at least one column that can act as a unique identifier (for example, email, user ID, employee number, booking reference)
Get started
- Open the Form component
- Enable Single Submission
- Choose an identifying column
- Configure the identifying field
- Set the post-submission behavior
Step-by-step instructions
Step 1 – Open the Form component
- Go to Fliplet Studio
- Open the app that contains the form you want to control with Single Submission
- Open the screen that contains the Form component
- Select the Form component on the screen to open its settings panel
- Ensure your form settings are configured correctly and connected to a datasource. You can learn more on the form component here.
Step 2 – Enable Single Submission
- With the Form component selected, look at the settings panel
- Locate the Single Submission option (displayed as a toggle or checkbox)
- Turn the Single Submission option on
When you enable Single Submission, the Form component will enforce one submission per identifier in the connected data source.
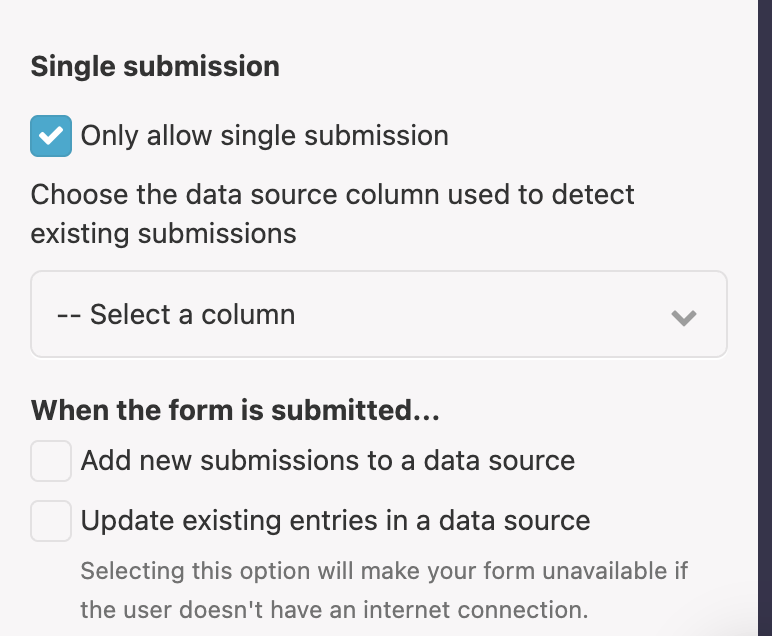
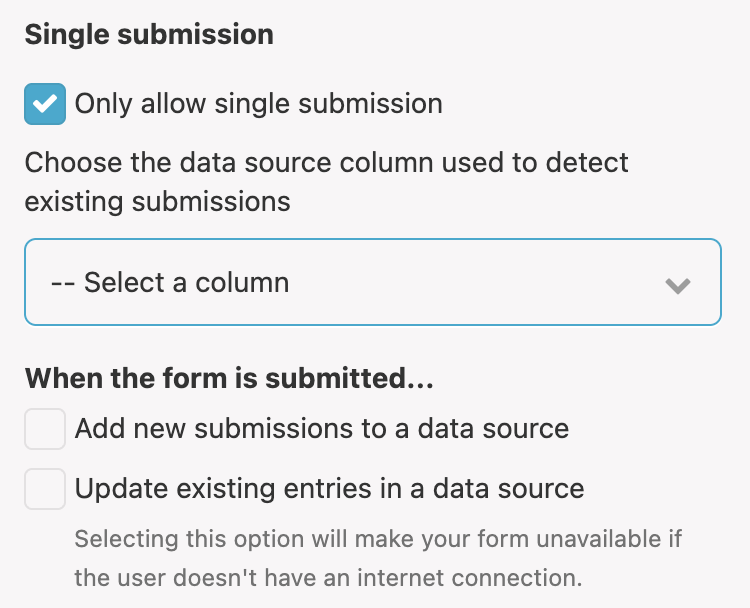
Step 3 – Choose an identifying column
When Single Submission is enabled, you must choose which column in the data source will be used to detect existing submissions. This is called the Identifying column.
- In the form settings panel, find the field that asks you to select an Identifying column
- Open the dropdown list of available data source columns
- Select the column that will uniquely identify each submission
The identifying column:
- Is how the form checks whether a submission already exists for a given value
- Does not have to match the user login or email, although it often can
- Should be something that must be unique per submission
Common choices for an identifying column include:
- User ID
- Employee number
- Booking reference
Step 4 – Configure the identifying field
For Single Submission to work reliably, the identifying value must always be present when the form is submitted.
- Find the form field that maps to the identifying column in the data source
- Decide whether users should enter this value themselves or whether it should be auto-populated
- Configure the field so that it is always filled when the form is submitted
You have two main options for the identifying field:
- Visible and required field – For example, an Email field that users must complete
- Make the field visible in the form
- Mark it as required so users cannot submit the form without it
- Auto-populated field – For example, a User ID taken from the logged-in user profile
- Hide the field from the user interface if you do not want users to change it
- Auto-populate it via field settings, such as mapping it from the logged-in user profile
Tip: If you do not want users to change the identifier, make the identifying field read-only or hide the form field and auto-populate it instead.
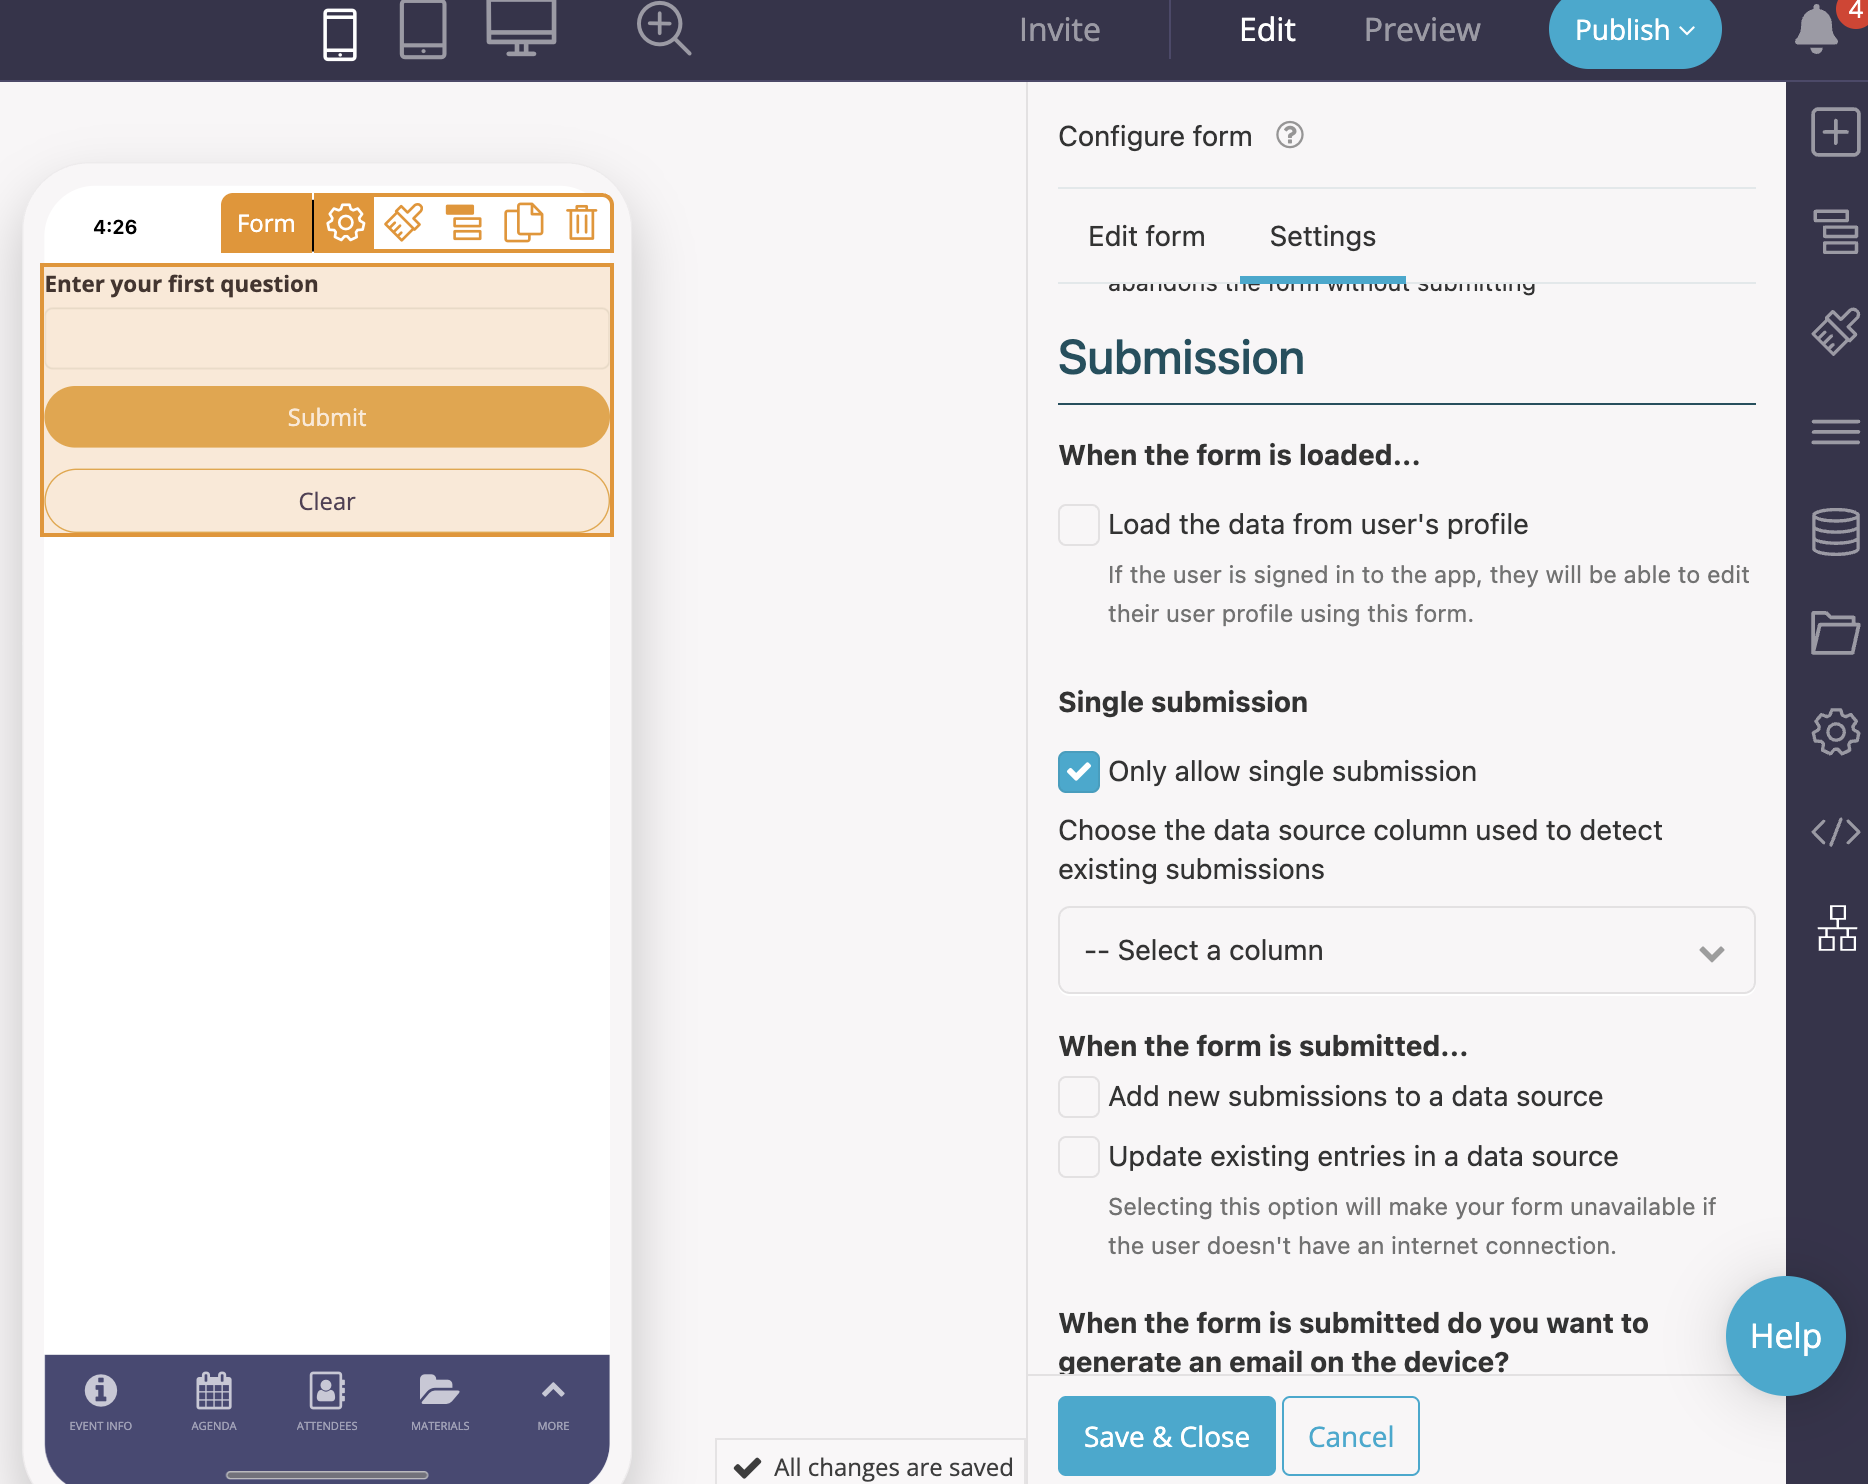
Step 5 – Set the post-submission behavior
Single Submission affects how your form behaves when users try to submit again with the same identifier, so it is important to configure what happens after submission.
- In the Form component settings, locate the post-submission action configuration
- Choose what should happen after a successful submission (for example, show a message, go to another screen, or run a workflow)
- Confirm that the selected post-submission action is appropriate for both first-time submissions and blocked repeat submissions
The post-submission action runs in two situations:
- After a normal, first-time form submission
- When a user is blocked because an entry with the same identifying value already exists and they tap OK on the message
Note: Once Single Submission is enabled and a form is submitted for the first time for a given identifier, the user cannot load the form to submit again with the same identifier and cannot use the same form to resubmit with that identifier. They are redirected to your post-submission flow instead.
Common use cases
Event registration – one registration per attendee
- Identifying column: Email
- Goal: Ensure one registration per email address
Use Single Submission so that each email address can only register once. If a user returns to the form with the same email, they are notified that an entry already exists and taken to your post-submission flow instead of creating a duplicate registration.
Employee or member profile – one record per person
- Identifying column: Employee ID or User ID
- Goal: Ensure one profile record per person
Use Single Submission to prevent duplicate profile records for the same person. Users can still edit their profile, but you should design the form so they cannot change the identifier in a way that would cause two people to share the same ID.
Surveys, feedback, and applications – one response per person or application
- Identifying column: Email, Application ID, or a similar unique value
- Goal: Allow only one survey response or one application per identifier
Use Single Submission to ensure each user, or each application reference, can only submit once. This is useful for one-time surveys, feedback forms, and application processes where duplicates are not allowed.
Best practices
- Pick a truly unique identifier. Use a column that should never repeat across records, such as an email, user ID, employee ID, booking reference, or membership number. Avoid generic fields like Country or Department that multiple people share.
- Make sure the identifier is always filled. If the identifying field can be blank, Single Submission cannot reliably detect duplicates. Always configure the field so that it has a value for every submission.
- Combine with login where possible. If your app uses authenticated users, it is usually safest to map the identifier to a login field such as email or user ID. This reduces the risk of users mistyping identifiers.
- Consider hiding or locking the identifier field. To avoid users changing the identifying value manually, make the field read-only or hide it and auto-populate it from user data or another trusted source.
- Use Single Submission only when you truly want one record per identifier. Once this setting is enabled, additional submissions or edits that would create another record with the same identifying value are blocked, and users are sent to the post-submission flow instead.
Related Articles