Pre-requisites
Before looking at your data source security rules, you should have an understanding of what data source security rules are and where to set them up. Learn more here.
When building an app with Fliplet, it is essential that you apply the correct level of security to your data sources. This is the only way to ensure people are not able to access data they are not allowed to see.
The rules you need to use depend on your use case. In this article, you’ll find a breakdown of what rules to apply depending on specific scenarios and requirements for how your data is used in apps.
Note: You will often need to use multiple rules on the same data source, as multiple scenarios might apply. It’s important to understand exactly how your data is used by users so you can apply the correct rules.
If you have reviewed all the use cases in this article but are still unsure what rules are required for your app and data source, please reach out to us and explain your scenario. We can then advise what rules you should apply.
Get started
This article will cover the following scenarios:
- All users should be able to create a record, but only view and alter their own records
- Users should be able to create and view records, but only be able to alter their own records
- Some users should be able to create, edit and delete records, all users can read them
- Different groups of users should be able to view and alter records from their group only
Scenario 1 – All users should be able to create a record, but only view and alter their own records
Examples of when this rule should be used: User and profile data sources
Required rules:
Rule 1 – Allow all users to write data
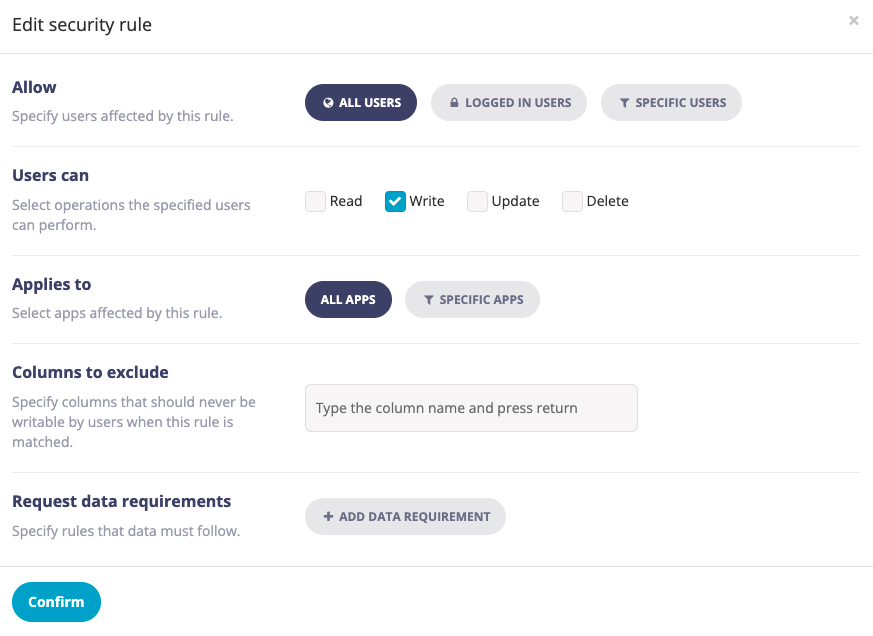
Note: this assumes your app allows any user to register for an account on the app. If this is not the case for your app, then you will need to alter this rule
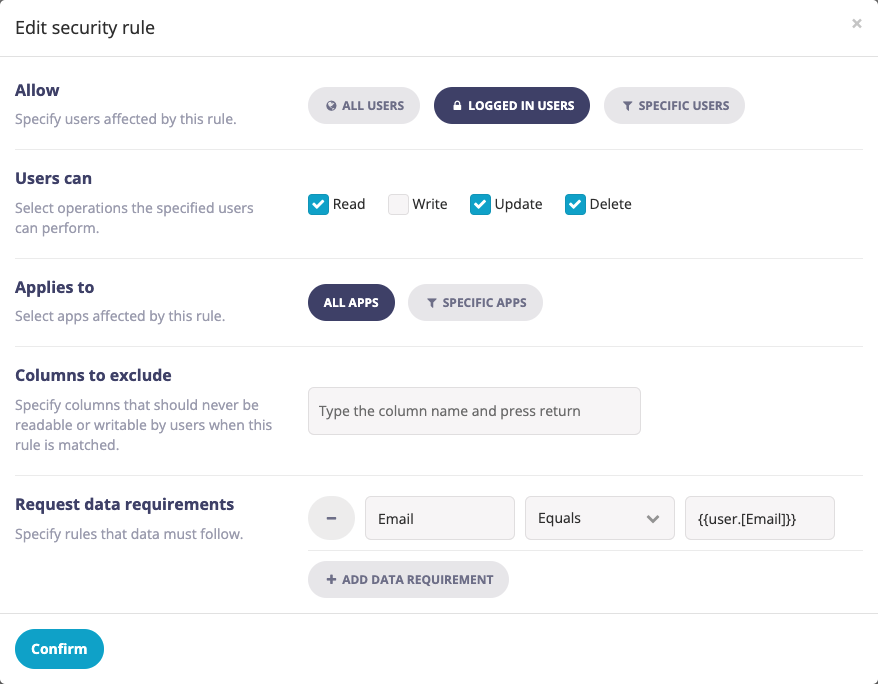
Rule 2 – Allow users to read, edit and delete their own data
Scenario 2 – Users should be able to create and view records, but only be able to alter their own records
Examples of when this rule should be used: Discussion forums or social feeds
Required rules:
Rule 1 – Allow all logged in users to write data

Note that the following might need to change depending on your requirements:
- Applies to – if your data source is used by multiple apps, you will need to amend this to specific apps, and select the required apps from the list
Rule 2 – Allow only the logged in user to edit or delete their own records

Note that the following might need to change depending on your requirements:
- Under “Request data requirements” you may need to amend the names of the columns, depending on your column names. Read here for more information.
Scenario 3 – Some users should be able to create, edit and delete records, all users can read them
Examples of when this rule should be used: Newsfeeds, document library, or any other content managed solely by Admins or other content owners
Required rules:
Rule 1 – All users can read data
Rule 2 – Some users can add, edit and delete
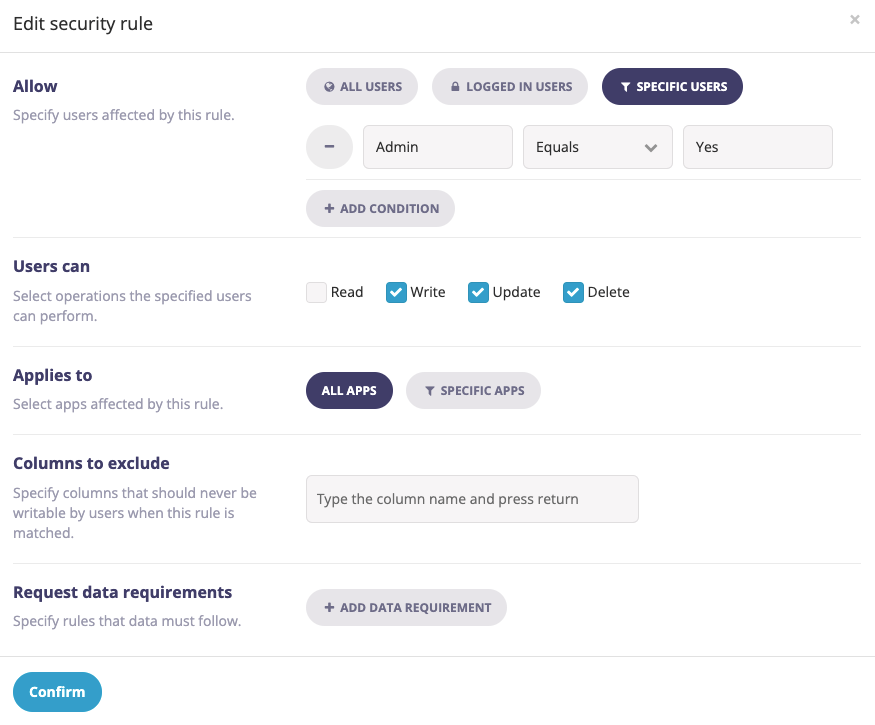
Note: the following might need to change depending on your requirements:
- If the user role is not admin or your column names are not “Admin”, you will need to update the column name and value for the “Specific users”
Scenario 4 – Different groups of users should be able to view and alter records from their group only
Example of when this rule should be used – Apps for multiple clients or groups of users
Required rules
Rule 1 – On your user data source, apply the same rules as per Scenario 1
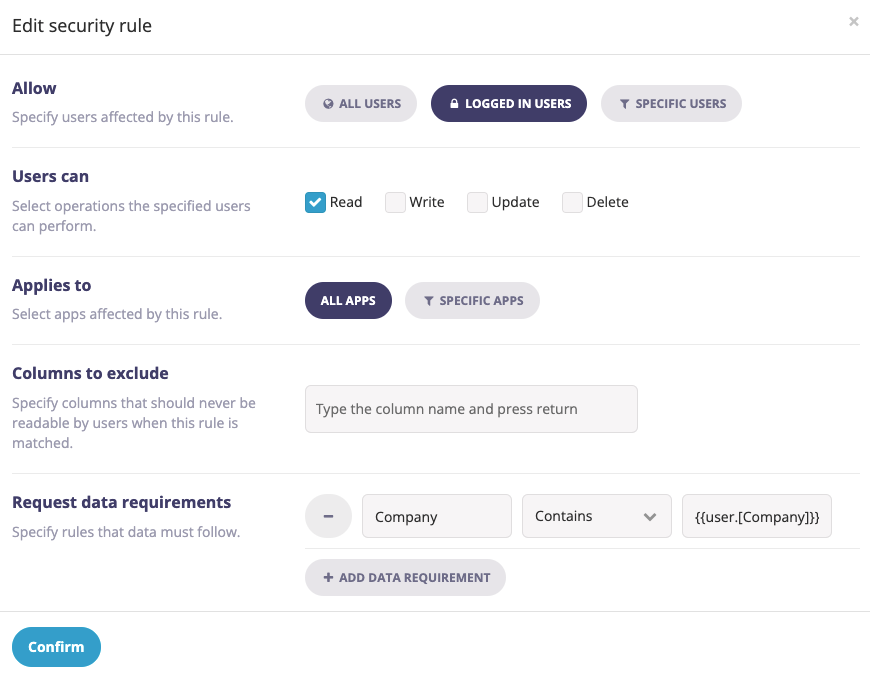
Rule 2 – On your content data source, users of a specific group can read and edit only their group’s data

Note that for this example:
- You may need to amend the request data requirements if your column names where you are storing the groups, are different.
Our example assumes different users at different companies can only read data that is assigned to the company in their profile - If your app uses an LFD that shows data for different types of users or clients, you will also need a snippet of Javascript on the screen.
See here for instructions.
Related Articles