Pre-requisites
To add custom security rules you should have a basic understanding of security rules. To learn more see here.
What are custom security rules?
Custom security rules give you more control over the security of your app than the standard configuration offers. Custom conditions can be written using Javascript.
Users should consider using custom security rules in the following cases:
- You need IP restrictions
- You want to restrict pages based on the logged-in user data for e.g. only admins can access certain pages.
- You want to target specific devices for e.g a web app or a mobile app
Why use custom security rules?
Custom rules can be used in conjunction with regular security rules to add an additional security layer on top of any existing security rules
Get Started
To implement custom security rules to your app you should:
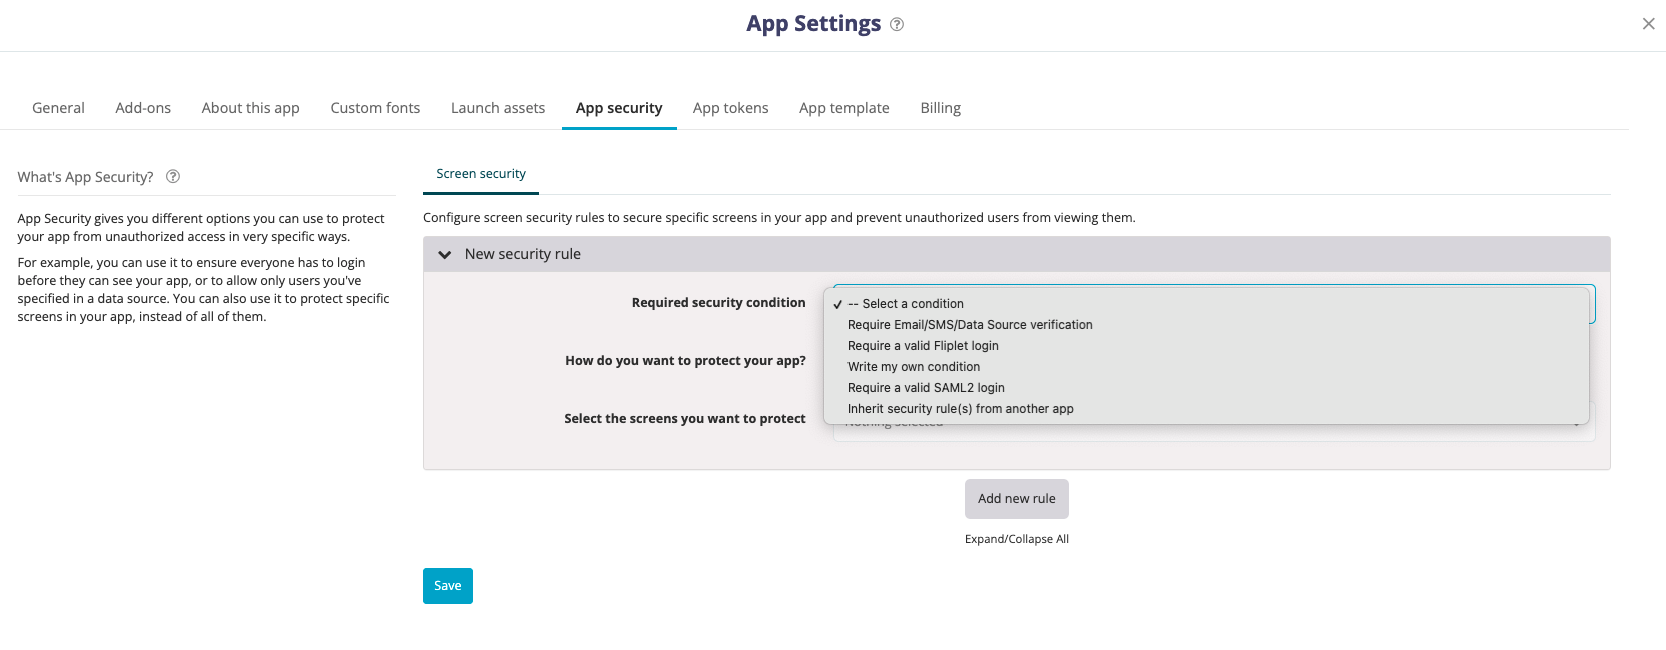
Step 1 – Open the settings
- Inside the app you wish to add security rules for, select the app name in the top left
- Click on the app security tab
- Select add new rule and choose write my own condition
Step 2 – Write your rules
See the how to write custom security rules article.
- Extreme care has to be taken when writing your custom security rules. If you are writing a rule you need to think about all possible conditions of access otherwise you might be exposing a page to the wrong person or the public.
- If you want to write lots of “If” statements then the best method is to set a boolean flag to true/false and determine at the end whether the user should be taken to another page or allowed to access the page.
- As an example, see below a rule from our ROMS template. It’s set up to:
- Only users whose ‘User role’ equals to Admin can access pages that start with “Admin”.
- Same with the “Office Manager” user role.
- If you are neither, then you are taken to the menu screen.
- Notice how the rule sets an error flag as it goes down the page and at the end, it determines if the user is allowed to access the page.
- At the end, there is an override where if you are Admin then you can see any page.
var menuScreen = 123456;
var hasSession = session && session.entries && session.entries.dataSource;
var isAdmin = hasSession && session.entries.dataSource.data['User Role'] === 'Admin';
var isAdminPage = page.title.indexOf('Admin') === 0;
var error = false;
var isOm = hasSession && session.entries.dataSource.data['User Role'] === 'Office Manager';
var isOmPage = page.title.indexOf('OM') === 0;

if (isOm && isAdminPage){
    error = true;
}

if (isOm && isOmPage){
    error = false;
}

if ((!isAdmin && !isOm) && (isOmPage || isAdmin)){
    error = true;
}

if (isAdminPage && !isAdmin) {
  error = true;
}

if (isAdmin) {
  error = false;
}

if (error && page.id !== menuScreen) {
  navigate = { action: 'screen', page: menuScreen, transition: 'slide.left' };
}
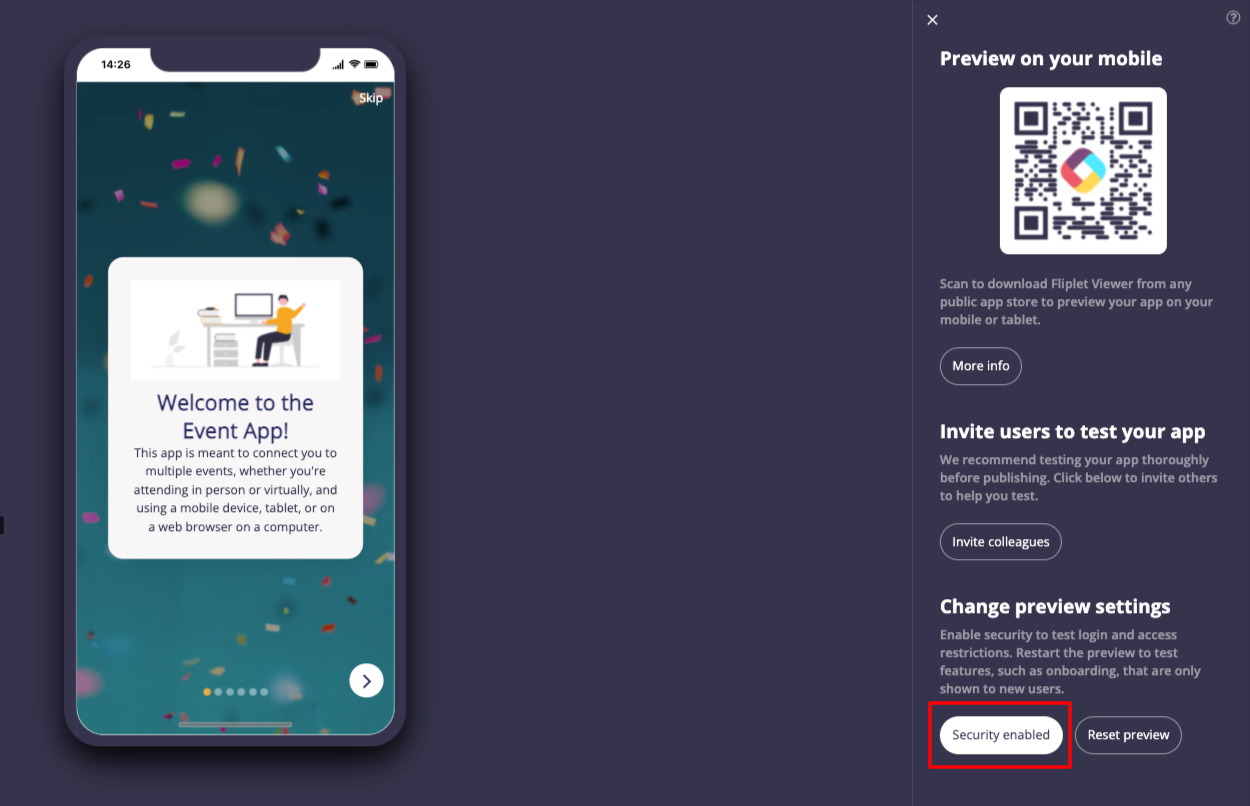
Step 3 – Test your rules
- Inside your app, switch to preview mode and ensure enable security is selected
- Test every scenario of your security rule
- In the example rule above, these scenarios would all have to be tested:
- Admins can access admin screens
- Office managers cannot access admin screens
- Office managers can access OM screens
- A user which is neither an office manager or an admin cannot access the screens and is redirected to the menu
Related Articles
Was this article helpful?
YesNo