Precursor:
The app must have a login with a corresponding data source to hold the user’s login information. See this article to create a login
The List from Data Source is a powerful prefab component in Fliplet Studio that will help you easily display, sort and filter items. This article will explain how to use the LFD filters and the user profile data value type to show only the logged in users data.
Features
The user profile data value type offers the following features:
- Set a filter using the logged in profile user’s data
- Allow the user to only see their own information
Get Started
To use the user profile data value type you’ll need to:
- Create an LFD screen, such as a Directory screen
- Set the Data Field, Logic, Value Type, and Value
- Test that the filters work in Preview Mode
Step 1 – Create an LFD screen, such as a Directory screen
- Create a list from data source/directory screen. For more information on creating a directory, read this article.
Step 2 – Set the Data Field, Logic, Value Type, and Value
- Click on the directory / LFD component.
- The configure your list menu will open on the right. Scroll down.
- Under How do you want to filter your list? Click Add a new filter.
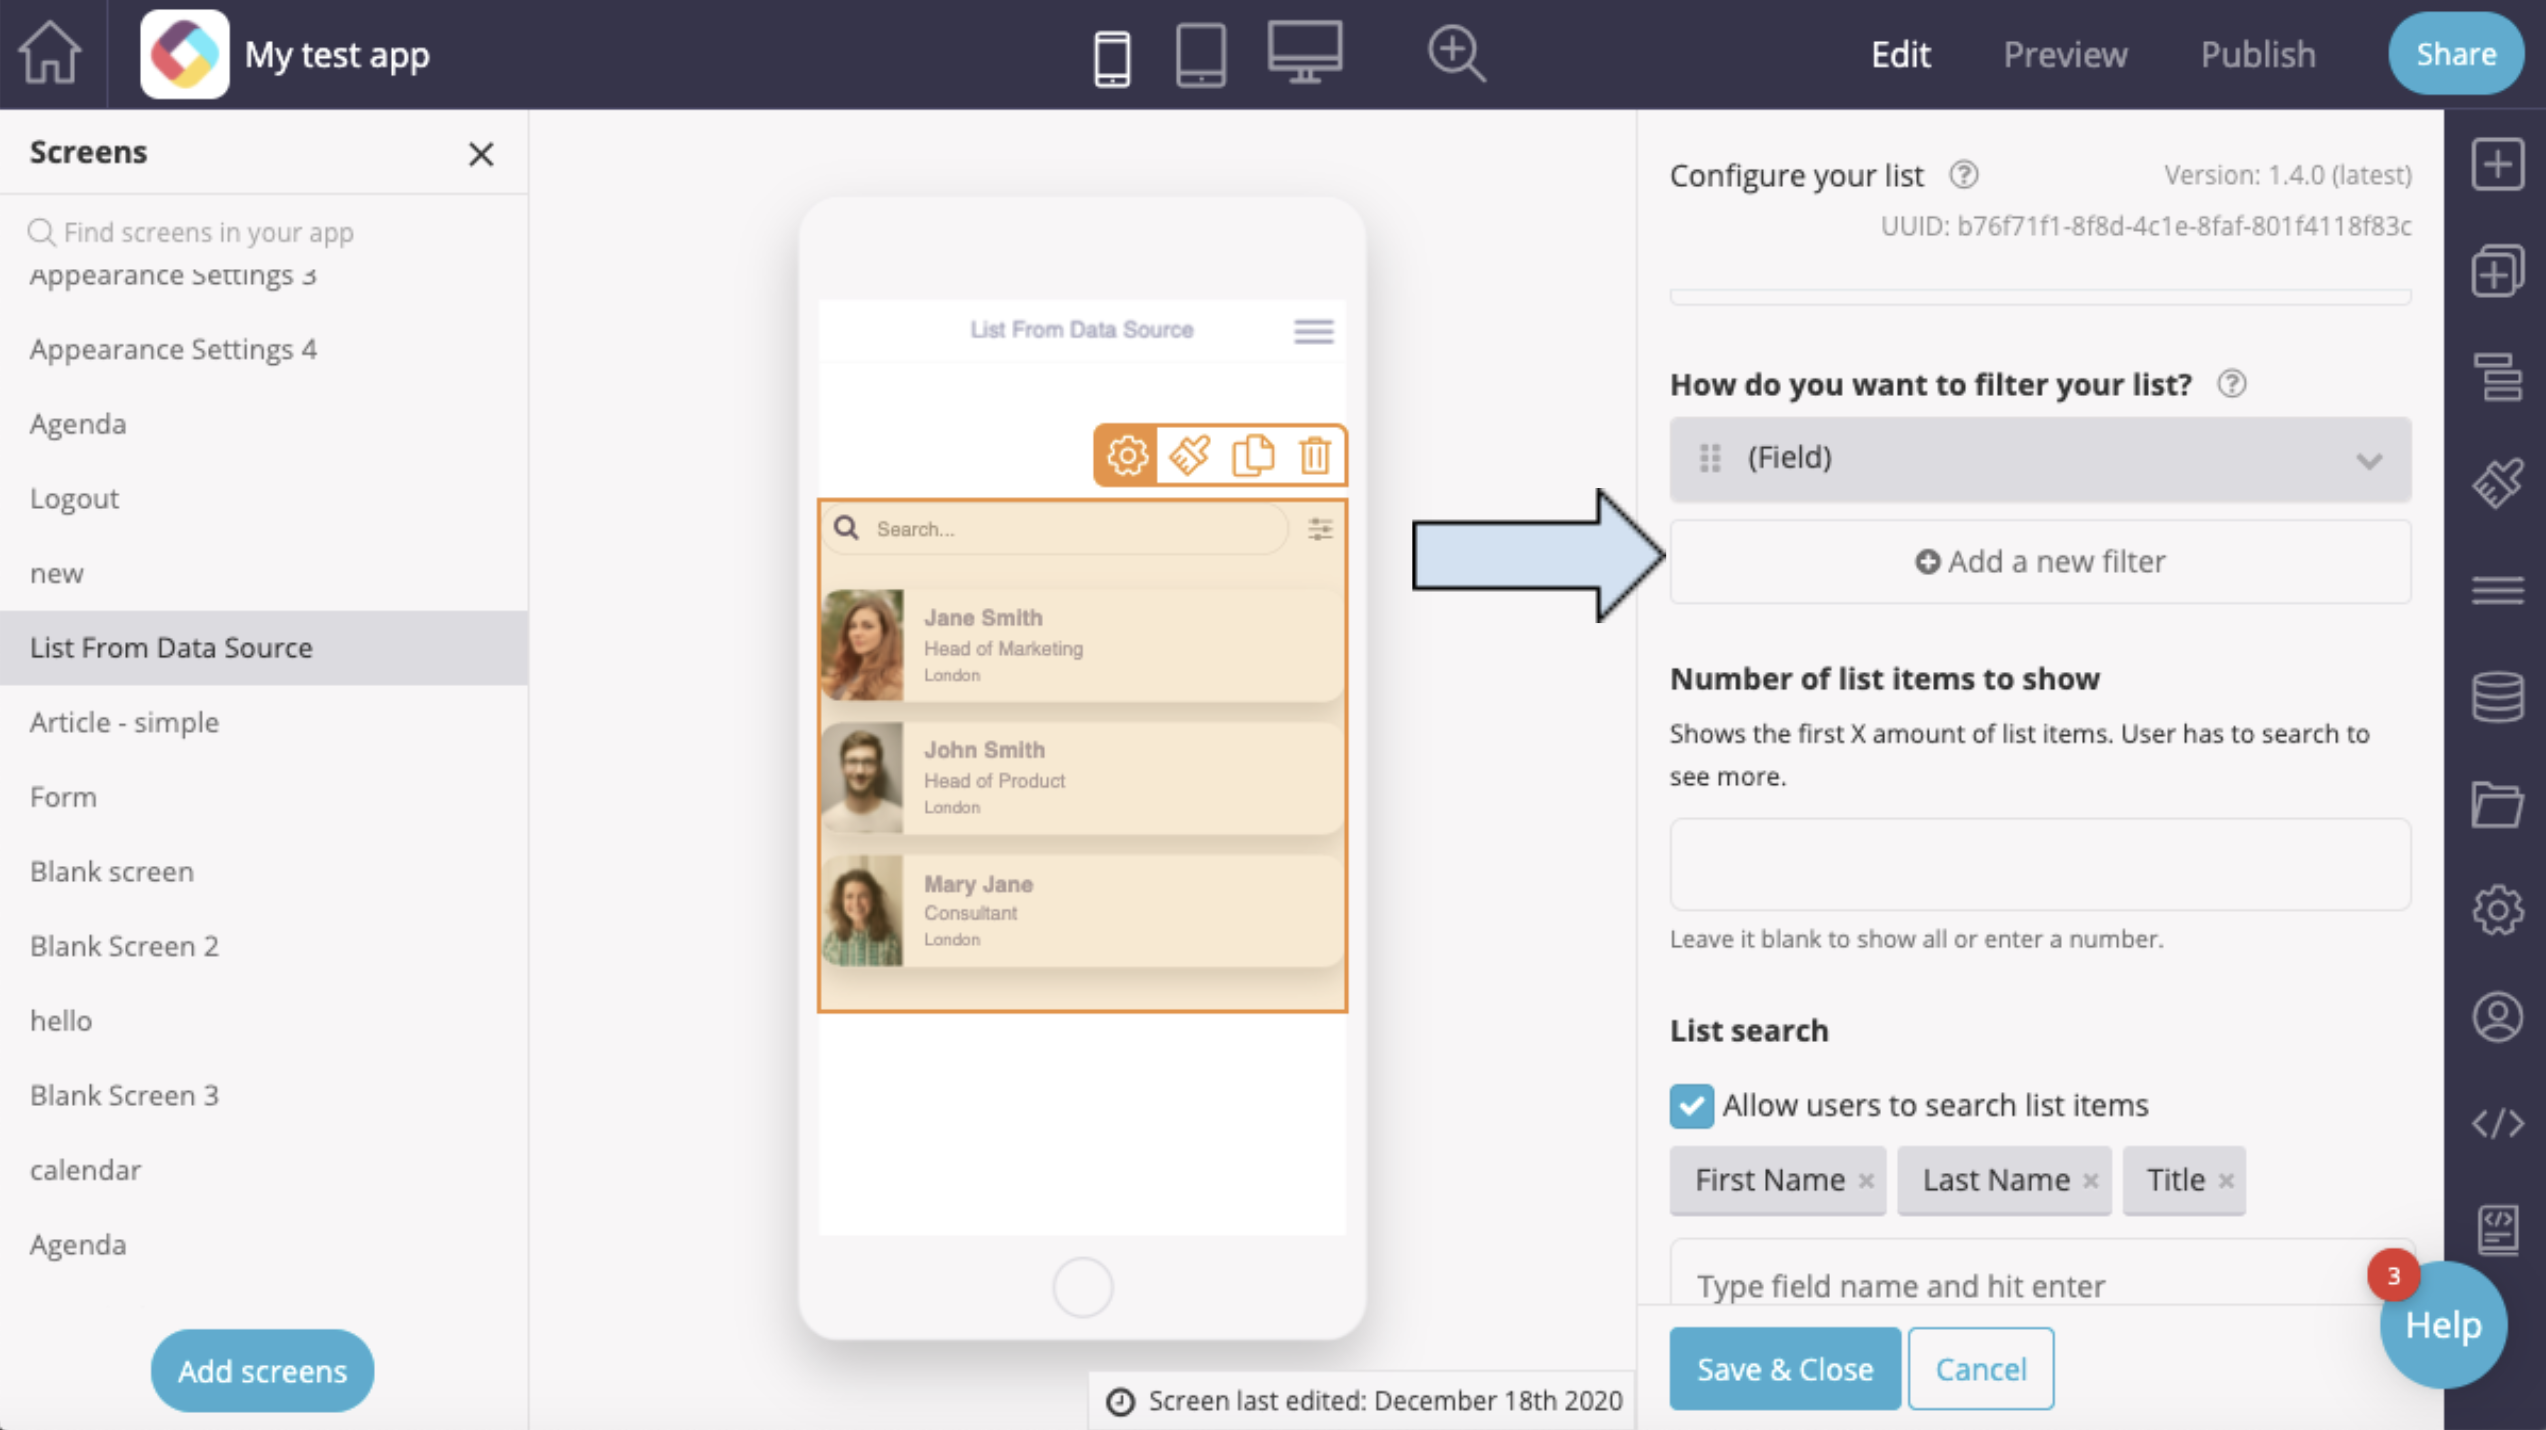
- The field dropdown menu will appear.
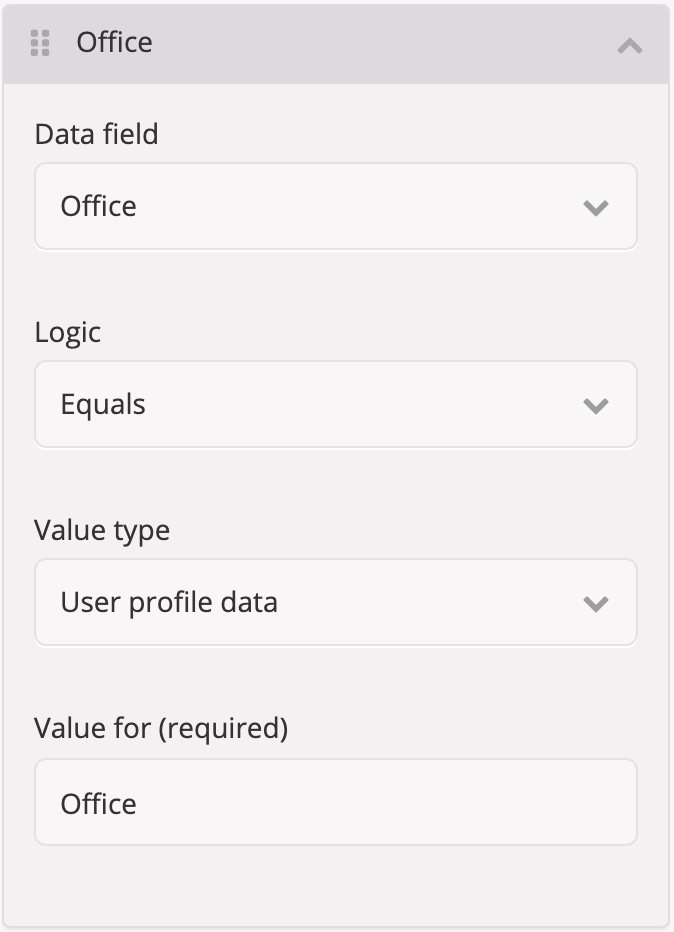
In this example, we will set the filters to show the logged in user only the employees in the same office as them. (keep in mind that the office value needs to be found in both the data source attached to your LFD and the user information data source used by the login screen):
Under the Data field dropdown, select “Office”.
- Under the Logic dropdown, select “Equals”.
- Under the Value type, select “User profile data”.
- Under Value, type “Office”. (Note this should be the name of the field in the data source.) The menu should look like this:
- Click on the blue “Save & Close” button.
Step 3 – Test that the filters work in Preview Mode
- Go to Preview Mode.
- Click on the Login screen from the list of screens on the left. Then click on the Enable security button in the bottom right and log in.
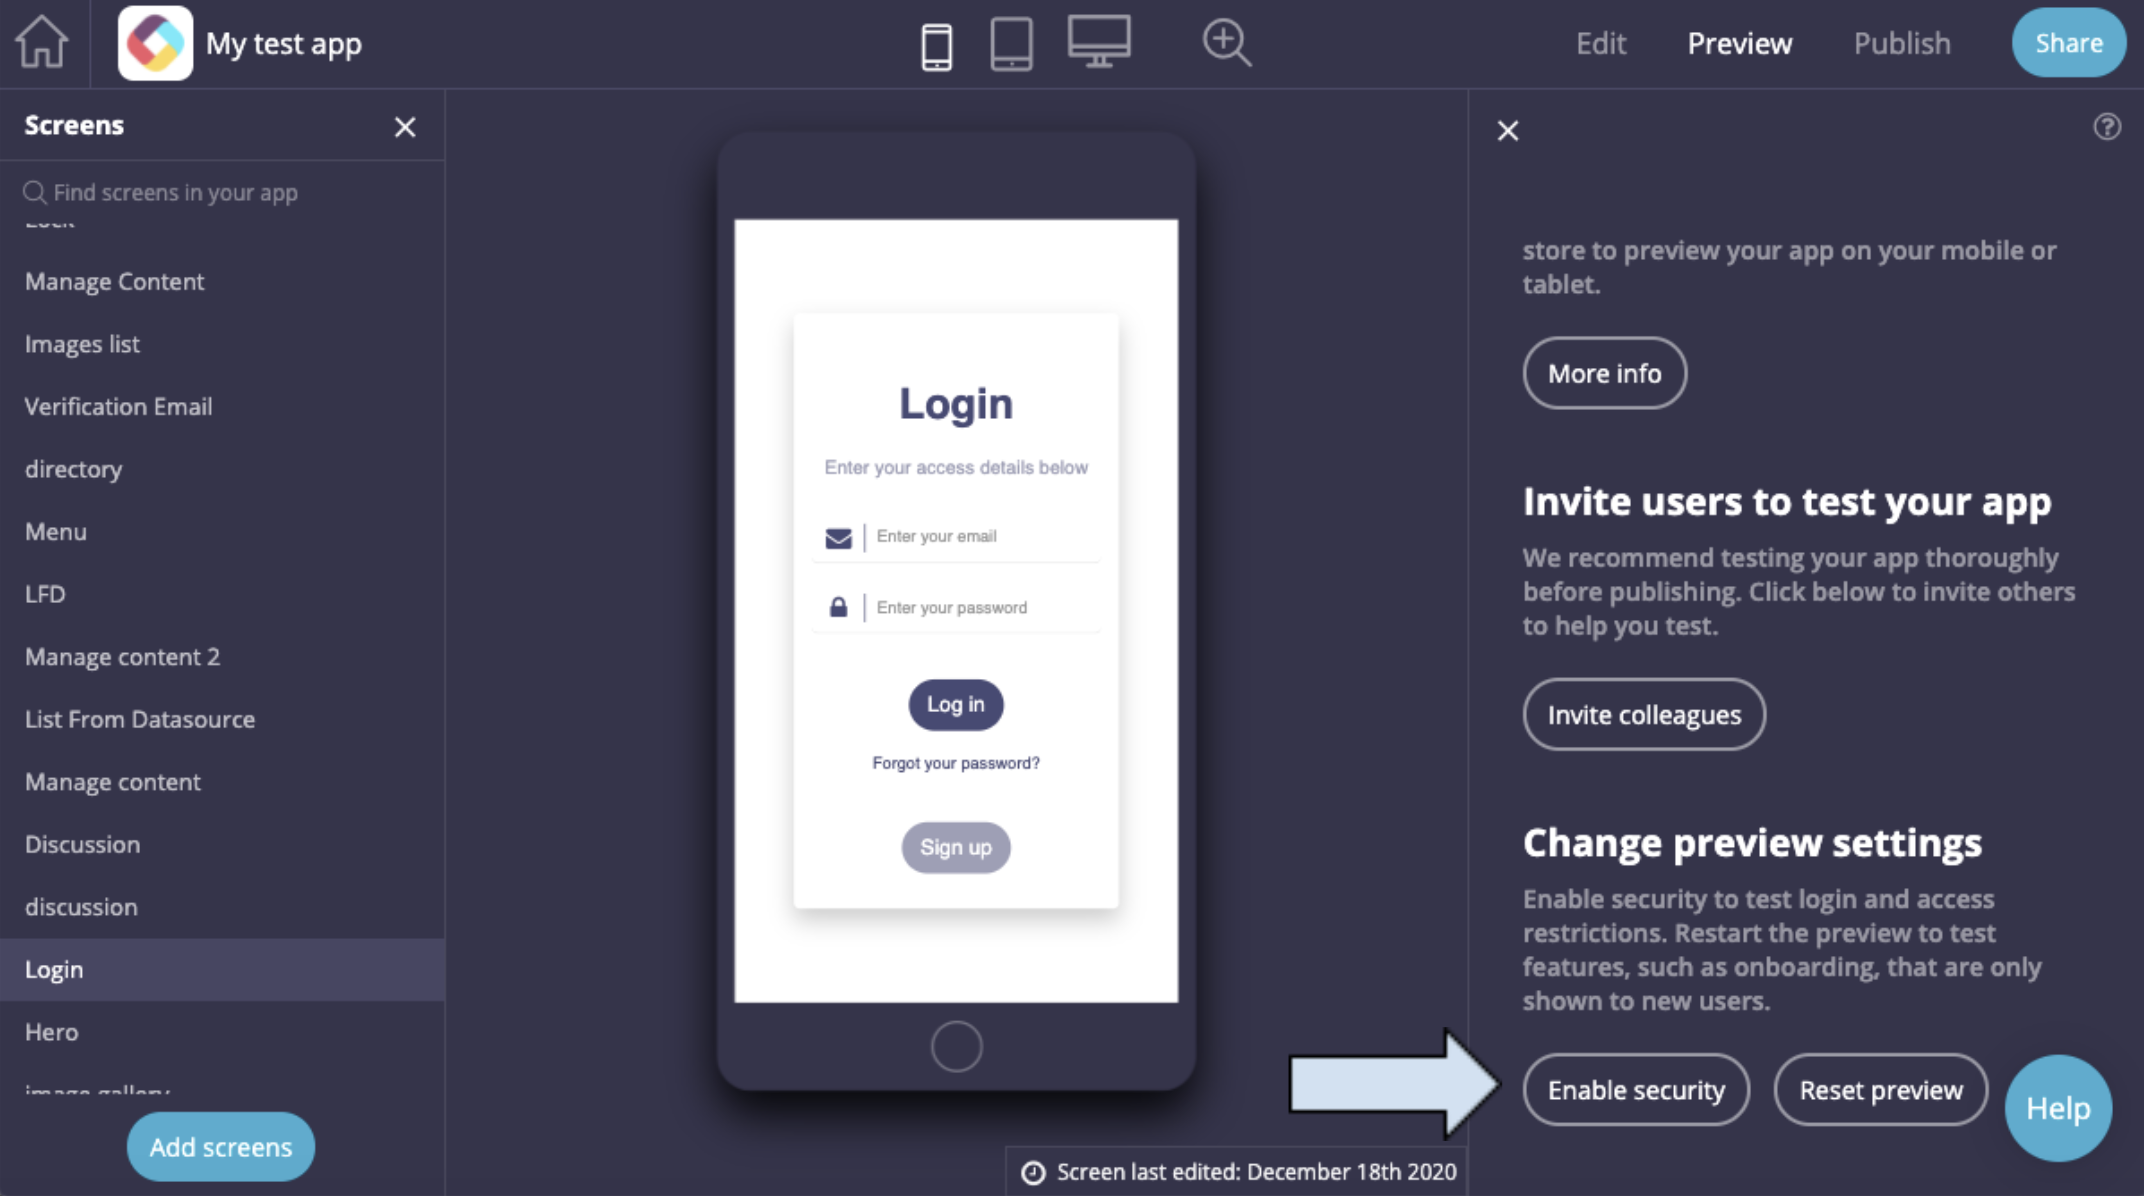
- Click on the LFD / Directory screen you created earlier from the screens on the left. You should only see entries from the same office.
Related Articles
Was this article helpful?
YesNo