Features
Data source security offers the following features:
- Fliplet users can determine which users are impacted by their security rules.
- Fliplet users can set security rules for any or all of their apps data sources.
- Fliplet users can edit, disable, and delete security rules.
Get Started
To use the data source security feature you’ll need to:
- Access a data source
- View, edit, delete or disable a rule
- Add a new security rule
- Assigning Security Rules to API Tokens
- Test the security rules
Step 1 – Access a data source
- Open Fliplet Studio.
- Open an existing data source or create a new data source. Learn more about data sources here.
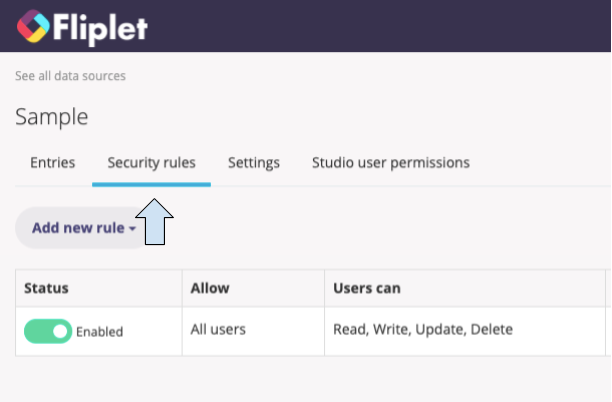
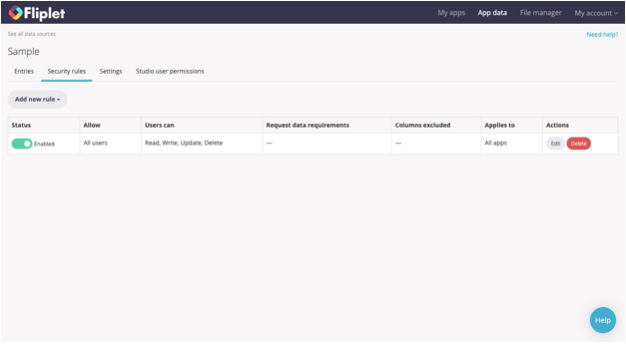
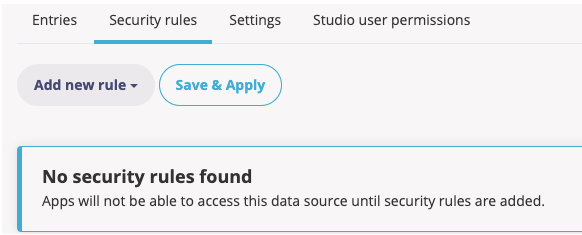
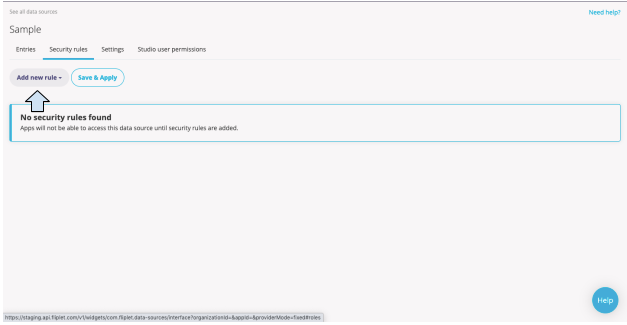
- When your new data source opens, click on the “Security rules” tab.
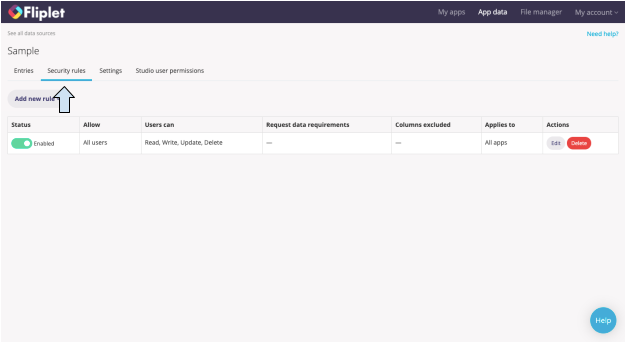
Step 2 – View, edit, delete or disable a rule
- Existing data sources will come with a default security rule. It is set to allow all users of all of your apps to read, write, update, and delete data from the data source.

- To disable the security rule, under Status, toggle the option to disable it.
Before

After

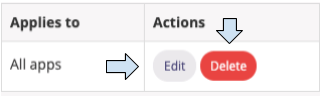
- To edit or delete the security rule, under Actions, the far right column of the table, click on either the “Edit” button or the “Delete” button.
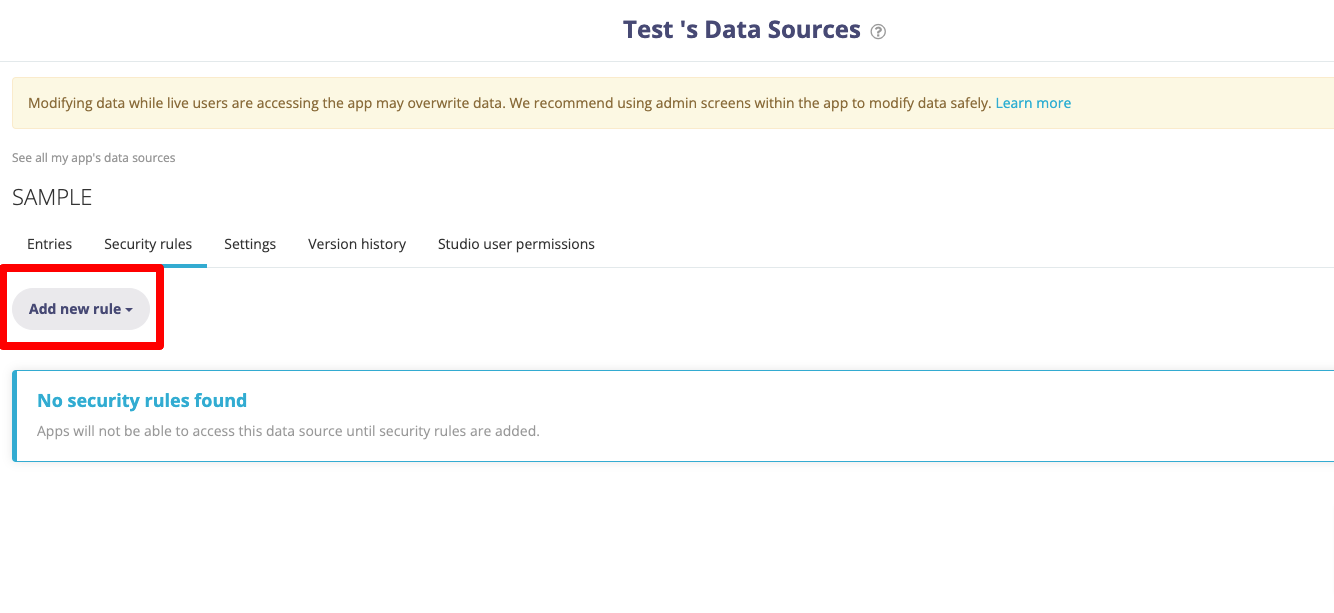
Warning – if you delete or disable all security rules, no part of any app will be able to access this data source.


Step 3 – Add a new security rule
- All new data sources will require a new rule if you want to use them in an app. To add a new rule, click on the “Add new rule” button.
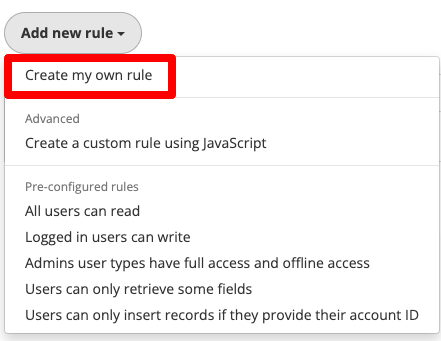
- A menu will appear with different options. Choose from the list of pre-configured rules or select “Create my own rule”. Note: For this article, we will highlight the “All users can read” pre-configured rule. Please be sure to familiarize yourself with the other pre-configured rules.
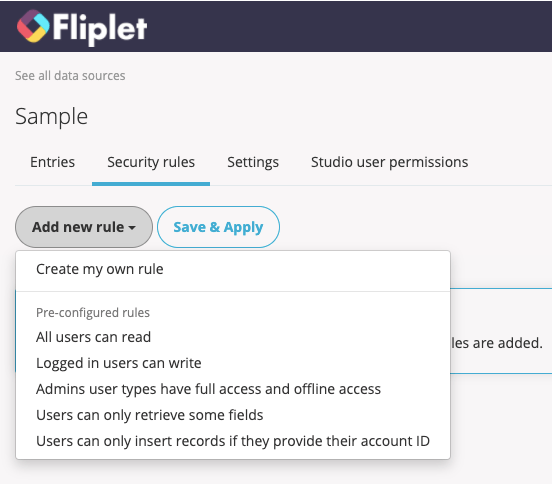
- Select “All users can read” from the menu.
- The “Edit security rule” window will open which will allow you to configure the security rule.
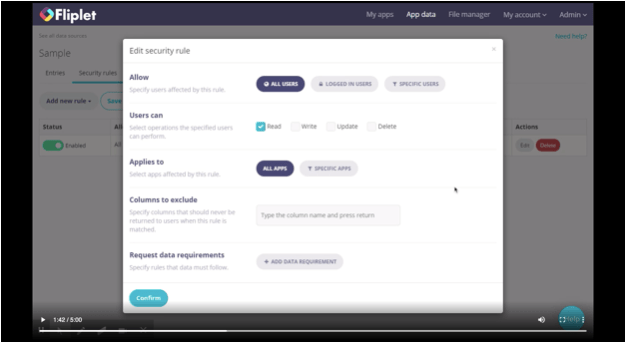
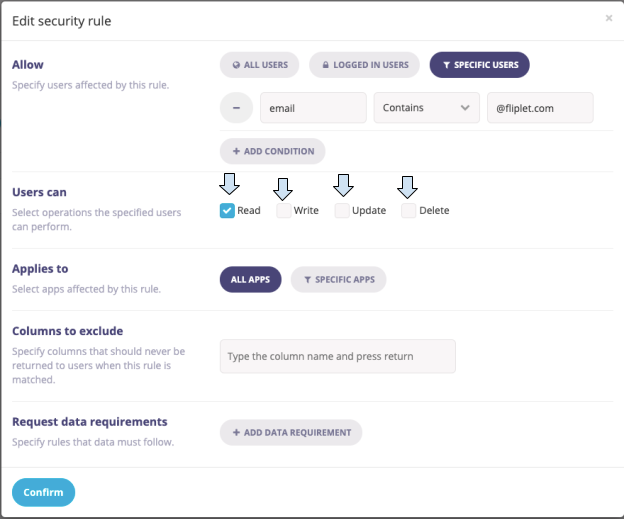
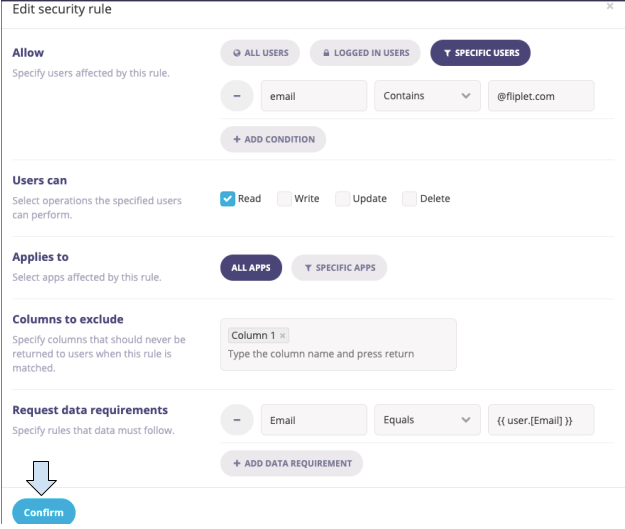
- Specify whether you would like All Users, Logged in Users, or Specific Users to be affected by the rule. If you choose Specific Users, you can set a condition that must be met in order for the user to be affected by the rule.

Note: in the image above, the condition is set so that only users who have @fliplet.com email addresses will be affected by the rule. - Next, select the operations that you want the specified users to be able to perform. The operations options are “Read”, “Write”, “Update”, and “Delete”. Note: In the settings below, the specified users can only read the security rule. This means that components that attempt to write to a data source, such as forms, will not work for this data source unless there is a separate security rule that allows writing permissions.
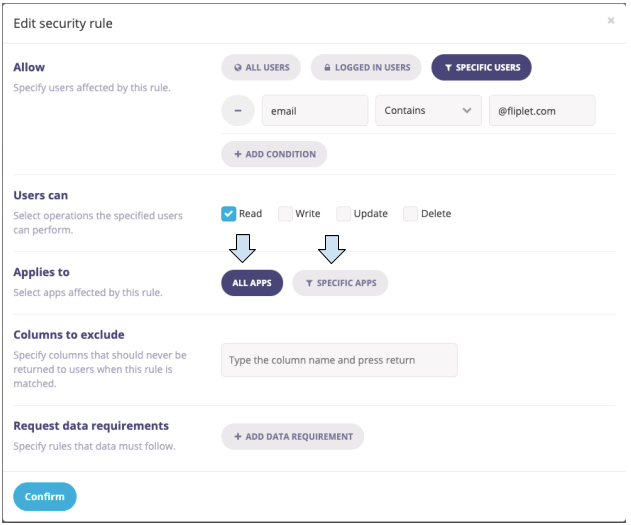
- Next, select if you want the security rule to apply to “All Apps” or “Specific Apps”. If you choose “Specific Apps” then select the apps you want to apply the security rule to from the list of apps.
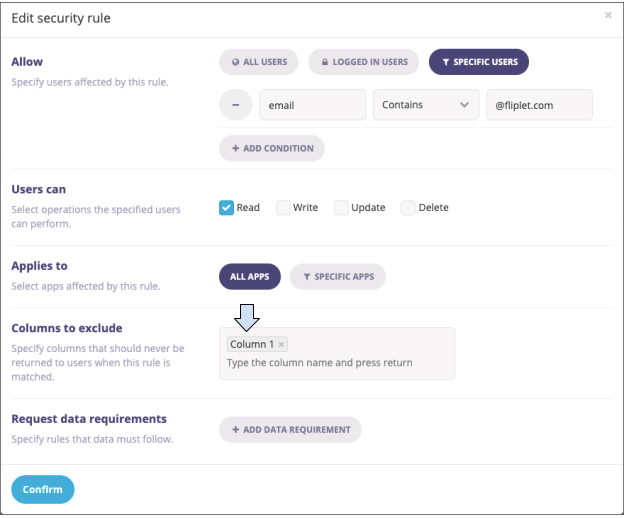
- If you have a column in your data source that you want to exclude from appearing to users, select the column or type the column name. This option is particularly useful if your data source contains sensitive data, such as a personal phone number.
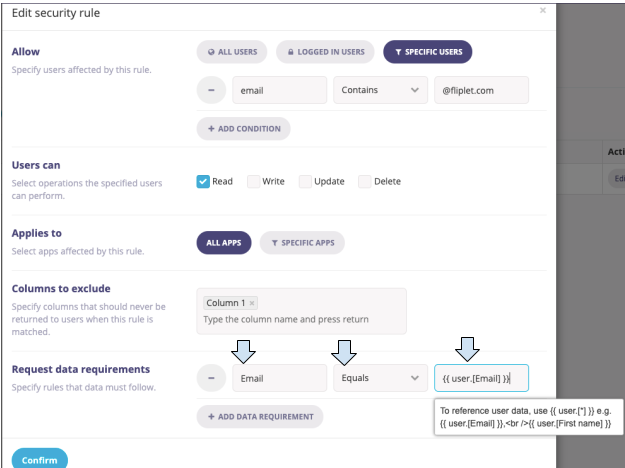
- Next, specify what data is required to appear in the data source as a filter or that specific data needs to equal a certain value. To set data requirements, click “Add data requirement”. Note: To reference user data, use {{ user.[*] }}, for example, {{ user.[Email] }} – this means a user can only access their own data (based on their logged in email matching an email in the data source).
- When you are finished configuring the security rule, click the blue “Confirm” button at the bottom of the page. This will add your rule to the list.

To add another rule just click the “Add new rule” button again. You can add as many rules as you want. - When you are finished configuring your rules, click the blue and white “Save & Apply” button above your list of security rules.

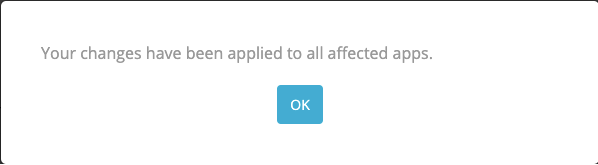
- The following note will appear when the changes have been applied. Click “OK”.
Step 4 – Assigning security rules to API tokens
- Assigning a new rule to the API token will require a new rule. Click on the “Add new rule” button
- Select “Create my own rule” from the menu
- The “Add new security rule” window will open, where you can configure and assign the API token to the rule. Click on the “Specific Token” and choose your API token from the “Select your API Token” drop-down. You will also check all the operation options “Read”, “Write”, “Update”, and “Delete” for the API token
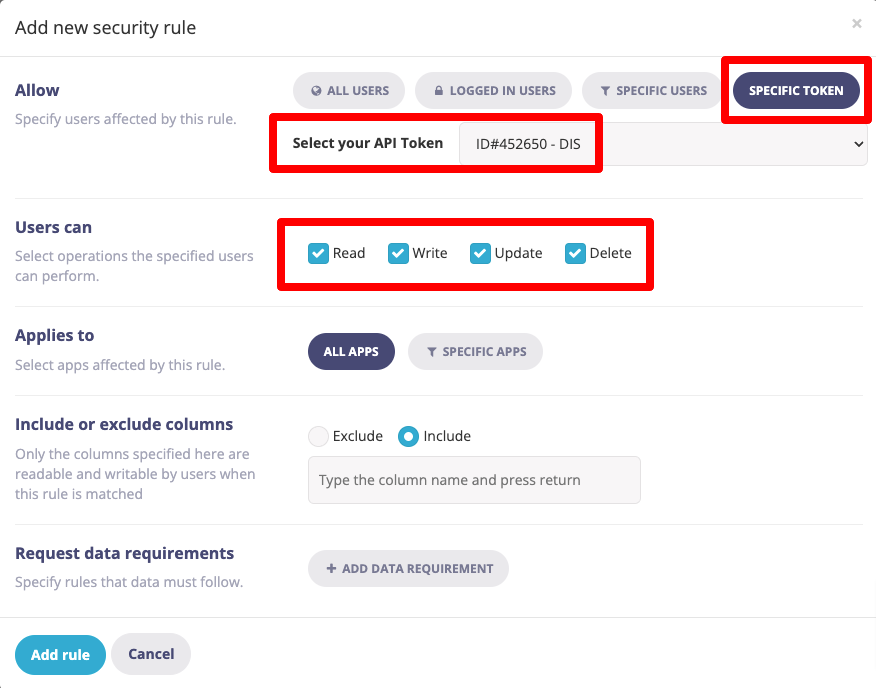
- Finally, click the “Add rule” button when you are finished
Step 5 – Test the security rules
- In Fliplet Studio, open one of the apps that the security rule has been applied to and go to Preview mode. Note – Be sure to test all apps affected by this data source in a similar manner.
- Click on the “Enable security” button and navigate to the screens in the app that use the data source.
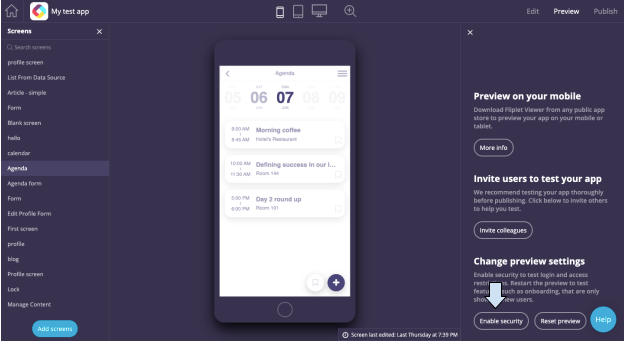
- Check that the security rule allows you to read the data source. If it doesn’t work, you will see a message at the bottom of the app screen that alerts you to the problem and explains how to fix it.
Related Articles
Was this article helpful?
YesNo