Precursor:
You must have set up an LFD. To learn how to do this, read this article.
Get Started
To add an image to an LFD you will need to:
- Configure data view settings
- Upload images
- Using file manager
- Using a form
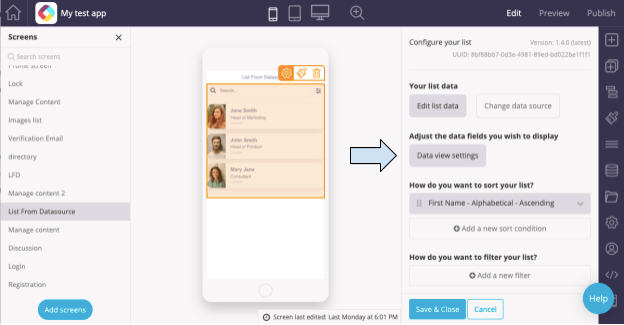
Step 1 – Configure data view settings
- Click on the “Data view settings” button. This is where you can determine what data you want to display and where you want to display it. It also shows what type of data it is. What you list in this section will depend on you, but you must include an “Image” field.
There are two choices for image data type; URL to external image or Image folder. If files are saved in the Fliplet file manager, choose the folder. The data must have the file name.
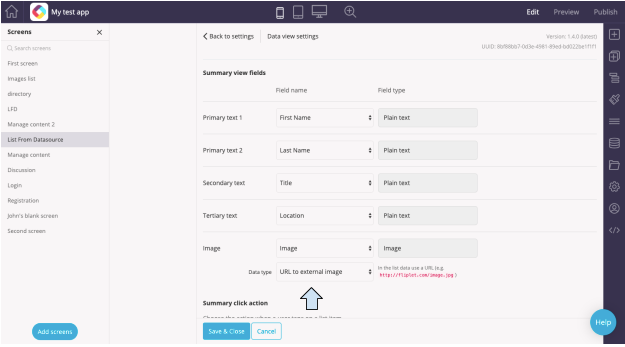
- Under Summary click action, choose the “Show the detail view” option.
- If you wish to add more “Detail view fields”, click the “Add new field” button at the bottom.
- When finished with the Data view settings, click on the blue “Save and Close” button.
Step 2 – Upload Images
Using File Manager
- In Edit mode, click on the “File Manager” icon from the menu on the far right.
- Click on the blue “New” button in the top right.
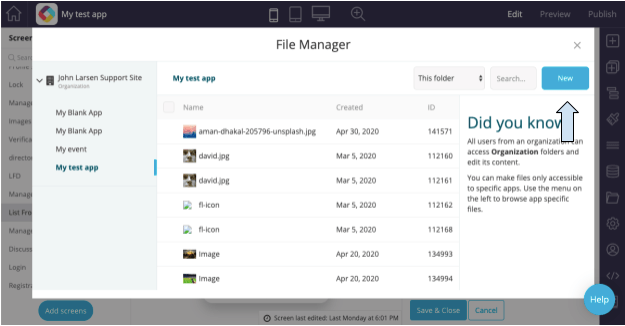
- Click “Upload new file” and choose an image file from the images on your computer or mobile device.
- When the image is finished loading, click on it.
- Copy the URL listed.
- Open the data source you are using for the LFD. For more on data sources, read this article.
- Paste the URL in the image column of the data source.
Using a Form
-
To upload images using a form, first read more about forms in this article. Make sure that your form includes an image field. Upload images using a form if you wish to allow users to add their own images to the list.
-
Be sure the form is configured to save to the same folder you configured in the list from data source data view settings.
Related Articles
Was this article helpful?
YesNo