There are two slider components available in Fliplet Studio. This article will guide you through the customizable slider and how to add it to your app.
The customizable slider enables you to create multiple slides within one screen of your app, adding flexibility and creativity in designing the slides to suit your app.
To learn more about the basic slider, click here.
Why use a slider component?
Sliders are a great way to highlight content in your app. The slider component is used in the Fliplet onboarding screen for many app templates and is a great tool for welcoming new users to your app.
Set up
Note: This slider component is currently in beta. It is optimized for images, video, text, and buttons. Some of the existing components will not function properly within the slider whilst the component is in Beta. If you have any questions please contact Fliplet Support.
Step 1 – Add slider container
- Open the screen in your app where you wish to place the slider
- Click the “add components” button on the right hand side toolbar and scroll to the “others” section
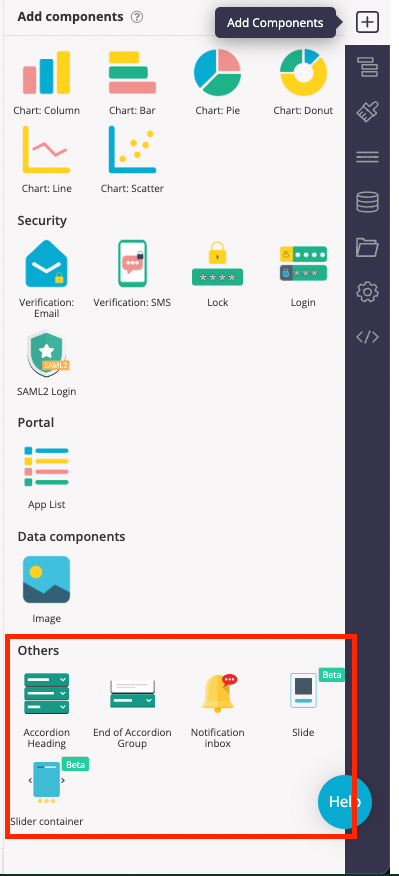
- Drag and drop the “slider container” component to the screen
- Now, choose your slider settings:
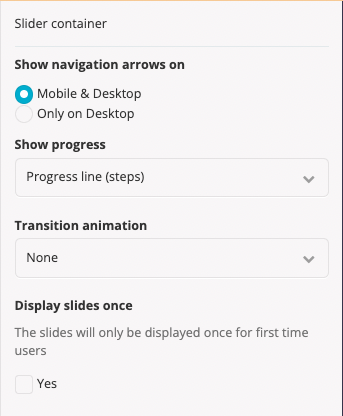
- Show navigation arrows on:
Mobile & Desktop – Users can use the arrows to navigate through each slide
Only on Desktop – This will remove the arrows on mobile view, users can swipe the slider to navigate through each slide - Show Progress:
Choose your progress indicators
Pagination dots
Pagination bar
Progress line - Transition animation:
Decide how you want to transition from one slide to the next
Slide
Fade
None - Display slides once:
Determine if slides will only be displayed once for first time users
- Show navigation arrows on:
Step 2 – Add slides
- Return back to the “add components” menu, and drag and drop the “Slide” component onto the screen, making sure to drop the slide inside of the slider container. You can also use the screen structure menu on the right hand side to ensure your slide is in the right place.
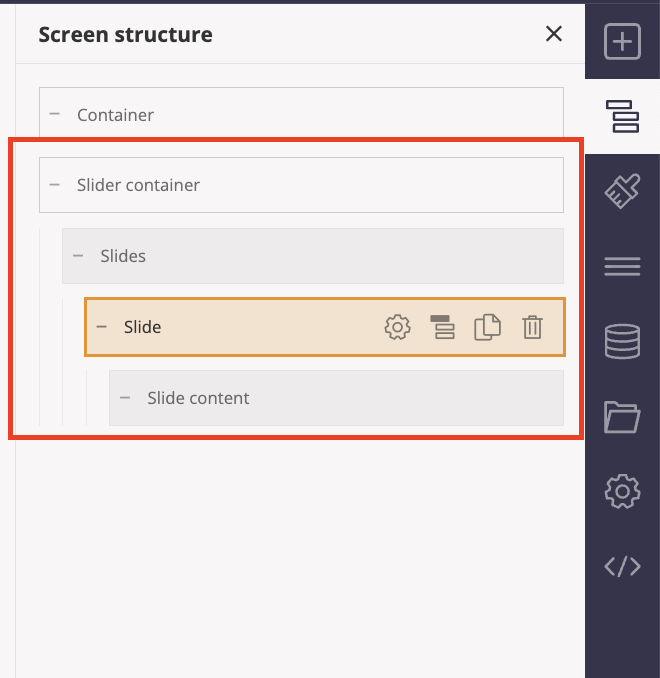
- For each slide you add you will need to select and save your settings:
- Is there a required form on this slide? – This enables you to make sure the user makes a selection on the form before being able to move to the next slide
- If you select yes for this setting, you should choose whether to prevent users from moving to the next slide, and/or prevent users from moving to the previous slide
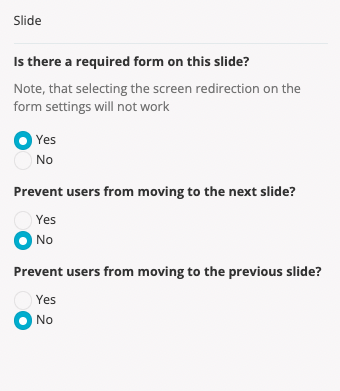
- Once you have selected your slide settings, click “Save & Close”
- Add the required number of slides to your screen, you can continue to add as many slides as you need at any time
Step 3 – Add content to your slides
- The order of the slides on your screen is the order they will be shown to the user
- Using the component menu on the right, drag and drop your required components into each slide, making sure to place them inside the slide.
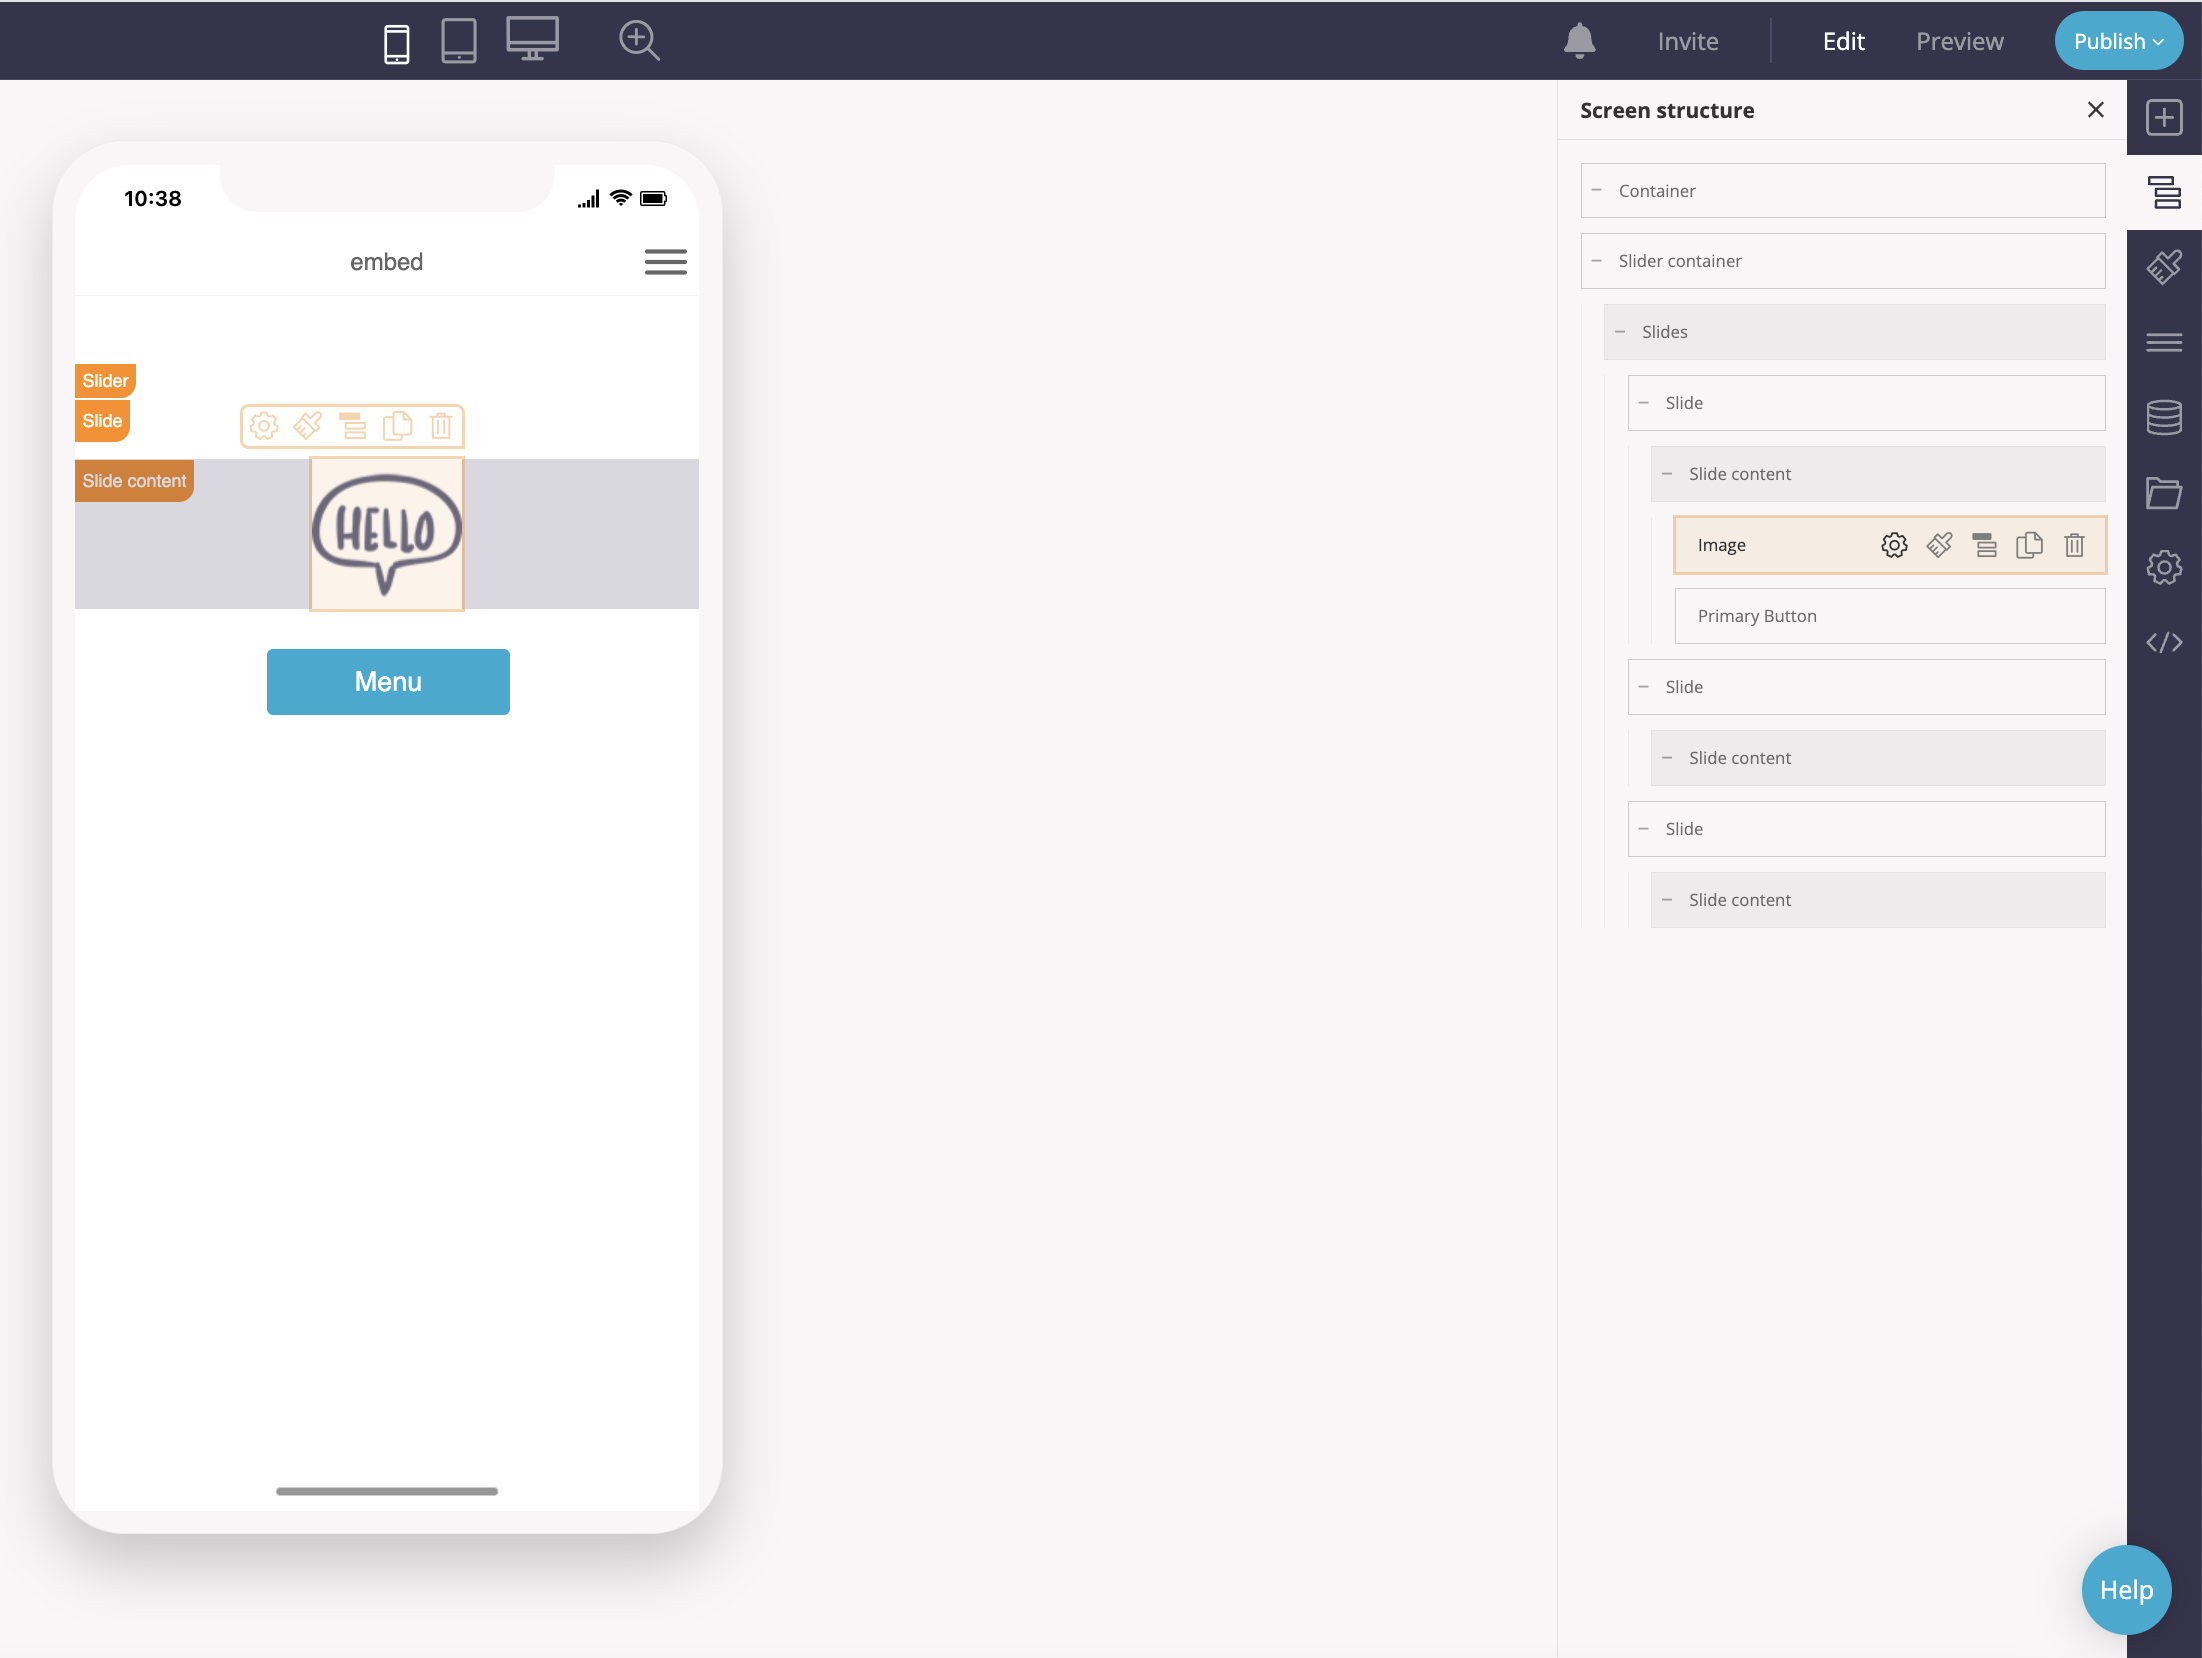
- Once you are happy with your slide configuration, you can use preview mode to view your app slides as they will appear to users
Related Articles