The AI feature component enables you to quickly build tailored functionalities without writing code. This article explains how to use the AI Feature component in Fliplet Studio to generate custom app features using text-based prompts.
Get started
- Add the AI feature component to your screen
- Configure a data source (optional)
- Enter your AI prompt
- Generate and review the feature
- Refine and regenerate (optional)
- Save and preview your feature
- AI feature ideas and inspiration
Step 1 – Add the AI feature component to your screen
- Open your app in Fliplet Studio
- Navigate to the screen where you want to add the AI feature
- From the “Add components” panel, scroll to the “Others” section and find the “AI Feature” component
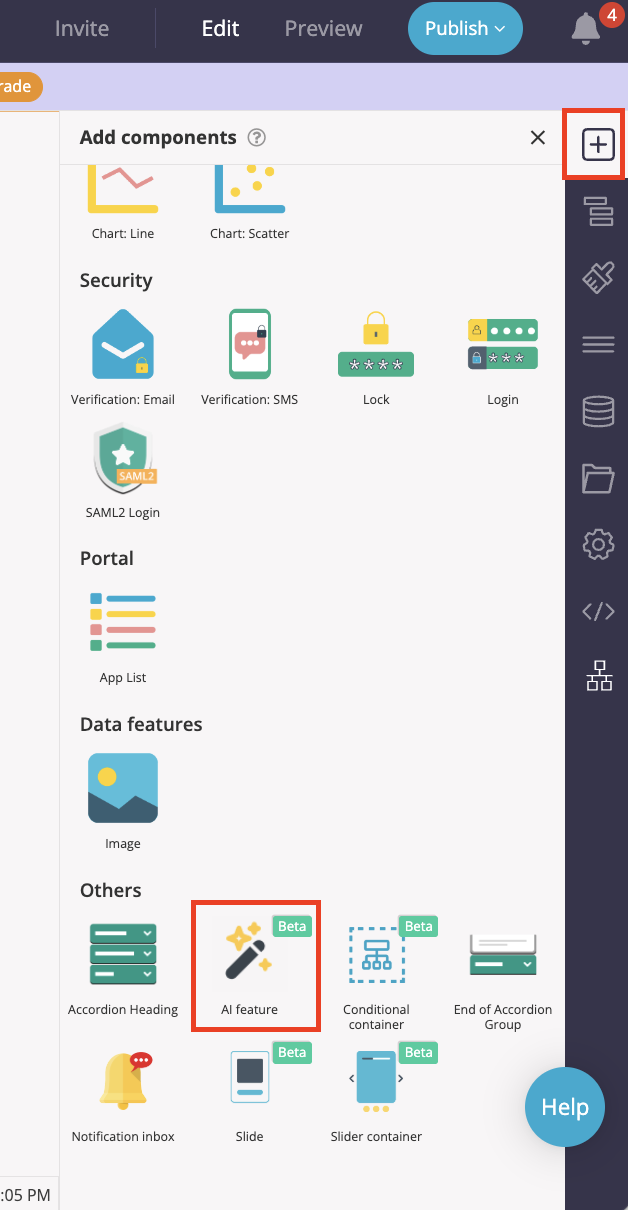
- Drag and drop the “AI Feature” component onto your app screen
Step 2 – Configure a data source (optional)
If your AI-generated feature needs to store or display data, connect it to a data source
- In the AI Feature settings panel, go to the “Data source” section
- Select an existing data source or click “Create new data source”
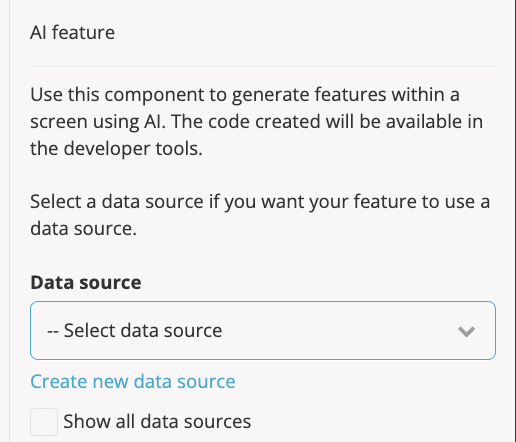
- Enter a name in the pop-up window and click “OK”
- Click “Configure security rules” to apply default access rules
- Confirm the rules to enable app user access. You can further edit them via “View data source”. For more information on data source security rules, see here
Step 3 – Enter your AI prompt
This is where you describe the feature you want to generate.
- In the AI Feature settings panel, find the “Prompt” textbox
- Expand the “What features are available?” dropdown to view more information about what features can be used
- Write a detailed prompt describing what the AI should create
Example:
Create a UK income tax calculator. Ask the user for annual income, age, and tax year and show the result of the income tax calculation below the calculator including showing the calculations that are used to arrive at that number.
What makes a good prompt?
A good prompt is:
Clear and concise: Avoid vague terms; be as specific as possible
Action-oriented: Clearly describe what the feature should do or how users should interact with it
Descriptive of inputs and outputs: List fields the user should complete, what should be displayed in return, and how it should behave or look
Styled (if needed): If you have design preferences, include them (e.g., button color, text alignment)
Example:
Create a UK income tax calculator. Ask the user for annual income, age, and tax year and show the result of the income tax calculation below the calculator including showing the calculations that are used to arrive at that number. Please create this with red text
You can use similar formats to request calculators, forms, dashboards, or lists. Include as much detail as you need to get your desired result. If unsure, start simple and iterate
Step 4 – Generate and review the feature
- Click “Generate code”
- Wait while the AI processes your prompt
- Review the feature as it appears in the AI Feature component
- And make sure to switch to preview mode to test the functionality
Step 5 – Refine and regenerate (optional)
Not satisfied with the result? Improve your prompt and regenerate
- To edit the prompt, hover over the “ai feature” header and choose the settings cog
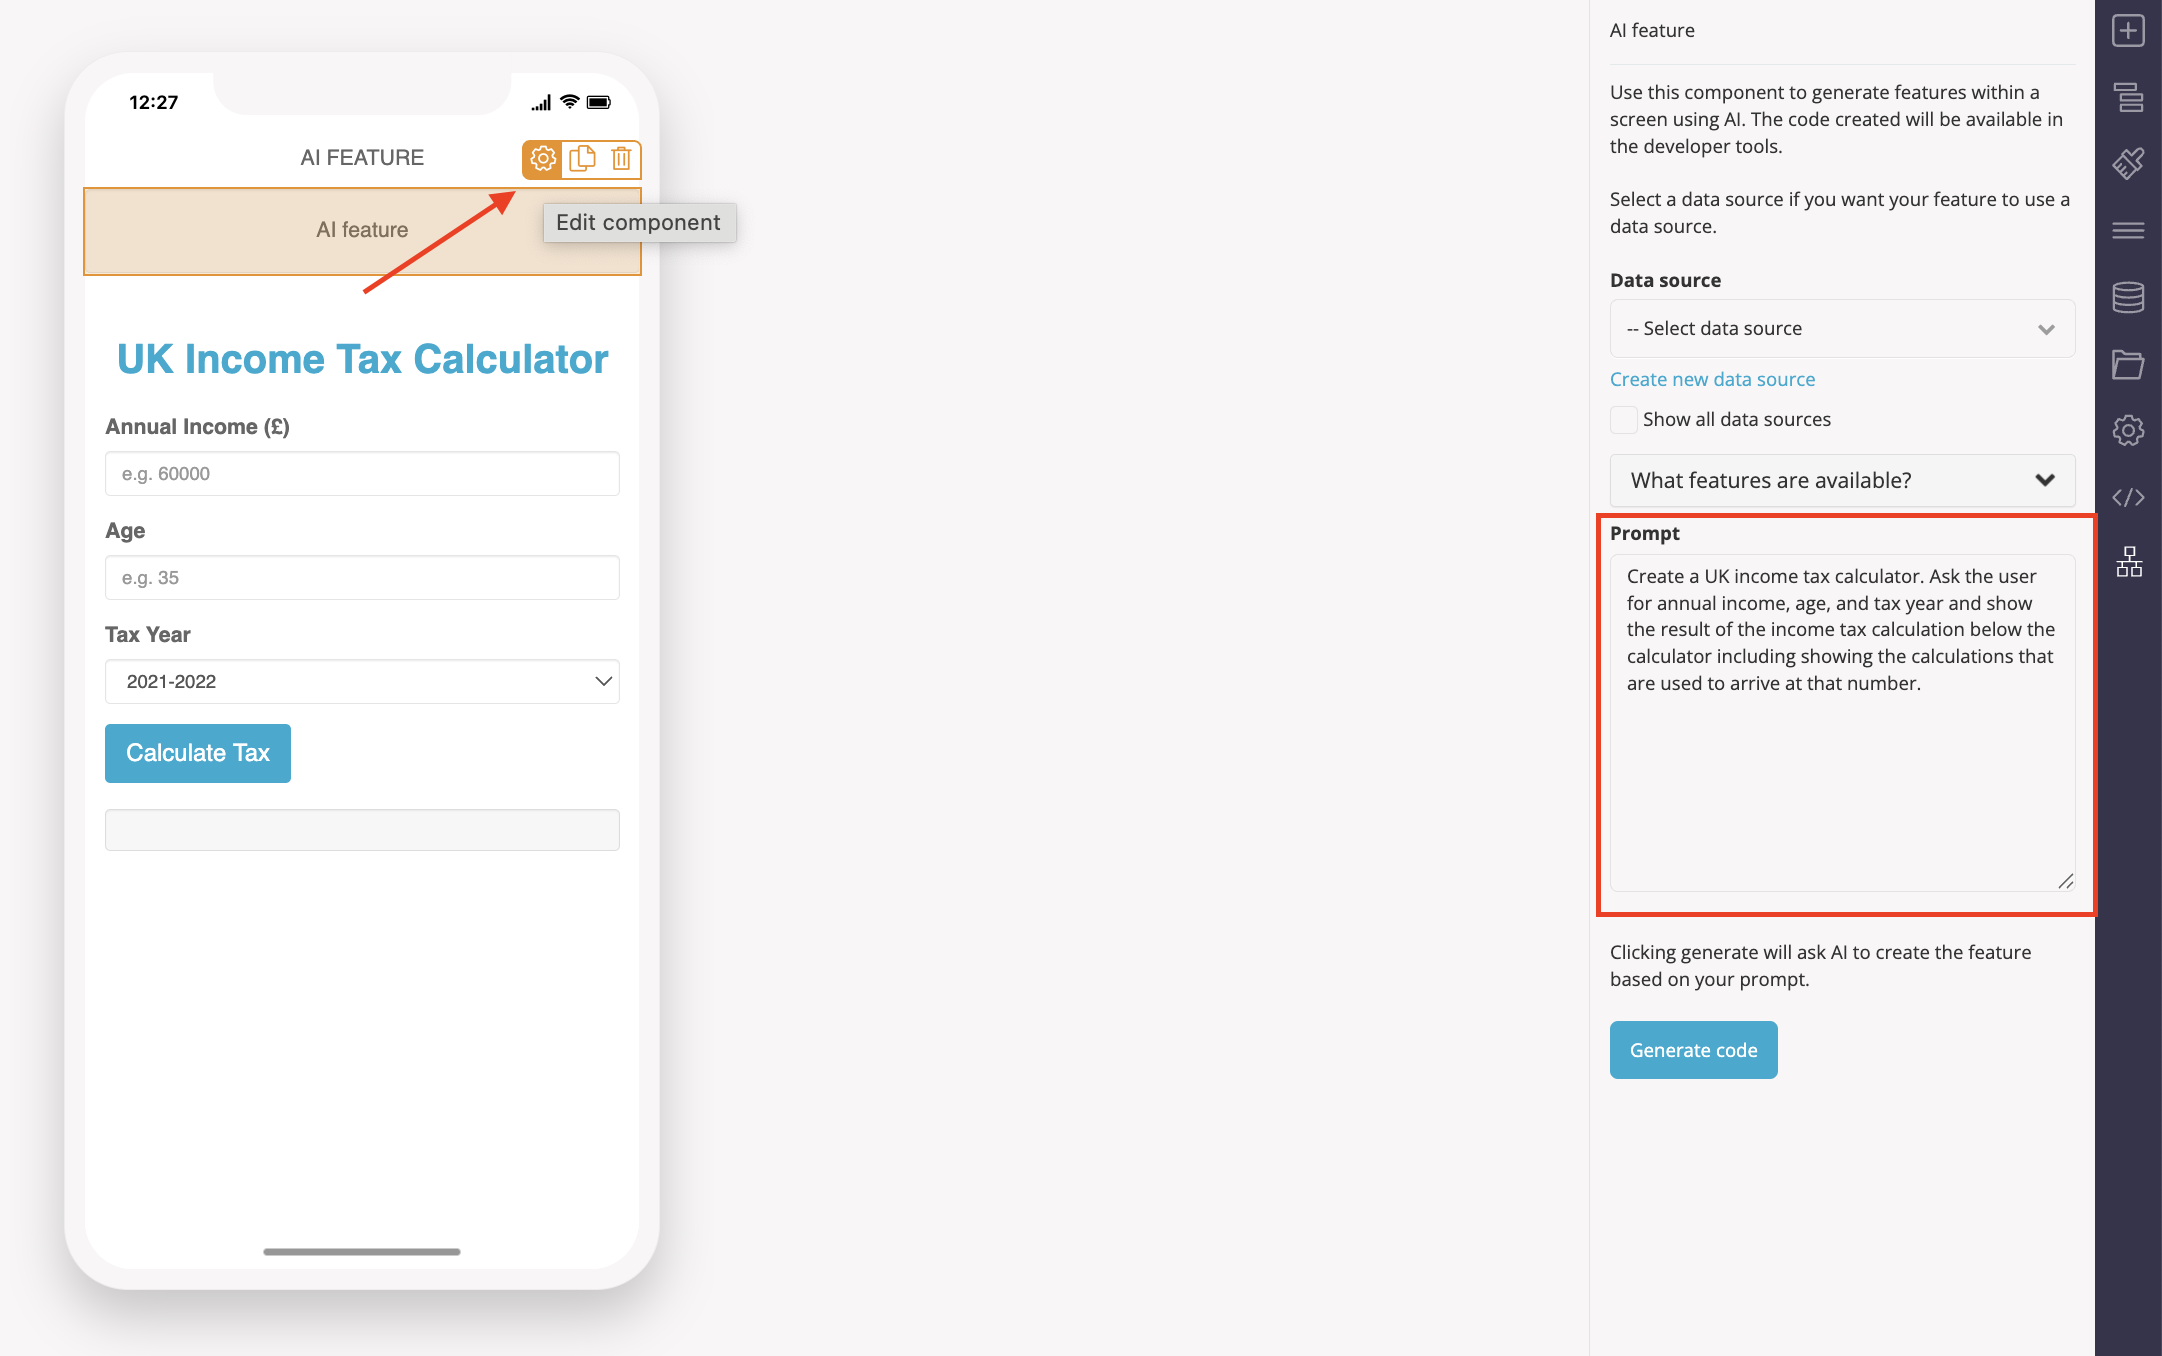
- Edit your prompt with additional information
- Click “Generate code” again
Example updates:
- “Please have the button in white”
- “Make the ‘Tax Calculation for Tax Year [YYYY-YYYY]’ text red also.”
Step 6 – Save and preview your feature
- Click “Close”
- Click “Preview” in the top-right to test your feature
- Interact with the feature as a user would
- To make further changes, open the AI feature settings again and adjust your prompt
AI Feature Ideas and Inspiration
Not sure what to build? The AI Feature component can help you create a wide variety of tools, forms, and utilities. Here are some examples to get you started:
- Expense tracker: “Create a form to track daily expenses and display totals by category in a chart”
- Customer feedback form: “Create a feedback form that saves submissions to a data source and displays a thank you message”
- Event countdown timer: “Add a countdown timer to my screen for an event on [date and time]”
- BMI calculator: “Create a BMI calculator asking for weight and height, then displaying the BMI and a brief health message”
- Custom onboarding flow: “Build a 3-step onboarding process with checkboxes and save results to a data source”
- Simple CRM dashboard: “Create a dashboard that displays leads from a data source with status filters and sorting options”
Use the “What features are available?” dropdown in the component for additional inspiration and supported use cases.
Tips
- Be specific: The more detailed your prompt, the better the results
- Iterate: You can regenerate and refine your prompts as often as needed
- Use inspiration: Try different formats and use cases from the examples above
- Mind your data: Always configure and verify data security settings
Related Articles