Precursor
Push notifications must be completed before building the app and you must have image assets ready (see the Google Play section in this article).
Publishing on the Google Play Store will provide your app with more exposure to potential users. However, publishing on the Google Play Store will make your app publicly available, so it should not be used for internal apps.
Note: We encourage you to give yourself extra time to go through publishing your app to Google. Due to Google’s app testing requirements, it could take up to one month to get your app published so please plan accordingly.
To launch your app to the Google Play store you will need to:
- Complete the app details section
- Complete the app analytics and push notifications section (optional)
- Request that the app be published
- Set up push notifications
- Complete steps in the Google Play Console
- Complete the store listing section
- Apply for Access to Production
- Submit your app for review
Get Started
Watch this short video or read the article below.
Step 1 – Complete the app details section
Note: At any point in the process, you can select the blue “Save Progress” button in the bottom left to save your work
-
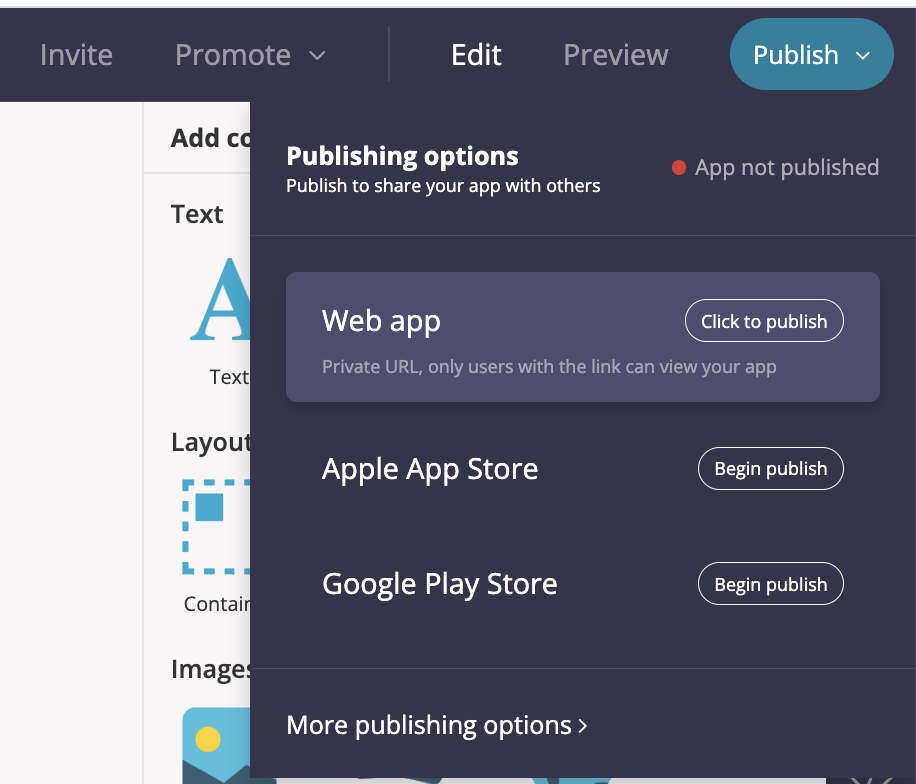
Whilst inside your app, hover over the “Publish” button in Fliplet Studio
-
Next to Google Play Store, select “Begin publish”, or select “More publishing options” and choose “Select” next to “Publish to Android devices”
-
Scroll down and select the “Google Play” Tab
-
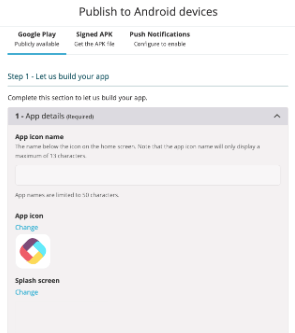
Underneath where it says “Let us build your app”, click on the first tab that says “App details”
-
Type the “App icon name”. This is the name you would like to appear on a device
-
Change the “App icon” or “Splash screen” image by clicking on the blue “Change” text underneath them. Both the App icon and Splash screen are required. (Information about requirements for image sizes can be found here)
-
To generate screenshots, you can useFliplet’s screenshot generator. Select “App settings”, “launch assets” to do this. In a later step, you will download them from Fliplet and upload them to the Google Play Console
-
Return to the publish section. Do not change the App version number and App version code. Also do not change the Bundle ID. It is not recommended to change these values. Fliplet will automatically produce values so you don’t need to do anything
Step 2 – Complete the app analytics & push notifications section (optional)
-
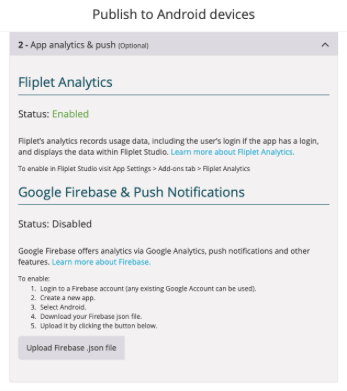
Click on the “App analytics & push notifications” tab
-
Fliplet Analytics is enabled by default. To learn more about Fliplet Analytics, click the blue text or read the article here
-
To add push notifications or enable Google Analytics, click on the blue text that reads “Learn more about Firebase” under the “Google Firebase & Push Notifications” heading or read the article here
To save your work click the “Save Progress” button in the bottom left
Step 3 – Request that the app be published
-
Click the green “Request App” button in the bottom right to request the app to be published
-
Then click “OK”.This process can take a few minutes to up to an hour to finish
-
Check the progress of the process by scrolling to the top of the “Publish to Android devices” window where you are currently
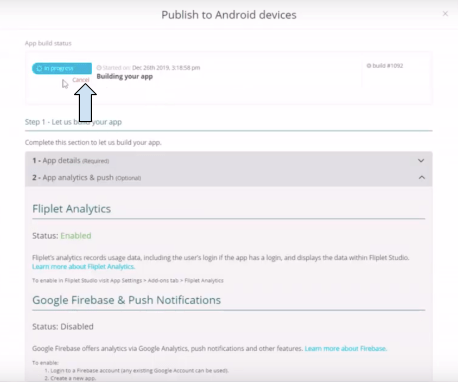
- When it’s complete, return to the window, download the app bundle file, and add it to the Google Play Console
Step 4 – Set up push notifications
For a reference on how to set up push notifications, click here
Step 5 – Complete steps in the Google Play Console
Move from Fliplet to Google Play Console
-
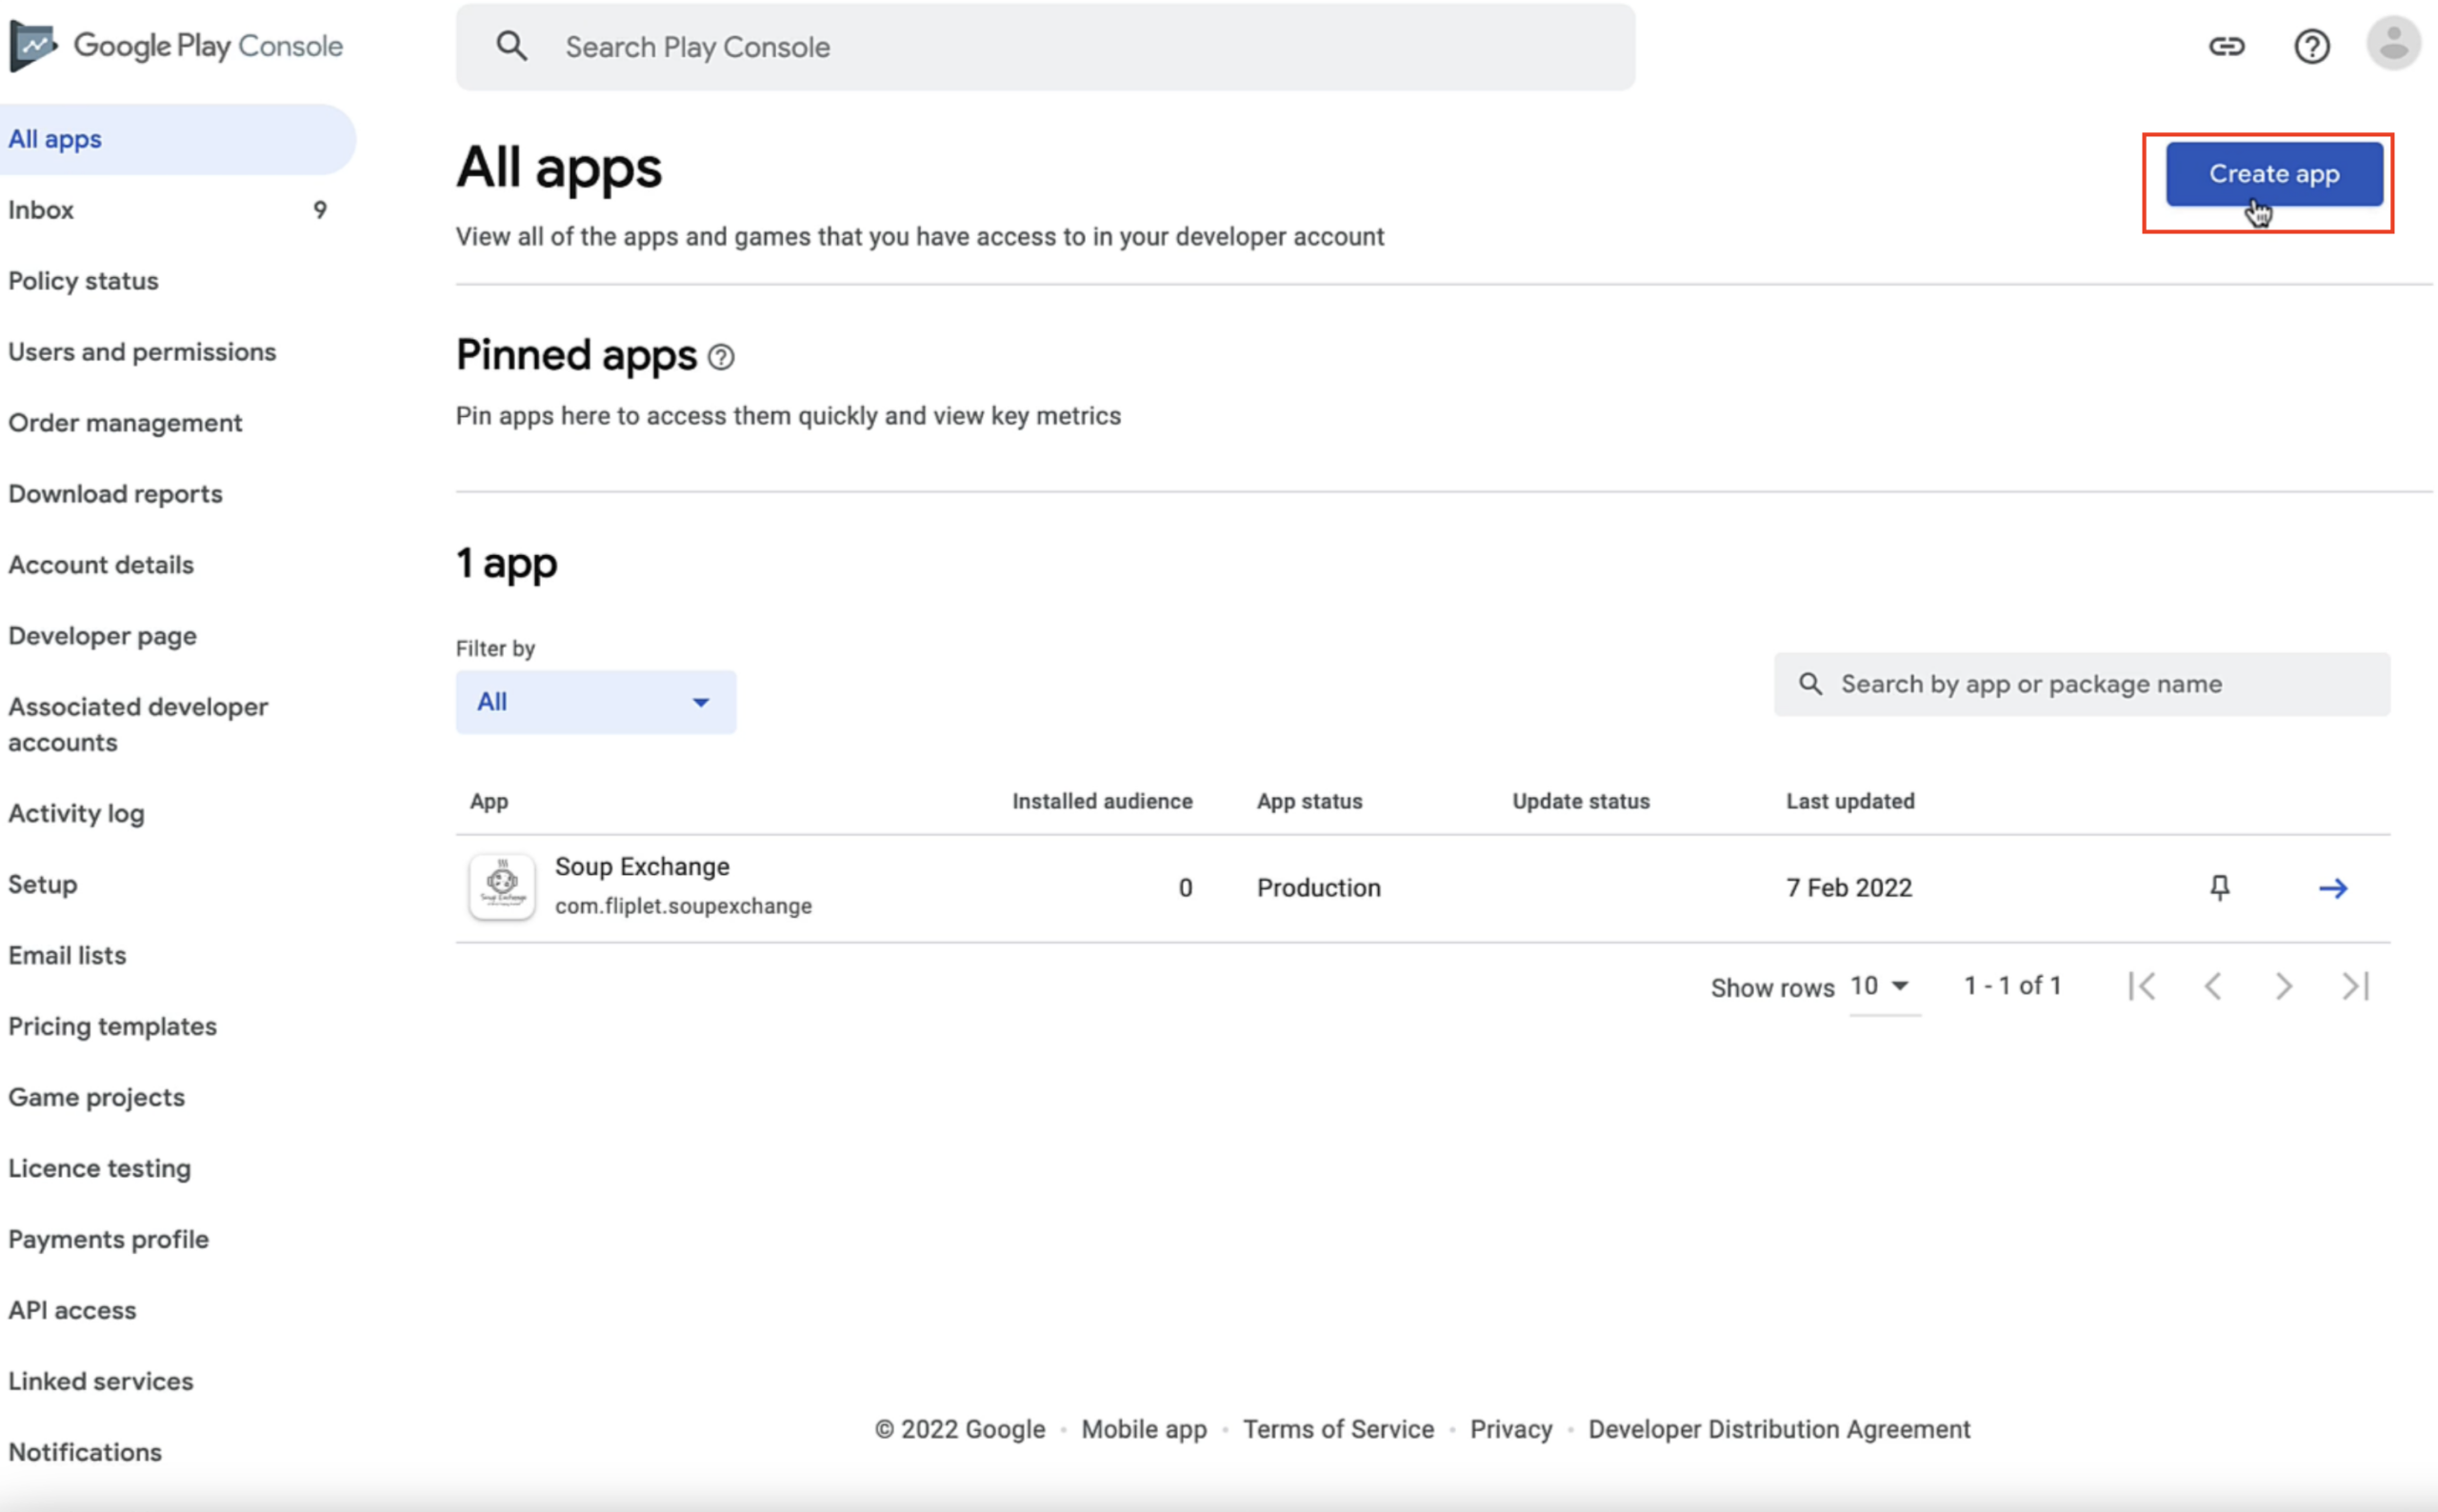
Login to Google Play Console with your Google Developer account details. The screen should display all of the apps that you have published. For more information on how to make a Google Developer account click here
-
Click the blue “Create App” button
-
Provide a name for your app
-
Select the default language
-
Select whether this will be an app or game
-
Select free or paid
-
Confirm that your app meets policies by reading and ticking the declarations
- Select “Create app”
Step 6 – Complete the store listing section
After you create your app, you can start setting it up. Your app’s dashboard will guide you through all the most important steps to get your app available on Google Play
When in the dashboard, start by scrolling down to the “set up your app” section, and click “View tasks”
Set privacy policy
- Add a privacy policy to your store listing to help provide transparency about how you treat sensitive user and device data
- Enter a URL
- Click “Save”
- Return to the dashboard by clicking “Dashboard” at the top of the screen
App access
- If parts of your app are restricted based on login credentials, memberships, location, or other forms of authentication, you will need to provide instructions on how to access them. Make sure that this information is kept up to date
- Select either – All functionality is available without special access or All or some functionality is restricted
- Enter Instructions – enter your test login credentials to allow the reviewer access to your app
- Click “Save”
- Return to the dashboard by clicking “Dashboard” at the top of the screen
Ads
- Select yes or no depending on whether your app contains any ads
- Click “Save”
- Return to the dashboard by clicking “Dashboard” at the top of the screen
Content ratings
- Enter your contact email
- Select the relevant category for your app
-
Next confirm whether or not your app includes “violence”, “sexuality”, offensive “language” or “controlled substance” references
-
After you complete and save the questionnaire Google will populate your rating for different countries
- Click “Save”
- Return to the dashboard by clicking “Dashboard” at the top of the screen
Target Audience and content
- Choose the target audience for your app
- Select to confirm whether your app appeals to children
- Click “Save”
- Return to the dashboard by clicking “Dashboard” at the top of the screen
News apps
- Confirm whether your app is a news app
- If yes – Provide information to help Google verify your credentials as a news publisher. You will be asked to explain how you source the news content that is shown in your app
- Click “Save”
- Return to the dashboard by clicking “Dashboard” at the top of the screen
COVID-19 contact tracing and status apps
- Select all of the statements in the list that apply to your app
- Click “Save”
- Return to the dashboard by clicking “Dashboard” at the top of the screen
Data Safety
In 2021 Google announced that app developers will be required to tell them about their app’s privacy and security practices by completing a form in the Google Play Console, this section is currently available for developers to declare this information.
More information can be found in the following Google support article.
Before proceeding we would recommend you prepare the following:
- Reading and understanding the requirements for completing the Data safety form in the Google Play console.
- Ensure that you have a Privacy Policy added to your app. (This does not need to be a screen in the app it could be a link to a privacy policy)
- Review how your app collects and shares user data and the app’s security practices.
- Review how any third-party code (such as data libraries and SDKs) is compliant with the Google Play Developer program policies. Fliplet complies with Google’s policies.
Data collection and security
- These will be Yes or No questions.
- To answer the first question please ensure you understand the different user data types, Google has compiled a list of Data Types in this article.
- If you selected Yes, then you will need to answer two follow-up questions.
- On the second question “Is all of the user data collected by your app encrypted in transit?”
- Encryption protects the data you send, receive, and store in your app using a process that scrambles readable text so it can only be read by the person who has the secret code, or decryption key. It helps provide data security for sensitive information.
- Please note that with Fliplet’s default functionality, all of the user data collected by Fliplet apps is encrypted in transit. If your app has added any custom code to implement a different behaviour, then you need to make Google aware.
- On the third and final question, whether there is a way for users to request their data to be deleted depends on how the app is built. For example, if there is a specific screen to request this data.
- Fliplet provides all the necessary tools, but this feature may or may not be built into the app.
Data types
- In the data types section, select all user data types collected or shared by your app. When you’re finished, select Next to move on to the next section.
- Expand each drop-down, carefully read through each option, and ensure to tick anything that is relevant to your app
- For most apps, the following will likely always be collected and need to be checked off: Name, Email, Phone Number, Analytics, and App Functionality. More detail on these data types is included in this article.
- The data types that Fliplet collects by default and that should be selected for any Fliplet app are:
- App activity – Page views and taps, search history. Note: Fliplet analytics will collect page views and taps for as long as you have the app, you can see this data in the app analytics section on Fliplet Studio
- Device or other identifiers – Device ID, IMEI number, MAC address, Widevine device ID, Firebase installation ID, or advertising identifier.
- Fliplet apps always collect the Device ID even if the app analytics are disabled. The device ID is still used to identify the app version on the device and for troubleshooting purposes for example.
- Fliplet apps collect an analytics ID to be used in the organization dashboard and app analytics.
- Once all the data types have been selected click Next.
Data usage and handling
- In this section, you will need to answer questions about how the data is used and handled for each user data type that the app collects or shares.
- Next to each user data type, on the right side of the screen there is a show option, click on this and click start and this opens an overlay with the options to fill in
- You will need to tick the relevant boxes on each data type used on the app to select if the data is collected, shared, or both.
- This will open a detailed view where you can answer questions about how this data is processed, for example, is this data processed temporarily, is this data collection required or users can choose if they want to share their data.
A note on the question: Is this data processed ephemerally? Processed ‘ephemerally’ means that the data is only stored in memory, retained for no longer than necessary to service the specific request in real-time, and not used for any other purpose.
- Once this is done, click next to continue.
Preview
- Once all the questions have been answered, the Store Listing preview section shows a preview of the information that will be shown to users on Google Play based on the form answers provided.
- This is where you can review if all the information you have entered is correct, once you do click Save.
- In case you want to make any changes you can always access this form again from the Google Developer Console > Policy > App content > Data safety.
- Click “Submit”
- Return to the dashboard by clicking “dashboard” at the top of the screen
Select an app category and provide contact details
- Confirm whether your app is an app or a game
- Select a category for your app
- Optionally add any tags to your app
- Provide an email address for your store listing to be shown to users on Google Play
- Optionally provide a phone number and a website to be shown to users on Google Play
- Choose to turn external marketing off or on
- Click “Save”
- Return to the dashboard by clicking “Dashboard” on the left-hand menu
Set up your store listing
- Fill out the “App Name”, “Short description”, and “Full description” for your app
- Click to add a 512×512 pixel image of your app icon
- Scroll down to add a 1024×500 pixel image as your “Feature graphic”
- If you have a video to promote your app you can add an optional youtube URL
- Scroll down to add screenshots of your app. If you used Fliplet to generate screenshots for you, find them in the File Manager under the “Screenshots Google” folder
- Add at least two screenshots for phone and tablet
- Click “Save”
- Return to the dashboard by clicking “Dashboard” on the left-hand menu
Step 7 – Apply for Access to Production
This step is an additional step required for any user who created a personal Google Developer account after November 13, 2023
Due to changes in Google’s app publishing policy, you must first conduct testing for your app before it is published.
Overview of Testing Requirements:
Developers with new personal accounts (this does not apply to organization accounts at this time) must conduct a closed test for their app with a minimum of 20 testers who have been opted-in continuously for the last 14 days.
Note that Google does not count testers who opted in, tested for less than 14 days, and then opted out. Even if they opt back in so that they are opted in for a total of 14 days, these 14 days must be consecutive to count towards the criteria of 20 opted-in testers who have tested for 14 consecutive days.
You can find more information on how to set up open, closed, or internal tests in this Google Support Article.
If you created your Google Developer account before this date you can skip ahead to step 8.
- Tell us about your closed test:
Rate the ease of recruiting testers.
Describe engagement during closed testing, including feature usage and consistency with production expectations.
Summarize tester feedback and how it was collected.
Click Next to proceed. - Tell us about your app/game:
Specify the intended audience.
For apps: Describe how the app provides value to users.
For games: Highlight what makes the game stand out.
Estimate the number of installs expected in the first year.
Click Next to proceed. - Tell us about your production readiness:
Detail changes made based on closed test insights.
Describe the decision-making process for determining app/game readiness for production.
Click Apply to submit the application. - Post-Application:
Review of the application typically takes 7 to 10 days, with occasional longer periods.
If approved, developers gain access to Production and can publish the app on Google Play.
Open testing is recommended for future updates.
Thoroughly testing the app before production release is emphasized for quality assurance.
Step 8 – Submit your app for review
Once your closed testing is approved, you can follow the set of steps under the release dashboard, which you can find under the production tab, to submit your app for review
- Choose countries and regions for release
- Select “Create new release”
- Add your app bundle (.AAB file)
- Click “Review release” and review your app information
- Finally, click “Start roll-out to production”. This will only work if you have completed all the necessary steps. Your app will be submitted to Google for review. This process can take several days
Check the status of your app by going to the “Dashboard” of Google Play Console. Your app will say “Published” when it is live
Related Articles