Action Builder
1. Introduction: What is an Action?
An Action is an automated background task that runs in your app without requiring a user to manually click a button. Think of it as a “cause and effect” rule for your app: When a specific event happens, the app automatically performs a task.
The Action Builder allows you to create these powerful automations using conversational AI. You don’t need to know how to write code; you simply tell the AI what you want to happen in plain English, and the AI configures the backend logic for you.
- Who can use it: All App Editors and App Publishers have access to the Action Builder in Fliplet Studio.
- Action Limits: Please note that your specific Fliplet plan dictates the total number of Actions you can create and the number of times those Actions can be executed per month. Check your plan details for your specific limits.
- For Technical Users: If you are a developer looking to understand the backend architecture or write custom scripts, please refer to our developer documentation on App Actions v3.
If you used Actions before the Action Builder was launched they won’t be visible. Only version 3 Actions are managed by the Action Builder.
2. How Can You Use Actions?
Actions are designed to save you time, keep your users engaged, and maintain your app’s data. Here are a few ways you can use the Action Builder to enhance your app:
- Welcome Emails (Onboarding): Trigger a personalized welcome email containing app instructions automatically when a new user signs up.
- Push Notifications (Alerts): Automatically send a push notification to all staff members the moment a high-priority incident report form is submitted.
- Scheduled Reminders (Engagement): Set up a weekly action that checks a “Tasks” data source and sends an email reminder to any user with an overdue item.
- Data Management (Maintenance): Create an action that automatically backs up your app’s data sources every Friday at midnight.
- Approval Workflows (Operations): When an employee submits an expense request, trigger an action that automatically notifies their manager to review the entry.
For more information using the Action Builder see How to use the Action Builder
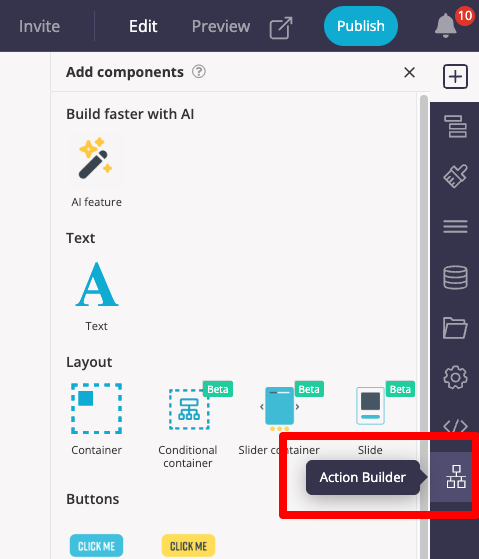
3. Accessing the Action Builder
Description: The Action Builder is located directly inside the Fliplet Studio interface and opens as an overlay, meaning you never have to leave your app editing screen.
How to Use: Open your app in Fliplet Studio. Look at the right-hand tool panel (next to Developer Options) and click the Action Builder icon.
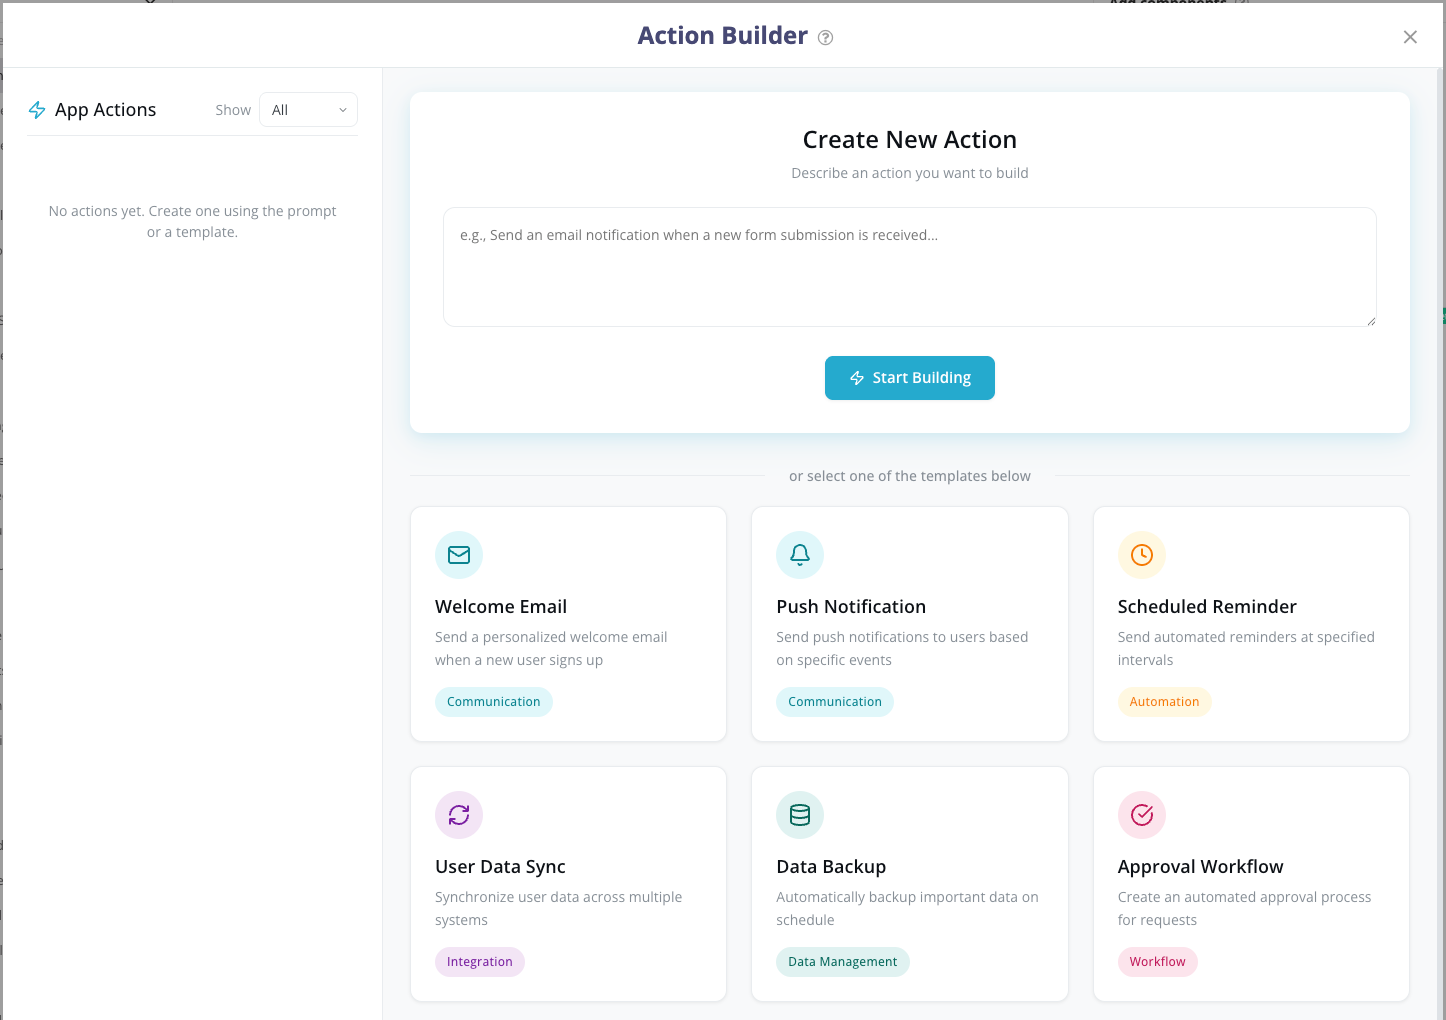
4. The Action Builder Dashboard
Description: When you open the Action Builder, you will see a centralized dashboard.
My Actions List: On the left, you can view all Actions previously created for this app. Use the drop-down menu to filter them by their current status: Enabled, Disabled, or Drafted.
Creating a New Action: On the right, you can start building.
- Start from Scratch: Click into the “Create New Action” text box, type your desired automation (e.g., “Send an email when a user submits a form”), and click Start Building.
- Use a Template: Click one of the pre-made templates below the text box (e.g., Welcome Email, Push Notification). This will auto-fill the prompt box, allowing you to tweak the text before clicking Start Building.
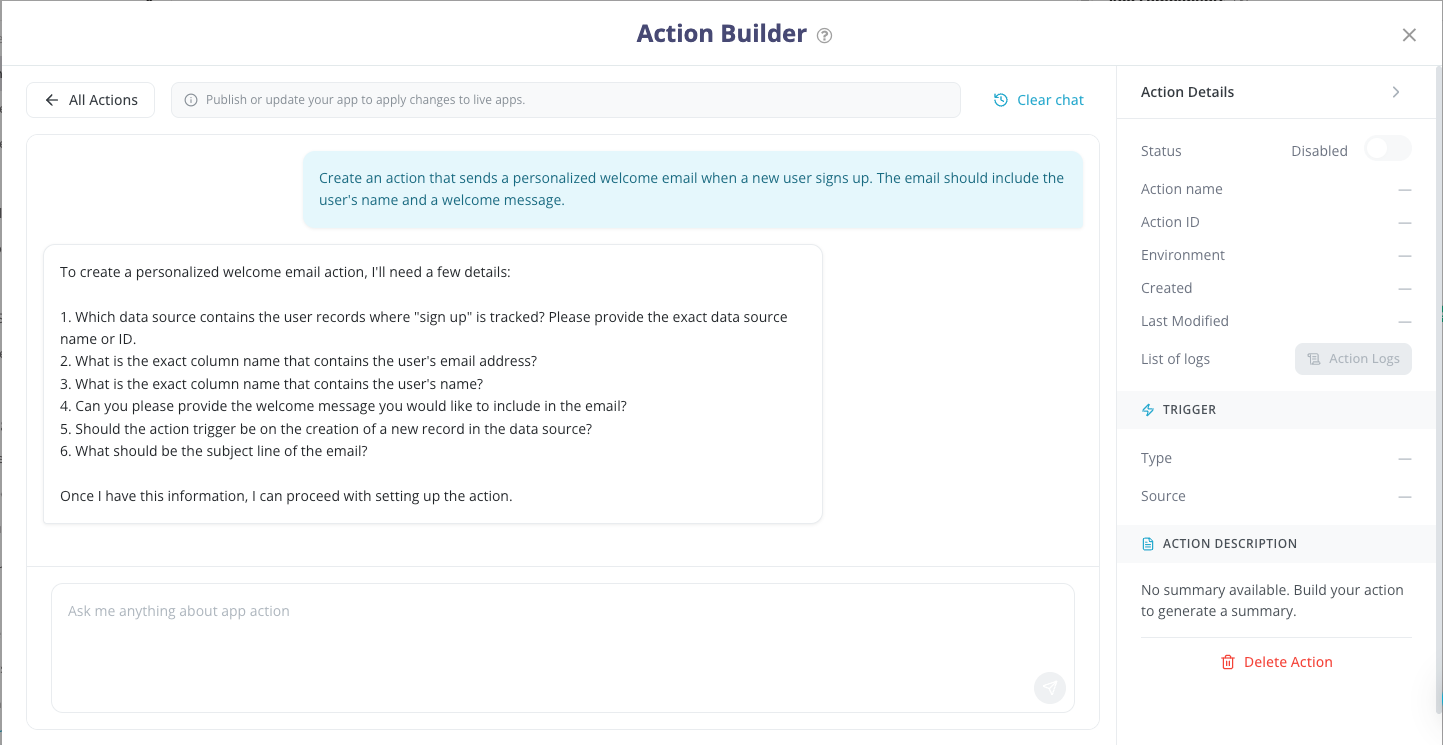
5. Building an Action with AI
Description: Once you click “Start Building,” you are taken to a chat interface. The AI will analyze your request and ask you clarifying, numbered questions to gather the exact parameters it needs (like triggers, target audiences, and notification details).
Important Note on Data Sources: If your action needs to read or write data (e.g., looking up a list of users to send an email), that Data Source must already exist in Fliplet Studio before you build the action. The AI can connect to any existing Data Source accessible by the app, but it cannot create a new one from scratch.
How to Use:
- Read the numbered questions provided by the AI.
- Type your answers into the chat box at the bottom. You can type conversationally (e.g., “1. Trigger it when a new row is added. 2. Use the ‘Staff Directory’ data source.”).
- Continue chatting until the AI asks for a final confirmation to build.
Managing the Build Process:
- Stop Button: If the AI is generating something and you realize you made a mistake, click the Stop button to interrupt it.
- Drafts: If you need to step away, simply close the Action Builder. Your progress is automatically saved as a Draft. You can click on it later from the Dashboard to resume exactly where you left off.
- Clear Chat: Click “Clear Chat” at the top right to erase the conversation history (this does not delete the action itself).
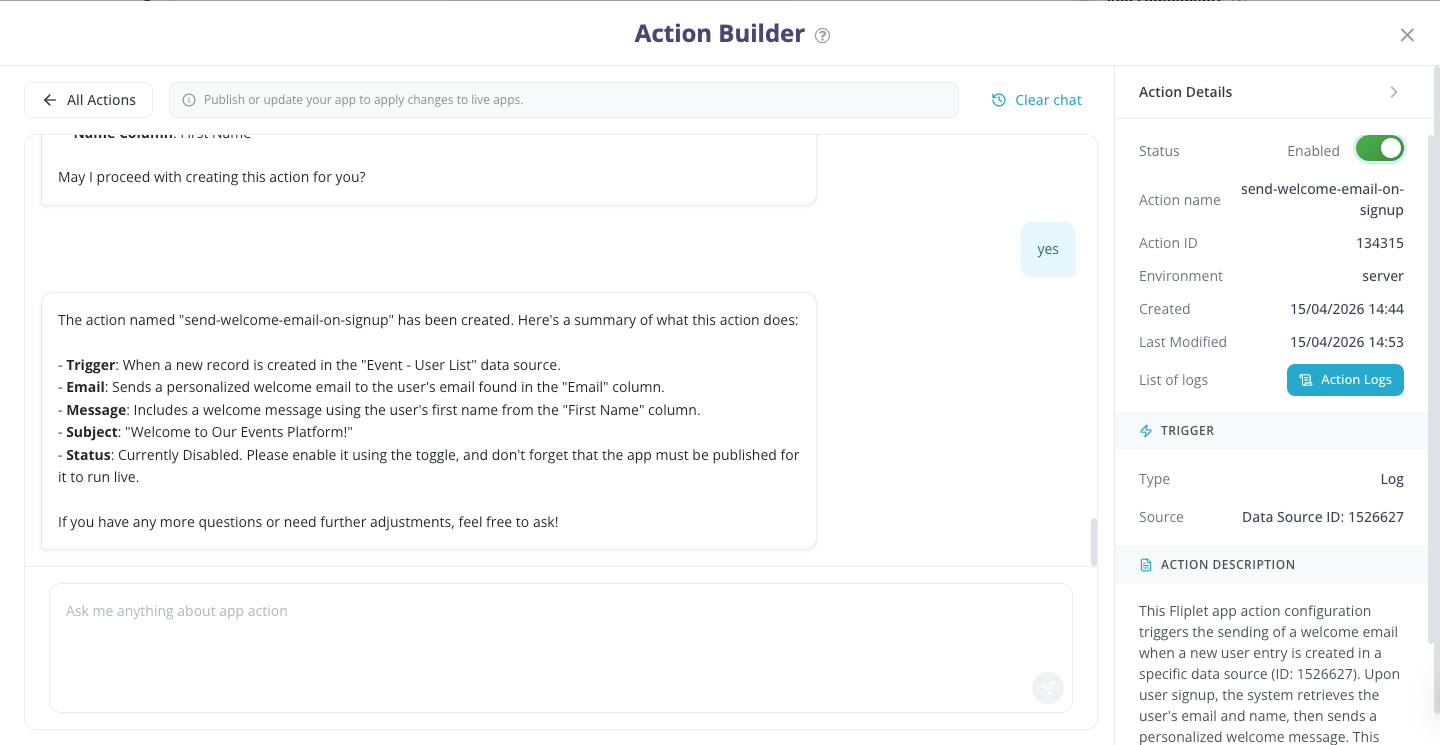
6. Managing and Editing Actions
Description: The right side of the chat interface features the Action Details panel. Here you can view the system name, environment, creation date, and trigger type.
Action Description: At the bottom of this panel is an AI-generated summary of what the action does. If it’s inaccurate, you can ask the AI in the chat to rewrite it.
Modifying Existing Actions: If you need to change an action later (e.g., changing an email subject line), simply select the action from your list, open the chat, and tell the AI what to change.
Enabling/Disabling & Deleting: Use the Status toggle at the top of the panel to turn the action on or off. Use the red Delete Action button at the bottom to permanently remove it.
7. Testing, Publishing, and Monitoring (Logs)
Building an action and toggling it to “Enabled” does not instantly make it live for your end-users. You must follow the proper deployment steps:
- Testing: Before publishing, you can safely test your enabled Actions to ensure they work as expected using Fliplet Studio Preview or the Fliplet Viewer app on your device.
- Publishing: Once you are satisfied with your tests, you must publish your app. Click the Publish button in the main Fliplet Studio interface. Actions affect the live app immediately upon publishing. Note: If you ever modify an existing action, you must publish the app again for the changes to take effect.
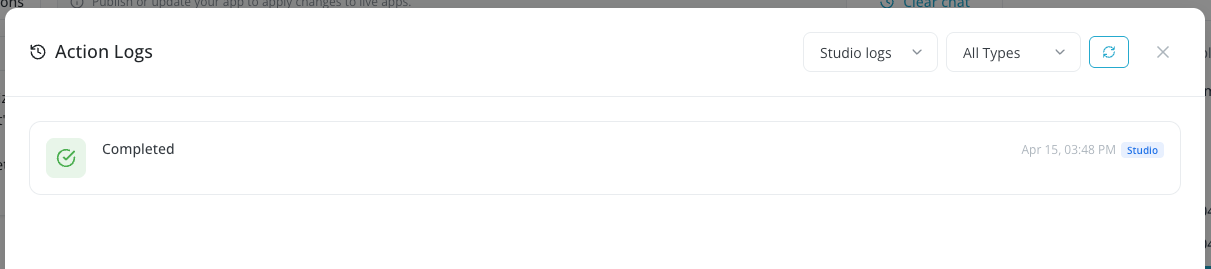
- Action Logs: To monitor the health of your live actions, click the Action Logs tab inside the Action Details panel. This will show you a history of every time the action is executed. If an action fails, the logs will display technical error details to help you (or Fliplet Support) troubleshoot the issue. For advanced details on reading logs, refer to the v3 Developer Documentation.
See also: