This guide walks you through publishing your Fliplet app to the Apple App Store using the Publishing Dashboard. By the end, your app is built, uploaded to App Store Connect, and ready for you to complete the remaining details and submit for Apple’s review.
Contents
- Before you start
- Step-by-step guide
- What happens during the build
- After the build: next steps
- Common issues and how to fix them
- Publishing updates
- Quick reference
Before you start
Make sure you have the following ready:
| Requirement | Details |
|---|---|
| Apple Developer Account | Enrolled in the Apple Developer Program ($99/year). Sign up here |
| App Store Connect access | You need an Admin or App Manager role in App Store Connect |
| App icon | 1024 x 1024 PNG, no transparency, no rounded corners |
| Splash screen | 2048 x 2732 PNG |
Tip: If you’re publishing an update to an existing app, most of your settings are saved from your previous build. You only need to update the version number and any changed details.
Step-by-step guide
Open the Publishing Dashboard
- Open your app in Fliplet Studio.
- Go to the Publishing Dashboard.
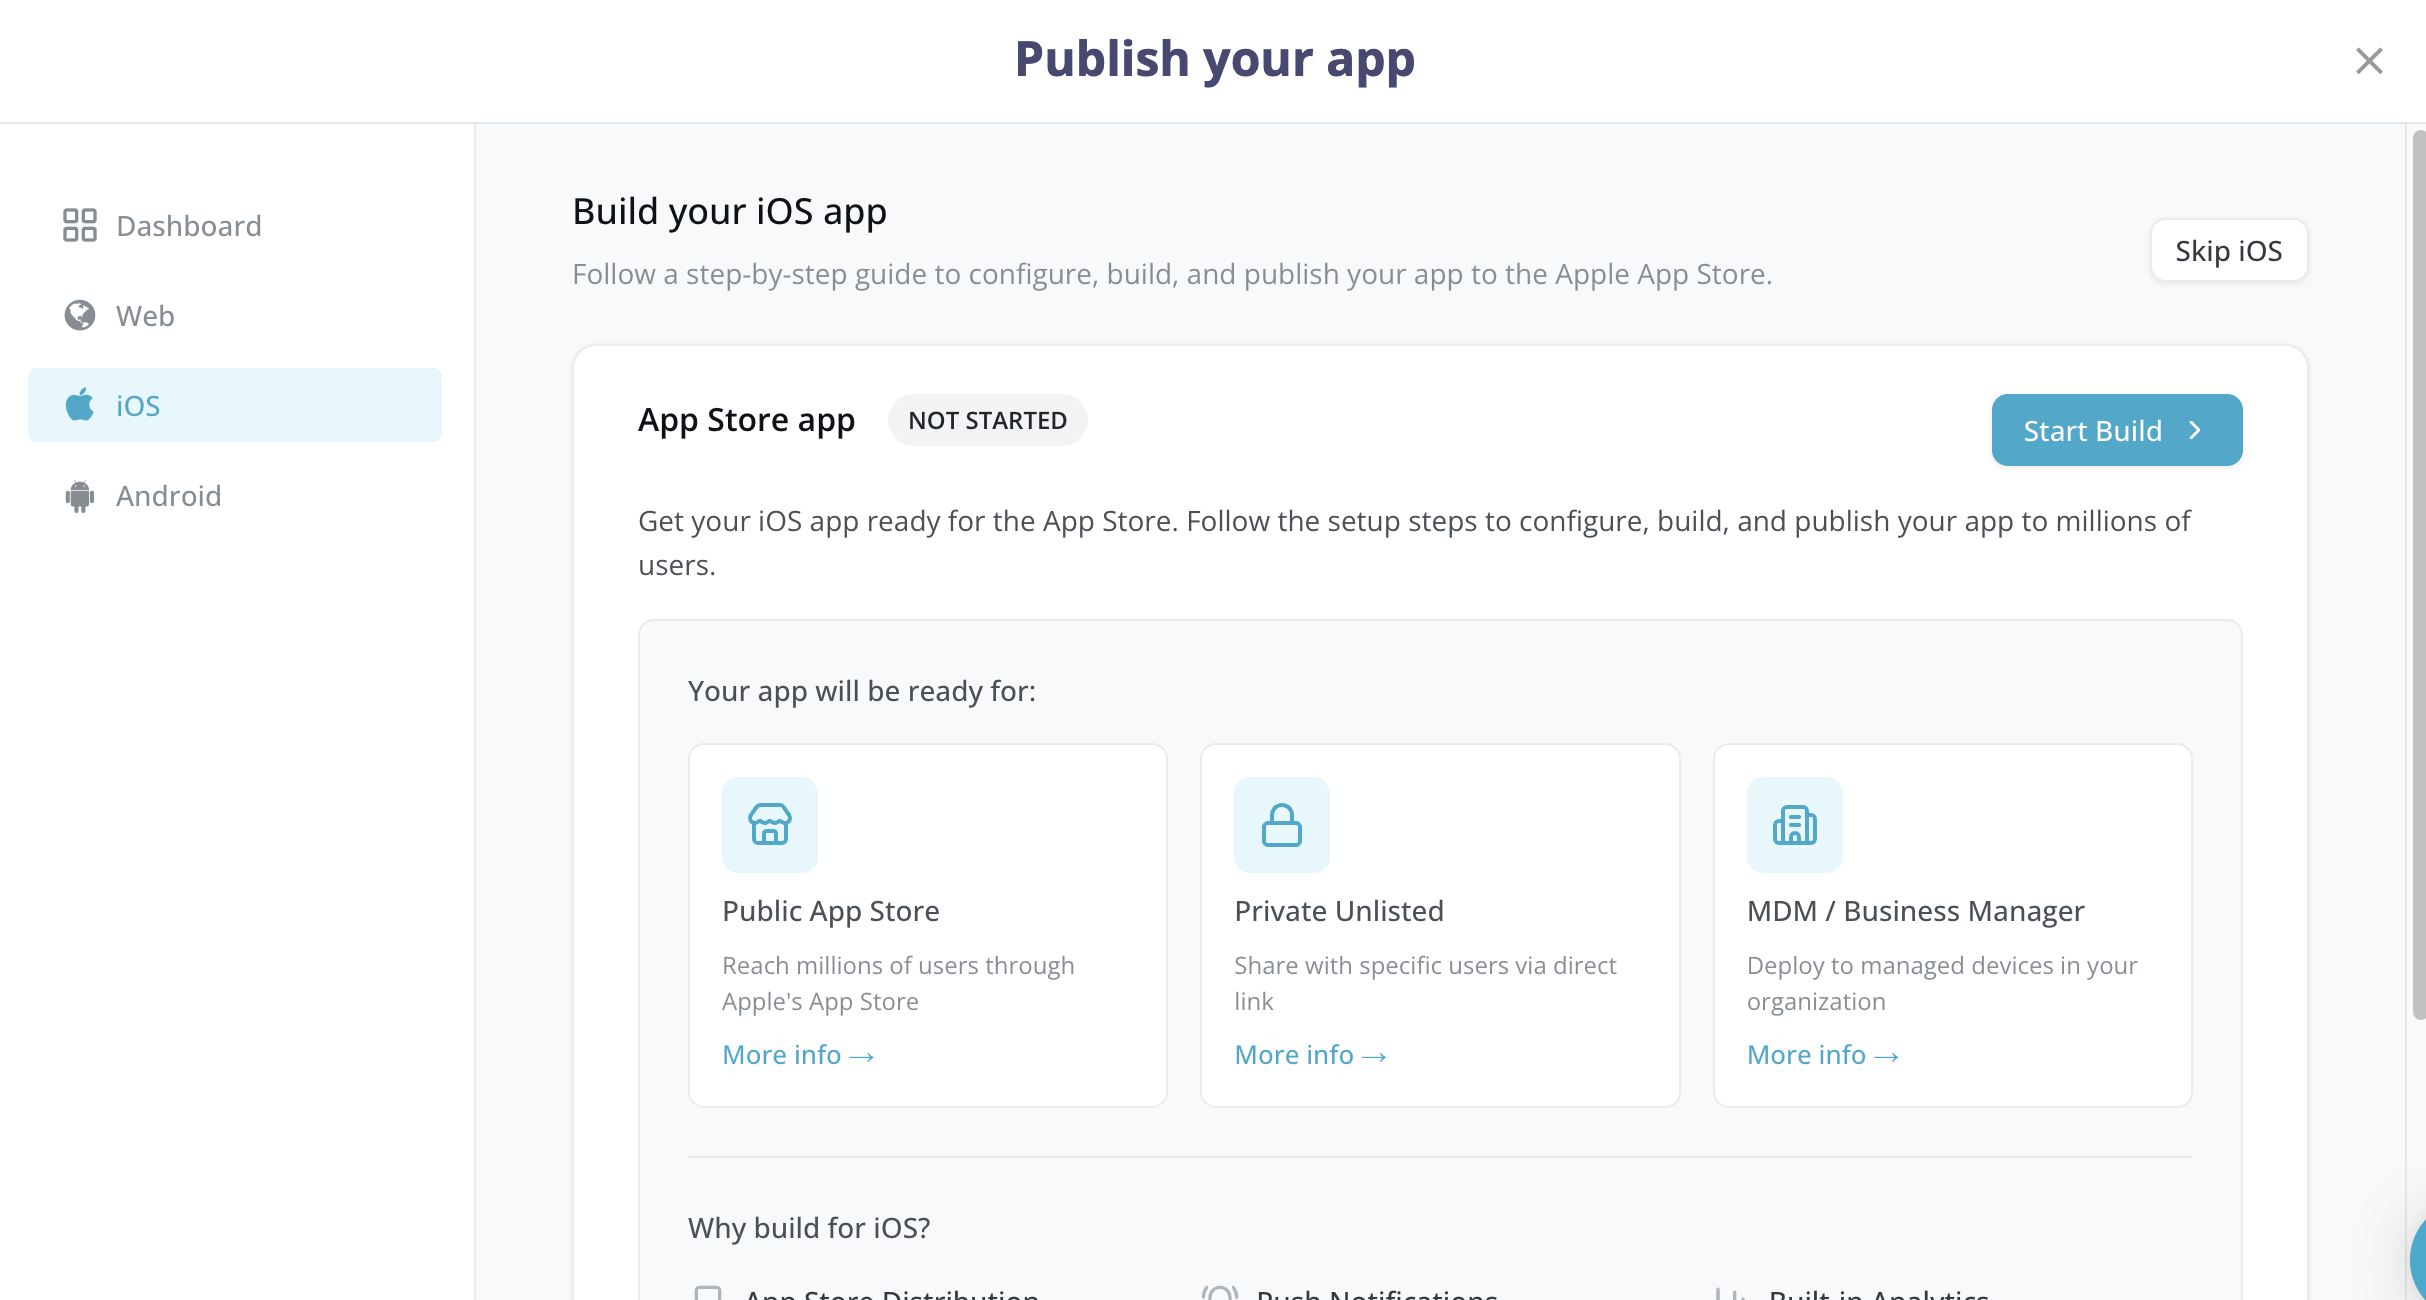
- Click the iOS card or select iOS from the sidebar. You land on the iOS Publishing Dashboard, which shows the current status of your iOS app (Not Started, Draft, In Progress, Built, or Failed).
- Click Start Build (for first-time builds) or Continue Setup / Rebuild App (for subsequent builds). This opens the iOS publishing flow — a 6-step guided wizard.
Step 1: App Store Connect setup
This step ensures your app exists in Apple’s system before Fliplet builds it.
- Go to developer.apple.com.
- Sign in to your account.
- Open Certificates, Identifiers & Profiles.
- Select Identifiers.
- Click the + button.
- Select App IDs.
- Select App.
- Enter an explicit Bundle ID (e.g.,
com.yourcompany.yourapp) and click Register. - Go to App Store Connect.
- Click My Apps.
- Click the + button.
- Select New App.
- Fill in your app details:
- Select iOS as the platform.
- Enter your app name.
- Select the Bundle ID you just created.
- Enter a SKU.
- Click Create.
- Return to Fliplet’s Publishing Dashboard and click Continue.
You don’t need to create a new Bundle ID or app listing. Your existing Bundle ID can be found in App Store Connect or from a previous submission. Confirm the setup and proceed.
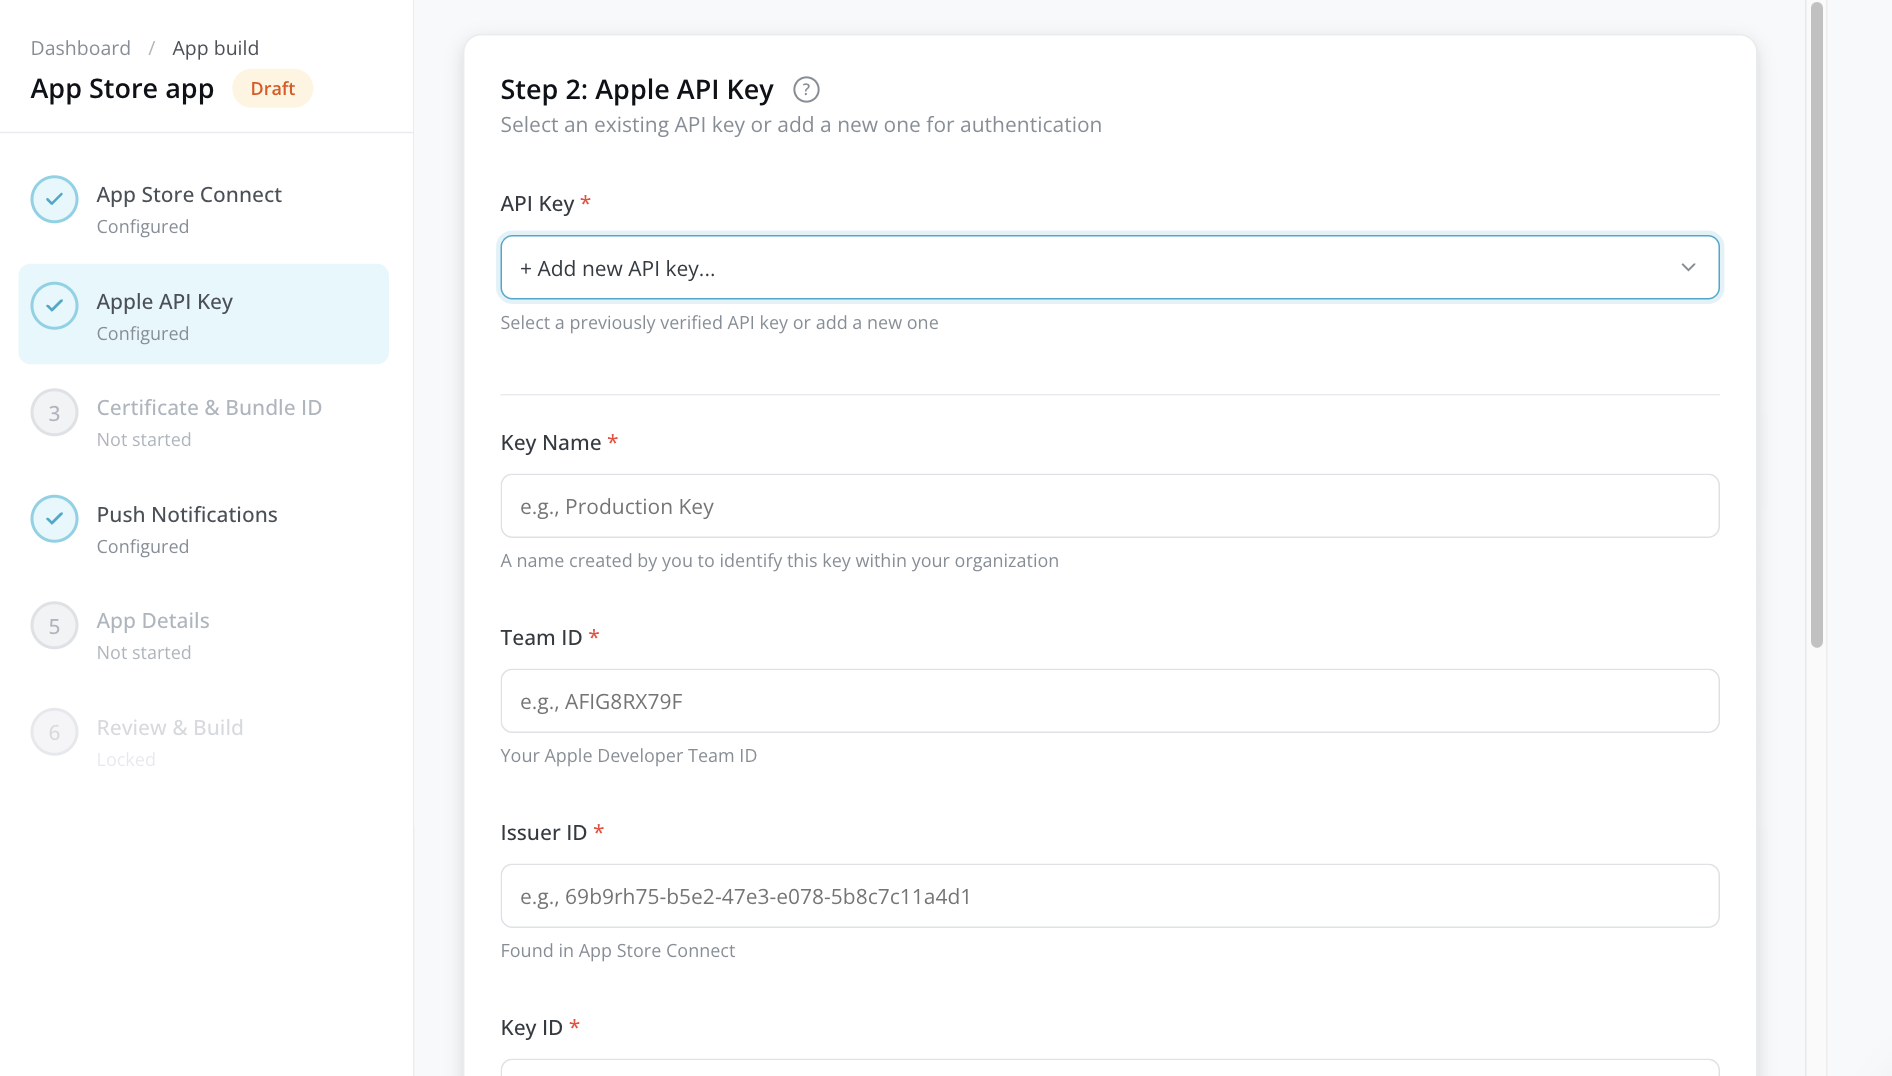
Step 2: Apple API key
The API key allows Fliplet to communicate with App Store Connect on your behalf to upload your app build.
If you already have an API key saved
- Select it from the API Key dropdown. Your key details (Key Name, Team ID, Issuer ID, Key ID) appear for confirmation.
- Click Continue.
If you need to create a key
- Go to App Store Connect.
- Click Users and Access.
- Select Integrations.
- Open App Store Connect API.
- Click + to generate a key.
- Give it a name and select App Manager access.
- Click Generate.
- Download the .p8 file immediately — you can only download it once.
- Note down the Key ID and Issuer ID shown on the page.
- Find your Team ID at developer.apple.com/account (shown in your membership details).
Back in the Publishing Dashboard, fill in:
| Field | Where to find it |
|---|---|
| Key Name | A name you choose to identify this key (e.g., “Production Key”) |
| Team ID | Your Apple Developer Team ID (e.g., AFIG8RX79F) |
| Issuer ID | Shown on the App Store Connect API keys page |
| Key ID | 10-character ID shown next to your key in App Store Connect |
| API Key Content (.p8) | Paste the entire contents of the .p8 file, including the -----BEGIN PRIVATE KEY----- header |
Click Continue. Your key is verified and securely stored for future builds.
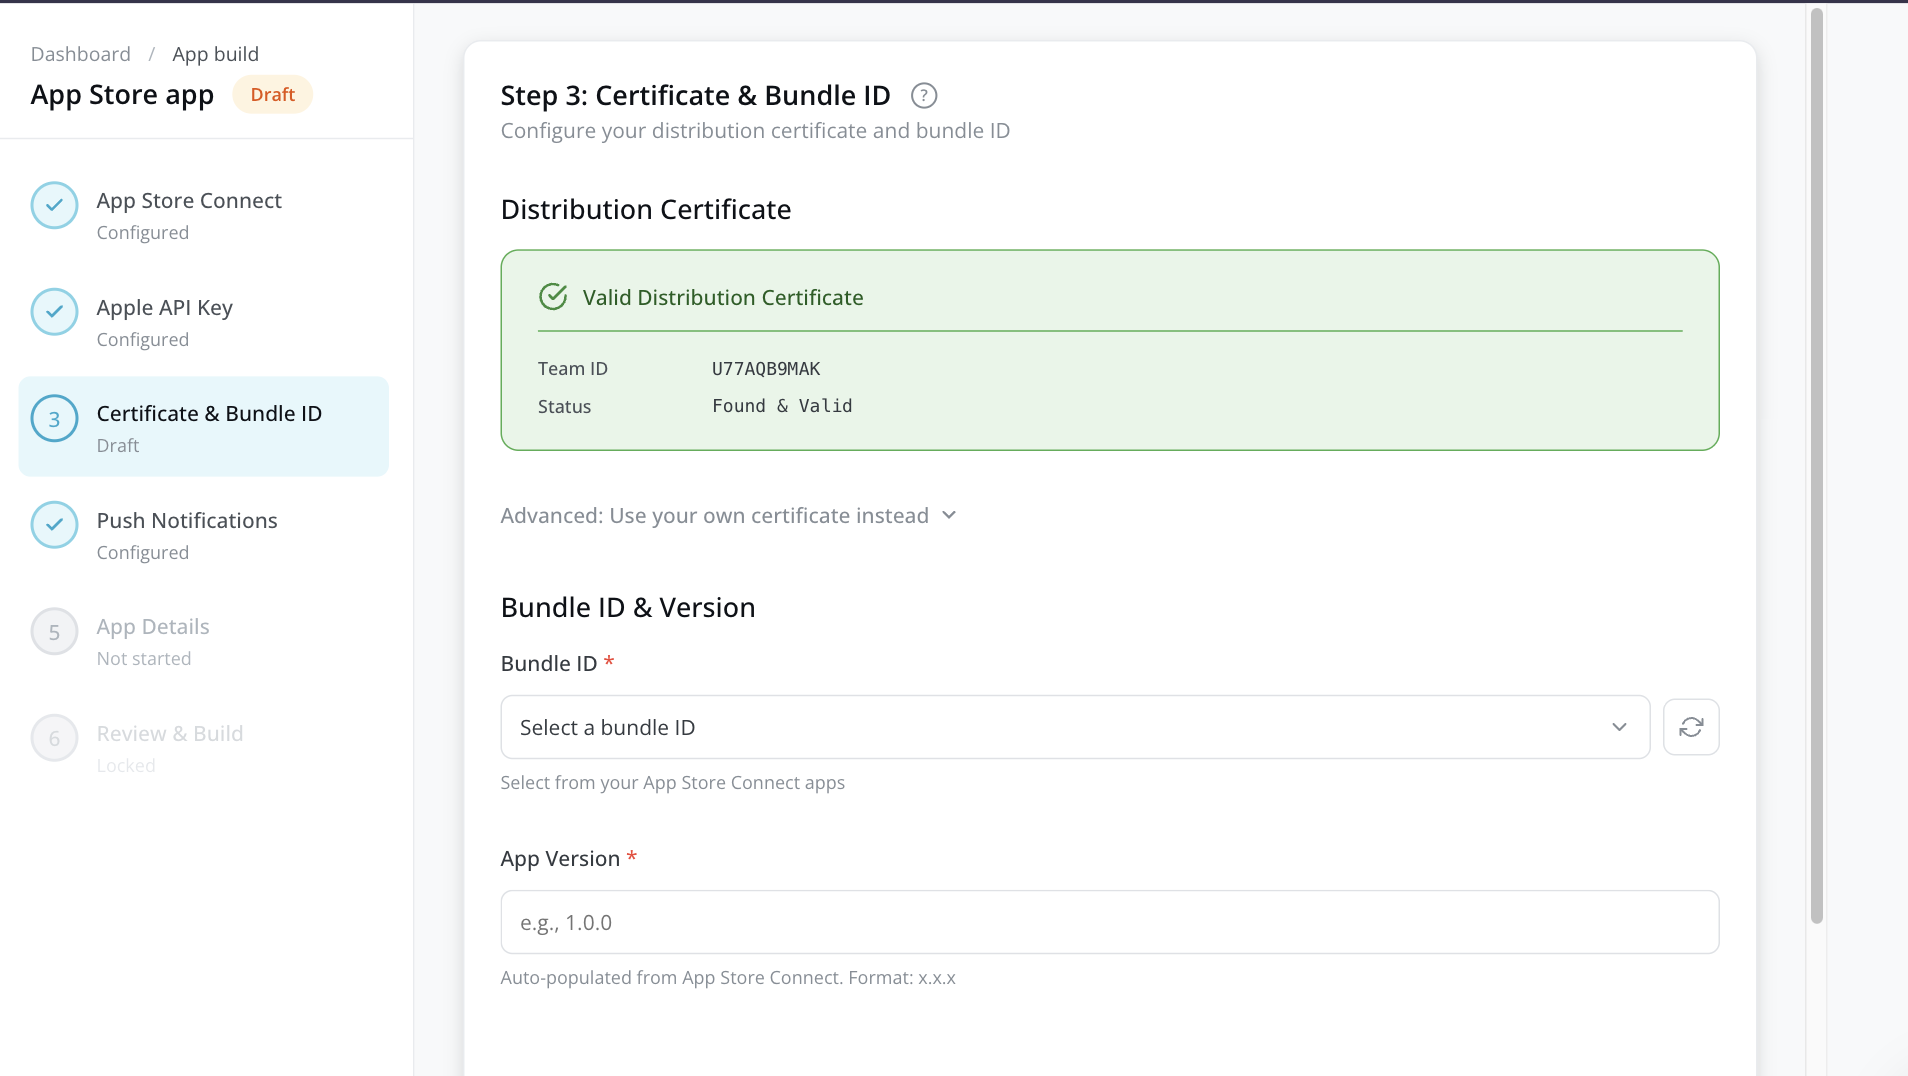
Step 3: Certificate and Bundle ID
Distribution certificate
Fliplet automatically manages your iOS distribution certificate. The system detects an existing valid certificate in your Apple Developer account or generates one for you. The certificate status displays automatically — no action is required unless you want to use your own certificate.
If you prefer to use your own certificate, expand the “Use your own certificate instead” section and upload your .p12 or .cer file (and private key if applicable).
Bundle ID
Select your app’s Bundle ID from the dropdown. This list is pulled directly from your App Store Connect account using the API key you provided in Step 2.
App version
Enter your version number in x.x.x format (e.g., 1.0.0). For updates, increase this number (e.g., 1.0.1 or 1.1.0). The field may be auto-populated based on the latest version in App Store Connect.
Click Continue.
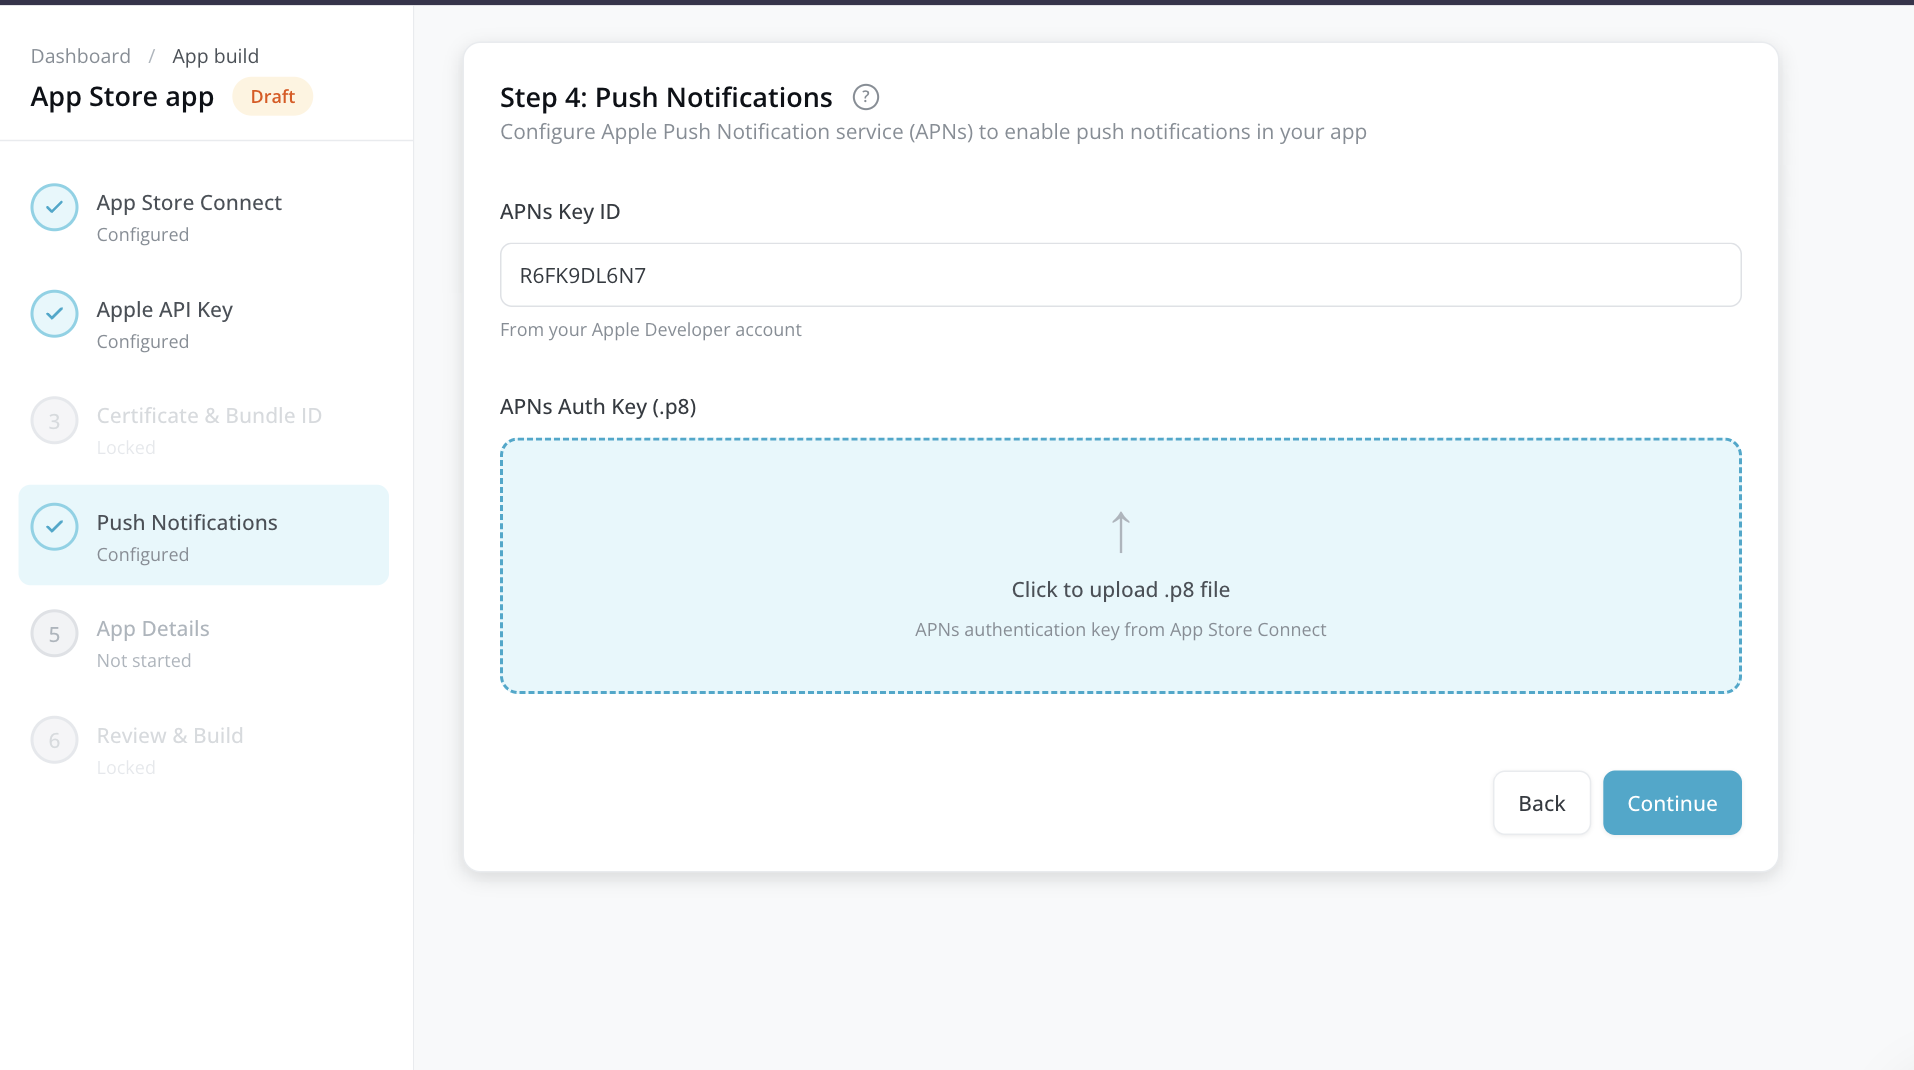
Step 4: Push notifications
Configure Apple Push Notification service (APNs) to enable push notifications in your app.
If your app uses push notifications
- In your Apple Developer account, go to Keys and create an APNs authentication key (if you don’t already have one).
- Download the
.p8file. - In the Publishing Dashboard, enter the APNs Key ID (shown next to your APNs key).
- Upload the
.p8authentication key file.
Tip: If Fliplet detects push notification settings from a previous build, you see a banner offering to reuse that configuration. Click Reuse this configuration to save time.
If your app doesn’t use push notifications
Skip this step — click Continue without entering anything.
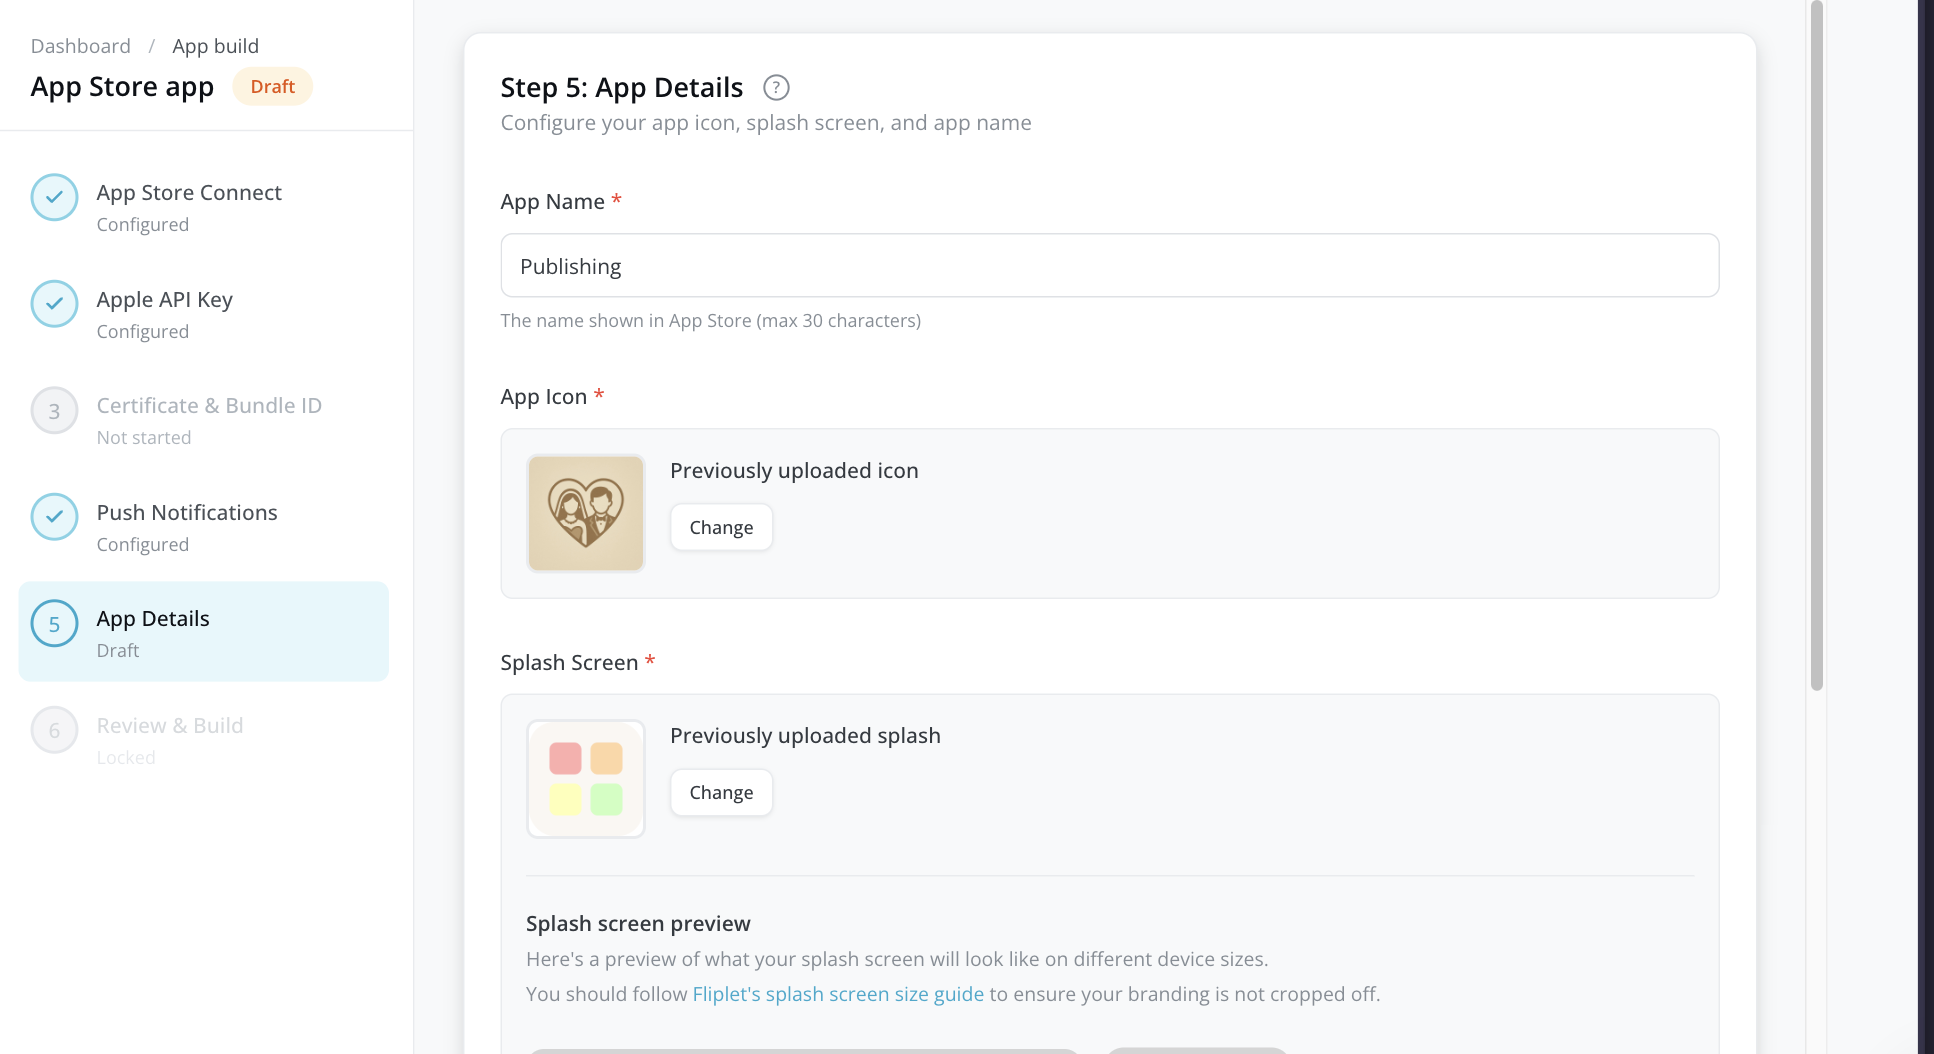
Step 5: App details
Configure how your app appears on the device.
| Field | Requirement | Details |
|---|---|---|
| App Name | Required | The name displayed under the app icon on the user’s device (max 30 characters) |
| App Icon | Required | 1024 x 1024 PNG. Shown on the home screen and in the App Store |
| Splash Screen | Required | 2048 x 2732 PNG. The image shown briefly when your app launches |
Upload your images by clicking or dragging files into the upload areas. Click Continue.
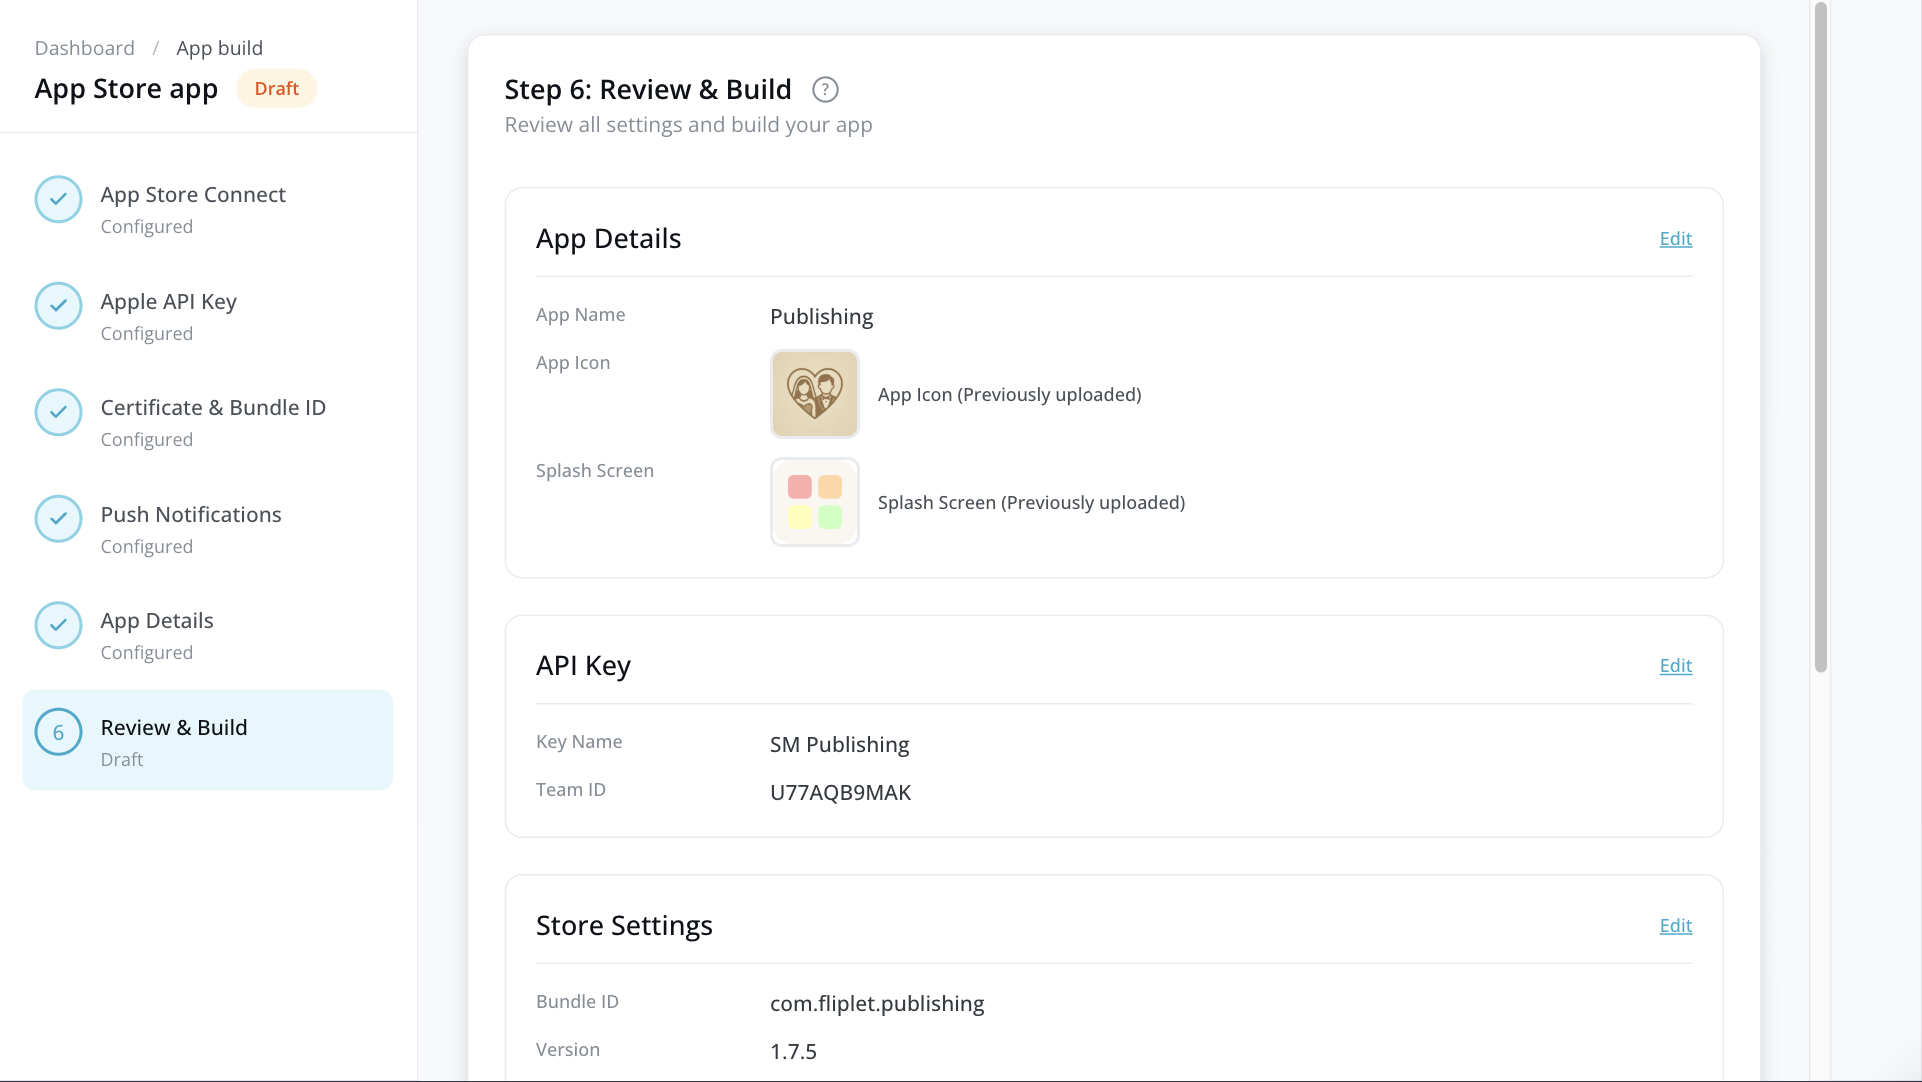
Step 6: Review and build
Review all your settings before building:
- App details — App name, icon, and splash screen
- API key — Key name and Team ID
- Store settings — Bundle ID and version number
- Certificate — Certificate status
- Push notifications — Configuration status
If anything needs changing, click the Edit link next to that section to jump back to the relevant step.
When everything looks good, click Start Build.
What happens during the build
- Fliplet packages your app with all the settings you configured.
- Fliplet uploads the app binary to App Store Connect.
- Real-time progress updates appear on the iOS Publishing Dashboard.
The status badge changes to In Progress while the build runs. You can safely leave the page — your build continues in the background.
Note: To cancel a build in progress, click Cancel app build on the iOS Publishing Dashboard.
When the build completes successfully, the status changes to Built.
After the build: next steps
Once your app is built and uploaded, complete the submission in App Store Connect. The iOS Next Steps screen guides you through this process and displays your build details (app name, Bundle ID, version, and build number).
Select your distribution method using the tabs at the top:
Option A: Public App Store
Your app is publicly discoverable and searchable on the App Store.
1. Prepare your App Store listing
In App Store Connect, complete:
- Screenshots — Upload for each required device size (iPhone 6.5″, iPhone 5.5″, iPad Pro, etc.). You can generate screenshots from the Publishing Dashboard using the Generate screenshots link.
- App information — Name, subtitle, description, keywords, support URL.
- Pricing — Set price tier and availability by country/region.
- Age rating — Complete the content rating questionnaire.
- Privacy details — Fill out data collection details and link your privacy policy URL.
2. Configure your build for release
- Select build — Attach the build Fliplet uploaded to your app version.
- Export compliance — Answer encryption questions if prompted.
- Release method — Choose manual release, automatic release, or scheduled release.
3. Submit for Apple review
- Review information — Add contact details for the review team.
- Demo account — If your app requires login, provide test credentials so the reviewer can access your app.
- Reviewer notes — Add any special instructions. A template is available — click Copy template to get a pre-written starting point.
Option B: Private unlisted
Your app goes through the same review process but doesn’t appear in App Store search results. Users can only install it via a direct link you share.
- Submit like a public app — Complete all the same metadata, screenshots, and review requirements as a public App Store submission.
- Generate your unlisted distribution link — After Apple approves your app (“Ready for Sale” status), generate an unlisted link in App Store Connect. Share this link via email, your website, or any other channel.
Option C: MDM / Apple Business Manager
Deploy your app to managed devices through Apple Business Manager and your MDM solution (Jamf, Intune, etc.).
1. Set up Apple Business Manager
- Confirm access to Apple Business Manager.
- Connect your MDM provider.
- Enable Custom Apps for your organization.
2. Mark as Custom App and acquire licenses
- Configure the app as a Custom App in App Store Connect.
- Specify which organizations can access it.
- Acquire licenses in the Apps and Books section of Apple Business Manager.
3. Deploy via your MDM
- Sync Apple Business Manager with your MDM.
- Assign licenses to users or device groups.
- Configure and deploy an installation policy.
- The app appears on managed devices automatically once the policy is applied.
Common issues and how to fix them
During the build flow
| Issue | Solution |
|---|---|
| API key verification failed | Double-check your Issuer ID, Key ID, and Team ID. Ensure the key has “App Manager” access. Make sure you pasted the complete .p8 file content, including the -----BEGIN PRIVATE KEY----- header. |
| Certificate limit reached | Apple allows a maximum of 3 distribution certificates. Revoke an unused certificate in your Apple Developer account. |
| Bundle ID not showing | Make sure you created a Bundle ID in the Identifiers section of your Apple Developer account and that your API key has the correct permissions. Click Refresh bundle IDs to reload the list. |
| Build failed | Return to the iOS Publishing Dashboard, check the error details, and click Retry Build to try again. |
During App Store review
| Issue | Solution |
|---|---|
| Missing screenshots | Upload screenshots for all required device sizes in App Store Connect. |
| Missing required fields | Ensure your support URL, privacy policy URL, description, and keywords are all filled in. |
| App privacy labels incomplete | Complete the App Privacy section to match the data your app actually collects. |
| Rejection: no demo login | If your app has a login screen, provide working test credentials in the Review Information section. |
| Rejection: app crashes or has broken links | Test your app thoroughly before submitting. Remove any placeholder content. |
Publishing updates
To release a new version of your app:
- Open the Publishing Dashboard and go to iOS.
- Click Rebuild App (your current version and status display on the dashboard).
- Most settings are pre-filled from your previous build.
- Increase the version number (e.g., from
1.0.0to1.0.1). - Make any other changes needed.
- Click Start Build.
After the build completes, go to App Store Connect to create a new version and submit for review.
Quick reference
| Item | Value |
|---|---|
| App Store Connect | appstoreconnect.apple.com |
| Apple Developer Account | developer.apple.com/account |
| Apple Business Manager | business.apple.com |
| App icon size | 1024 x 1024 PNG |
| Splash screen size | 2048 x 2732 PNG |
| Version format | x.x.x (e.g., 1.0.0) |
| Apple review time | Typically 24–48 hours. Build a buffer of 3–5 days into your launch plan for unexpected delays. |