Fliplet Hub is a single mobile app, published under Fliplet’s Apple and Google developer accounts, that lets your end users access the private apps you build in Fliplet Studio. Your users install Fliplet Hub once from the App Store or Play Store, verify their email, and then see every app you’ve given them access to.
Publishing to Fliplet Hub is an alternative to submitting a standalone app to the App Store or Play Store. You can publish to Hub in parallel with any other publishing method (web app, standalone native app, Fliplet Viewer preview). Hub does not replace them.
In this article
- When to use Fliplet Hub
- Benefits at a glance
- Where to find Fliplet Hub in Studio
- Configuring your app for Fliplet Hub
- Sharing your app with users
- What your users experience
- Analytics for Hub apps
- What’s not supported
- Frequently asked questions
Before you start
- Your app is ready to publish.
- You have a Fliplet Data Source that lists the users who should have access, with a column containing each user’s email address.
When to use Fliplet Hub
Fliplet Hub is a good fit when you need to:
- Get an app in front of end users in minutes rather than days.
- Distribute a private app to a defined audience (employees, event attendees, members) without listing it publicly on the App Store or Play Store.
- Give your end users a genuine native iOS and Android app experience — Fliplet Hub is a real native app that lives on their device, with push notifications and offline support — without having to build, submit, or maintain your own App Store or Play Store listing.
- Ship apps that are short-lived (events, pilots, temporary portals) where individual App Store or Play Store submissions do not make sense.
- Avoid managing your own Apple or Google developer accounts, certificates, and store reviews.
- Push updates immediately, without waiting for App Store or Play Store review.
Fliplet Hub is designed for private apps only. Every app published to Hub is restricted to a defined user list. There is no public discovery or global app directory. Users only see apps they have been explicitly granted access to.
Benefits at a glance
| For you (the app builder) | For your end users |
|---|---|
| No Apple or Google developer account required | One app to install, many apps to access |
| No App Store or Play Store review queue, no certificate management | Verify email once, see all authorized apps |
| Publish and unpublish instantly | Content works offline once cached |
| Push content and layout updates without a store release | Push notifications are clearly labeled per app |
| Share access with an invitation link or QR code | Fast switching between apps they have access to |
Where to find Fliplet Hub in Studio
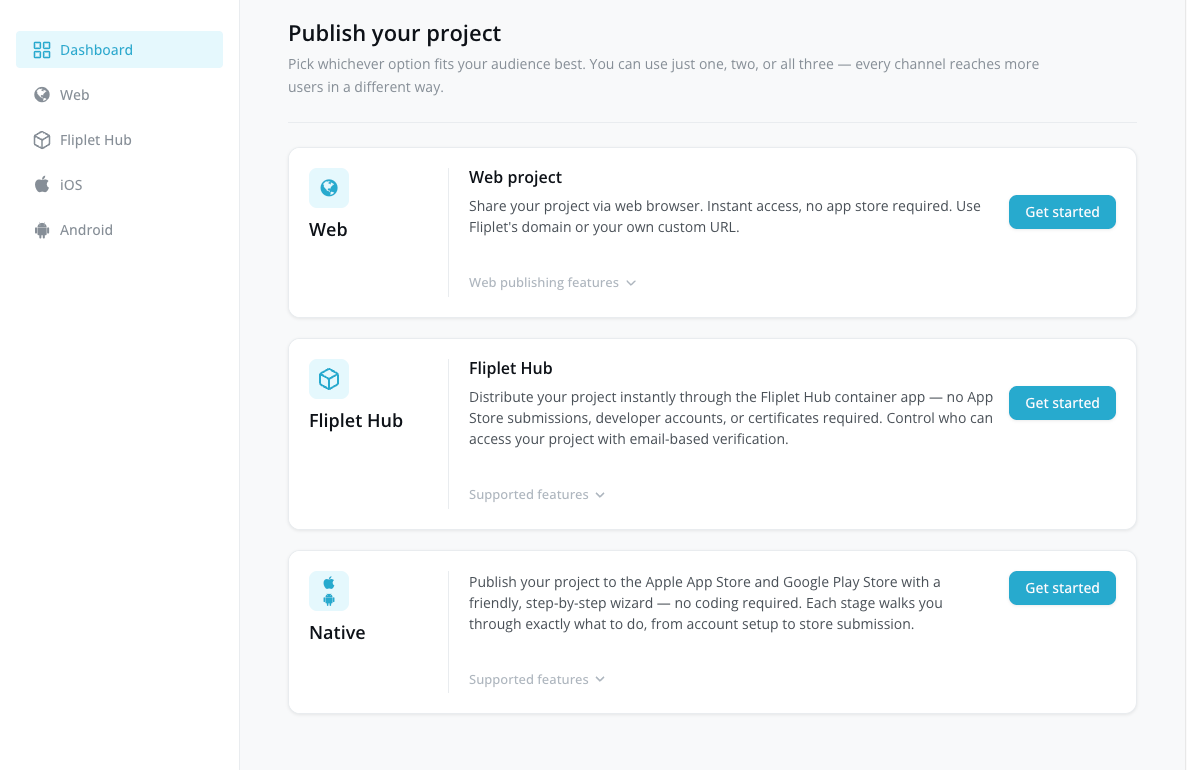
Fliplet Hub appears as an additional publishing option in the Publish overlay of your app.
- Open your app in Fliplet Studio.
- Click Publish in the top toolbar.
- In the list of publishing options, select Fliplet Hub > Get started.
Configuring your app for Fliplet Hub
Publishing to Fliplet Hub takes two steps: choose the Data Source that identifies your users, and then publish the app.
Step 1: Choose the user list
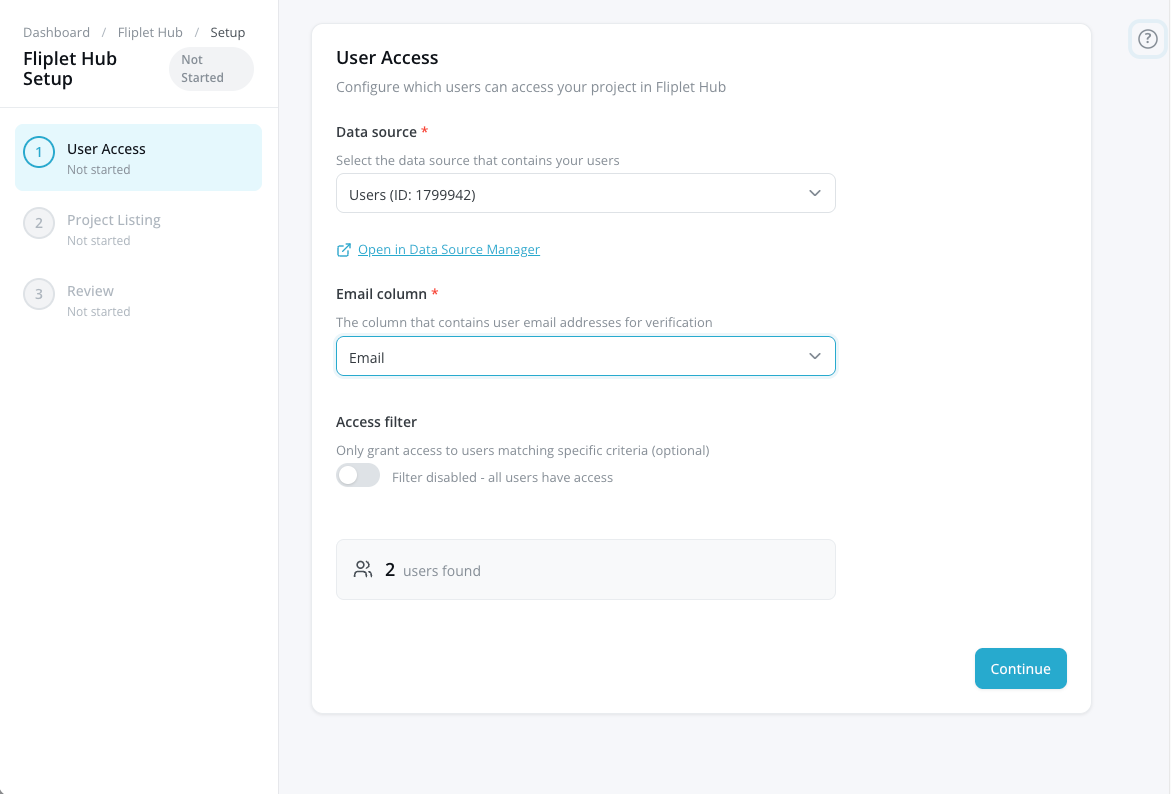
Fliplet Hub decides who can open your app by matching each signed-in user’s email against a Data Source you control. You pick the Data Source and tell Hub which column holds the email addresses.
- Open the Publish to Fliplet Hub overlay for your app.
- Under User list, select the Data Source that contains the users who should have access.
- Select the Email column. This is the column in that Data Source that contains each user’s email address.
- Save your selection.
Every user whose email appears in that column will see your app in Fliplet Hub once they sign in. Anyone else will not. To change who has access later, update the Data Source itself: add rows to grant access, remove rows to revoke it. Changes take effect the next time the user opens Fliplet Hub.
Step 2: Publish
Once you have chosen a Data Source and email column, the Publish button is enabled. Optionally, add a short app description. This is shown to your users in Fliplet Hub next to the app name.
Click Publish to Hub. Your app is available immediately to every user listed in the Data Source.
Once published, the overlay shows:
- Status. Published, and the total user count.
- Invitation link. A link you can share with your users to point them directly at this app in Fliplet Hub. Example:
https://hub.fliplet.com/invitation?appId=123456 - QR code. A downloadable PNG of the invitation link, for print materials, slides, posters, or event badges.
- Update description. Edit the description shown to users at any time.
- Unpublish from Hub. Removes the app from Hub. Users will no longer see it in their list.
You can change the user list (by editing the Data Source), update the description, and unpublish at any time. Changes take effect immediately. There is no store review.
Sharing your app with users
Adding a user to the Data Source grants them access, but it does not notify them. You still need to tell your end users how to get in. At a minimum, they need to know to:
- Install Fliplet Hub from the App Store (iOS) or Play Store (Android).
- Open Fliplet Hub and enter the same email address you listed for them in the Data Source.
- Enter the 6-digit code sent to their email to sign in. The app then appears in their Home list.
You can communicate this to your audience in whichever way works best — email, Slack, an intranet post, a printed handout at an event. Fliplet gives you two things to make that easier:
- Invitation link. A direct link to your app in Fliplet Hub. Users who already have Fliplet Hub installed are taken straight into your app; users who don’t are shown a landing page with badges to install Fliplet Hub from the App Store or Play Store.
- QR code. A scannable version of the invitation link, useful for print materials, slides, posters, or event badges.
The invitation link and QR code are optional — a user whose email is in the Data Source can also just install Fliplet Hub, sign in with their email, and the app will appear in their Home list. But you do need to tell them to do that.
What your users experience
The end-user flow is designed to be as short as possible:
- Install Fliplet Hub. Users download the Fliplet Hub app from the App Store (iOS) or Play Store (Android). They do this once, and they only ever need this one app to access any Fliplet Hub app you publish.
- Enter their email. On first open, Fliplet Hub asks for their email address.
- Enter the 6-digit code. Fliplet sends a 6-digit code to their inbox. The user types the code into Fliplet Hub to confirm their identity — there is no link to click in the email.
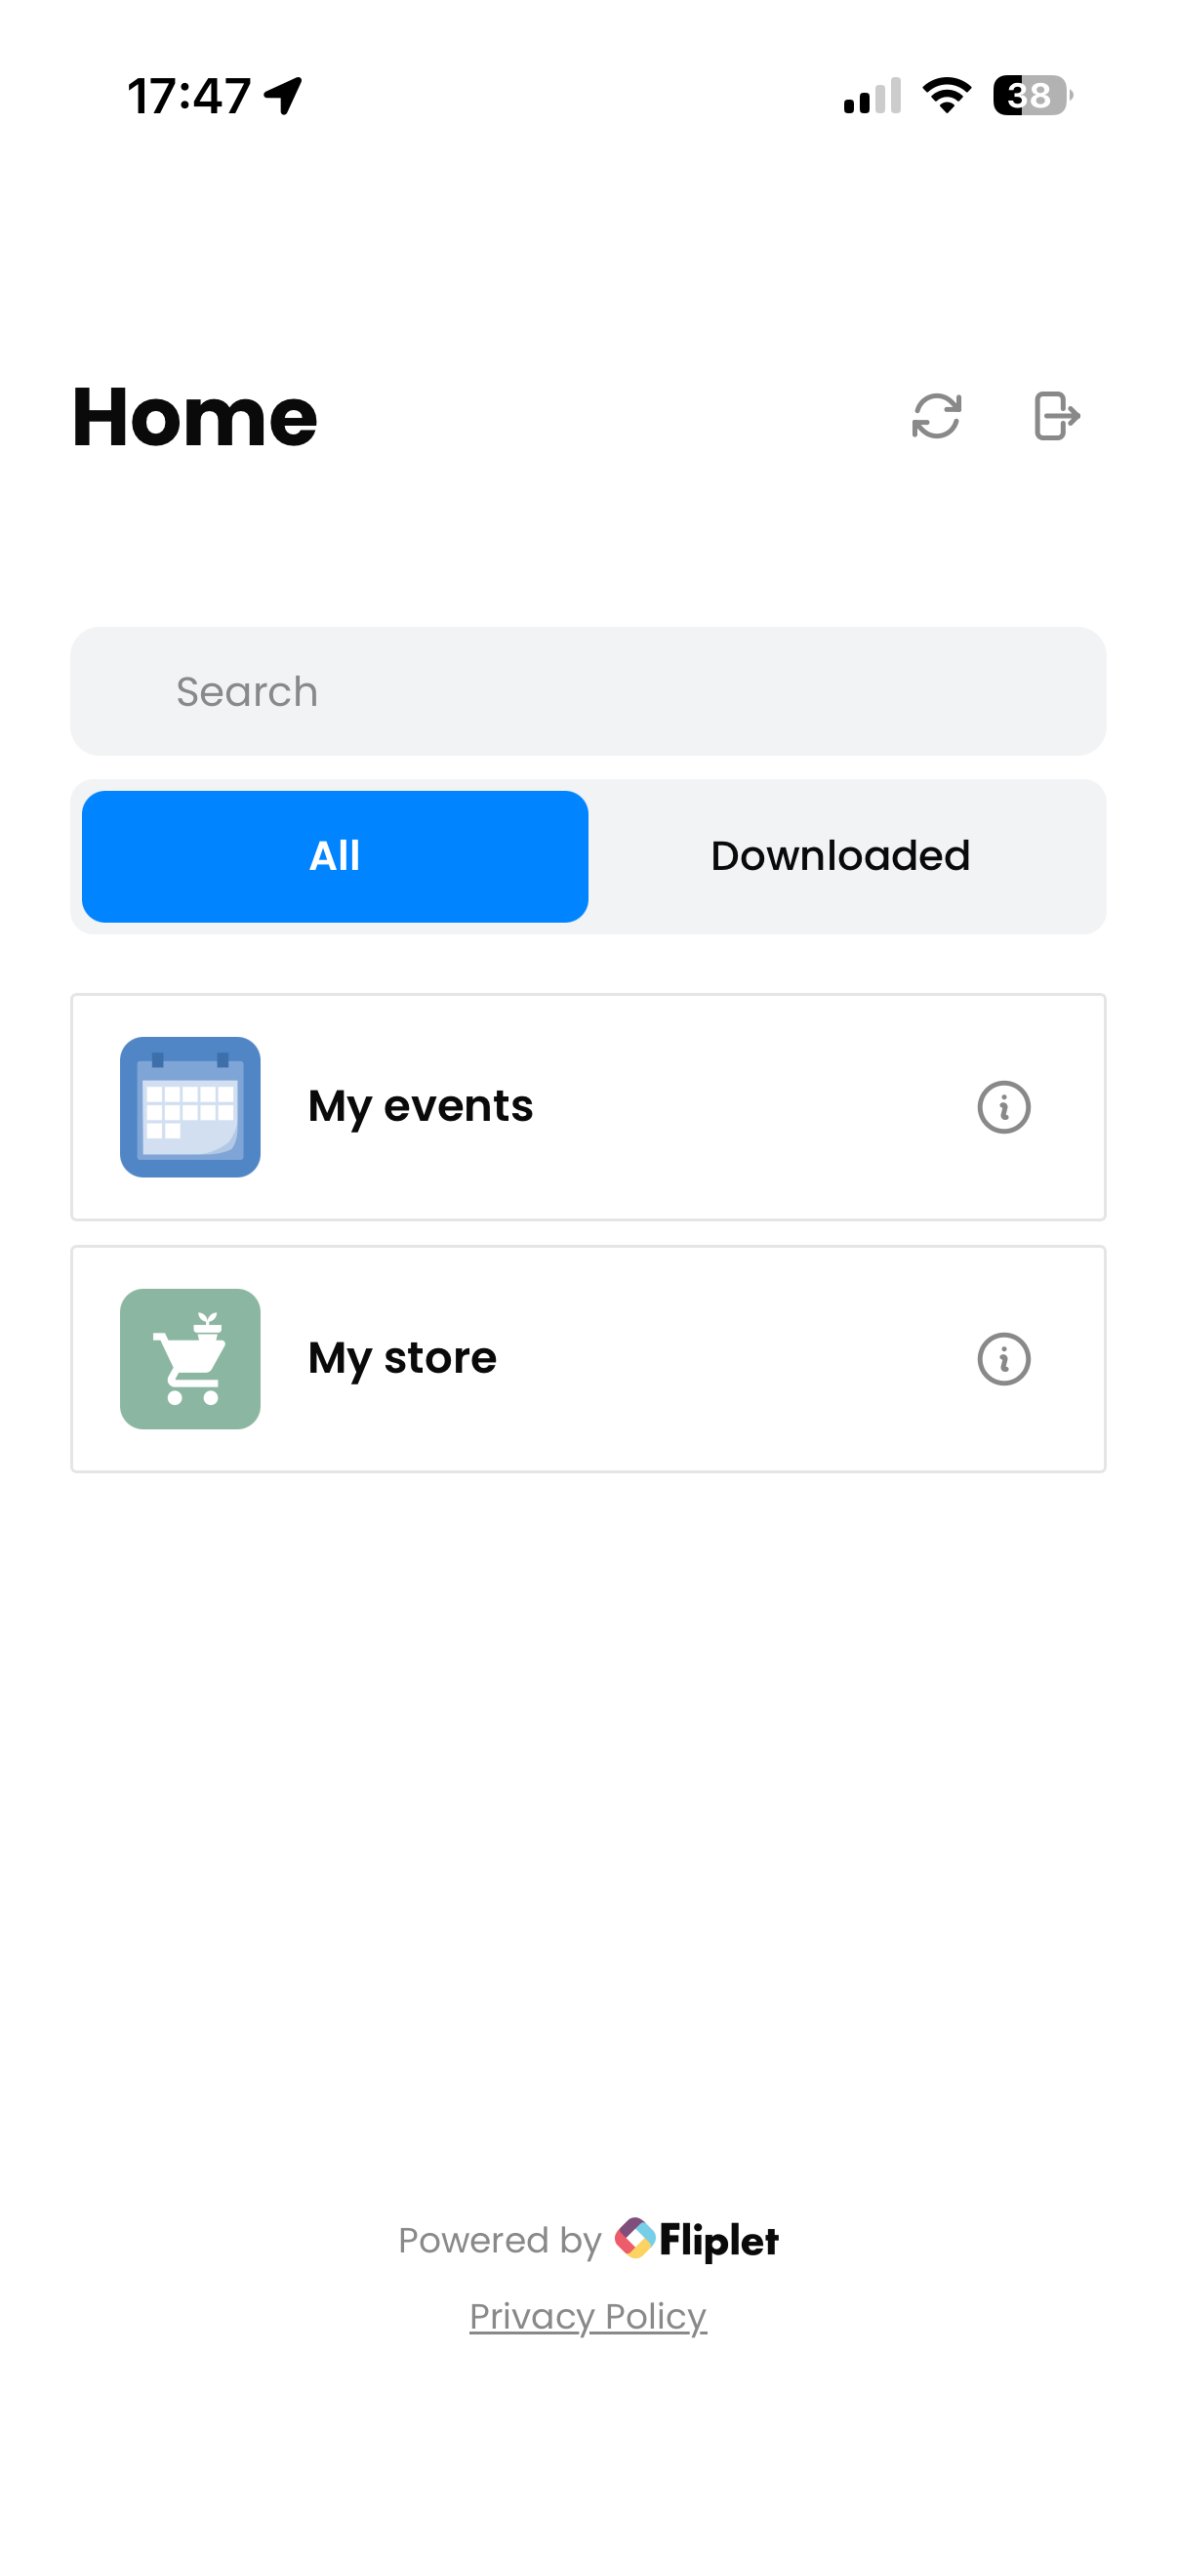
- See their apps. Fliplet Hub shows the Home list of every app the user has been granted access to. Each entry shows the app name, description, and unread notification count.
- Tap to open. The first time a user opens an app, its content is downloaded and cached. Subsequent opens are fast, and content works offline once cached.
-
Switch between apps. To leave the current app and return to the Home list, the user taps and holds anywhere on the screen for 3 seconds. A system option to exit the current app appears. This gesture always works, in every app that runs inside Fliplet Hub.
Optionally, if you build your app with the Fliplet drag-and-drop builder, you can add a menu item that returns to the Home list. This is not automatic — it’s something you add during app design if you want to give your users a visible button as an alternative to the tap-and-hold gesture.
Logging into your app
Fliplet Hub verifies each user’s email, so you know who is opening the app. If your app has its own login component (for example, PIN verification, Data Source login, or SSO), your users will still be prompted to log in when they open the app. The Hub email check and the app’s own login are separate.
If you don’t need a second login, leave the login component out of your app. In that case, users go straight from the Hub apps list into the content.
Push notifications
Push notifications from your app work the same way in Fliplet Hub as they do in a standalone published Fliplet app. When a notification is delivered through Fliplet Hub, its title is prefixed with your app name (for example, “Acme Conference: Keynote starts in 15 minutes”) so users always know which app it came from. Tapping the notification opens Fliplet Hub and takes the user directly into the correct app.
Analytics for Hub apps
Apps published to Fliplet Hub use the same Analytics and Audit Logs surfaces as any other Fliplet app. Open your app in Fliplet Studio and use the existing Analytics and Audit Logs screens to review usage.
What’s not supported
Fliplet Hub is scoped for private, invitation-only apps. The following are not supported:
- Public app discovery or browsing within Fliplet Hub.
- Anonymous access (users must verify their email).
- Fully white-labeled apps published under your own brand on the App Store or Play Store. The app users install is always Fliplet Hub. Your own app’s branding, colors, and content remain fully under your control once the user is inside it.
- Users with multiple different email addresses in a single Fliplet Hub install (advanced multi-account support).
Frequently asked questions
Can I publish the same app to Fliplet Hub and as a standalone app?
Yes. Fliplet Hub is a parallel publishing method. It does not replace your existing publishing methods.
Do my users need a Fliplet account?
No. Your users only need a valid email address that appears in the Data Source you selected for the app.
What happens when I remove a user from the Data Source?
That user will no longer see the app in Fliplet Hub the next time they open it. If they had already downloaded the app locally, its content is no longer accessible once their access is revoked.
Can I update my app after publishing?
Yes. Any change you make in Studio can be pushed out immediately. There is no App Store or Play Store review step. Depending on the type of update, your users will see the new content on next open.
Does the app work offline?
Yes. Once a user has downloaded an app inside Fliplet Hub, its cached content remains available offline. Data that needs the server to update will sync when the user is back online.